Matt
How to Repurpose Your Podcast Content
Podcasting takes time—but the smartest creators know how to squeeze every drop of value from each episode. If you’re just hitting “publish” and moving on, you’re leaving massive growth and monetization potential on the table.
In this post, we’ll break down exactly how to repurpose your podcast content across platforms, grow your audience, and turn your episodes into a lead-generating, money-making machine. Plus, you’ll see how tools like ChatGPT with memory can automate a lot of the work for you.
🔁 Step 1: Turn Your Podcast into a Funnel
Your podcast isn’t just content—it’s the top of your funnel.
Offer a free resource (like a Podcast Membership Starter Kit or AI Tools for Podcasters) that solves a specific problem related to the episode.
Then direct listeners to:
-
The link in your show notes
-
Your Instagram bio
-
Your YouTube video description
-
A pinned Twitter/X post
This brings them into your email list, where you can nurture them with more valuable content, affiliate tools, or paid offers.
🎥 Step 2: Slice It Into Short-Form Video Gold
Take your best soundbites, bold opinions, or behind-the-scenes moments and turn them into 30–60 second clips for:
-
TikTok – hook-heavy or controversial takes
-
Instagram Reels – fast, visual tips
-
YouTube Shorts – quick value + CTA
-
LinkedIn – educational clips with subtitles for silent viewing
💡 Bonus: Use AI tools like Descript, Opus Clip, or even ChatGPT + a video editor to script and polish the clips.
⚡ Want to make short-form videos without showing your face or learning to edit?
Try InstaDoodle — a whiteboard video creator that transforms your podcast ideas into engaging, shareable animations in minutes. Perfect for promoting episodes on YouTube Shorts, Instagram, and TikTok.
🧵 Step 3: Break It Down Into Social Threads & Carousels
One podcast episode can become:
-
A Twitter/X thread: “Why I stopped using Patreon and built my own membership site 🧵”
-
An Instagram carousel: “Still using Patreon? Here’s why I quit + what I did instead.”
-
A Facebook post or LinkedIn story with commentary
End each with a CTA to your episode or your freebie.
✍️ Step 4: Turn It Into a Blog Post (SEO Win)
Use your podcast transcript or a ChatGPT summary to create a long-form blog post. Here’s how to format it:
-
H1: Your main keyword-rich title
-
H2: Key takeaways or themes
-
H3: Resources, tools mentioned, and CTAs
This not only boosts SEO but gives you another surface area for people to find your show.
📧 Step 5: Build a Weekly Content Engine
Ask ChatGPT something like:
“What were my last 3 podcast episodes? Create an email newsletter with one highlight from each and a CTA to the full episodes.”
Memory-enabled ChatGPT can:
-
Track your recent topics
-
Format your email in your brand voice
-
Reuse content across social + blog
It’s like a mini content manager built into your workflow.
🤖 Repurposing Podcast Content with ChatGPT (Using Memory)
If you have memory turned on in ChatGPT, you unlock platform-specific, personalized automation.
1. Platform-Specific Content Creation
Let ChatGPT remember your tone and preferred formats for:
-
Twitter threads with hooks and takeaways
-
Instagram carousels and reels
-
LinkedIn posts in a professional tone
-
YouTube Shorts or TikTok scripts in your voice
No need to re-explain yourself each time.
2. Turn Episodes into Evergreen Lead Magnets
Bundle key takeaways from your best episodes into free downloads:
-
“5 Podcast Monetization Tips”
-
“How to Launch Your Own Membership Site”
Then use them as opt-ins to build your email list and promote upsells or affiliate tools.
3. Auto-Generate SEO Blog Posts
Let ChatGPT:
-
Pull from transcripts or summaries
-
Format with headings, summaries, and calls-to-action
-
Use your preferred keywords, blog structure, and tone
This keeps your blog SEO-friendly and consistent.
4. Build a Weekly Content Calendar
Ask:
“What content should I post this week based on my last 3 episodes?”
Let ChatGPT:
-
Plan social media posts
-
Repurpose each episode into blog/email/TikTok formats
-
Align with your product or affiliate promotions
5. Prioritize Monetization-Focused Repurposing
Find episodes where you mention:
-
Products
-
Affiliate links
-
Membership site benefits
Then ask ChatGPT to:
-
Create short clips, quote cards, or social posts
-
Write emails or landing page copy
-
Turn content into ad creatives
Repurposing isn’t just about visibility—it can directly drive sales.
🧠 Try These Prompts to Repurpose Your Podcast Content
Want to repurpose your podcast content like a pro? Copy, paste, and tweak these prompts in ChatGPT to create your own content engine.
🎧 Turn Your Podcast into a Funnel
Prompt:
“Summarize my podcast episode about [topic] and turn it into a free lead magnet. Make it feel valuable enough to exchange an email for. Give me a title, a short description, and bullet-point contents.”
🧵 Create a Social Media Thread
Prompt:
“Turn this podcast episode into a 7-tweet Twitter thread. Make the first tweet hooky and the last one include a link to my landing page [insert URL]. Write in a tone that sounds like [your style: casual, confident, helpful, etc.].”
📲 Write an Instagram Carousel
Prompt:
“Turn my episode on [topic] into a 7-slide Instagram carousel. The first slide should be bold and grab attention. The last slide should include a CTA to watch the episode or grab my free resource. Keep the tone friendly but authoritative.”
✍️ Convert Your Episode into a Blog Post
Prompt:
“Turn this transcript or summary into an SEO-friendly blog post. Use subheadings, clear takeaways, and a call to action at the end. Keep the tone [your preferred tone] and optimize it for the keyword: [insert keyword].”
📧 Generate a Weekly Email Newsletter
Prompt:
“Summarize my last 3 podcast episodes and create a newsletter that highlights one key takeaway from each. Include a short intro, bullet points, and links to listen. Use a tone that matches [your brand or voice].”
🎥 Script a Short-Form Video (TikTok/Reels/Shorts)
Prompt:
“Write a 30-second video script for TikTok based on my podcast episode about [topic]. Start with a bold hook, deliver one core insight, and end with a CTA to watch the full episode or grab my free resource.”
🧠 Final Thoughts
The smartest podcasters don’t just hit publish.
They build content ecosystems.
By turning every episode into a web of videos, posts, emails, blogs, and downloads, you create more surface area for people to find, engage with, and buy from you.
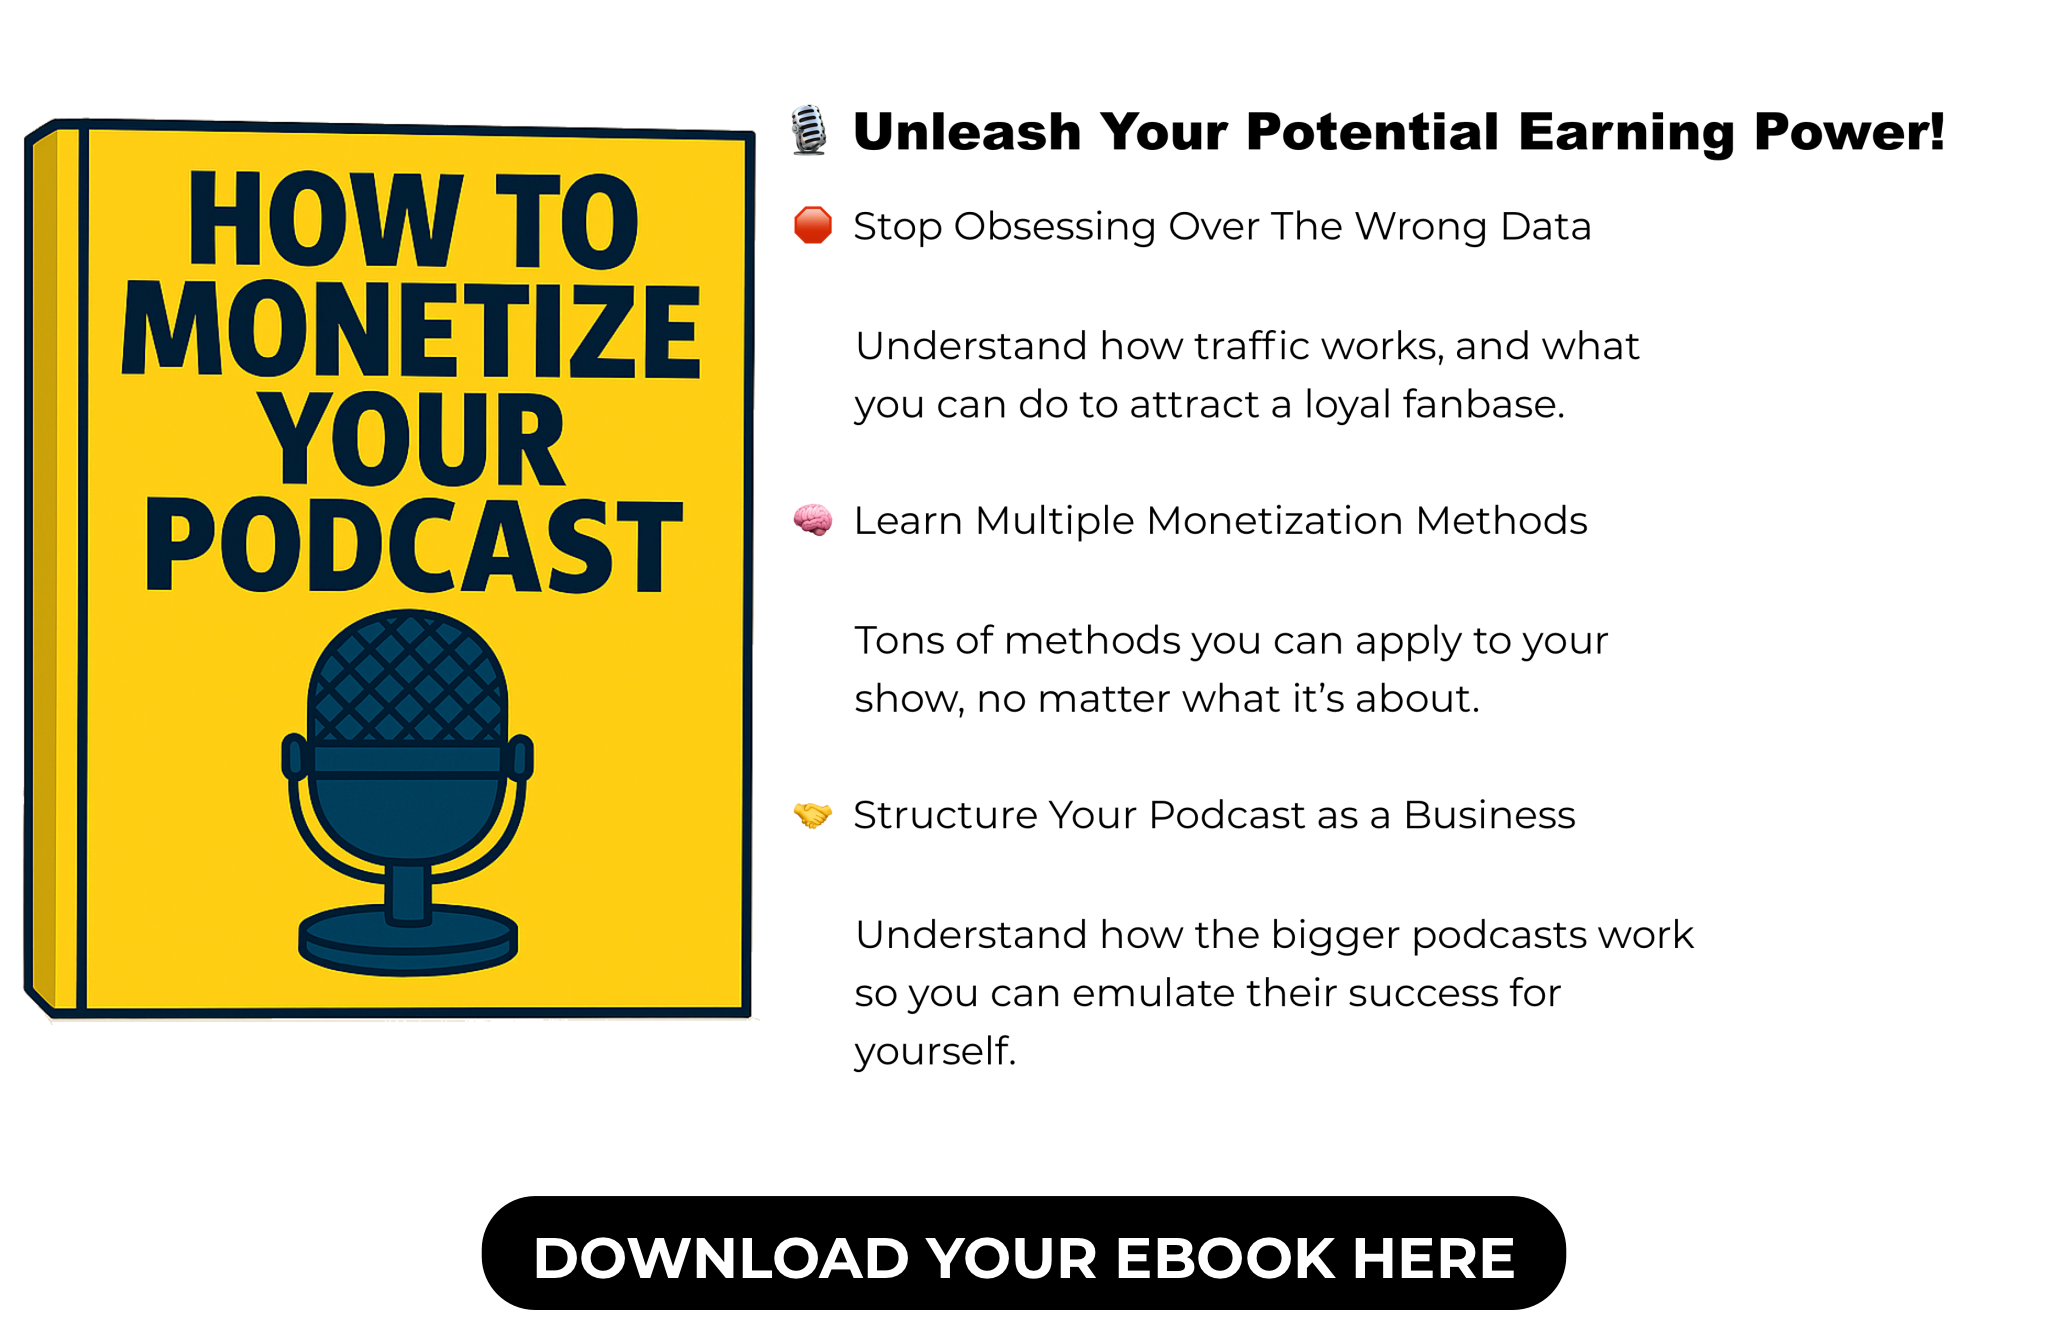
And with tools like ChatGPT (especially with memory enabled), this process becomes faster, smarter, and way more sustainable. Click below to grab our free monetization guide + video training
Best YouTube Channels for Small and Local Businesses
Want to grow your business with real-world strategies, proven marketing tips, and behind-the-scenes success stories?
Whether you’re an Etsy seller, service provider, or local shop owner, these YouTube channels offer actionable advice from people who’ve actually done it.
🧵 Handmade, Etsy, and Small Product Businesses
Perfect for crafters, creators, and product-based side hustles
| Channel | Niche | What You’ll Learn |
|---|---|---|
| Kate Hayes (288K) | [Etsy] | Etsy seller strategies, pricing, packaging, and scaling tips |
| Angela Jasmina (280K) | [Print-on-Demand] | Starting & growing t-shirt and merch businesses |
| XXL Scrunchie & Co (370K) | [Vlog] | Transparent, behind-the-scenes look at building a handmade brand |
| Craft Biz Studio (28.9K) | [Etsy/Handmade] | Practical Etsy shop tips and time-saving hacks |
| The Small Business Handbook (3.6K) | [Motivation/Small Biz] | Day-in-the-life and real-world experience running a small biz |
🌐 Marketing, SEO & Digital Strategy
For business owners trying to build an audience or drive online traffic
| Channel | Niche | What You’ll Learn |
|---|---|---|
| Kimberly Ann Jimenez (85.2K) | [Digital Marketing] | Sales funnels, email strategy, online brand growth |
| Marketing Solved (32.7K) | [Content Marketing] | Social media and email list building |
| A Nerd’s World (37.5K) | [SEO/Web] | Web design, branding, and SEO tutorials |
| Backlinko (Brian Dean) | [SEO] | SEO deep dives that actually move the needle |
| Moz | [SEO] | Industry insights, SEO best practices, and algorithm changes |
| Krista Mashore (28.8K) | [Local Biz] | Digital domination strategies for local service businesses |
| Bigger Better Biz (6.8K) | [Local Marketing] | Marketing tactics for mom-and-pop shops |
| Channel Zero Marketing (5.3K) | [Facebook Ads] | Easy-to-follow Facebook and social ads tutorials |
💼 All-Around Business Builders & Thought Leaders
These are for startup ideas, leadership, and entrepreneurship fundamentals
| Channel | Niche | What You’ll Learn |
|---|---|---|
| U.S. SBA (54.1K) | [Small Biz Help] | Government grants, startup guides, and funding options |
| ASBN (4.1K) | [News/Expert Tips] | Interviews with real small biz owners |
| SmallBusiness.co.uk (1.6K) | [UK-Focus] | SME and startup help for UK entrepreneurs |
| Startup Grind (81.6K) | [Startups] | Global community events and founder interviews |
| Google Small Business (430K) | [SEO/Tools] | Using Google tools to boost visibility |
| Slidebean | [Pitch Decks/Startup] | Startup funding, validation, and pitch help |
| My First Million | [Biz Ideas] | Entertaining business breakdowns and money-making ideas |
| Michael Hyatt | [Productivity] | Leadership, mindset, and goal-setting frameworks |
💡 Motivation, Community & Growth Mindset
| Channel | Niche | What You’ll Learn |
|---|---|---|
| Soar High (22.5K) | [Inspiration] | Motivation for first-time entrepreneurs |
| Startup Network Europe | [EU Startups] | Community-focused startup growth stories |
| Jay Baer | [Customer Experience] | Customer service that actually increases revenue |
👤 Bonus: Our Personal Favorites
We’ve personally found these channels super valuable — especially if you’re starting small or solo:
-
Starter Story – Real founder stories + revenue numbers
-
Neil Patel – SEO, website traffic, and conversion tutorials
-
Meet Kevin – Finance, small biz trends, and economic commentary
➕ What To Watch Next:
📌 Final Tip:
Don’t just subscribe—take notes and implement. The biggest difference between a casual viewer and a successful entrepreneur is execution.
Struggling to Launch or Scale? These Are the Top YouTube Channels for Startups
YouTube isn’t just for entertainment—it’s become a powerhouse of education, especially for startup founders looking to learn, grow, and scale. In 2025, with thousands of channels competing for your attention, we’ve narrowed it down to the 25 most valuable YouTube channels that every startup founder should subscribe to.
Why YouTube Is a Goldmine for Startup Founders
Startup founders often face time, budget, and knowledge constraints. YouTube solves all three by providing:
- Free educational content on business models, pitching, growth tactics, and leadership.
- Real-world stories from successful founders who’ve already navigated the terrain.
- Up-to-date trends in venture capital, SaaS, marketing, and product development.
- Community feedback in the form of comments and live Q&As.
Whether you’re just brainstorming an idea or preparing for your next round of funding, these channels offer crucial guidance.
How We Picked These Channels
This list is built from:
- Recommendations from startup communities (like Reddit, Hacker News, and Twitter/X).
- Data from founder-focused publications.
- Channel metrics (engagement, quality, relevance).
- Diversity of content—from practical tips to inspirational interviews.
- Personal favorites that we’ve spent a lot of time with, including Starter Story, Meet Kevin, and Neil Patel.
Channel Categories for Startup Success
To help you navigate based on your startup journey, we’ve grouped the channels into these themes:
🧭 Fundraising & Scaling
- Y Combinator – Legendary startup incubator with pitch tips, demo days, and founder advice.
- Startupbootcamp – Accelerator insights, global founders, and industry trends.
- This Week in Startups – Hosted by Jason Calacanis, covering tech news and startup interviews.
📈 Marketing & Growth Hacking
- Neil Patel – SEO, lead gen, and startup traffic strategies.
- GaryVee – Content marketing, brand-building, and hustle motivation.
- HubSpot – Growth tactics, CRM tutorials, and B2B marketing insights.
🧠 Founder Stories & Insights
- The Diary of a CEO – Vulnerable interviews with top founders and CEOs.
- ColdFusion – Tech and startup case studies with a storytelling twist.
- Starter Story – Entrepreneurs explain how they built successful businesses.
💪 Female Founder Focus
- Female Startup Club – Women entrepreneurs share advice and startup wins.
- Startup Reine – Focus on female-led businesses and empowerment.
🌍 Global Startup Ecosystems
- Startup India – Government initiatives and real-world startup stories from India.
- InnMind – Investor access, market trends, and founder webinars.
- Startup Grind – Global community of founders and events.
🧰 SaaS / Indie Hackers / Solopreneurs
- Dan Martell – SaaS growth frameworks and founder productivity.
- Marc Lou – Indie hacking and bootstrapping startup journeys.
- John Coogan – Tech startup stories and industry commentary.
- Meet Kevin – Finance meets entrepreneurship with business trends and personal branding strategies.
The Top 25 Startup Channels at a Glance
| Channel Name | Focus / Highlights |
|---|---|
| Y Combinator | Startup advice, founder stories, fundraising, and tech entrepreneurship |
| Startup Grind | Global community, founder interviews, mentorship, and networking |
| Gary Vaynerchuk (GaryVee) | Motivation, business growth, digital marketing, and hustle culture |
| Neil Patel | Digital marketing, SEO, and growth strategies for startups |
| Noah Kagan | Entertaining business lessons, interviews, and actionable startup tips |
| InnMind | Webinars, investor interviews, startup mentorship, and market insights |
| HubSpot | Marketing, sales, CRM for startups, tech news, and productivity |
| This Week in Startups | Startup news, interviews, and insights with Jason Calacanis |
| Founderbounty | Founder interviews, startup growth essentials |
| Lean Startup Co. | Lean Startup methodology, education, and events |
| Startup India | Indian startup ecosystem, government initiatives, and founder stories |
| Female Startup Club | Female entrepreneur interviews, startup journeys, and advice |
| Startup Reine | Female entrepreneurship, online business building, and empowerment |
| Startup Akademia | Startup acceleration, validation tools, and founder guidance |
| Matt Brown Show | Entrepreneur interviews, founder journeys, and business lessons |
| Startupbootcamp | Accelerator programs, founder support, and industry mentorship |
| Raw Startup | Practical startup advice from Vivino’s founder, real-world lessons |
| The Diary of a CEO | Candid interviews with business leaders, founder insights |
| ColdFusion | Stories behind innovative companies and technologies |
| Marc Lou | Indie hacking, product building, and startup life |
| Starter Story | Success stories, actionable ideas from real entrepreneurs |
| Dan Martell | SaaS growth, founder productivity, and scaling strategies |
| Silicon Valley Girl | Founder journey, motivation, and startup culture |
| Charlie Chang | Entrepreneurship, personal finance, and multiple income streams |
| John Coogan | Startup building, tech insights, and founder experiences |
| Meet Kevin | Personal finance, business trends, startup investing, and founder takes |
Pro Tips: How to Use These Channels
- Organize by Topic: Make themed playlists (fundraising, pitching, growth, etc.)
- Schedule Learning Time: Dedicate 20 minutes daily to absorb new lessons.
- Apply and Reflect: Take notes in Notion or a journal, and test one new idea per week.
- Join the Community: Comment and engage to network with like-minded founders.
Bonus: Honorable Mentions
- Marie Forleo – Marie TV – Business coaching and productivity tips.
- CNBC Make It – Real-world founder stories and finance insights.
- Google Business Channel – Tools, resources, and stories from small business owners.
FAQ
What type of YouTube content helps startup founders the most? Content that mixes strategy with real-world execution—like pitch breakdowns, growth tips, and founder interviews.
Are these channels suitable for first-time entrepreneurs? Yes. Many channels like Y Combinator, Starter Story, and Neil Patel provide beginner-friendly content.
What’s the difference between motivational vs. tactical content? Motivational content inspires (e.g., GaryVee), while tactical content teaches specific actions (e.g., Neil Patel).
Conclusion
YouTube has become one of the most powerful (and free) tools available to startup founders today. By following just a handful of the channels above, you can cut your learning curve, gain real-world insights, and stay inspired every step of the way.
👉 Challenge: Subscribe to 3 new channels today and implement one idea this week.
📣 Got a favorite startup YouTube channel we missed? Share it in the comments!
Explore More
- Best Podcasts for Small Business Owners
- Best Podcasts for Entrepreneurs
- Our Favorite YouTube Channels for Small Businesses
Struggling With Sales or Growth? These Small Business Podcasts Have the Answers
Running a small business is a nonstop juggling act. Between marketing, operations, finances, and customer service—most business owners wear every hat. That’s why more and more entrepreneurs are turning to podcasts for fast, actionable insights they can learn while driving, walking the dog, or grabbing lunch. Whether you’re just getting started or looking to break through a plateau, this list of top-rated podcasts will guide you through every phase of your business journey.
What Type of Business Owner Are You?
Not all small business podcasts are created equal. Below, we’ve broken down the best shows based on where you might be in your business journey:
Just Starting Out
If you’re still developing your idea, registering your business, or landing your first customer, these shows offer the clarity and momentum you need.
Top Picks:
- The $100 MBA Show – Omar Zenhom shares bite-sized business lessons to help you skip the fluff and get to action.
- Entrepreneurs on Fire – John Lee Dumas delivers daily motivation and interviews with successful founders.
- Dirty Secrets of Small Business – Adam Sonnhalter shares candid conversations about the real challenges of getting a business off the ground.
Gaining Traction (0–2 Years In)
You’ve launched—but now it’s about getting noticed and building consistent revenue. These podcasts focus on marketing, product refinement, and audience growth.
Top Picks:
- Duct Tape Marketing Podcast – John Jantsch offers tactical advice on getting your first 100 customers.
- Online Marketing Made Easy – Amy Porterfield delivers powerful strategies for growing your list and sales.
- Product Boss – Jacqueline Snyder & Minna Khounlo-Sithep share tips for product-based businesses looking to grow.
Scaling Up
You’ve found a rhythm. Now it’s time to build systems, delegate, and grow intentionally. These podcasts help you go from operator to owner.
Top Picks:
- Grow a Small Business Podcast – Troy Trewin interviews founders on how they scaled.
- Small Business Matters – Tim Fulton covers leadership, financial growth, and team-building advice.
- Business Mastermind Podcast – Gavin Preston shares high-level strategies and mindset shifts.
Burned Out or Plateaued
Feeling stuck? These shows offer insight and inspiration to help you rediscover your passion and build a more sustainable business.
Top Picks:
- Small Business, Big Life – Derick Van Ness shares how to align your business with your life goals.
- Akimbo – Seth Godin explores deeper thinking around work, creativity, and leadership.
- Brilliant Breakthroughs Business Podcast – Maggie Mongan delivers practical advice for profitability and productivity.
Side Hustlers
Balancing a business with a full-time job or parenting? These shows offer time-tested tips and strategies to help your hustle thrive.
Top Picks:
- Tropical MBA – Dan Andrews & Ian Schoen focus on location-independent entrepreneurs and side hustlers.
- Paychex THRIVE – Gene Marks discusses compliance, operations, and insights for small business owners.
- Hack the Entrepreneur – Jon Nastor emphasizes mindset, marketing, and building lean.
Full List: 25 Top Small Business Podcasts (2025)
| Podcast Name | Host(s) | Focus/Description |
|---|---|---|
| Entrepreneurs on Fire | John Lee Dumas | Daily interviews with successful entrepreneurs, actionable insights for growth |
| The $100 MBA Show | Omar Zenhom | Practical business lessons, short actionable episodes |
| Online Marketing Made Easy | Amy Porterfield | Marketing strategies and business growth tips |
| The Duct Tape Marketing Podcast | John Jantsch | Marketing advice for small businesses |
| Grow A Small Business Podcast | Troy Trewin | Interviews and insights for scaling small businesses |
| Paychex THRIVE | Gene Marks | Timely business insights, policy updates, and expert interviews |
| Hack the Entrepreneur | Jon Nastor | Actionable advice and stories from entrepreneurs overcoming challenges |
| Tropical MBA | Dan Andrews & Ian Schoen | Entrepreneurship and location-independent businesses |
| The Indicator from Planet Money | NPR | Quick, insightful economic and business lessons |
| Product Boss | Jacqueline Snyder & Minna Khounlo-Sithep | Product-based business strategies |
| Perpetual Traffic | DigitalMarketer | Digital marketing and paid traffic strategies |
| Akimbo | Seth Godin | Culture, leadership, and creative thinking for business |
| Dirty Secrets of Small Business | Adam Sonnhalter | Real-world small business advice and stories |
| Small Business Talk With Cathy Smith | Cathy Smith | Tips and expert interviews for business owners |
| Small Business Small Talk | Christy Smallwood | Real stories and advice from small business owners |
| Small Business Big Deal Podcast | Tracy Jepson | Entrepreneurial journeys and business building stories |
| Small Business Boss | Maggie Patterson | Service-based business growth strategies |
| Communication Strategy That Works | Emma Drake | Communication and marketing for ambitious small businesses |
| The Small Business Britain Podcast | Michelle Ovens & Karen Campbell | Inspiring small business stories from across Britain |
| Small Business Matters | Tim Fulton | Management, marketing, and finance for small businesses |
| Small Business Big World | Jon (Paper Trails) | Diverse topics for small business owners, including DEI and marketing |
| The Small Business Big Marketing Podcast | Tim Reid | Marketing strategies and interviews with innovative business owners |
| Brilliant Breakthroughs Business Podcast | Maggie Mongan | Expert interviews and actionable advice for profitability and productivity |
| Business Mastermind Podcast | Gavin Preston | Growth strategies for small and medium-sized businesses |
| Small Business, Big Life | Derick Van Ness | Balancing entrepreneurship, life, and financial success |
Starter Playlist: 5 Must-Hear Episodes This Week
Want to start fast? Here are a few standout episodes to binge this week:
- “7 Habits of Highly Profitable Startups” – The $100 MBA Show
- “How I Built a 7-Figure Product Business” – Product Boss
- “Marketing Without a Big Budget” – Duct Tape Marketing
- “The Hidden Costs of Scaling Too Fast” – Grow a Small Business
- “Work-Life Balance Isn’t a Myth” – Small Business, Big Life
Bonus Resources
- Free Podcast Notes Template – Never forget a key insight again.
- Spotify Playlist: Small Business Essentials – Handpicked episodes in one spot.
- Guide: How to Turn Podcast Learning into Action – Downloadable workbook.
Frequently Asked Questions
What’s the best podcast for new entrepreneurs?
Start with The $100 MBA Show—it’s fast, clear, and no-nonsense.
Are business podcasts actually helpful?
Yes—especially when you pick ones tailored to your stage of business.
How do I make time to listen to podcasts?
Use your commute, workout, or lunch break. Even 10–15 minutes a day adds up.
Can I grow a business just by listening to podcasts?
They won’t do the work for you—but they’ll show you the shortcuts, lessons, and frameworks you’d otherwise have to learn the hard way.
Conclusion
You don’t have to figure everything out alone. Whether you’re just starting or hitting your next growth ceiling, the right podcast can plug you into a world of experience, support, and smart strategies. If you’re still on the hunt for more, you might want to take a read through our favorite small business and startup YouTube channels that are knocking it out of the park. Click here to see what we’ve been watching and learning from.
Want to Scale Your Startup Faster? These Are the Only Entrepreneur Podcasts You Need
When you’re trying to scale your startup, learning directly from founders and experts can fast-track your growth and save you months (or even years) of trial and error. Below is a curated list of 25 high-impact podcasts—organized by theme—to help you grow, lead, and stay inspired as an entrepreneur.
🎯 Startup Stories & Founder Inspiration
| Podcast Name | Description / Focus | Host(s) |
|---|---|---|
| How I Built This | Iconic origin stories from founders of household‑name brands. | Guy Raz |
| StartUp | Behind‑the‑scenes stories of launching and running startups. | Alex Blumberg & Lisa Chow |
| The Diary of a CEO | Raw founder stories with deep dives into business psychology. | Steven Bartlett |
| Hack the Entrepreneur | Lessons from entrepreneurs overcoming challenges and building success. | Jon Nastor |
| Traction: How Startups Start | Creative and unconventional paths to finding your first customers. | Jay Acunzo |
🚀 Business Growth & Strategy
| Podcast Name | Description / Focus | Host(s) |
| Masters of Scale | Strategies for scaling businesses, featuring top CEOs. | Reid Hoffman |
| Entrepreneurs on Fire | Daily interviews packed with tactical advice for starting and scaling. | John Lee Dumas |
| The $100 MBA Show | Quick, practical business lessons you can implement immediately. | Omar Zenhom |
| Mixergy | In‑depth interviews covering growth, monetization, and startup lessons. | Andrew Warner |
| My First Million | Trendspotting and business-building tactics. | Sam Parr & Shaan Puri |
| Smart Passive Income | Online revenue strategies—from affiliate funnels to digital products. | Pat Flynn |
| Rocketship.fm | Product management and growth frameworks from the tech industry. | Michael Sacca & team |
| This Week in Startups | Startup news, founder interviews, and investor perspectives. | Jason Calacanis |
| The Pitch | Real entrepreneurs pitch to investors—like Shark Tank for your ears. | Josh Muccio |
💼 Leadership & Productivity
| Podcast Name | Description / Focus | Host(s) |
| Coaching for Leaders | Practical leadership, management, and team development. | Dave Stachowiak |
| Beyond the To‑Do List | Productivity and work-life balance tips for high‑performers. | Erik Fisher |
| The Tim Ferriss Show | Deep interviews on peak performance, routines, and tools. | Tim Ferriss |
📈 Marketing, Finance & Tech Trends
| Podcast Name | Description / Focus | Host(s) |
| Marketing School | Daily, 10‑minute marketing tips to accelerate business growth. | Neil Patel & Eric Siu |
| Marketer of the Month | Deep dives into cutting‑edge marketing strategies and trends. | Various industry leaders |
| BiggerPockets Money Podcast | Personal-finance and wealth-building for entrepreneurs. | Mindy Jensen & Scott Trench |
| a16z Podcast | Tech trends, startup insights, and innovation from Andreessen Horowitz. | a16z team |
| The Indicator | Bite‑sized insights on work, business, and the economy. | NPR team |
| Inside Intercom | Product, design, and customer success insights. | Intercom team |
| Business Wars | Dramatic rivalries between iconic businesses with strategy lessons. | David Brown |
| The Journal | In‑depth business news and macroeconomic analysis. | WSJ team |
How to Consume Strategically
- Create a Podcast Playbook
List your chosen shows, note recent episodes, and tag each by topic (e.g., Marketing, Leadership). - Schedule Listening Sprints
Block out 30–45 minutes twice a week. Treat it like any other high‑priority meeting. - Take Smart Notes
Use a two‑column template: Insight on the left, Action on the right. - Run Experiments
Turn insights into hypotheses, test quickly in your business, and measure impact. - Review & Iterate
Every month, revisit your Playbook. Drop shows that aren’t delivering value and add those recommended by your network.
Next Steps
- Pick 3–5 shows from this list that align with your current challenges and goals.
- Schedule your first listening sprint this week and commit to implementing at least one takeaway.
Best Desktop Computers for Podcasters, Audio Engineers, and Editors (2026 Guide)
Podcasting has grown far beyond simple voice recordings. Today’s podcasters are editors, audio engineers, and even video creators. Whether you’re producing high-fidelity interviews, editing multi-track sessions, or live streaming to your audience, your desktop is the powerhouse behind the scenes. Choosing the right desktop isn’t about brand loyalty — it’s about matching your workflow with reliable, future-proof performance.
This guide breaks down the best Mac and Windows desktop computers for podcasters, based on real-world use, power, expandability, and value.
What Makes a Great Desktop for Podcasting?
Podcast production requires more than a decent processor. Here’s what to look for:
Core Specs to Prioritize:
- Multi-core CPU: Essential for smooth DAW performance and faster rendering.
- 32GB+ RAM: Critical for multitasking, plugins, and editing large audio files.
- SSD/NVMe Storage: Ensures fast access to session files and reduced load times.
- Quiet Operation: Your microphone can pick up fan noise — choose quiet builds.
- Thunderbolt/USB-C Ports: Ideal for modern audio interfaces and fast external drives.
Bonus Features:
- High-end GPU (if you’re editing video podcasts).
- PCIe Expansion for pro cards and future upgrades.
- Upgradable components (especially in Windows towers).
Best Mac Desktops for Podcasting in 2026
| Model | Chip | Max RAM | Best For |
|---|---|---|---|
| iMac (M4) | M4 | Not stated | All-in-one setups with minimal cables |
| Mac Studio | M4 Max/M3 Ultra | 512GB | Heavy editing, multi-track production |
| Mac Pro | M3 Ultra | 512GB | Large studio environments with expansion |
iMac (2024, M4)
- All-in-one design with 24-inch 4.5K Retina display
- Ideal for creators who want simplicity and performance in one unit
Mac Studio (2025, M4 Max / M3 Ultra)
- Compact but incredibly powerful
- Thunderbolt 5, massive RAM support, fast SSD
- Ideal for power users working with dozens of tracks and plug-ins
Mac Pro (2024, M3 Ultra)
- For studios needing internal PCIe expansion (DSP cards, RAID, etc.)
- Best for those already deep into Apple’s professional ecosystem
Best Windows Desktops for Podcasting in 2026
| Model | CPU | Max RAM | Best For |
| Dell Precision 7960 | Intel Xeon W9-3495X | 2TB | Enterprise-level audio studios |
| HP Z8 G5 Fury | Xeon/Threadripper Pro | 2TB | Audio post-production houses |
| ASUS ProArt PD5 | i9-14900K / Ryzen 9 7950X | 128GB | Content creators and podcast editors |
| Corsair Vengeance i8200 | i9-14900K / Ryzen 9 7950X | 128GB | Home-based podcasters + streamers |
Dell Precision / HP Z8 / Lenovo PX
- Designed for critical workflows and redundancy (ECC RAM, RAID, dual CPUs)
- Expensive, but mission-critical reliable
ASUS ProArt PD5
- Balanced for podcasters who also do video work or advanced editing
- Quiet cooling and elegant design
Corsair Vengeance i8200
- Gamer-class power meets podcasting
- Excellent thermals and upgradability
Mac vs. Windows for Podcasting: Which to Choose?
| Feature | macOS | Windows |
| Software Access | Logic Pro, GarageBand | Audition, Reaper, Pro Tools |
| Expandability | Limited (except Mac Pro) | High |
| Upgradability | Low (except Mac Pro) | Very High |
| Ease of Use | High | Varies |
| Initial Cost | Higher | More options at lower cost |
Choose macOS if:
- You already use Logic Pro or Final Cut
- You prefer all-in-one simplicity
Choose Windows if:
- You want custom builds or upgrades
- You run plugin-heavy or video workflows
Final Recommendations by Podcasting Style
| Use Case | Best Desktop Option |
| Solo podcaster + editing | iMac (M4), ASUS ProArt PD5 |
| Remote interviews + plugins | Mac Studio, Corsair Vengeance |
| Livestreaming and podcasting | Corsair Vengeance, Mac Studio |
| Audio agency / production team | Mac Pro, Dell Precision, HP Z8 |
Pro Tips Before You Buy
- Opt for 1TB+ of storage for long-term episodes and backups.
- Don’t forget a UPS battery backup — power loss ruins recordings.
- Consider dual monitors for easier multi-track editing.
- Check compatibility with your preferred audio interface.
- Budget for a high-quality mic, audio interface, and room treatment.
Conclusion
Your desktop is the foundation of your podcast studio. Whether you’re editing your first episode or producing high-end interview shows, the right computer will make your workflow faster, smoother, and more enjoyable.
The Mac Studio (M4 Max) and ASUS ProArt PD5 hit the sweet spot for most podcasters — offering massive performance without the overkill. For those building out a commercial studio, the Mac Pro or Dell Precision 7960 provide the flexibility and muscle needed to scale.
Choose the machine that matches your ambition — and let your content shine.
Best Cheap Podcast Microphones in 2026 (That Still Sound Pro)
Want great audio without spending a fortune? Whether you’re launching your first show or upgrading your setup, the right podcast microphone doesn’t have to cost $200+. Below are the best cheap podcast microphones under $100 — offering solid sound, simple setup, and serious value.
✅ What to Look for in a Cheap Podcast Mic
Before we dive into the top picks, here’s what really matters when shopping for a budget microphone:
- Sound Quality: Even low-cost mics can produce studio-like clarity.
- Background Noise Rejection: Especially important for untreated rooms.
- Connection Type: USB is plug-and-play. XLR offers pro-level upgrade paths.
- Build Quality: Cheap shouldn’t mean flimsy.
- Included Accessories: Bonus points for pop filters, stands, and cables.
🎧 6 Best Cheap Podcast Microphones (Under $100)
1. Samson Q2U – Best Overall Budget Mic
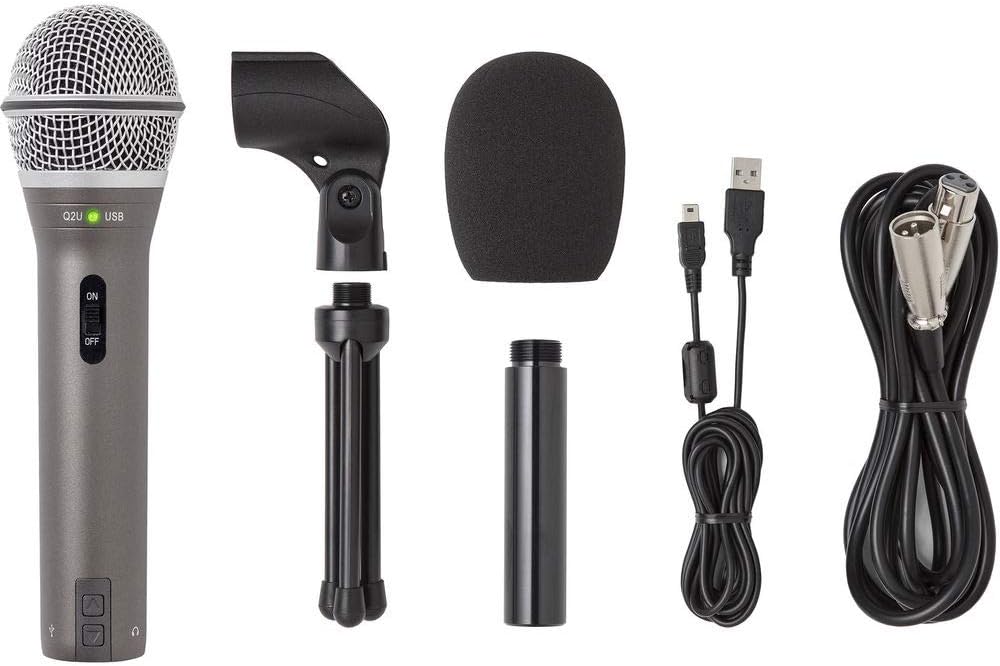
- Type: Dynamic | Connection: USB + XLR
- Price: ~$77 | ⭐ 4.7 (1,000+ reviews)
Why It’s Great:
This mic punches way above its price class. The Samson Q2U offers both USB and XLR outputs, making it ideal for beginners now and future upgrades later. Its dynamic capsule naturally blocks room noise, giving you cleaner audio even in echoey spaces.
✅ Pros:
- Dual USB/XLR for flexibility
- Excellent clarity for the price
- Rugged build
⚠️ Cons:
- Can be harder to find in stock
2. Audio-Technica ATR2100x-USB – Best Value Alternative
- Type: Dynamic | Connection: USB + XLR
- Price: ~$49 | ⭐ 4.8 (500+ reviews)
Why It’s Great:
Nearly identical to the Q2U, the ATR2100x is a favorite among podcasters for its quiet background handling and upgrade-ready connections. It’s a plug-and-play mic that can also go pro when paired with an interface.
✅ Pros:
- Great noise rejection
- Dual connectivity
- Crisp vocal capture
⚠️ Cons:
- Included stand is a bit flimsy
3. Behringer D3 Podcast Bundle – Best All-in-One Starter Kit
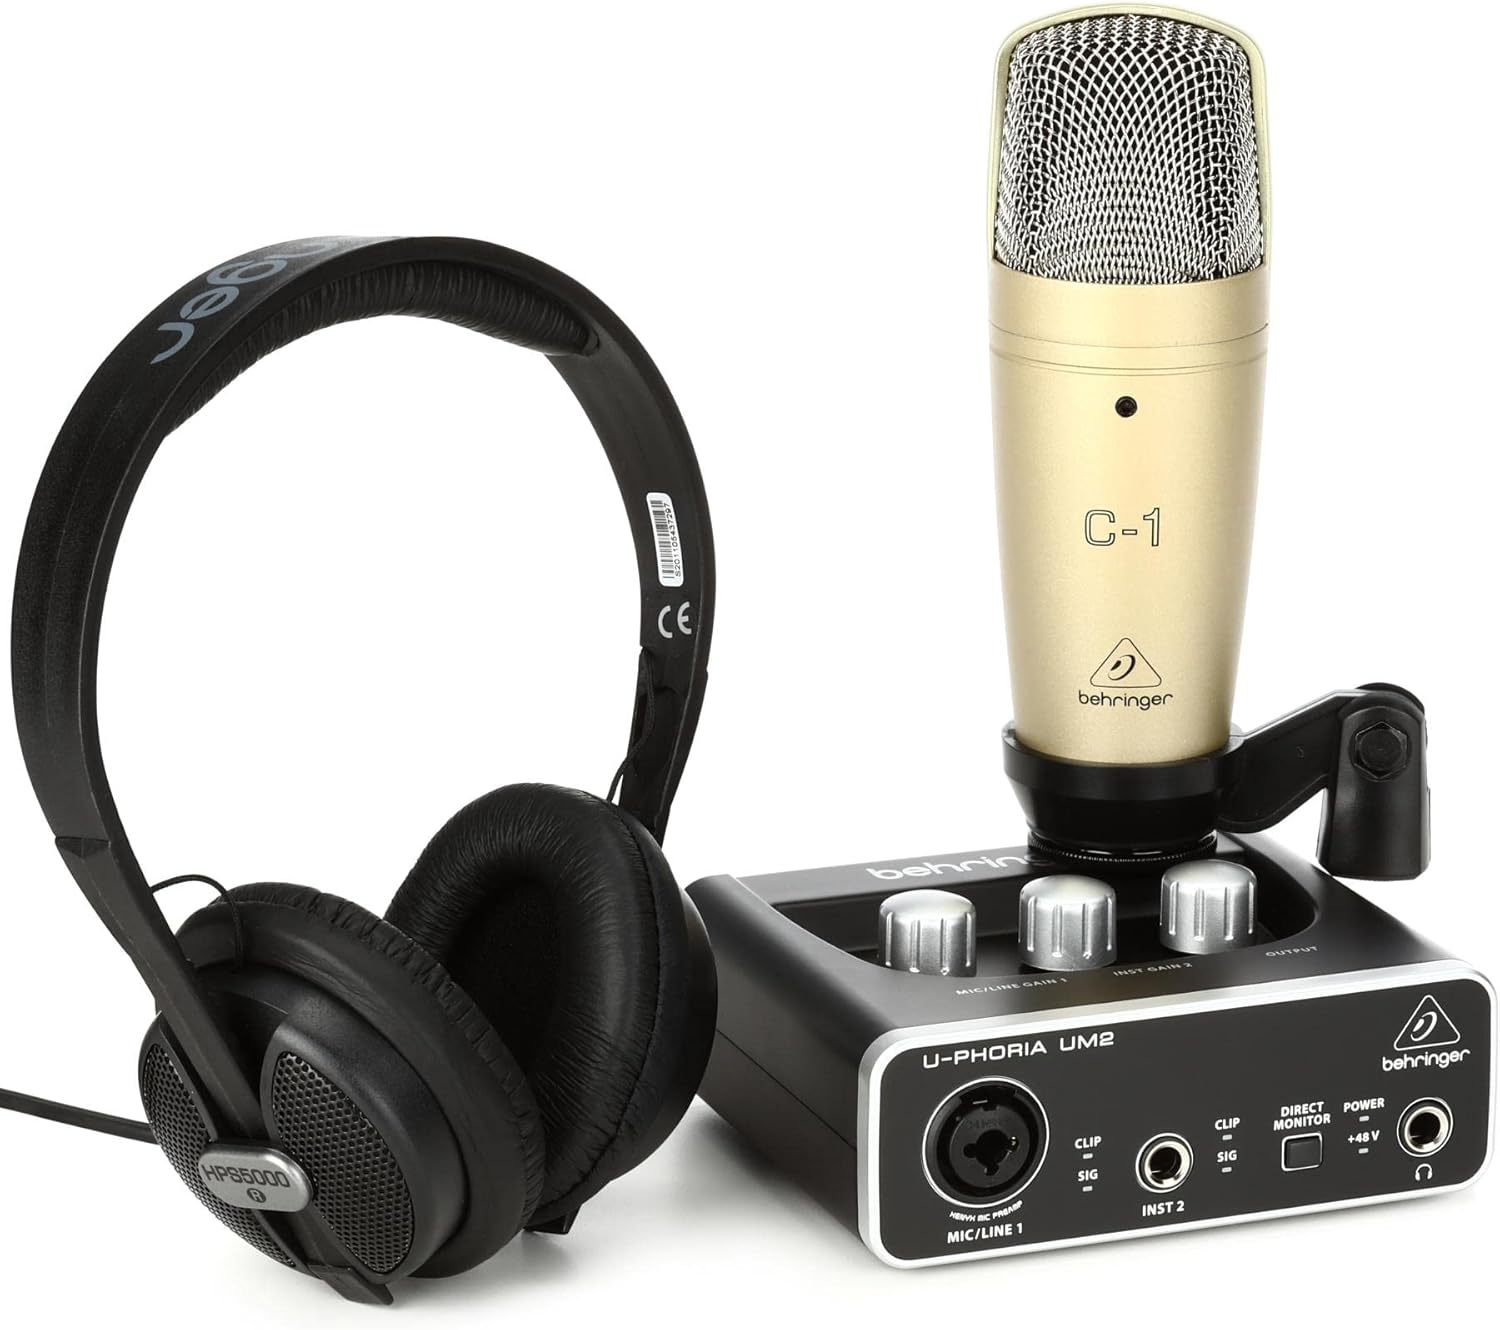
- Type: Condenser | Connection: USB
- Price: ~$72
Why It’s Great:
Just starting out? The Behringer D3 Podcast Bundle includes everything you need: USB mic, boom arm, pop filter, and cables. It’s a simple way to jump into podcasting without buying accessories separately.
✅ Pros:
- Complete kit
- Easy USB setup
- Cardioid pattern for voice focus
⚠️ Cons:
- Mic is basic, better for solo or beginner setups
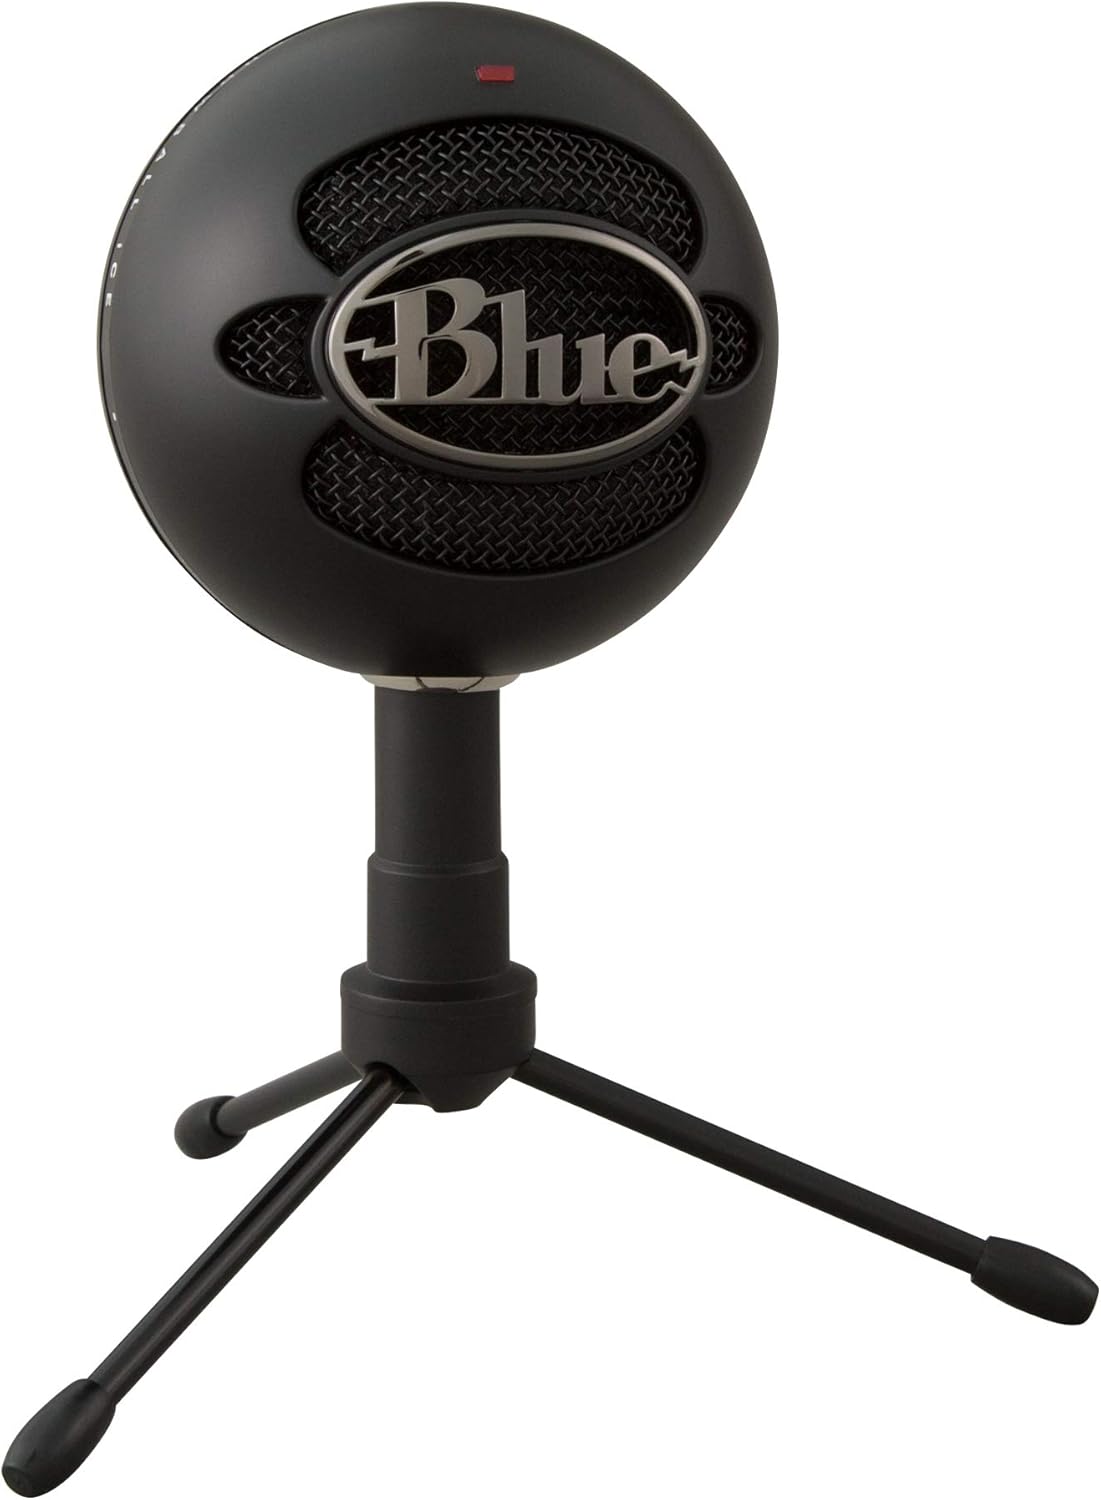
4. Blue Snowball iCE – Most Popular USB Mic
-
Type: Condenser | Connection: USB
-
Price: ~$49 | ⭐ 4.5 (1,600+ reviews)
Why It’s Great:
The Blue Snowball iCE is a longtime favorite of hobby podcasters. It’s simple, stylish, and delivers decent sound for the price. Great for voiceovers, solo podcasts, and general use.
✅ Pros:
- Recognized brand
- Sleek, compact design
- Plug-and-play simplicity
⚠️ Cons:
- Picks up more background noise than dynamic mics
5. HyperX SoloCast – Best for Streamers & Podcasters
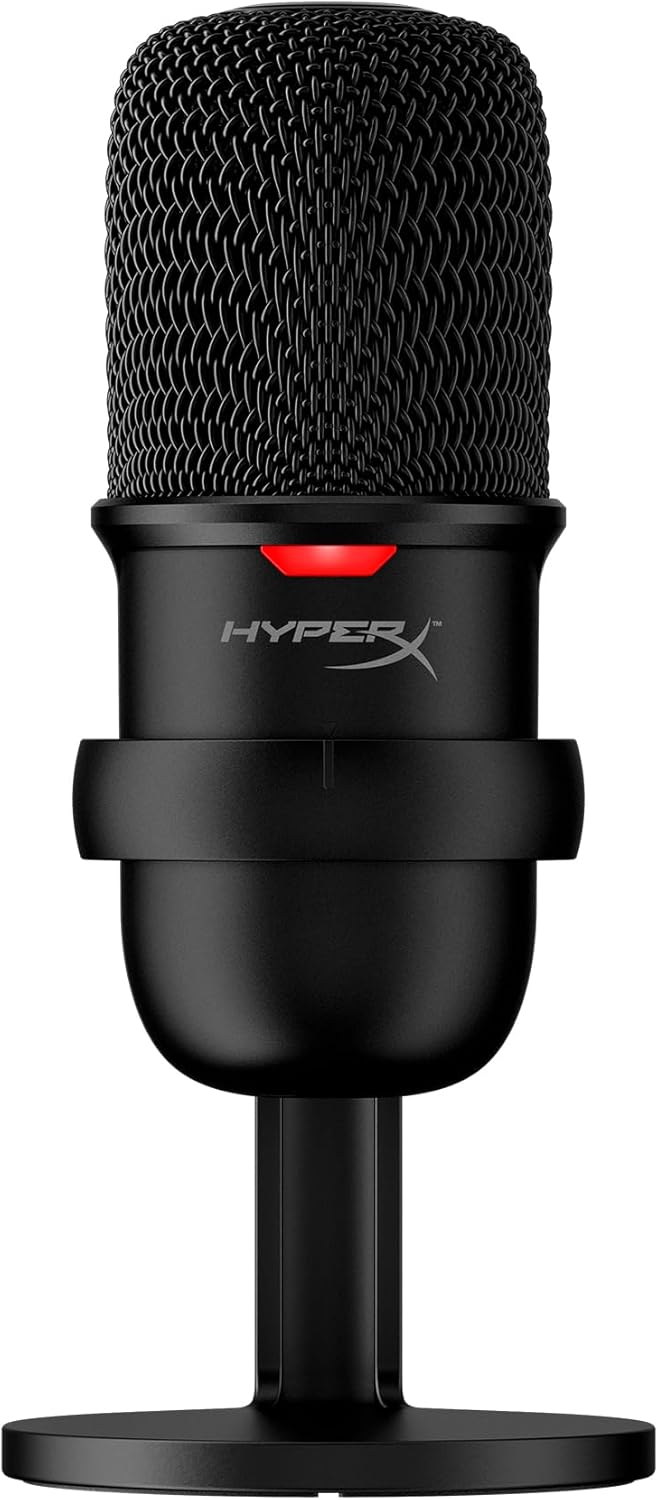
- Type: Condenser | Connection: USB
- Price: ~$48 | ⭐ 4.8 (3,800+ reviews)
Why It’s Great:
The HyperX SoloCast brings modern convenience to a budget mic. Features like tap-to-mute and a slim design make it perfect for podcasters who stream or record regularly in small spaces.
✅ Pros:
- Tap-to-mute + LED indicator
- Great voice isolation
- Certified for Discord & TeamSpeak
⚠️ Cons:
- Condenser mic = more room sensitivity
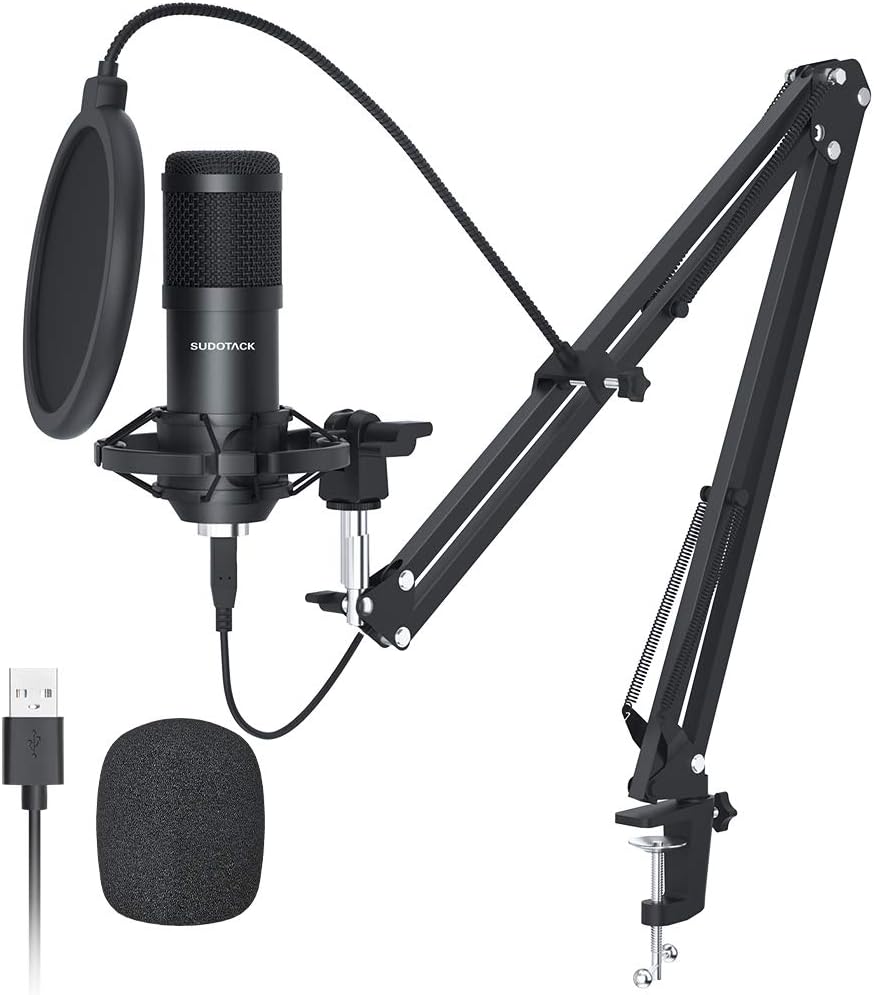
6. Sudotack ST-800 – Best Full Kit on a Tight Budget
- Type: Condenser | Connection: USB
- Price: ~$48 | ⭐ 4.5 (Amazon)
Why It’s Great:
The Sudotack ST-800 offers premium features at a budget price — including 24bit/192kHz resolution and a full kit with stand, pop filter, and shock mount. Perfect for quiet rooms where detail matters.
✅ Pros:
- High-res audio
- Complete kit included
- Excellent value
- ⚠️ Cons:
- Best used in quiet environments due to condenser design
🔍 Quick Comparison Table
| Microphone | Type | USB/XLR | Price | Best For |
|---|---|---|---|---|
| Samson Q2U | Dynamic | Both | ~$77 | All-purpose, long-term setup |
| ATR2100x-USB | Dynamic | Both | ~$49 | Beginners with upgrade plans |
| Behringer D3 Bundle | Condenser | USB | ~$72 | First-time users, full kit |
| Blue Snowball iCE | Condenser | USB | ~$49 | Hobbyists, solo podcasters |
| HyperX SoloCast | Condenser | USB | ~$48 | Streamers & minimalist setups |
| Sudotack ST-800 | Condenser | USB | ~$48 | Quiet rooms, full-feature kit |
💡 Pro Tips for Better Sound on a Budget
- 🎧 Use a pop filter: Cuts out harsh ‘p’ and ‘s’ sounds.
- 🪟 Record in soft spaces: Curtains, rugs, and pillows help dampen reverb.
- 🎚️ Learn to EQ: Even free tools like Audacity let you polish your audio.
- 🧼 Use noise reduction software: Clean your recordings with tools like Krisp or Adobe Enhance.
🙋♂️ FAQ: Cheap Podcast Microphones
What is the best cheap podcast microphone under $100?
The Samson Q2U and Audio-Technica ATR2100x-USB are top choices. Both offer excellent sound quality, background noise rejection, and dual USB/XLR connectivity, making them ideal for beginners and intermediate podcasters.
Can a cheap microphone still sound professional?
Yes! Many budget mics offer impressive audio quality. Dynamic microphones like the Samson Q2U or ATR2100x are especially good for untreated rooms because they block out background noise better than condenser mics.
What’s the difference between USB and XLR microphones?
- USB mics are plug-and-play and ideal for beginners.
- XLR mics require an audio interface or mixer but provide more control and upgrade options for serious podcasters.
Some mics, like the Q2U and ATR2100x, offer both connections.
Should I get a dynamic or condenser mic for podcasting?
- Dynamic mics (like Samson Q2U) are better at rejecting room noise — ideal for noisy or untreated environments.
- Condenser mics (like the Blue Snowball or SoloCast) capture more detail but are sensitive to background sounds. Best used in quiet, treated spaces.
Do I need accessories with a cheap podcast mic?
Some cheap mics include stands, pop filters, or shock mounts. Others may require you to buy accessories separately. Look for bundles or starter kits (like the Behringer D3 or Sudotack ST-800) to get more value upfront.
Is it okay to buy a used or refurbished podcast mic?
Absolutely. Sites like Amazon Renewed, eBay, or Sweetwater often offer gently used or refurbished mics at steep discounts. Just make sure you’re buying from a reputable seller with a return policy.
🎬 Final Thoughts: Build Your Dream Podcast Setup Without Breaking the Bank
A great podcast starts with great audio — and as you’ve seen, you don’t need to spend a fortune to sound professional. Whether you go with the Samson Q2U for long-term flexibility, the all-in-one Behringer D3 Bundle, or the sleek HyperX SoloCast, there’s a cheap podcast microphone out there that fits your budget and goals.
But your mic is just one piece of the puzzle.
If you’re ready to take your podcast to the next level, don’t miss these essential guides:
- 🎧 Best Laptops for Podcasting – Find out which laptops handle editing, recording, and streaming with ease.
- 💡 Podcast Lighting Setups – Learn how to look polished on video even if you’re filming in a small room.
- 📷 Best Cameras & Lenses for Podcasting – Explore gear that captures sharp, professional video for interviews and livestreams.
With the right tools and knowledge, launching or upgrading your podcast doesn’t have to be expensive — just intentional. Focus on gear that’s budget-friendly but reliable, and you’ll be well on your way to creating content that sounds (and looks) like a pro.
The Best Wireless Podcast Mics
Wireless microphones are revolutionizing how podcasters and content creators capture high-quality audio. No more tangled cords or being tethered to a desk—just freedom to move, clean recordings, and sleek, minimal setups. Whether you’re recording from your home studio, interviewing on location, or streaming on the go, this guide covers the best wireless podcast mics of 2025, carefully reviewed for sound quality, ease of use, and value.
Quick Comparison Table
| Microphone | Recording Format | Range (ft) | Battery Life | Noise Cancellation | Best For |
|---|---|---|---|---|---|
| DJI Mic 2 | 32-bit float | 820 | 6 hrs (18 w/ case) | Intelligent noise canceling | Best overall |
| Rode Wireless PRO | 32-bit float | 853 | 7 hrs (w/ smart case) | N/A | Premium / Pro users |
| Hollyland Lark M2 | 48 kHz/24-bit | 984 | 10 hrs (w/ case) | >70 dB SNR | Interviews, dual-host setups |
| Rode Wireless GO II | 24-bit/48 kHz | 656 | 7 hrs | N/A | 2-person podcasting |
| Hollyland Lark M1 | 48 kHz/24-bit | 656 | 4 hrs (w/ case) | DSP algorithms | Budget pick |
| Saramonic Blink 500 | 48 kHz/16-bit or 24-bit | 328 | 8 hrs (w/ case) | Yes | Flexible, mobile creators |
| Neewer CM28 | 48 kHz/16-bit | 200 | 6 hrs (w/ case) | Basic | Beginners on a budget |
| Samson Go Mic | 48 kHz/16-bit | 100 | 6 hrs (w/ case) | Basic | Simple setups, tight spaces |
| Rode Wireless ME | 24-bit/48 kHz | 656 | 7 hrs | N/A | On-the-go/mobile podcasting |
| Lark 150 System | 48 kHz/16-bit or 24-bit | 328 | 8 hrs (w/ case) | Yes | Dual-host, easy setup |
Click here to learn more about our favorite wireless mic
Best Overall Wireless Podcast Mic
DJI Mic 2 The DJI Mic 2 balances professional-grade audio with portability. Designed for creators who move between settings, it offers up to 820 feet of wireless range and 32-bit float recording that preserves audio dynamics even in fluctuating environments. Intelligent noise canceling ensures your voice stays crisp.
Why we love it: The DJI Mic 2 works seamlessly with smartphones, cameras, and computers. It magnetically clips on, charges in a sleek case, and supports USB-C, Lightning, and 3.5mm TRS outputs.
Pros:
- 32-bit float recording
- 18 hours total battery with case
- Great noise reduction
Cons:
- Single-channel only—best for solo creators
Best Budget Option
Hollyland Lark M1 The Lark M1 delivers reliable wireless audio without breaking the bank. It’s ideal for beginners who want plug-and-play simplicity with surprising audio clarity. DSP noise cancellation and a 656-ft range give it more value than most entry-level systems.
Pros:
- Clear sound for under $100
- Easy to use, auto-pairing transmitters
- Solid build for the price
Cons:
- Limited battery per charge (4 hrs)
- No internal storage
Best for Mobile/On-the-Go Podcasting
Rode Wireless ME This compact system is designed for creators recording from a smartphone or DSLR. It features built-in microphones on both the transmitter and receiver, making quick interviews and mobile podcasting easier than ever.
Pros:
- Ultra-lightweight and portable
- Compatible with iOS and Android
- Internal mic on both ends
Cons:
- No on-device storage
- Lacks 32-bit recording depth
Best for Interviews and Multi-Person Setups
Rode Wireless GO II and Hollyland Lark M2 These dual-transmitter systems are perfect for co-hosts, guests, or on-location interviews. Both provide clean audio, extended range, and internal storage (GO II), with the Lark M2 offering up to 10 hours of runtime.
Pros:
- Dual mics and receivers
- Long wireless range
- Versatile connectivity
Cons:
- Requires some initial setup and software familiarity
Premium Pick for Professionals
Rode Wireless PRO The Wireless PRO is built for serious audio work. It supports 32-bit float recording, timecode sync for video alignment, and encrypted digital transmission. Whether you’re a documentary producer or a commercial podcaster, this is a top-tier mic system.
Pros:
- Broadcast-quality audio
- Timecode for syncing video
- Comes with lav mics and smart charging case
Cons:
- More expensive than most others
- Overkill for casual users
What to Look For in a Wireless Podcast Mic
Click here for our favorite wireless podcasting mic
Choosing the right mic depends on your workflow, environment, and goals. Here’s what to prioritize:
- Audio Quality: 24-bit or 32-bit float recording ensures detail and dynamic range.
- Battery Life: Look for systems with 6–10 hours or a charging case that extends use.
- Wireless Range: Longer range allows flexibility in setup and movement.
- Noise Cancellation: Vital for busy or outdoor environments.
- Connectivity: Ensure compatibility with smartphones, DSLRs, and computers via USB-C, Lightning, or TRS.
- Storage: Onboard memory is helpful as a backup or when recording in remote areas.
FAQs
Are wireless mics good for podcasting?
Yes. They reduce cable clutter and are ideal for dynamic or multi-person recordings.
Do wireless mics have latency?
High-end models have negligible latency. Entry-level models may experience slight delay.
Can I use wireless mics with my iPhone or DSLR?
Absolutely. Most come with or support adapters for phones and cameras.
How many people can record at once?
Depends on the system—some support one transmitter, others (like Rode GO II or Lark 150) support two or more.
Conclusion
The best wireless podcast mic for your needs depends on your goals, budget, and environment. If you’re serious about podcasting and want top-tier performance, the Rode Wireless PRO delivers unmatched clarity and control. For most creators, the DJI Mic 2 offers the best balance of portability, quality, and price. And if you’re just getting started, the Hollyland Lark M1 is your best bet.
Use the table above to compare specs at a glance—and choose the mic that will let your voice shine wherever you record.
Free Music for Podcasts
Free music for podcasts
Track 1: Podcast Show Notes
Track 2: Podcast Growth Strategies
Track 3: Monetizing Your Podcast
Track 4: Podcast SEO Tips
Track 5: Engaging Your Audience
If you’re starting a podcast, you’ll need music for your intro, outro, or background. However, you can’t just use any song from Spotify or YouTube without proper licensing—it will get flagged for copyright violations. Fortunately, there are several platforms where you can find legal, high-quality music for your podcast.
On this page, you’ll find a list of music licensing companies, royalty-free platforms, sound effects libraries, and helpful tips for choosing, editing, and using podcast music effectively.
Does My Podcast Need a Theme Song?
Many podcasts use music at the beginning (also known as an intro or theme song) to set the tone and create a recognizable identity. Having a signature piece of music can make your podcast feel more professional and engaging.
Where Can I Find Licensed Podcast Music?
Click Here to Get Exclusive Music Tracks That Set Your Podcast Apart
Top Music Licensing Companies
These companies provide high-quality, legally licensed music for podcasts and other media projects. Some require subscriptions, while others offer pay-per-track options.
-
Track Club by Marmoset – A curated music library with straightforward licensing for podcasts.
-
PremiumBeat – Offers a vast selection of music with both subscription and one-time purchase options.
-
Pond5 – Provides royalty-free music at various price points, including a monthly subscription option.
-
Depositphotos – Known for its extensive library of royalty-free music and sound effects.
-
Soundstripe – Offers unlimited access to music and sound effects through a subscription plan.
Best Royalty-Free Music Platforms
These platforms provide music that can be used for free or with attribution, making them great choices for podcasters on a budget.
-
Pixabay – A free source for royalty-free music and sound effects.
-
YouTube Music Library – A collection of free music tracks for creators.
-
AudioJungle – Part of Envato Market, offering affordable royalty-free music.
-
Epidemic Sound – A premium music library offering high-quality, fully licensed tracks.
-
Audiosocket – A curated selection of indie music for licensing.
Additional Free Music Resources
These websites provide free music under Creative Commons licenses, which may require attribution.
-
Free Music Archive – A massive collection of free music under various licenses.
-
Jamendo – Features music that can be used for free under Creative Commons terms.
-
Bensound – Provides royalty-free tracks with flexible licensing options.
-
No Copyright Sounds – A source of free music for videos and podcasts.
-
Incompetech – Offers a wide range of Creative Commons-licensed music.
Stock Music Libraries for Podcasts
If you’re looking for professional-quality music for your podcast, these stock music libraries offer great options.
-
Shutterstock Music – A diverse catalog of licensed music for media use.
-
Musicbed – High-quality, professionally produced music for podcasts.
-
Marmoset Music – A carefully curated selection of licensed tracks.
-
Audioblocks – A subscription-based service offering unlimited downloads.
-
Artlist – A premium platform with a focus on curated, high-quality music.
How to Choose the Right Podcast Music
Picking the right music is crucial to creating the right feel for your podcast. Here are some key factors to consider:
-
Mood & Tone – Does the music match your podcast’s style? (Upbeat for business, chill for wellness, dramatic for true crime)
-
Energy Level – Make sure the track complements your voice rather than overpowering it.
-
Loopability – Can you easily extend or trim the track as needed?
-
Licensing Considerations – Ensure you have the appropriate rights to use it in a commercial podcast.
Understanding Music Licensing for Podcasts
Understanding licensing is important to avoid copyright violations. Here’s a quick breakdown of common license types:
| License Type | Can You Use It for Free? | Requires Attribution? | Allowed for Monetization? |
|---|---|---|---|
| Creative Commons (CC-BY) | ✅ | ✅ | ✅ |
| Creative Commons (CC-BY-NC) | ✅ | ✅ | ❌ (Non-commercial only) |
| Royalty-Free | ❌ (Usually Paid) | ❌ | ✅ |
| Public Domain | ✅ | ❌ | ✅ |
| Copyrighted Music | ❌ | ❌ | ❌ |
Always check the license terms on the website you’re downloading from.
Where to Find Sound Effects for Podcasts
Beyond intro music, many podcasters use sound effects for transitions, background ambiance, and storytelling. Here are some great resources:
-
Free Sound Effects:
-
Freesound.org – Community-driven sound library.
-
BBC Sound Effects – Free archive of thousands of sounds.
-
ZapSplat – Free and premium sound effects for creators.
-
-
Paid Sound Effects:
-
Boom Library – Studio-quality sound effects.
-
SoundSnap – Subscription-based sound FX library.
-
Artlist SFX – Part of Artlist’s premium offerings.
-
Editing Your Podcast Music for a Professional Sound
Once you’ve chosen your music, make sure it integrates smoothly into your podcast. Here are some best practices:
-
Fade in/out: Start the music softly and fade it down before speaking.
-
Use ducking: Reduce the music volume when speaking to avoid distractions.
-
Looping: Trim and loop music to fit your intro or transitions.
-
Recommended Free Audio Editors:
-
Audacity – Free, open-source audio editing.
-
GarageBand (Mac) – Great for beginners.
-
Reaper – Low-cost, professional DAW.
-
AI-Powered Music Creation Tools
If you want unique, AI-generated music, these tools might help:
-
Boomy – AI-generated custom music.
-
Aiva.ai – AI compositions for commercial use.
-
Soundraw – AI-powered royalty-free music generator.
These tools allow you to create original music tailored to your podcast’s needs.
Mistakes to Avoid When Using Podcast Music
Here are some common pitfalls podcasters should avoid:
❌ Choosing music that’s too loud or distracting – It should complement, not overpower, your voice.
❌ Not checking licensing terms – Some “royalty-free” music still has restrictions.
❌ Overusing background music – Too much music can make dialogue hard to hear.
❌ Using generic or overused tracks – A unique sound helps brand your podcast.
Tips for Using Podcast Music Effectively
-
Keep it Short – Avoid long intros. Five seconds of music is often enough.
-
Balance the Volume – Ensure your music isn’t louder than the rest of your episode.
-
Consider a Sound Instead of a Song – A unique sound effect (like a chime, strum, or beat) can be a recognizable signature for your show.
Final Thoughts
These platforms offer a variety of music styles and licensing options to suit different podcast needs. Whether you’re looking for free tracks, professional-grade paid music, or AI-generated compositions, there’s an option for you. Click Here to Discover Affordable, High-Quality Music for Your Podcast
How Long Should Your Podcast Be? A Strategic Guide to Episode Length, Retention & Monetization
Have you ever wondered how long your podcast episodes should be? Should you keep them short and snappy, or go all-in with long-form deep dives? With so many successful podcasts ranging from 5-minute daily tips to 3-hour epic conversations, choosing the right length can feel overwhelming.
The truth is, there’s no universal perfect episode length—it depends on your content, audience, and monetization goals. The good news? Whether you prefer quick insights, medium-length discussions, or marathon-style episodes, you can still keep your listeners engaged and maximize revenue—without relying on built-in platform ads.
This guide will break down:
- The pros and cons of different episode lengths
- Why Joe Rogan’s long-form model works—and why it’s tough to replicate
- How to keep listeners engaged (regardless of length)
- Monetization strategies beyond standard podcast ads
- A step-by-step framework to determine your ideal podcast length
What’s the Ideal Podcast Length?
Understanding Listener Behavior
- Different podcast types have different optimal lengths:
- Short-form (5-20 min): News, quick tips, daily updates
- Medium-length (20-45 min): Interviews, solo discussions, storytelling
- Long-form (45+ min): In-depth conversations, panel discussions, Joe Rogan-style formats
Data Insights on Episode Length & Retention
- Shorter episodes tend to have higher completion rates.
- Longer episodes work best when content is engaging and formatted well.
- Varied lengths can work if they fit your audience’s listening habits.
💡 Pro Tip: Use your podcast analytics (Spotify for Podcasters, Apple Podcasts Connect) to see where listeners drop off and adjust your format accordingly.
The Joe Rogan Factor: Why Long-Form Works & Why It’s Hard to Replicate
Why Rogan’s 3-4 Hour Episodes Work
- Built-in audience → Fans expect deep, unfiltered conversations.
- High-profile guests → Big names drive interest & long engagement.
- No ad pressure → His Spotify deal gives him monetization freedom.
- Repurposed clips → JRE Clips makes long content digestible.
Why Small Podcasters Struggle with Long Episodes
🚨 Challenges for Smaller Podcasters:
- Unknown hosts struggle with long retention times.
- Listeners won’t commit to a long episode without trust.
- Shorter, high-quality content often converts better for newer podcasts.
- Long-form requires tight editing—rambling, off-topic tangents will make listeners drop off.
- New listeners rarely start with a 3-hour episode—discovery and conversion rates are lower.
How Small Podcasters Can Make Long Episodes Work
✅ Keep Content Structured: Use clear segments (e.g., Intro → Guest Q&A → Main Discussion → Closing Thoughts).
✅ Break Up the Episode: Release highlights as separate, shorter episodes or clips for easier consumption.
✅ Use Strong Hooks: The first 5 minutes should make it clear why the listener should stay.
✅ Edit Ruthlessly: Cut fluff—long doesn’t mean slow or unstructured.
✅ Promote in Small Bites: Share 1-5 minute clips on social media to drive traffic to the full episode.
✅ Drive Listeners to an Owned Platform: Offer exclusive content, timestamps, or written summaries on your website.
🎯 Recommended Tools for Engagement:
- Descript (editing & transcript creation)
- Riverside.fm (high-quality remote recording)
- Podcastle (AI-powered voice editing & enhancement)
- Headliner (audiograms for social media)
How to Keep Listeners Engaged (Regardless of Episode Length)
Tips for Small Podcasters to Increase Retention
✅ Start Strong: The first 30 seconds matter. Hook listeners with a question, an intriguing statement, or a preview of what’s coming. ✅ Segment Your Content: Break your episode into sections (intro, main topic, Q&A, conclusion) to keep it structured. ✅ Use Sound Design: Music, transitions, and sound effects add polish and keep attention. ✅ Encourage Interaction: Ask listeners to engage on social media or email you with questions. ✅ Keep Energy High: Monotone delivery kills engagement. Speak naturally, with variation in tone and pace. ✅ Tease Future Episodes: Give listeners a reason to come back.
Monetization: Why Your Episode Length Matters
Short vs. Long: Which Makes More Money?
| Episode Length | Strengths | Weaknesses | Best Monetization Methods |
|---|---|---|---|
| Short (5-20 min) | High retention, quick to produce | Limited ad spots | Sponsored shoutouts, website traffic, affiliate links |
| Medium (20-45 min) | Good balance, flexible format | Needs engagement strategy | Host-read ads, email opt-ins, memberships |
| Long (45+ min) | Deep engagement, more ad opportunities | Harder to retain new listeners | Direct sponsorships, premium content, repurposed clips |
Monetization Strategies Beyond Platform Ads
🎁 Get a Free Monetization Resource & Video Training
Want to take your podcast revenue to the next level? Visit PodcastPontifications.com for a free guide and exclusive video training on monetizing your podcast effectively!
🎯 Recommended Tools for Monetization:
- Podia (sell digital products & courses)
- ConvertKit (email marketing)
- Supercast (premium podcast subscriptions)
- Teachable (course creation)
- ThriveCart (for selling digital products & services)
Choosing the Right Length for Your Podcast (Actionable Framework)
Step 1: Define Your Goal
🔹 Brand Awareness? → Short, punchy episodes. 🔹 Deep Engagement? → Long-form interviews. 🔹 Monetization? → Hybrid approach.
Step 2: Analyze Your Audience
- Do they prefer long discussions or quick insights?
- Check listener drop-off rates in analytics.
Step 3: Test & Optimize
- Experiment with different lengths and track performance.
- Use listener feedback to adjust structure and pacing.
Making Podcast Length Work for You
There’s no magic formula for the perfect podcast length—only the right length for your goals. Whether you prefer short-form episodes or long-form conversations, your success depends on keeping listeners engaged and monetizing strategically.
🚀 Next Steps: ✅ Decide your podcast length based on your goals.
✅ Set up a website + monetization funnel.
✅ Experiment, analyze, and optimize your strategy.
Got questions or want to learn more? Visit PodcastPontifications.com for exclusive resources to grow and monetize your podcast!
- StreamYard Business Plan Review: Is It Worth $299/Month for Teams?
- Synology DS1525+ for Podcasters: What You Need to Know Before You Buy
- StreamYard Pricing (2026): Full Comparison of Plans, Differences, Features & Discounts
- Podbean Pricing: The Best Podcast Hosting Platform for Getting Started?
- SquadCast Pricing Explained: Every Plan, Feature, and Trade-Off Worth Knowing