
Matt
StreamYard Review: Is It Worth It? My Hands-On Verdict
Last Updated: July 2026
StreamYard is worth it if you go live, run webinars, or record video podcasts with remote guests, and you want that to be simple. After running my own live shows on the Advanced plan since 2024, my verdict is that StreamYard trades a little raw audio fidelity for the easiest browser-based studio on the market. This hands-on review covers exactly what that trade-off gets you.
I recorded a full walkthrough of StreamYard from signup to final export, and this review is built on that hands-on session plus everyday use of the platform. Below I’ll cover setup, what the studio is actually like to work in, the recording and download workflow, current pricing, and who should (and shouldn’t) use it.
What Is StreamYard?
StreamYard is a browser-based live streaming and recording studio. You run everything from a Chrome tab: record locally, invite remote guests, multistream to platforms like YouTube and Facebook, and edit and repurpose the result without leaving the app. There’s nothing to install, which is the whole point.
If you want the full primer on the platform’s history and positioning, I go deeper in what is StreamYard. This review is about what it’s like to actually use.
How Easy Is StreamYard to Set Up?
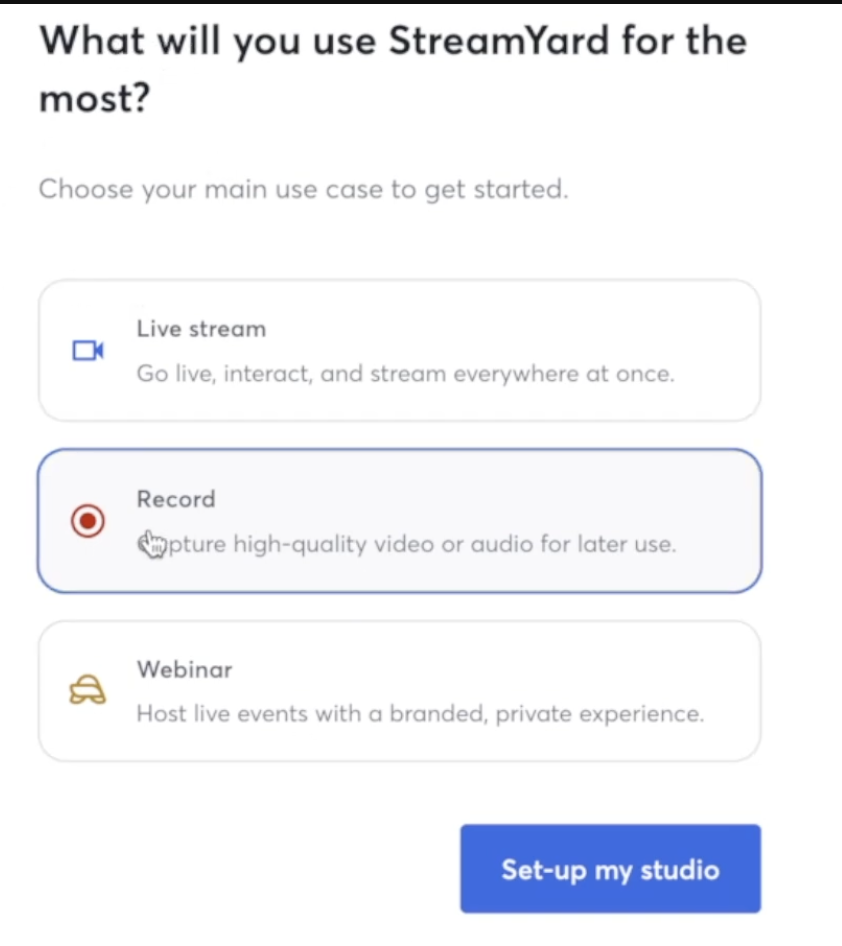
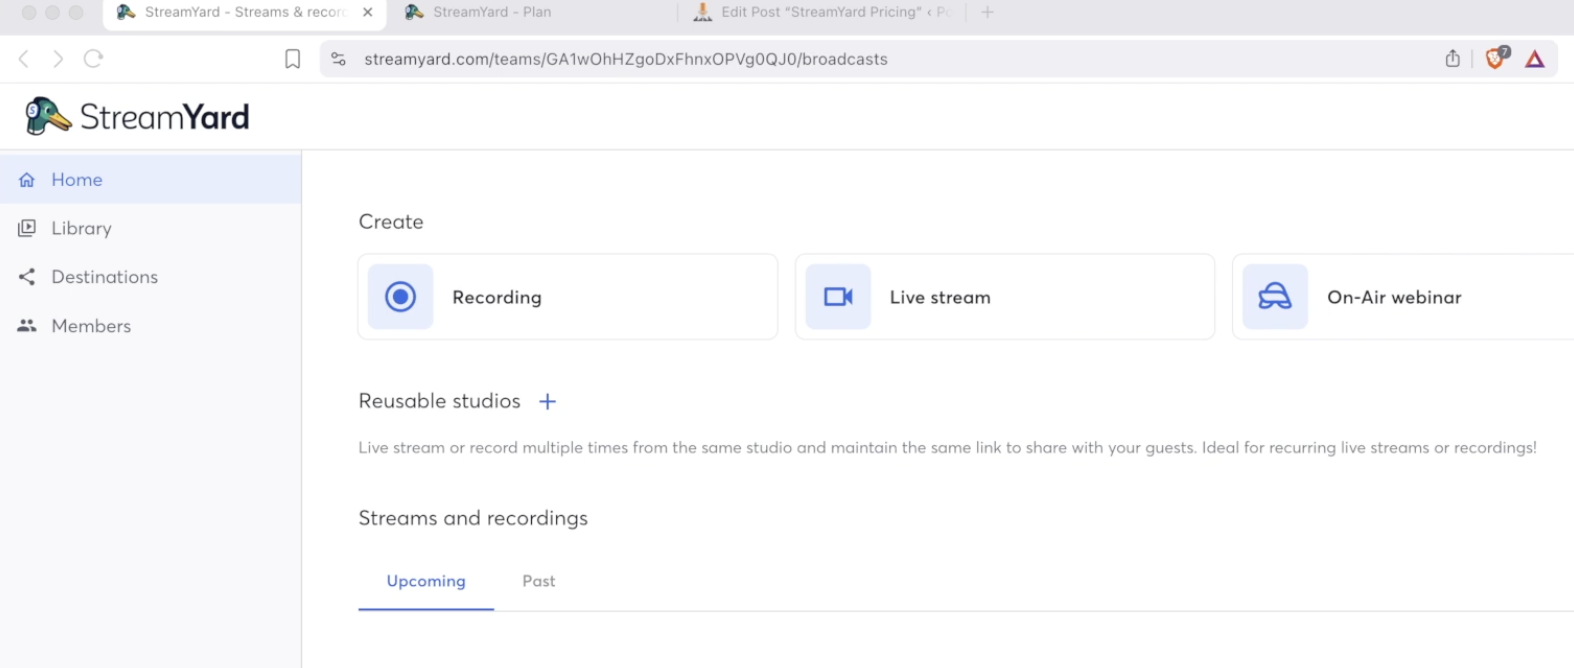
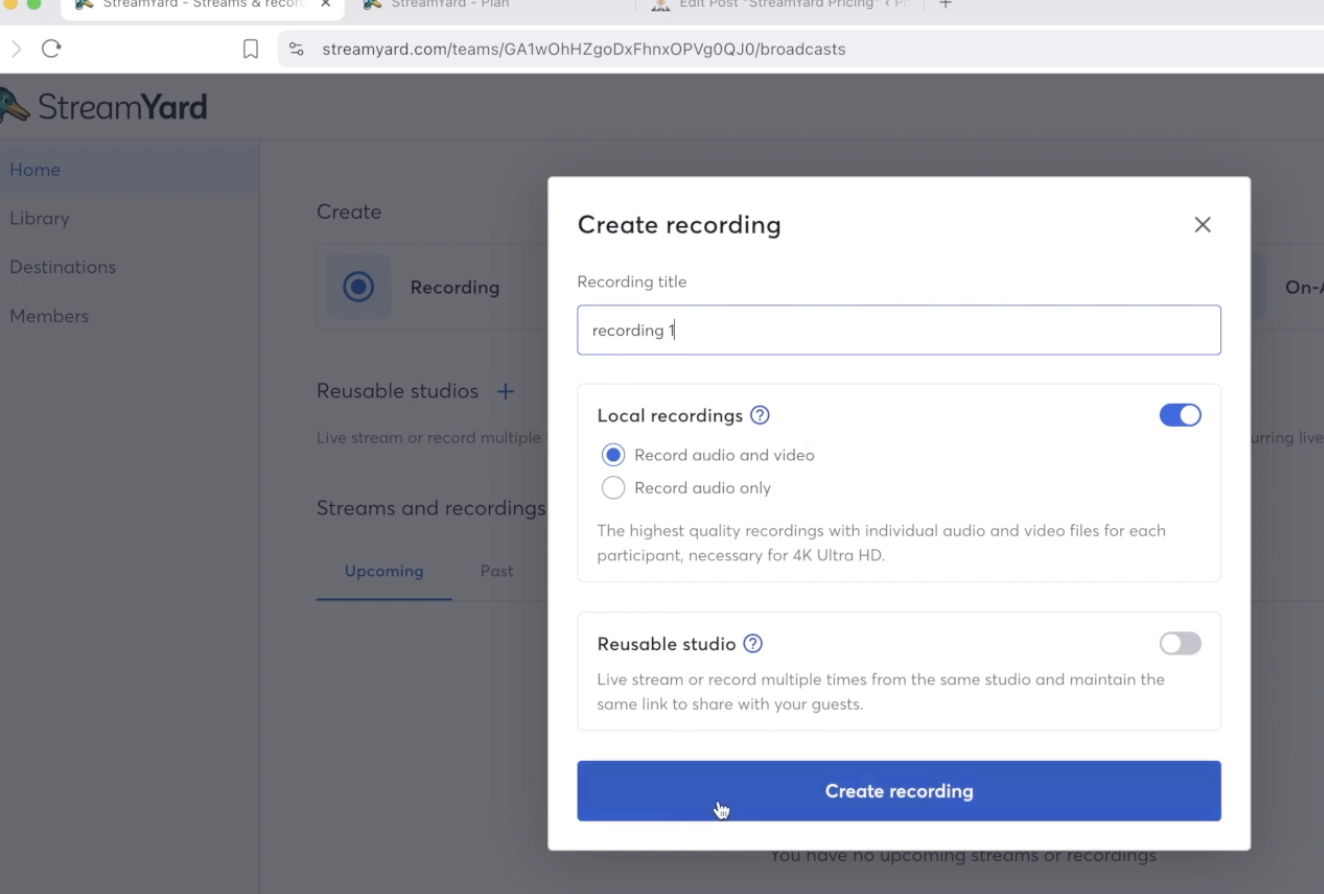
Setup is genuinely fast. You enter your payment details to start the seven-day trial, answer a couple of questions about how you plan to use it, and land straight on the dashboard. From there you pick one of three paths: go live, run an on-air webinar, or start a recording.
To record, you name the session, choose local recordings, enable audio and video, and hit create. That drops you into the studio in seconds. In my walkthrough, getting from a fresh signup to an actual recording took under a few minutes, which is the fastest onboarding of any platform in this category.
What’s It Like Inside the StreamYard Studio?
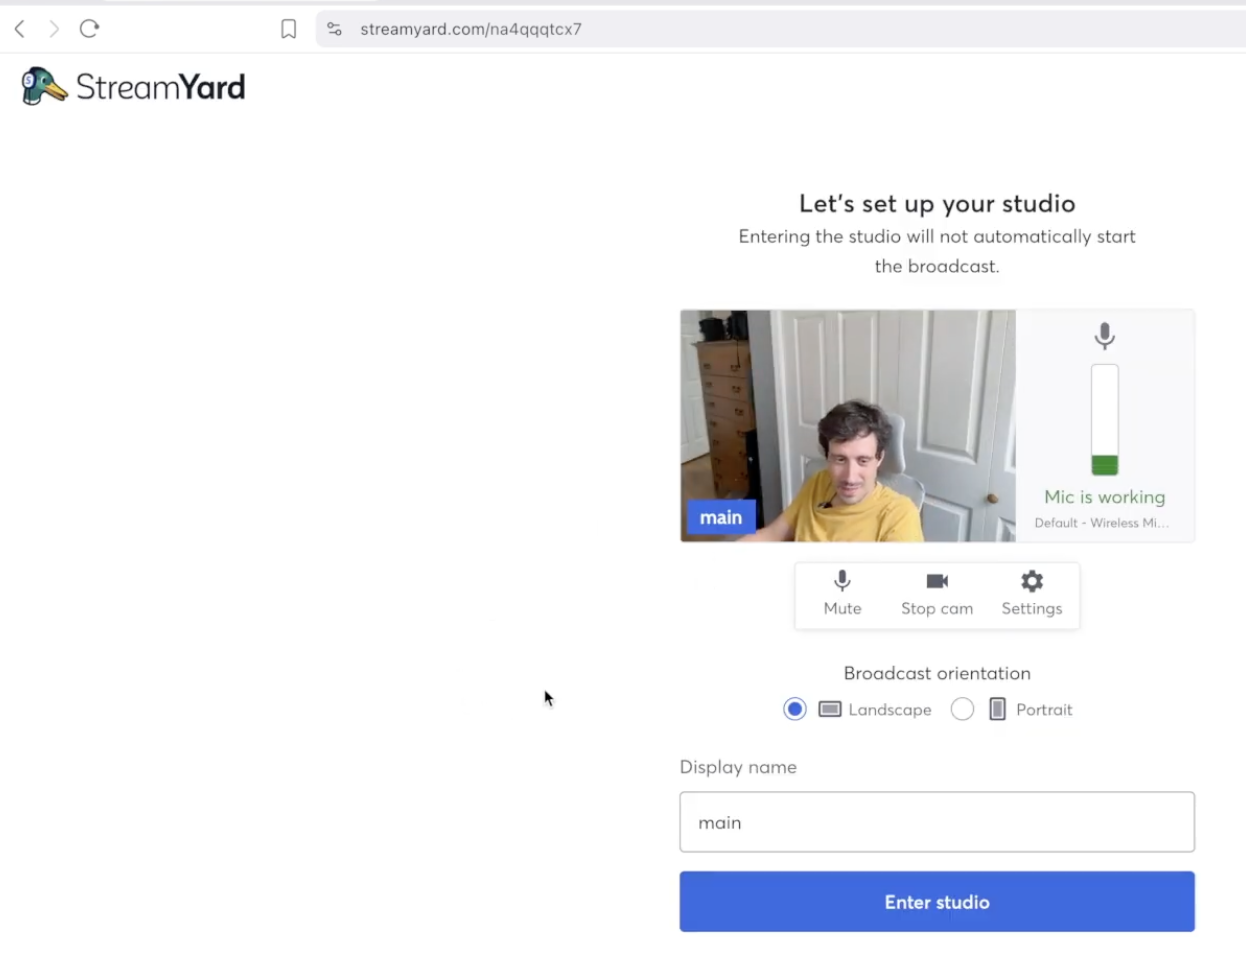
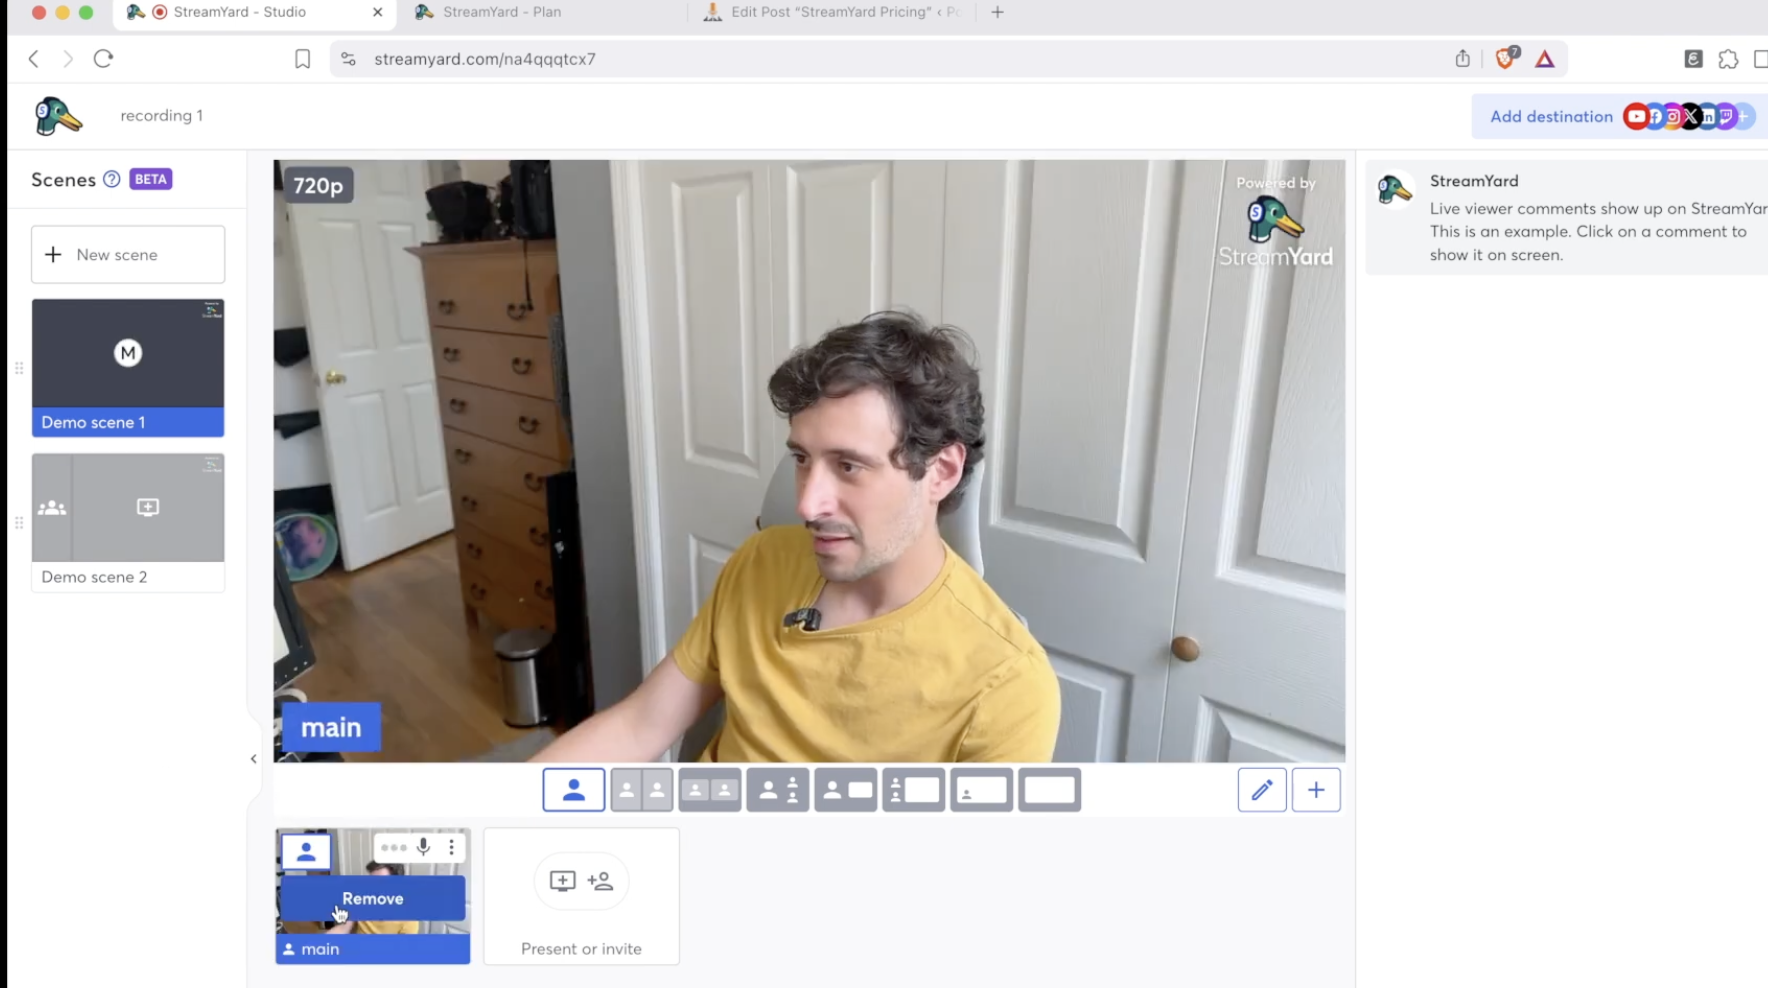
The studio is the strongest part of the product. Before you go live you get a clean mic and camera test, resolution controls, a mirror toggle, virtual backgrounds, and hotkeys. Everything is where you’d expect it, and nothing requires a manual.
One honest quirk I caught on camera: when I bumped up the resolution, my local recording resized. That happens because StreamYard shares your camera feed rather than pulling a separate high-resolution capture. It’s a small thing, but it’s the reason StreamYard isn’t a true double-ender like a dedicated recording tool. If pristine isolated video is your top priority, weigh that against the convenience.
What Can You Actually Do in a StreamYard Recording?
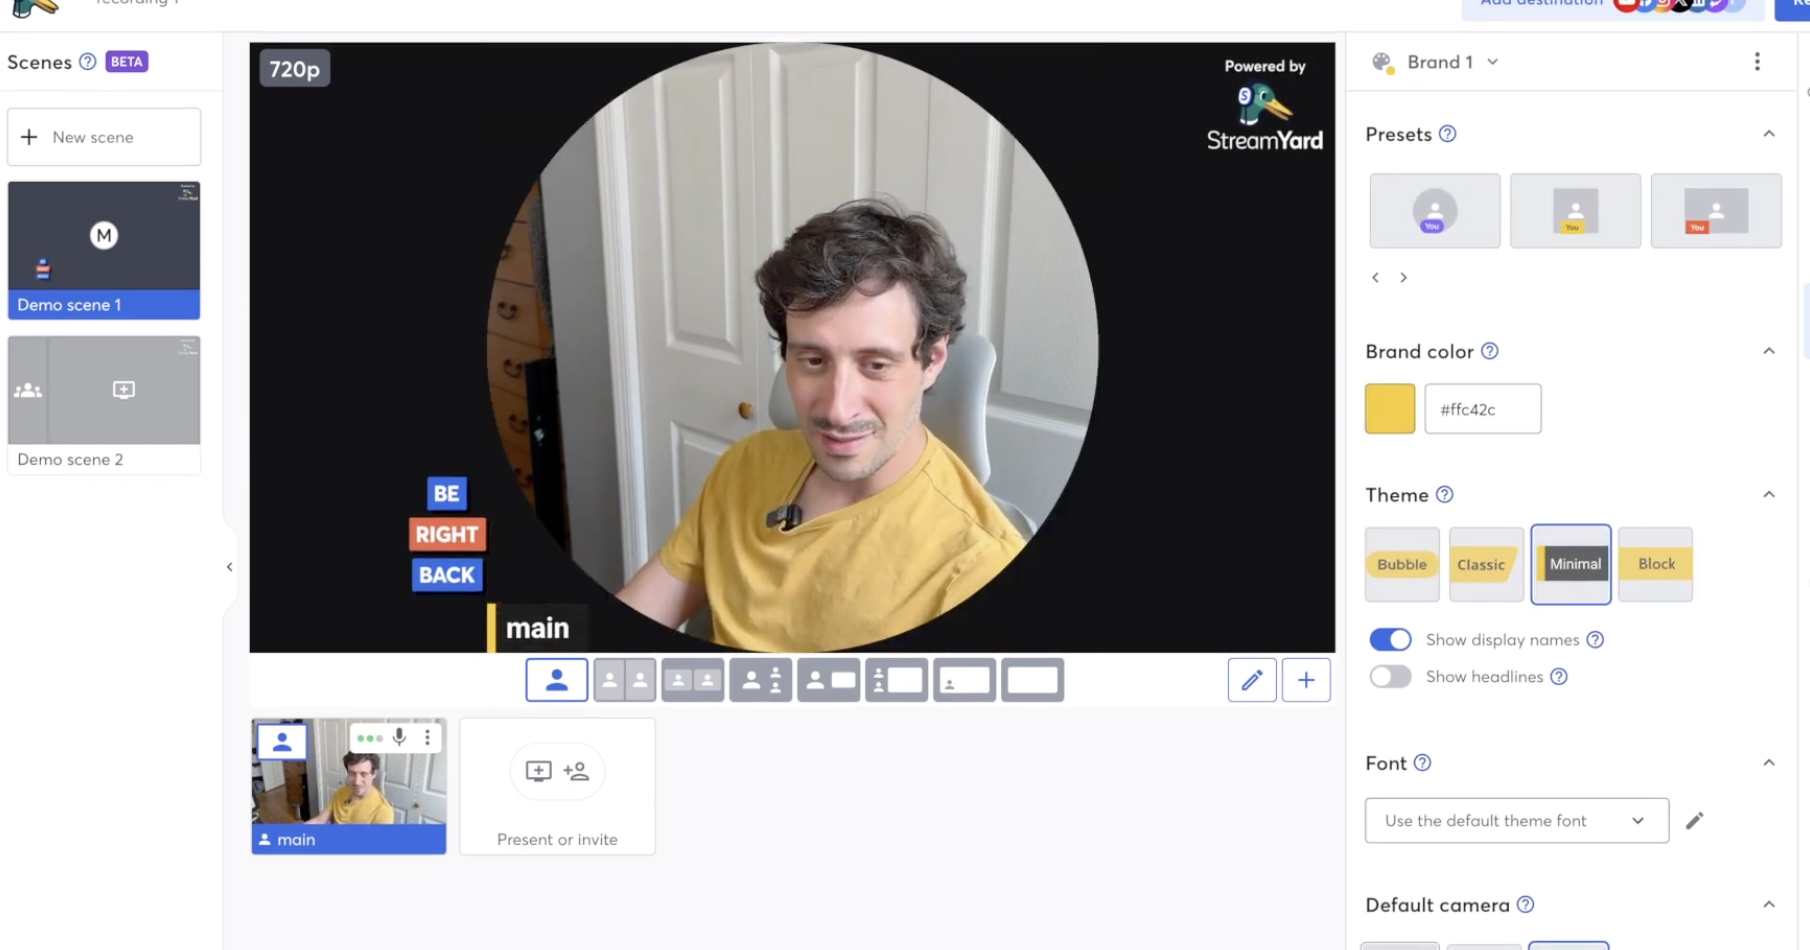
Once you add yourself to the stage, you’re live in the scene, and this is where StreamYard earns its reputation. You can build multiple scenes to plan out a whole show, so a “puzzle segment” or interview block is one click away mid-recording.
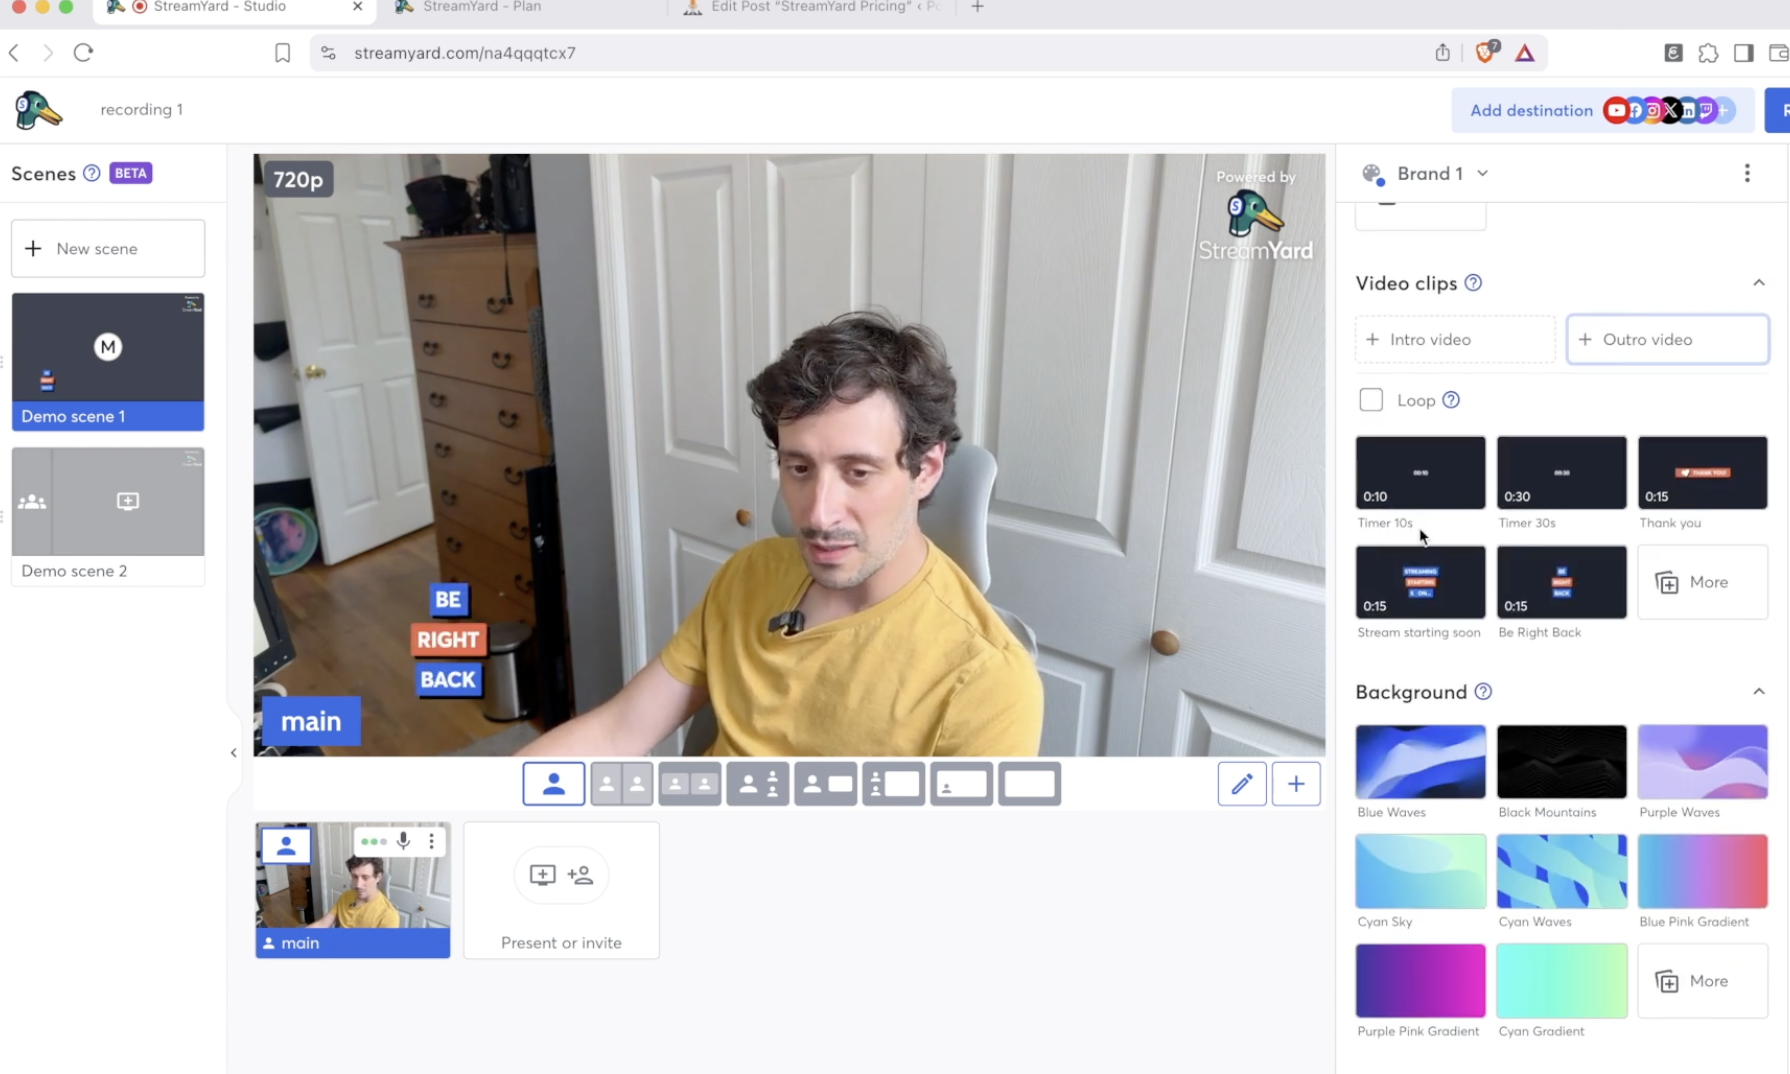
You can share your screen, play a video, drop in an image, or run a presentation without breaking stride.
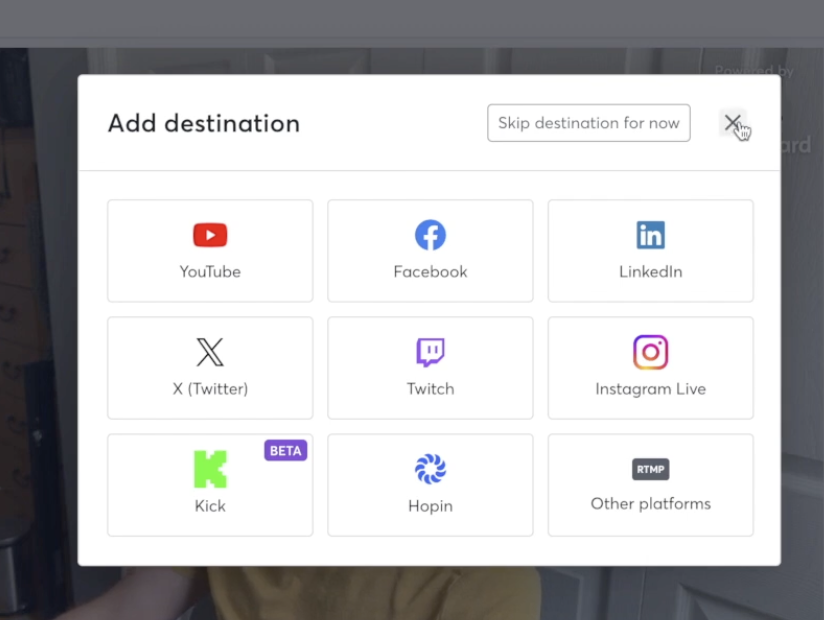
Guests join by clicking a link in their browser, then you arrange them in side-by-side layouts however you like. On the right you add destinations to push the stream straight to YouTube and other platforms, and a live comments panel lets you chat with viewers in real time.
Branding, Banners, and Media Assets
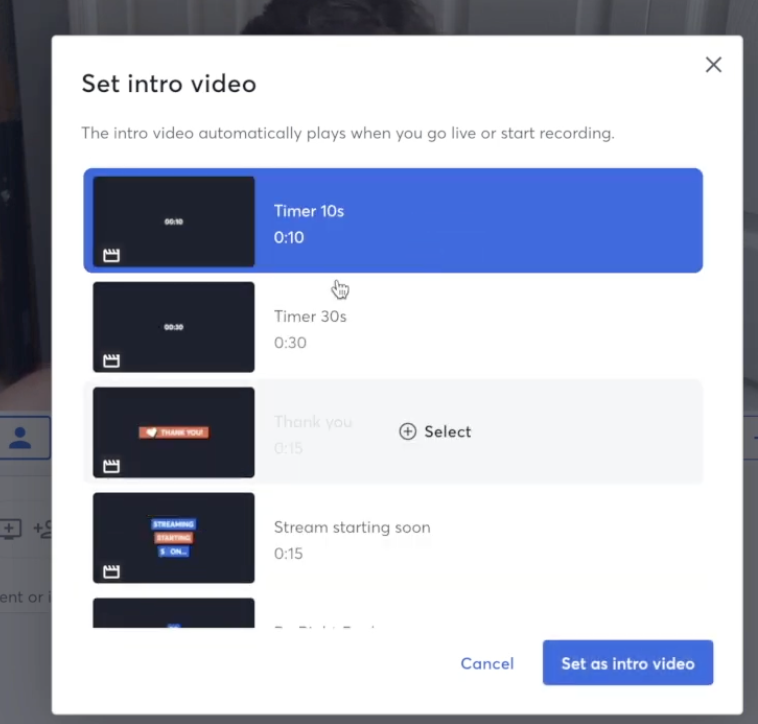
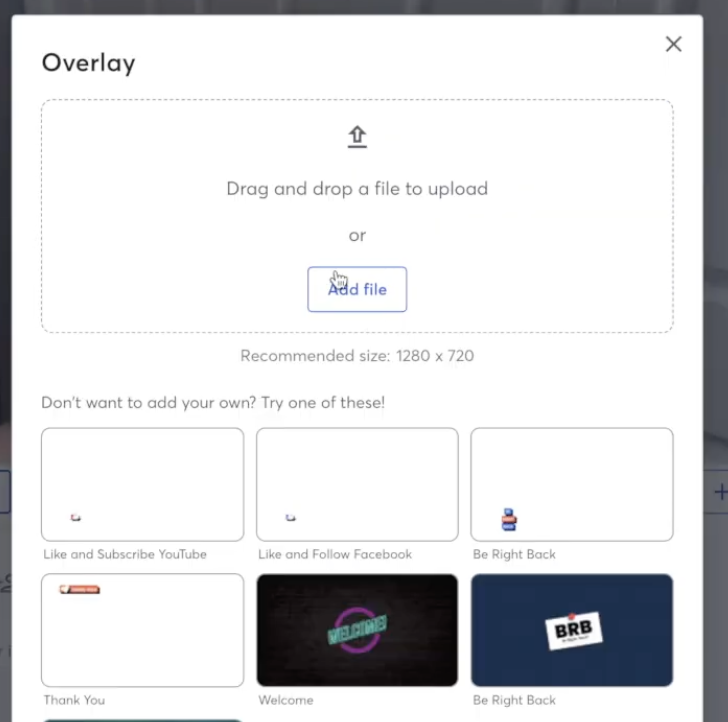
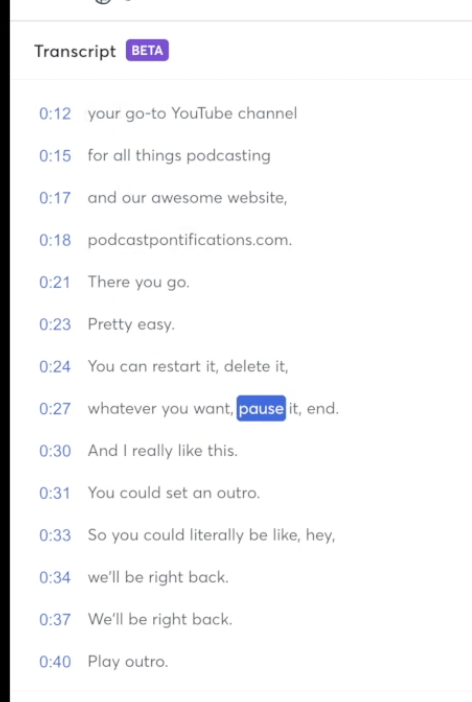
Banners let you drop call-to-action text on screen (“go to my website”), and media assets cover the cutesy stuff like animated “like and subscribe” prompts and welcome graphics, with room to upload your own custom overlays. You can set intro clips with a countdown timer so a “stream starting soon” screen plays the moment you hit record, plus a matching outro like “we’ll be right back.”
Music and the Copyright Trap
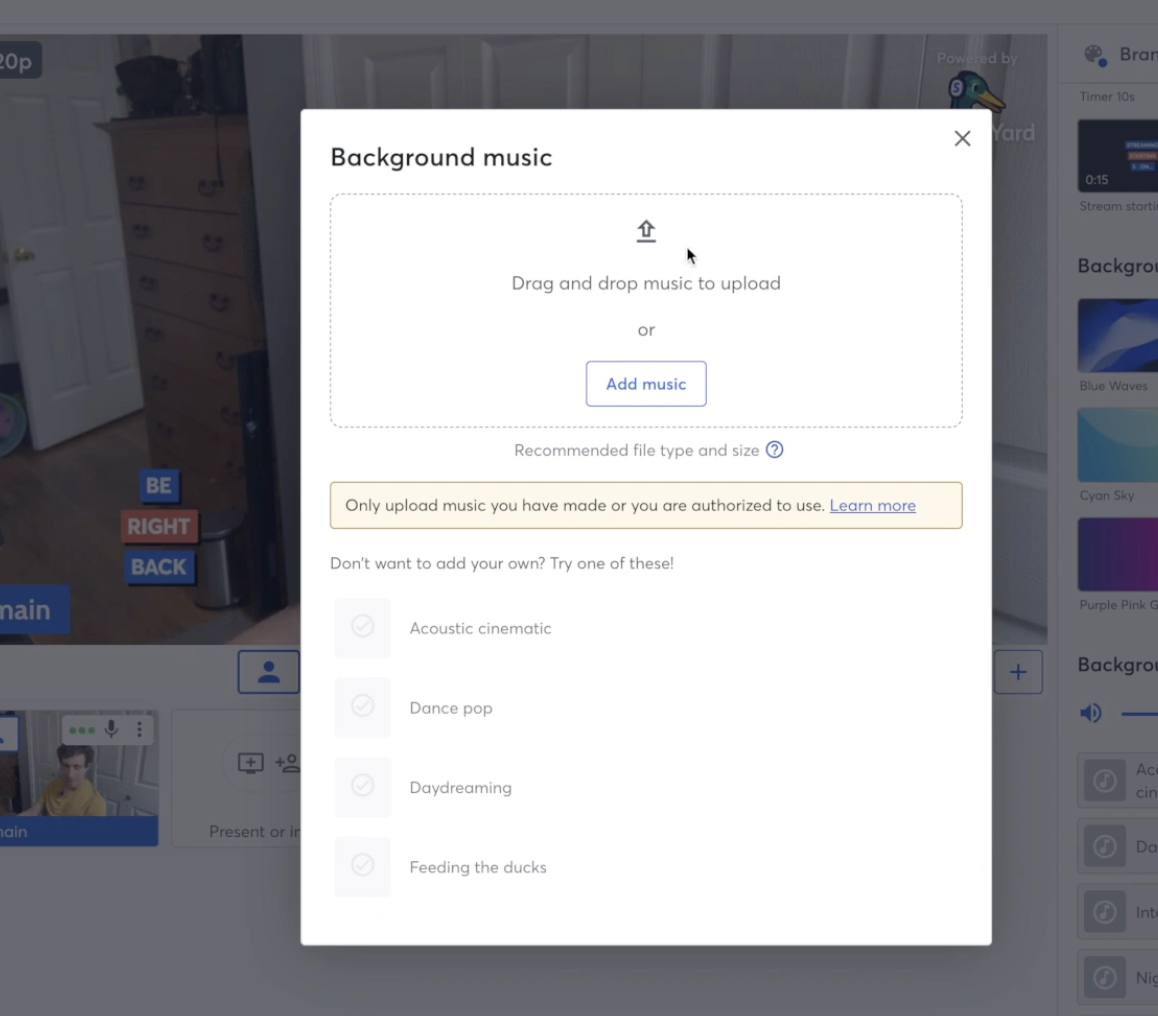
StreamYard has a built-in music option for intro and wait music, and you can upload your own tracks or use its lo-fi presets. This is handy because so many podcasters agonize over whether they can play music. The catch: StreamYard warns you to make sure you hold rights to anything you upload. Drop in a commercial track and you’ll get flagged, so keep it to licensed or original music.
Managing People
The people panel shows everyone in the call, and you can adjust an individual guest’s microphone or send a private side-chat message without interrupting the broadcast. It’s a small touch that makes directing a multi-guest show far less chaotic.
How Does StreamYard Handle Recording and Downloads?
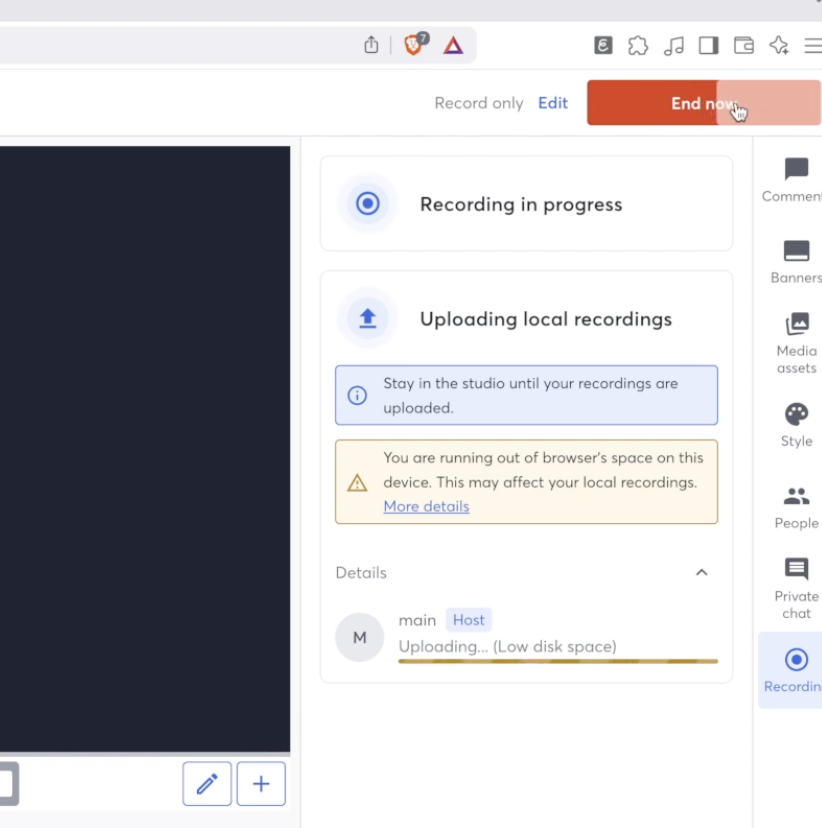
When you hit record you can trigger your intro video and countdown, run the show, and play your outro on the way out. When you end the session, StreamYard processes the recording in the cloud and hands you the files.
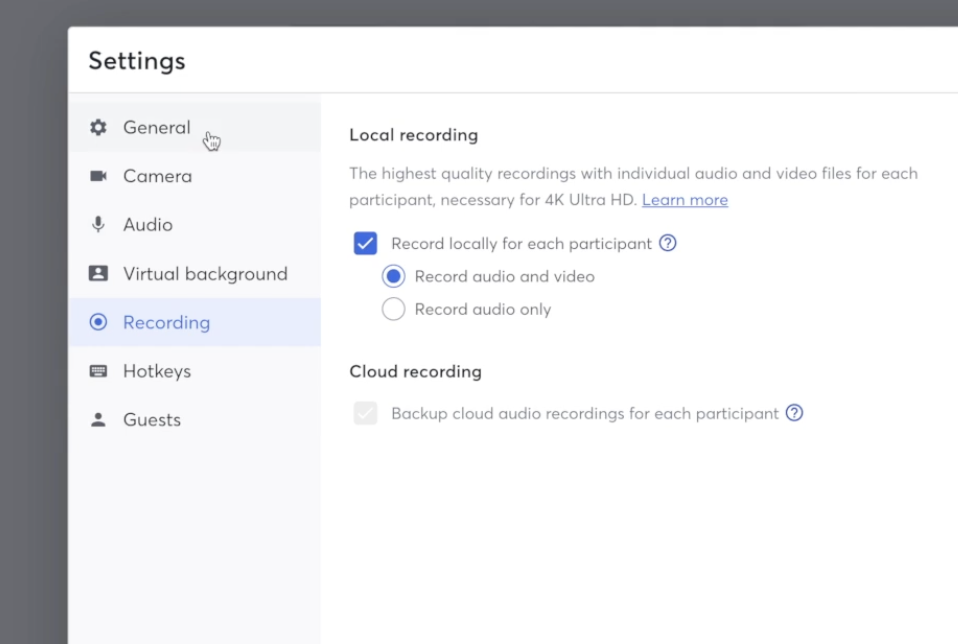
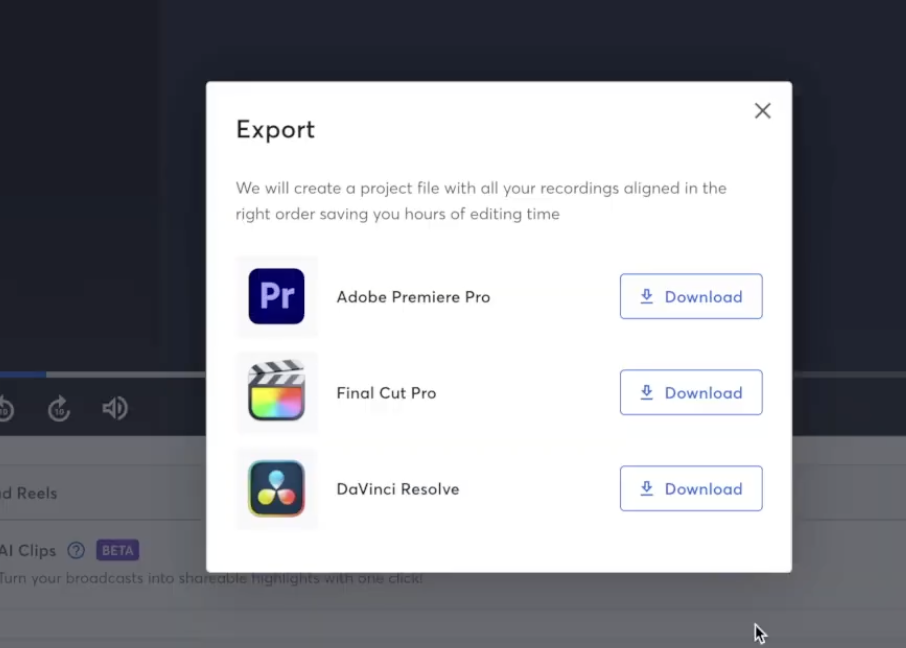
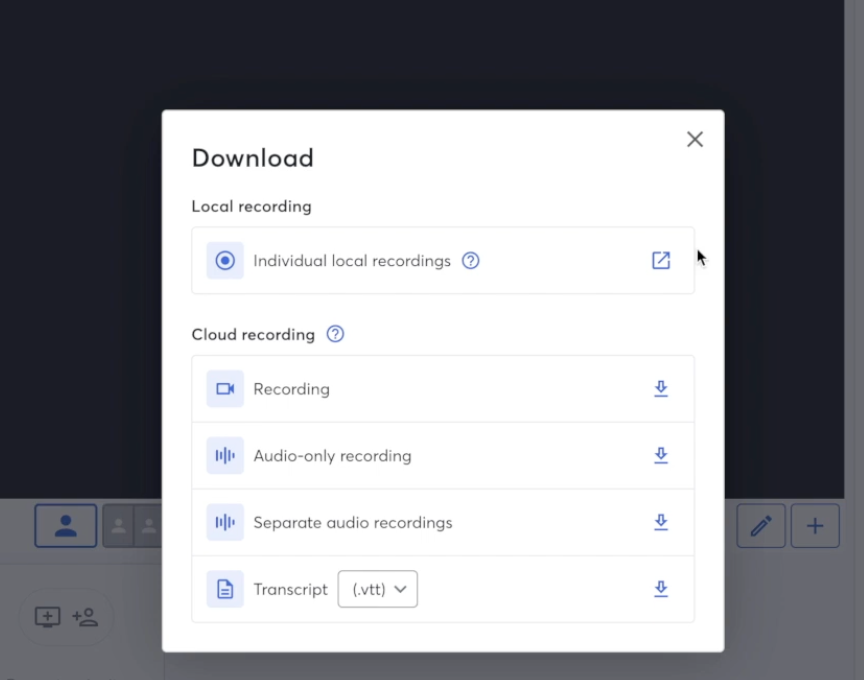
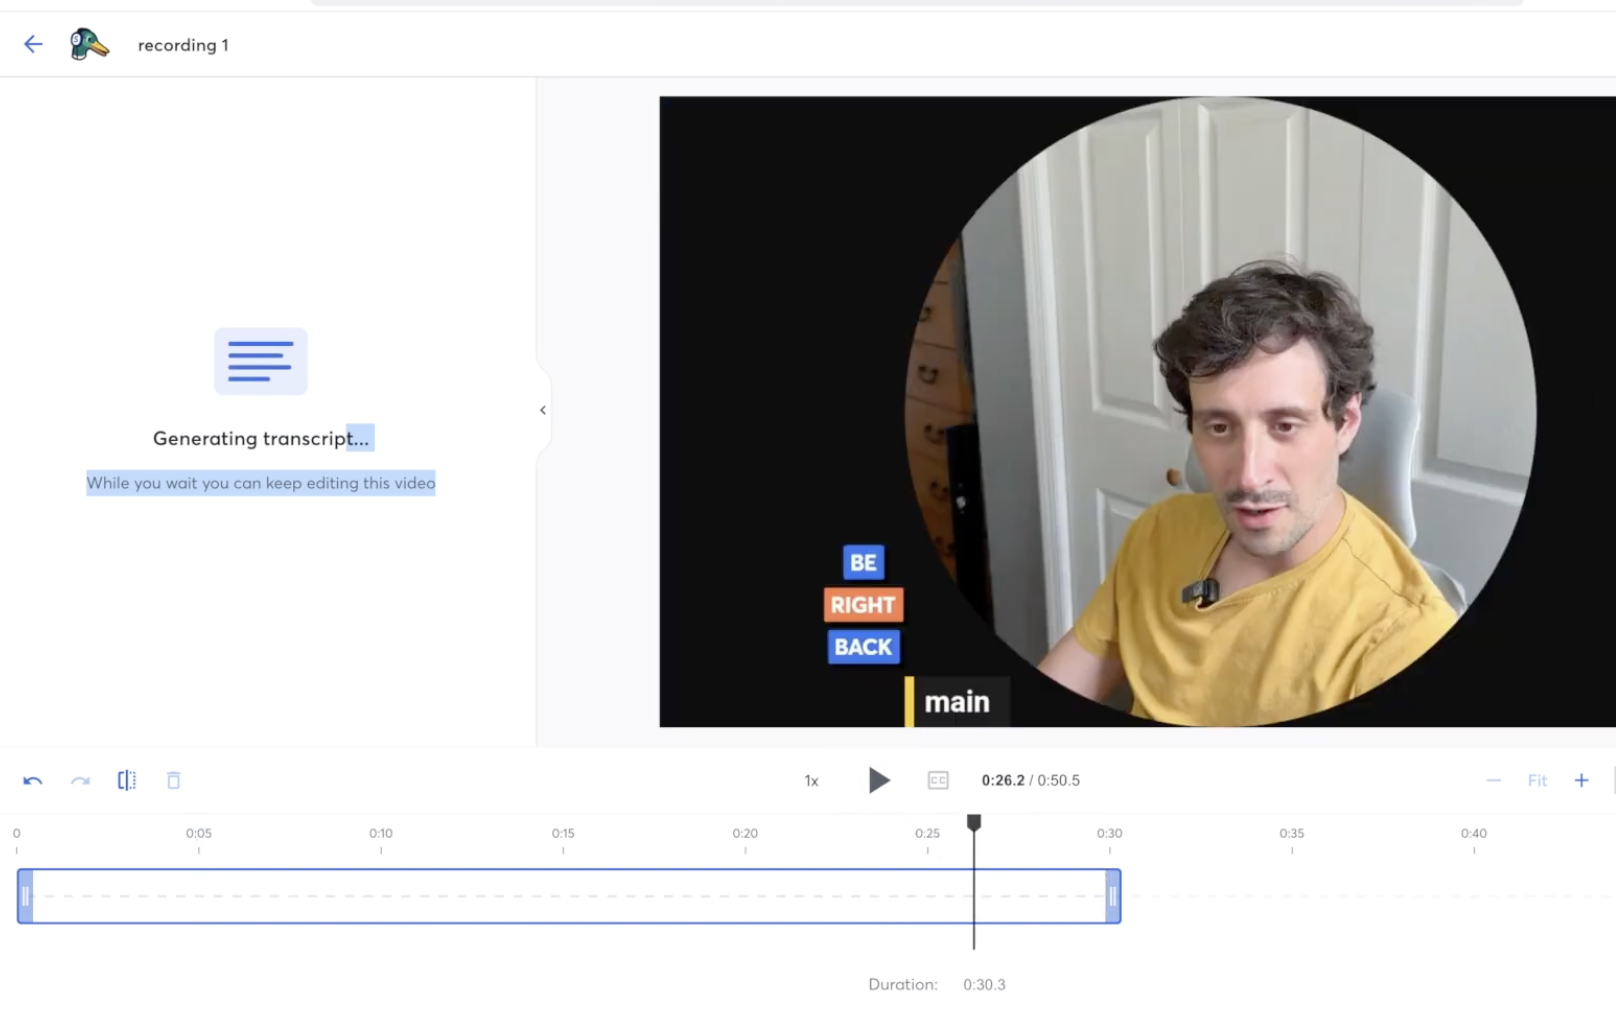
This is where the paid tiers pay off. If you had ten people on the call, you can download each participant’s local recording separately, export everything at once, or send it straight into StreamYard’s own editor. From there you cut the piece down, and it generates a full transcript you can turn into a blog post and clip into reels in the correct vertical aspect ratio for social. Recording, editing, and repurposing live in one place, which is a real time-saver. For more on that side, see how to repurpose your podcast content and turn podcast audio into social content.
How Much Does StreamYard Cost?
StreamYard runs on a freemium model with a free plan and four paid tiers. Following the April 2024 Bending Spoons acquisition, pricing was restructured and raised significantly, so the current lineup is: Free, Core ($44.99/mo or $35.99 annual), Advanced ($88.99/mo or $68.99 annual), Business ($299/mo or $249 annual), and custom-priced Enterprise. Annual billing saves roughly 22 percent.
The free plan includes a StreamYard watermark, a two-hour monthly local recording cap, standard-definition quality, and a single destination. One thing worth flagging: the 4K on Advanced is for local recording only, not streaming. Every paid plan comes with a seven-day trial and a seven-day money-back guarantee. For the full plan-by-plan breakdown, see the StreamYard pricing guide.
Start your free StreamYard trial and test it yourself →
What Are the Pros and Cons of StreamYard?
Here’s the balanced view after real use.
What StreamYard does well:
- Fastest, friendliest browser-based studio, with zero-download guest joins.
- Genuine multistreaming to YouTube, Facebook, LinkedIn, and more at once.
- Scenes, banners, intros, outros, and overlays make a show look produced without extra tools.
- Per-participant local recordings, built-in editing, transcripts, and vertical clip export for social.
Where it falls short:
- Not a true double-ender: sharing the camera feed means audio and video fidelity sit below dedicated recording tools.
- Pricing jumped 80 to 369 percent after the Bending Spoons acquisition, with no grandfathering for existing users.
- Most useful features (multistreaming, separate tracks, webinars) sit behind paid tiers.
Who Should Use StreamYard?
StreamYard is the right pick if your show is live, video-first, or multistreamed, and you value speed and simplicity over squeezing out the last few percent of audio quality. It’s ideal for creators running panels, webinars, or interview shows who want guests on set in one click.
It’s the wrong pick if you record audio-only or need studio-grade isolated tracks, in which case a dedicated recording platform fits better. Compare the trade-offs in StreamYard vs. Riverside, StreamYard vs. OBS, and StreamYard vs. Zoom, or see where it lands among the best remote podcast recording platforms.
Is StreamYard Worth It?
For live and video-first creators, yes. StreamYard is the easiest way to run a professional-looking multistreamed show, capture usable recordings, and turn them into clips and posts, all from a browser tab. The post-acquisition price hikes sting, and it isn’t the tool for audio purists, but nothing else makes going live this painless. If that’s the show you’re building, it’s worth the money, and the free trial lets you confirm that before you commit.
Try StreamYard free for 7 days →
Frequently Asked Questions
Is StreamYard worth it in 2026?
For creators who go live, run webinars, or record video podcasts with remote guests, StreamYard is worth it thanks to its speed and one-click guest joins. It’s less compelling for audio-only shows or anyone needing studio-grade isolated tracks, where a dedicated recording platform delivers better fidelity for the money.
Is StreamYard free?
StreamYard has a free plan, but it adds a watermark, caps local recording at two hours per month, limits you to standard definition, and allows a single streaming destination. Paid plans start at $44.99 per month ($35.99 annual). Every paid tier includes a seven-day trial and a seven-day money-back guarantee.
Does StreamYard record locally?
Yes. StreamYard records locally and, on paid plans, lets you download each participant’s track separately. Note that it shares your camera feed rather than pulling a separate high-resolution capture, so it isn’t a true double-ender. That keeps setup simple but places its raw quality below dedicated recording tools like Riverside.
How many people can be on a StreamYard recording?
StreamYard supports multiple on-screen guests, with limits that scale by plan. Guests join through a browser link with no downloads or accounts, and you can arrange them in side-by-side layouts, adjust individual microphones, and send private side-chat messages without interrupting the broadcast. Check current per-tier caps before a large session.
Can you use music on StreamYard?
StreamYard includes built-in intro and wait music, plus lo-fi presets, and you can upload your own tracks. The important caveat: you must hold the rights to anything you upload. Using a commercial song will get your stream flagged, so stick to licensed or original music to stay safe on YouTube and other platforms.
Can you edit and make clips inside StreamYard?
Yes. After a recording processes, StreamYard’s built-in editor lets you trim the episode, generate a full transcript, and cut vertical clips in the correct aspect ratio for social platforms. You can also repurpose the transcript into a blog post, keeping recording, editing, and content creation in one browser-based workflow.
Does StreamYard multistream to YouTube and Facebook?
Yes. On paid plans you can add multiple destinations and broadcast simultaneously to YouTube, Facebook, LinkedIn, and other platforms from one session. You can also drop on-screen banners with calls to action and read live comments from your audience in a single panel while you stream.
Why did StreamYard raise its prices?
StreamYard was acquired by Bending Spoons in April 2024 and restructured its plans that August, raising prices roughly 80 to 369 percent with no grandfathering for existing users. The legacy tiers were replaced by Free, Core, Advanced, Business, and Enterprise. It’s the main reason some users now compare alternatives.
Is StreamYard good for podcasts?
StreamYard is excellent for live and video podcasts, especially interview and panel shows that benefit from easy guest joins and multistreaming. For audio-only podcasts prioritizing the cleanest possible sound, a dedicated recording tool captures higher-fidelity isolated tracks. Many podcasters use StreamYard for live production and edit elsewhere when quality is critical.
What’s the difference between StreamYard and OBS?
StreamYard is a browser-based studio that handles encoding and guest management for you, while OBS is free, open-source software that offers more control but demands technical setup. OBS suits creators comfortable configuring their own rig; StreamYard suits those who want to go live without the learning curve. See the full comparison for details.
StreamYard Alternatives
Last Updated: June 2026
The best StreamYard alternatives are Restream (for multistreaming reach), Riverside (for recording quality), Ecamm Live (for Mac users who want 4K), OBS Studio (free, maximum control), Streamlabs (for gamers), and Zoom (for meeting-first webinars). StreamYard still wins for most podcasters who want browser-based simplicity, but each of these beats it in a specific situation.
I run my own show on StreamYard’s Advanced plan, so this isn’t a spec-sheet roundup. Below is where I’d actually reach for something else, what each tool costs in 2026, and who should pick which one.
Try StreamYard free and see if it fits your workflow →
What are the best StreamYard alternatives in 2026?
Here’s the quick comparison before we get into the details. Prices reflect the entry-level paid tier as of June 2026; most platforms also offer a free plan with watermarks and limits.
| Tool | Entry paid price | Platform | Free plan? | Best for |
|---|---|---|---|---|
| StreamYard | $44.99/mo (Core) | Browser | Yes | Browser-based simplicity for podcasters and solo creators |
| Restream | $19/mo (Standard) | Browser | Yes | Multistreaming to 30+ destinations at once |
| Riverside | $19/mo (Standard) | Browser | Yes | High-quality local recording plus live streaming |
| Ecamm Live | $16/mo (Standard) | macOS only | No (trial) | Mac users who want true 4K live output |
| OBS Studio | Free | Desktop | Free & open source | Total control if you don’t mind a learning curve |
| Streamlabs | $27/mo (Ultra) | Desktop | Yes | Gaming and Twitch creators who want overlays and alerts |
| Zoom | $13.33/user/mo (Pro) | Desktop & browser | Yes | Meeting-first webinars and internal calls |
Why look for a StreamYard alternative at all?
StreamYard is the easiest browser-based live studio on the market, but it isn’t the cheapest, and the April 2024 Bending Spoons acquisition pushed paid pricing up noticeably. The Core plan now starts at $44.99/month ($35.99 billed annually), which is roughly double what Restream or Riverside charge for their entry tiers.
There are also two capability gaps worth knowing. StreamYard’s live output tops out at 1080p on every plan; the 4K it advertises on Advanced and Business applies only to the local recording file, not the live broadcast. And it’s browser-only, so if you want deep audio routing or hardware-level control, a desktop app will serve you better. If either of those is a dealbreaker, one of the tools below probably fits you better. If you just want to confirm it’s still the right call, my full StreamYard pricing breakdown walks through every tier.
Which StreamYard alternative is best for multistreaming?
Restream is the best alternative for pure multistreaming. It broadcasts to 30+ platforms simultaneously, which is more destinations than StreamYard offers on any tier, and its Standard plan starts at just $19/month ($16 billed annually). It also offers true monthly billing, which StreamYard makes awkward by pricing annual commitments so aggressively.
The tradeoff: Restream’s live production tools are thinner than StreamYard’s, and its AI Clips feature is a paid add-on rather than being bundled in. If reach across many channels matters more than polished on-screen production, Restream wins. I’ve laid out the head-to-head in detail in Restream vs StreamYard.
Which alternative is best for recording quality?
Riverside is the best choice when recording quality matters as much as going live. It records each participant’s audio and video locally in studio quality (48 kHz WAV audio), so a guest’s spotty connection doesn’t wreck your final file. Riverside Live then lets you stream that same session to YouTube, Facebook, and LinkedIn. The Standard plan starts around $19/month.
One honest caveat that applies to StreamYard too: Riverside’s live broadcast caps at 1080p, and the 4K only shows up in the local recording, not the stream. So you’re paying for post-production quality, not a sharper live feed. If you repurpose episodes into clips and polished video, that local-recording quality is the whole point. See StreamYard vs Riverside for the full comparison, and Squadcast vs Riverside if you’re weighing recording-first platforms against each other.
Is there a StreamYard alternative for Mac users who want 4K?
Ecamm Live is the standout for Mac users. It’s the only major platform in this list that delivers genuine 4K live streaming rather than 4K-in-the-recording-only, and its Standard plan starts at about $16/month (Pro is around $32/month). As a native macOS app, it also gives you camera switching, overlays, and audio control that browser tools can’t match.
The obvious limitation is that it’s macOS-only, so Windows and Linux users are out entirely. But if you’re already on a Mac and want professional production with real 4K output, nothing else here competes on that specific point.
What’s the best free StreamYard alternative?
OBS Studio is the best free alternative, full stop. It’s open-source, costs nothing, runs on Windows, Mac, and Linux, and gives you more granular control over scenes, sources, and audio than any paid browser tool. Serious streamers and technical creators swear by it.
The catch is the learning curve. OBS does nothing for you out of the box. There’s no guest-invite link, no cloud recording, no point-and-click branding, and remote guests require workarounds. You trade convenience for control. If you have the patience, it’s unbeatable on price. I cover the tradeoff in StreamYard vs OBS, and if you go the OBS route, capture cards for OBS will smooth out your camera setup.
Which alternative is best for gamers and Twitch streamers?
Streamlabs is built for gaming and Twitch. Its free desktop app bundles overlays, alerts, tipping, and chatbots geared toward live gameplay audiences, and the Ultra subscription ($27/month, or about $15.75/month billed annually) adds a creative suite including a video editor and podcast editor.
Two things to weigh. First, Streamlabs is overkill for a straightforward podcast or webinar; its strengths are gamer-specific. Second, on the trust front, Streamlabs settled a $4.4 million class-action lawsuit (final approval January 2025) over past billing practices, so if you subscribe, watch your statements and note the 7-day refund window. My full take is in StreamYard vs Streamlabs.
Which alternative is best for meetings and webinars?
Zoom is the right pick if your “live show” is really a meeting or internal webinar. Pricing starts at $13.33/user/month (billed annually) for Pro, it’s the tool everyone already knows how to join, and it can stream meetings out to social platforms in a pinch.
But Zoom was never designed for branded broadcast production. You don’t get the custom overlays, banners, and clean multi-guest layouts that make a StreamYard stream look like a TV show. For client calls and team webinars it’s ideal; for a polished public-facing live show it’s a compromise. The details are in StreamYard vs Zoom.
So should you actually switch away from StreamYard?
For most podcasters, no. After running my show on it daily, StreamYard remains the fastest path from “open a browser tab” to “live, branded, multi-guest broadcast” with essentially zero setup. The Core plan billed annually ($35.99/month) removes the watermark, unlocks 1080p, and bundles AI clip generation that competitors charge extra for.
Switch only if you have a specific reason: you need more streaming destinations (Restream), studio-grade local recordings (Riverside), true 4K on a Mac (Ecamm Live), a zero-cost setup (OBS), gaming overlays (Streamlabs), or a meeting-first tool (Zoom). If none of those describe you, StreamYard’s simplicity is worth the premium. You can test every paid feature with the 7-day free trial before committing.
Try StreamYard free and see if it fits your workflow →
Still deciding between live-streaming tools for your show specifically? Start with livestreaming platforms for podcasters and the best video podcast platform guide for the podcast-first angle, or what is StreamYard if you’re brand new to it.
Frequently Asked Questions
What is the cheapest StreamYard alternative?
OBS Studio is the cheapest at $0, since it’s free and open source. Among paid tools, Zoom’s Pro plan ($13.33/user/month annually) and Ecamm Live’s Standard plan (about $16/month) are the lowest entry points, both well below StreamYard’s $44.99/month Core tier.
Is there a free alternative to StreamYard?
Yes. OBS Studio is completely free with no watermark or time limits. Restream, Riverside, Streamlabs, Zoom, and StreamYard itself also offer free plans, though those typically add watermarks, cap recording time, and limit you to a single streaming destination.
What is the best StreamYard alternative for Mac?
Ecamm Live is the best Mac-specific alternative. It’s a native macOS app and the only tool in this comparison that streams in genuine 4K, not just 4K local recording. Pricing starts around $16/month for Standard and $32/month for Pro.
Which alternative records the highest quality video?
Riverside records the highest-quality files by capturing each participant locally in studio quality, independent of internet speed. Note that its live stream still outputs at 1080p; the higher resolution only appears in the downloaded recording used for post-production.
Is Restream better than StreamYard?
Restream is better for multistreaming, broadcasting to 30+ platforms at once for $19/month versus StreamYard’s $44.99/month and fewer destinations. StreamYard is better for on-screen production polish and bundled AI clips. Your priority between reach and production quality decides the winner.
Can I switch from StreamYard without losing my content?
Yes. Your past recordings and clips remain downloadable from StreamYard while your subscription is active, so export everything before canceling. New platforms like Riverside or Restream start fresh; there’s no direct project import between live-streaming tools.
Does StreamYard stream in 4K?
No. StreamYard’s live output caps at 1080p on every plan. The 4K advertised on Advanced and Business tiers applies only to the local recording file saved to your device, not the live broadcast. Ecamm Live is the only tool here with true 4K live streaming.
What’s the best StreamYard alternative for podcasters?
Riverside suits podcasters who prioritize recording quality and repurposing, while Restream suits those who multistream widely. For most podcasters, though, StreamYard’s browser-based simplicity is still the easiest option, which is why it remains the recommended default for solo and interview shows.
Is OBS Studio hard to learn?
OBS has a meaningful learning curve. There’s no guest-invite link or built-in cloud recording, and scenes, sources, and audio all require manual setup. Budget a few hours to configure it. Once dialed in, it offers more control than any paid browser tool at zero cost.
Do these alternatives offer free trials?
Most do. StreamYard, Restream, and Riverside offer free plans plus trials of premium features, Ecamm Live offers a free trial, and OBS is free outright. Always test the specific paid features you need during the trial window before committing to annual billing.
How to Increase Podcast Ratings and Rank on Spotify
Last Updated: June 2026
The Spotify podcast charts are daily-updated rankings of the most popular shows on Spotify, broken into Top Podcasts (the top 200 per country by weekly unique audience), Trending Podcasts (the fastest-growing shows), and Top Podcasts by category. You can view the live charts below. Placement is earned through real listening and engagement, not bought — so the reliable way onto them is followers who actually listen.
Below you’ll find the live Spotify charts, how the rankings actually work, how to climb them, and an honest answer to whether chasing a top spot is worth it.
Live Spotify Podcast Charts
Live data from Spotify, updated daily. If the embed doesn’t load, view the charts directly at podcastcharts.byspotify.com.
What Are the Spotify Podcast Charts?
The Spotify podcast charts are Spotify’s official rankings of the top shows on its platform, refreshed every day. They exist so listeners can discover what’s popular and so creators can benchmark their growth. There are three distinct charts:
- Top Podcasts: The top 200 shows in each country, ranked by weekly unique audience.
- Trending Podcasts: The top 200 shows gaining popularity fastest, based on a combination of growth signals.
- Top Podcasts by Category: The top 50 shows in each category, available in select countries.
The charts are country-specific, so a show can rank highly in one market and not appear in another. At the time of writing, The Joe Rogan Experience sits at #1 on the US Top Podcasts chart, which gives you a sense of the scale required to reach the very top.
How Are the Spotify Podcast Charts Ranked?
Spotify ranks the charts on listening behaviour and engagement, not raw download counts. That means follows, actual plays, and how much of your episodes people listen to all feed the ranking. This is a meaningful difference from older download-based charts: you can’t inflate your way up with empty downloads, because Spotify is measuring genuine on-platform listening.
Two practical consequences follow. First, Spotify’s own advice is direct: remind your fans to follow and listen to you on Spotify, because that engagement is what the chart rewards. Second, which category chart you can appear on is decided by the first category listed in your RSS feed — so if you’re charting in the wrong category, fix the category order in your feed (your Spotify for Creators settings and your host control this).
How Do You Get Your Podcast on the Spotify Charts?
Getting on the charts comes down to concentrating real listening and engagement on Spotify, in the right category, over a short window. There’s no shortcut that beats genuine audience, but a few things measurably help.
- Be properly distributed on Spotify. Make sure your show is live on Spotify with correct categories and metadata. If you’re not there yet, see how to upload your podcast to Spotify.
- Drive follows and listens, on Spotify specifically. Because the chart is engagement-based, a direct call to action to follow and listen on Spotify moves the needle more than generic “subscribe everywhere” asks.
- Set the right primary category. The first category in your RSS feed determines your category chart, where it’s far easier to crack the top 50 than the overall top 200.
- Concentrate a launch or big episode. Since Top Podcasts uses weekly unique audience and Trending rewards fast growth, rallying your audience around a single release window helps.
- Stay consistent. A reliable schedule keeps weekly listeners returning, which is exactly what the ranking measures. Lower churn means a stronger, stickier weekly audience.
Underneath all of it, you need the audience in the first place. Our guides to growing your podcast audience, increasing listeners, and promoting on social media cover the work that actually fills the chart-eligible audience. A host that distributes cleanly to Spotify and gives you reliable analytics makes this easier — Buzzsprout handles both.
Is a Top Placement in Spotify’s Podcast Charts Worth the Price?
A genuinely earned chart placement is valuable; a bought one usually isn’t worth it. Because Spotify’s charts run on real listening and engagement rather than downloads, the old playbook of buying bulk downloads to fake a chart debut doesn’t work the way it once did on download-based charts — and paid download schemes risk violating platform terms.
That doesn’t mean promotion is pointless. Spending on legitimate audience growth (ads that drive real Spotify follows, cross-promotion, guesting) can absolutely help you chart, because it produces the genuine engagement the algorithm measures. The distinction is simple: paying to reach real new listeners is an investment; paying for hollow numbers to game a ranking is a waste, and increasingly a futile one. Chase the audience, and the chart placement follows.
How Do You Track Your Chart Performance?
Track your standing with a mix of Spotify’s own data and platform-independent analytics. Spotify for Creators shows your follows, plays, and engagement on the platform that the charts are based on, so it’s your primary dashboard for chart progress.
For a fuller picture across every app, layer in independent analytics. Our OP3 analytics walkthrough and roundup of podcast analytics tools cover the options, and our piece on what social stats can and can’t tell you explains why engagement, not vanity metrics, is the signal that maps to chart movement. If charting is part of a monetization plan, see Spotify podcast monetization.
The Bottom Line on the Spotify Podcast Charts
The Spotify charts are a daily, engagement-based scoreboard of the most-listened and fastest-growing shows. You can’t buy your way to a lasting spot, but you can earn one by driving real follows and listens on Spotify, picking the right primary category, and keeping a consistent release schedule that holds your weekly audience. Use the live charts above to watch your category, then focus on the genuine growth that actually moves you up it.
Frequently Asked Questions About the Spotify Podcast Charts
What are the Spotify podcast charts?
They are Spotify’s official daily rankings of its most popular shows. There are three: Top Podcasts (top 200 per country by weekly unique audience), Trending Podcasts (fastest-growing shows), and Top Podcasts by category (top 50 in select countries). They help listeners discover shows and let creators benchmark growth.
How often do the Spotify podcast charts update?
The Spotify podcast charts update daily. Rankings are based on recent listening behaviour and engagement, so your position can move from day to day as follows, plays, and listen-through shift. This is why a concentrated push of real engagement over a short window can lift a show onto the charts.
How are the Spotify charts calculated?
Spotify ranks shows on listening behaviour and engagement on its platform, not raw downloads. Follows, actual plays, and how much of each episode people listen to all count. The Top Podcasts chart specifically uses weekly unique audience, while Trending rewards fast growth across several signals.
How do I get my podcast on the Spotify charts?
Be live on Spotify with the correct primary category, then drive genuine follows and listens on the platform, ideally concentrated around a launch or key episode. Charting in your category’s top 50 is far more achievable than the overall top 200, and consistency keeps the weekly audience the chart measures.
Can you buy your way onto the Spotify podcast charts?
Not reliably, and you shouldn’t try. Because the charts run on real listening and engagement rather than downloads, buying bulk downloads doesn’t work the way it did on older charts, and paid download schemes can violate platform terms. Spending on legitimate growth that earns real Spotify follows is the only worthwhile approach.
Why isn’t my podcast showing in the right category chart?
Spotify uses the first category listed in your RSS feed to decide which category chart your show can appear on. If you’re charting in the wrong category, reorder your podcast’s categories in your RSS feed so the correct one is first. Your podcast host’s settings control this.
What is the difference between Top and Trending podcasts on Spotify?
Top Podcasts ranks the 200 biggest shows per country by weekly unique audience, so it favours established shows. Trending Podcasts ranks the 200 shows gaining popularity fastest, based on growth signals, so newer or surging shows can appear there even before they reach the Top chart.
Is being on the Spotify podcast charts worth it?
An earned placement is valuable for visibility and credibility; a bought one is not. The charts reward genuine engagement, so the worthwhile investment is in real audience growth that produces follows and listens, not in hollow numbers meant to game a ranking. Chase the audience and the placement follows.
How do I track my Spotify chart performance?
Use Spotify for Creators for follows, plays, and engagement on the platform the charts are based on, then layer in independent analytics like OP3 for a cross-app view. Watch engagement metrics rather than vanity numbers, since engagement is what actually maps to chart movement.
Do downloads affect Spotify chart ranking?
Not in the way they affect download-based charts elsewhere. Spotify’s charts are built on on-platform listening and engagement, so follows and genuine plays matter far more than a download count. This makes the charts harder to manipulate and more reflective of an actively listening audience.
Royalty-Free Music for Podcasts: Music Rights & Licensing for Beginners
Last Updated: June 2026
No — you can’t legally play just any music you want on a podcast. Most commercial songs require expensive licensing (often thousands of dollars for a few seconds), so the practical, affordable path is royalty-free or purpose-licensed podcast music. Below is exactly what you can and can’t use, what each license type actually means, whether fair use applies, and where to get music that won’t get your show hit with a copyright claim or takedown.
If you just want the short version, we also keep a quick music-rights cheat sheet. Otherwise, read on for the full picture.
Can You Play Copyrighted Music on a Podcast?
No, not without permission. Playing a copyrighted song on your podcast without a license is copyright infringement, even if you only use a few seconds and even if you credit the artist. Podcast feeds are distributed publicly across platforms like Spotify, Apple Podcasts, and YouTube, which is exactly the kind of public use that requires the rights holder’s permission.
The consequences are real: episodes get pulled, you can face Content ID claims that demonetize or block your show, and in serious cases, fines or legal action. The cost of licensing a popular track is also steep — securing rights to a well-known song can run into thousands of dollars, which is why almost no independent podcast uses commercial music. For the related question of whether your own show is protected, see are podcasts protected by copyright.
What Music Can You Legally Use on a Podcast?
You have five legal options for podcast music: royalty-free music, music you’ve licensed directly, public domain works, Creative Commons tracks, and original music you create or commission. Royalty-free is by far the most popular because it’s affordable, pre-cleared, and easy.
- Royalty-free music: Pay once (or subscribe) and use tracks without per-play royalties. Pre-cleared for podcasts, so no copyright worries. The easiest and cheapest route for most shows.
- Directly licensed music: Negotiate rights with the artist, label, or publisher. Thorough but slow and often expensive.
- Public domain music: Works whose copyright has expired are free to use with no restrictions, though recordings of them may still be protected.
- Creative Commons music: Some artists release tracks under Creative Commons licenses that allow use with conditions like attribution or non-commercial-only. Check the specific license carefully.
- Original music: Compose it yourself or commission a musician for a unique, fully owned sound.
For ready-to-use options, see our free podcast music roundup, free intro music, and free sound effects.
What Are the Music License Types?
If you do license a specific song, you may need more than one type of license depending on how you use it. These are the ones that matter for podcasting:
- Public performance license: Grants the right to play a musical work publicly, which includes broadcasting it to your podcast audience.
- Synchronization (sync) license: Required when you pair music with other content, such as syncing a track under your podcast audio or video.
- Mechanical license: Needed to reproduce and distribute a copyrighted composition, which is effectively what publishing an episode does.
- Master use license: Required to use a specific recording of a song (the actual master), obtained from whoever owns that recording, usually the label.
The takeaway: licensing a single commercial song properly can mean clearing several rights with several parties. That complexity is exactly why royalty-free music exists.
Does Fair Use Cover Music in a Podcast?
Rarely, and you shouldn’t rely on it. Fair use is a legal defense, not a permission slip, and courts decide it case by case using four factors: the purpose of the use, the nature of the work, the amount used, and the effect on the work’s market value. There is no “safe” number of seconds — even a short clip of an iconic song can be ruled infringing.
Fair use can apply to genuine criticism, commentary, or education, but the analysis is genuinely uncertain and the downside (a lawsuit) is large. For music specifically, the reliable move is to skip the fair-use gamble entirely and use royalty-free or licensed tracks with clear terms. If you’re building a show around commentary on copyrighted audio, that’s a conversation for an intellectual-property attorney, not a blog post.
What Is the Best Royalty-Free Music for Podcasts?
Royalty-free libraries are the easiest and cheapest way to add legal music to a podcast. They offer thousands of pre-cleared tracks across genres for a one-time fee or subscription, so you can score intros, transitions, and ad breaks without copyright risk. Here are the main providers and what each costs in 2026.

| Provider | Model | Starting Price (2026) | Best For |
|---|---|---|---|
| PremiumBeat | Subscription or per-track | $9.99/mo (Creator, billed annually); single tracks also available | Curated, studio-quality tracks from the Shutterstock catalog |
| Epidemic Sound | Subscription | ~$9.99–$15/mo (Personal) | Podcasters wanting an all-rights-included catalog with no Content ID claims |
| Artlist | Subscription | $14.99/mo (Social, billed yearly) | Creators wanting music plus SFX, footage, and templates |
| Soundstripe | Subscription | $19.99/mo (Creator) | Workflow features and bundled sound effects |
| Bensound | Free w/ attribution or paid | Free, or ~$9.99/mo | Hobbyists and tight budgets |
| YouTube Audio Library | Free | $0 | Brand-new podcasters who need zero-cost tracks |
One honest caveat worth knowing: “royalty-free” doesn’t always mean zero further obligations. Some libraries still work with performing-rights organizations, so read each license for how it handles monetization and the number of shows or channels you can cover. For podcasting, the per-show economics usually favor a subscription you can use across every episode.
For curated, broadcast-quality tracks, PremiumBeat is the option we point most podcasters to first; our full PremiumBeat for podcasters breakdown covers the plans in detail.
How Do You License a Specific Song for a Podcast?
If you’re set on a particular copyrighted track, licensing it is a four-step process. Be realistic that for a popular song, this is often slow and costly enough that royalty-free becomes the obvious choice.
- Identify the rights holder. Find who owns both the composition and the recording, which may be the artist, a publisher, and a label.
- Choose the right license(s). Based on how you’ll use it, you may need sync, mechanical, master use, or performance rights.
- Negotiate terms and fees. Agree on cost, duration, territory, and any conditions with the rights holder.
- Document everything. Keep written records of every agreement, including scope and duration, as proof of compliance.
How Should You Use Music in Your Episodes?
Once you have legal tracks, music does the most work in a few specific places: a branded intro, a consistent outro, transitions between segments, and bumpers around ads or guest introductions. Used well, these create a recognizable sonic identity and smooth pacing.
A few principles keep it professional: match the music’s energy to your content, keep background beds low enough that they never compete with the dialogue, and reuse consistent themes so listeners start to recognize your show by sound. Instrumental tracks usually work best under speech, since lyrics fight your voice for attention.
The Bottom Line on Using Music in Your Podcast
You can’t legally drop a commercial hit into your show, but you don’t need to. Royalty-free music gets you broadcast-quality intros, outros, and beds with clear terms and no fear of takedowns, usually for less than the price of a coffee per month. Skip the fair-use gamble, pick a library that fits your budget and how many shows you run, and put your energy into the content instead of copyright worry.
Browse podcast-ready royalty-free tracks on PremiumBeat →
Frequently Asked Questions
Can you play copyrighted music on a podcast?
No, not without a license. Using a copyrighted song without permission is infringement, even if you use only a few seconds or credit the artist. Podcasts are distributed publicly, which requires the rights holder’s permission. The practical alternative is royalty-free or purpose-licensed music made for podcasts.
Can you use a few seconds of a song under fair use?
There is no safe number of seconds. Fair use is a case-by-case legal defense, not a permission slip, and even a short clip of an iconic song can be ruled infringing. For music, it’s far safer to use royalty-free or licensed tracks than to rely on a fair-use argument.
What music can I legally use on my podcast?
Five options: royalty-free music, directly licensed tracks, public domain works, Creative Commons music (subject to its conditions), and original music you create or commission. Royalty-free is the most popular because it’s affordable, pre-cleared for podcasts, and removes copyright risk entirely.
What is royalty-free music?
Royalty-free music is licensed for a one-time fee or subscription, letting you use tracks without paying per-play royalties. Libraries pre-clear the music for uses like podcasts, so you avoid copyright claims. It’s the easiest and cheapest legal way to add music to a show.
What is the best royalty-free music site for podcasts?
For curated, broadcast-quality tracks, PremiumBeat is a strong first choice, with subscriptions from about $9.99/month billed annually. Epidemic Sound and Artlist are excellent alternatives, and YouTube Audio Library is a solid free option. The best pick depends on your budget and how many shows you run.
Do I need a license to play music on my podcast?
Yes, unless the music is royalty-free, public domain, or your own. Licensing a specific commercial song can require several licenses (sync, mechanical, master use, and performance), often from multiple parties. That complexity is why most podcasters use royalty-free libraries instead.
What happens if you use copyrighted music without permission?
Your episode can be removed, flagged by Content ID systems that block or demonetize it, and you can face fines or legal action. Platforms like Spotify and Apple Podcasts enforce this strictly, and repeated violations can damage your show’s standing and reach.
Is music in the public domain free to use?
The composition is free once its copyright expires, but a specific recording of it may still be protected. To be safe, use a public domain composition performed in a recording you also have the rights to, or choose a royalty-free version cleared for commercial use.
Can I use Creative Commons music on a podcast?
Often yes, but only within the specific license’s conditions. Some Creative Commons tracks require attribution, some prohibit commercial use, and some prohibit modification. Always read the exact license and follow its terms; a monetized podcast may not qualify under a non-commercial license.
How much does podcast music cost?
Royalty-free subscriptions typically run about $10 to $25 per month, with free options like the YouTube Audio Library available. Licensing a popular commercial song, by contrast, can cost thousands of dollars and require clearing multiple rights, which is why royalty-free is the standard choice for podcasters.
How to Monetize a Podcast on Buzzsprout
Last Updated: June 2026
Buzzsprout is one of the most popular podcast hosting platforms, and beyond hosting it bundles in built-in ways to make money: Buzzsprout Ads (automatic ad revenue you share in), Listener Support and Premium Content subscriptions, and a curated Affiliate Marketplace. Paid plans start at $19/month. Here’s exactly how Buzzsprout helps you grow and monetize your show, what it costs in 2026, and where it fits.
What Is Buzzsprout?
Buzzsprout is a podcast host trusted by over 120,000 podcasters that handles storage, distribution to every major listening app, a built-in podcast website, IAB-certified analytics, and a set of monetization tools in one interface. Its appeal is that everything just works: you upload audio, it cleans up and distributes the episode, and you can promote and monetize it without stitching together separate services.
Pricing is based on monthly upload hours rather than file size, which suits regular weekly shows. If you’re weighing it against other hosts, see our Podbean vs Buzzsprout, Buzzsprout vs Libsyn, and Buzzsprout vs Captivate comparisons.
How Does Buzzsprout Help You Make Money?
Buzzsprout offers four built-in revenue streams, and a key advantage is that none of them are exclusive: you can run them alongside your own sponsorships and other platforms. It covers the monetization basics independent podcasters need to start earning, rather than acting as a full programmatic ad network.
| Tool | What It Does |
|---|---|
| Buzzsprout Ads | Automatically inserts ads into your episodes and pays you a share of the revenue. Available to shows that meet eligibility criteria (around 1,000 downloads in 30 days). |
| Listener Support | Lets your audience make recurring contributions to support the show, deposited into your Buzzsprout Wallet. |
| Premium Content | Offer paid subscribers exclusive or bonus episodes through a private RSS feed they can use in their favorite app. |
| Affiliate Marketplace | A curated, pre-vetted marketplace of podcast-relevant products you can promote for cash commissions, with no minimum audience size. |
| Dynamic Content | Insert or swap your own sponsor and affiliate reads across your entire back catalog, so older episodes keep earning. |
For how these stack up against other hosts’ monetization, see the best podcast platforms for monetization and our roundup of top-paying podcasting platforms.
Start your podcast on Buzzsprout →
What Is Buzzsprout Ads, and Who Qualifies?
Buzzsprout Ads is Buzzsprout’s automatic, revenue-share advertising program. Once your show is eligible, ads are inserted into your episodes for you and you earn a share of the revenue, with no need to find your own sponsors. It’s a genuine set-it-and-go option for podcasters who don’t yet have direct ad deals.
The catch is eligibility: Buzzsprout Ads is only open to shows that meet a download threshold, commonly cited as about 1,000 downloads in 30 days. Below that, the practical monetization path is Listener Support, Premium Content subscriptions, the Affiliate Marketplace, and inserting your own affiliate reads through Dynamic Content, none of which have an audience minimum.
How Much Does Buzzsprout Cost?
Buzzsprout’s paid plans cost $19, $39, or $79 per month, based on monthly upload hours (4, 15, or 35 respectively). Annual billing runs $199, $399, or $799 per year, saving roughly 15–19%. There’s a free 90-day trial rather than a permanent free plan: episodes are removed after 90 days unless you upgrade. Note that Buzzsprout raised prices from the older $12/$18/$24 structure, so older guides you’ll find elsewhere are out of date.
| Plan | Monthly | Annual | Upload Hours/Month |
|---|---|---|---|
| Free trial | $0 | — | Test the platform; episodes removed after 90 days |
| 4 hours | $19 | $199 | Best for a weekly one-hour show |
| 15 hours | $39 | $399 | Longer interviews or multiple shows |
| 35 hours | $79 | $799 | Indie networks and high-volume creators |
All paid tiers include unlimited storage, advanced analytics, the podcast website, directory distribution, and the monetization tools above. Optional add-ons (Magic Mastering for audio cleanup and Cohost AI for titles, descriptions, and transcripts) run roughly $5–$10 each per month. For the full breakdown including overage fees, see our Buzzsprout pricing guide.
What Platforms Does Buzzsprout Publish To?
Buzzsprout submits your show to every major podcast directory and listening app in a single setup, including:
- Apple Podcasts
- Spotify
- YouTube Music
- Amazon Music
- iHeartRadio
- Pandora
- TuneIn
- Overcast
- Pocket Casts
- Castro
- Podchaser
- Podcast Addict
If you’re setting up on Spotify specifically, our guide to uploading your podcast to Spotify walks through it, and our guide to starting a podcast on Buzzsprout covers the whole setup.
Is Buzzsprout Worth It for Monetization?
For beginner and intermediate podcasters who want hosting and monetization in one easy package, yes. Buzzsprout’s strength is the overall experience: smooth onboarding, a quality podcast website, reliable IAB analytics, and built-in earning tools that don’t lock you into exclusivity.
Be realistic about the ceiling, though. Buzzsprout isn’t a full ad network or a programmatic dynamic-ad-insertion suite with geo-targeting and campaign scheduling. Shows that have outgrown the basics and want a larger ad marketplace may look at hosts built around that. For the bigger monetization picture, see can you make money from a podcast.
The Bottom Line on Buzzsprout for Growth and Monetization
Buzzsprout pairs genuinely easy hosting with a practical, non-exclusive set of monetization tools: automatic Buzzsprout Ads once you qualify, plus Listener Support, Premium Content, and an Affiliate Marketplace that work from day one. At $19/month to start, it’s a strong all-in-one home for podcasters who want to grow and earn without managing a stack of separate services.
Try Buzzsprout and start monetizing your show →
Buzzsprout Podcast FAQ
How does Buzzsprout help you make money?
Buzzsprout offers four built-in revenue streams: Buzzsprout Ads (automatic revenue-share advertising for eligible shows), Listener Support (recurring contributions), Premium Content (paid subscriber-only episodes), and an Affiliate Marketplace of pre-vetted products you promote for commission. You can also insert your own sponsor reads across your catalog with Dynamic Content.
What is Buzzsprout Ads?
Buzzsprout Ads is an automatic advertising program that inserts ads into your episodes and pays you a share of the revenue, without you sourcing sponsors. It’s available to shows meeting an eligibility threshold, commonly cited as around 1,000 downloads in 30 days. Smaller shows can still use Buzzsprout’s other monetization tools.
How much does Buzzsprout cost in 2026?
Buzzsprout’s paid plans are $19/month (4 upload hours), $39/month (15 hours), and $79/month (35 hours), with annual billing at $199, $399, and $799. There’s a free 90-day trial rather than a permanent free plan. The older $12/$18/$24 pricing has been retired.
Does Buzzsprout have a free plan?
Buzzsprout offers a free 90-day trial rather than a permanent free plan. You can upload episodes, use basic analytics, and test the publishing workflow without a credit card, but episodes are removed after 90 days unless you upgrade to a paid plan. Add-ons aren’t included in the trial.
What is the Buzzsprout Affiliate Marketplace?
It’s a curated marketplace of podcast-relevant products and services that Buzzsprout pre-vets for quality and reputation. You earn cash commissions on sales from your unique affiliate link, and there’s no minimum audience size, so even brand-new podcasters can participate alongside their other monetization.
Can you monetize old episodes on Buzzsprout?
Yes. Buzzsprout’s Dynamic Content lets you insert or swap sponsor and affiliate reads across your entire back catalog, so older episodes keep earning. If you qualify for Buzzsprout Ads, ads can also be served across eligible episodes, not just new releases.
Is Buzzsprout’s monetization exclusive?
No. Buzzsprout takes a non-exclusive approach, so you can use its built-in tools while also running your own direct sponsorships, affiliate deals, and other revenue streams. This flexibility lets you combine multiple income sources rather than being locked into a single platform’s program.
What platforms does Buzzsprout publish to?
Buzzsprout distributes to all major apps in one setup, including Apple Podcasts, Spotify, YouTube Music, Amazon Music, iHeartRadio, Pandora, TuneIn, Overcast, Pocket Casts, Castro, Podchaser, and Podcast Addict. You submit once and Buzzsprout handles getting your feed listed across the directories.
Does Buzzsprout support video podcasts?
Buzzsprout is audio-first. You can upload a video file and Buzzsprout will extract the audio for a standard audio podcast and host the video for embedding or linking, but it isn’t a native video-podcast host. If video is central to your show, a video-focused platform is a better fit.
Is Buzzsprout good for beginners?
Yes. Buzzsprout is widely recommended for beginners because of its simple onboarding, clear interface, quality podcast website, and built-in monetization tools that work without an audience minimum. The upload-hour pricing model and all-in-one design make it easy to launch and grow without juggling separate services.
15 Corporate Podcast Ideas That Actually Drive Brand Growth
The best corporate podcast ideas share three traits: they reflect a clear brand personality, they serve a defined audience (customers, employees, or industry peers), and they exist for reasons beyond “we should have a podcast.” Below are 15 proven formats — drawn from real branded shows like Wendy’s, Shopify Masters, McKinsey’s The McKinsey Podcast, Sephora’s #LipStories, GE’s The Message, BCG’s The So What, Trader Joe’s Inside Trader Joe’s, and Google’s Search Off the Record — that you can adapt to your own company, plus the strategic questions to answer before you press record.
If you’re brand-new to the medium, start with our guide to starting a successful podcast and our podcast business plan template before you choose a format.
Corporate Podcast Ideas at a Glance
| Format | Best For | Real-World Example |
|---|---|---|
| Brand-personality show | Consumer brands with a distinct voice | Wendy’s The Other Side of the Menu |
| Customer-education podcast | SaaS, e-commerce, marketplaces | Shopify Shopify Masters |
| Thought-leadership interview | B2B, consulting, professional services | BCG The So What |
| Narrative / scripted series | Brands with budget and a story to tell | GE The Message, LifeAfter |
| Behind-the-scenes documentary | Retailers, manufacturers, food brands | Trader Joe’s Inside Trader Joe’s |
| Product-launch limited series | Consumer products, beauty, lifestyle | Sephora #LipStories |
| Internal employee podcast | Companies with 500+ distributed staff | American Airlines Tell Me Why |
| Industry-news roundup | Trade media, B2B publications | Google Search Off the Record |
| Founder / executive interview | VC, recruiting, leadership firms | Russell Reynolds Redefiners |
| How-to / tutorial series | Tools, software, productivity brands | HubSpot Academy podcasts |
| Customer-story podcast | Service businesses, B2B SaaS | Salesforce Leading Through Change |
| Adjacent-passion show | Brands targeting an executive lifestyle | Goldman Sachs Exchanges |
| Research-report companion | Consultancies, analyst firms, research orgs | McKinsey The McKinsey Podcast |
| Daily micro-podcast | News brands, media companies | NYT The Daily, WSJ What’s News |
| Culture & wellbeing show | HR tech, benefits, mental-health brands | Headspace Radio Headspace |
1. Lean Into Your Brand Personality (The Wendy’s Approach)
If your brand has a recognizable voice on social media, the podcast version is the most natural starting point. Wendy’s built its podcast around the same sassy, irreverent tone its X account became famous for — and that’s exactly why it works. A bank wouldn’t sound right doing this. A QSR brand does.
The pattern to copy: identify the two or three personality traits your brand is already known for, then commit to those traits across every episode. Don’t invent a new voice for the podcast — extend the one customers already recognize. For more on tone-finding, see our piece on correcting your authentic podcasting voice.
2. Educate Your Customers (The Shopify Masters Model)
Customer-education podcasts work because they create a free, on-demand training resource that lowers churn and increases account expansion. Shopify Masters interviews successful Shopify store owners — every episode is implicitly a case study for staying on Shopify and using more of its features. It’s marketing disguised as genuine help, which is exactly why listeners tolerate the brand association.
This format works best when your product has a learning curve and your customers self-identify with a community (sellers, developers, marketers, traders). Pair it with strong show notes so episodes double as searchable knowledge-base content.
3. Build Thought Leadership (The BCG “So What” Model)
For B2B brands — consultancies, law firms, enterprise software, financial services — a thought-leadership interview podcast is the highest-ROI format. BCG’s The So What uses a journalist host to interview BCG’s own consultants on big-picture business questions. That structure does three things at once: it positions BCG experts publicly, gives sales teams a calling card, and produces source material for blog posts, LinkedIn content, and conference talks.
The execution lesson here is to hire an outside professional host. Internal SMEs are rarely also strong interviewers. For more on this, see our breakdown of why your first business podcast episode can’t suck.
4. Tell a Scripted Story (The GE “Message” Model)
GE’s The Message — an eight-part sci-fi audio drama that hit #1 on iTunes in 2015 — is still the gold-standard branded narrative podcast. The brand barely appears in the show itself. GE’s logic was that listeners would associate the prestige and craft of the show with the company, even without a sales pitch.
This format is expensive (think $30K–$100K+ per episode for full sound design, voice acting, and original score) and only makes sense for brands with serious content-marketing budgets. But when it works, it generates earned media, awards-circuit attention, and brand affinity that no banner ad can buy.
5. Show the Inside of the Business (The Trader Joe’s Model)
Inside Trader Joe’s takes listeners behind the scenes of a grocery store — how products get chosen, where they’re sourced, why the parking lots are tiny. It works because Trader Joe’s customers are already curious about the brand’s quirks, and the podcast scratches that itch in a long-form way social media can’t.
Behind-the-scenes podcasts work for any company customers feel emotionally attached to: retailers, restaurants, manufacturers, fashion brands, sports teams. The key is to focus on process and people, not products. Nobody wants a 30-minute commercial.
6. Launch a Product With a Limited Series (The Sephora “#LipStories” Model)
Sephora’s #LipStories ran alongside the launch of a new lipstick collection. Each episode featured a different woman telling a personal story about confidence and identity — with the product implicitly woven into the narrative. The limited-series format is critical here: 6–10 episodes, then done. No bloat, no commitment to producing forever.
This works for any product launch where the product itself maps to an emotional theme. Beauty, fitness, wellness, food, and lifestyle brands have the easiest time pulling it off. B2B brands can adapt the format for major platform releases — think a 6-episode series timed to an annual conference.
7. Run an Internal Employee Podcast (The American Airlines Model)
American Airlines’ internal podcast Tell Me Why publishes five-to-ten-minute episodes for its ~122,000 employees, explaining policy changes, uniform decisions, and operational updates. The format solves a real problem: nobody reads internal email blasts, but employees will listen during a commute or break.
Internal podcasts work for any company with 500+ distributed employees, especially in industries with frontline workers (retail, hospitality, healthcare, logistics). They require a private podcast platform with authentication, not a public RSS feed. See our guide on how to make a private podcast for free for budget-friendly options, or our full breakdown of enterprise podcast solutions if you need SSO and analytics.
8. Cover Your Own Industry (The Google “Search Off the Record” Model)
Google’s Search Off the Record humanizes the company’s search engineers, demystifies SEO, and indirectly shapes the discourse around how Google works. It’s a masterclass in using a podcast to control your own narrative on technical topics — instead of letting third parties speculate, Google’s own team explains things directly.
This works for any company whose product is widely discussed but poorly understood. Software platforms, financial-services firms, scientific brands, and infrastructure companies all have an audience hungry for “from the source” content.
9. Interview Executives and Founders (The Russell Reynolds Model)
Russell Reynolds’ Redefiners interviews CEOs and senior executives about leadership in a changing world. The podcast doesn’t sell the firm’s services — it demonstrates the firm’s access. If Russell Reynolds can get those guests on the phone, they can probably get them on your shortlist too.
This model is built for recruiting firms, VC funds, professional-services firms, and any business where access and relationships are the product. Production quality matters here — sloppy audio undermines the access signal.
10. Build a Tutorial Library (The HubSpot Model)
How-to podcasts work when your product has enough surface area to support hundreds of mini-tutorials. Each episode tackles one specific question or workflow, runs 8–15 minutes, and slots into a learning library on your site. Done well, it doubles as SEO real estate — short, focused episodes with clear titles tend to rank well in podcast search and increasingly in AI search results too.
Pair tutorial podcasts with strong transcripts. AI search engines (ChatGPT, Perplexity, Claude) cite text far more readily than audio, so the transcript is what actually gets indexed.
11. Feature Customer Success Stories
Customer-story podcasts are interview shows where the guests are your customers, talking about their work — not necessarily about your product. Salesforce, HubSpot, and dozens of other B2B brands use this format because it accomplishes three things: it makes customers feel celebrated, it produces case-study content sales teams can use, and it gives prospects a chance to hear from peers without a sales pitch.
The trick is restraint. If every episode ends with the guest saying “and we couldn’t have done it without [your product],” listeners check out. Let the customer talk about their actual work; the brand association takes care of itself.
12. Tap an Adjacent Passion (The Goldman Sachs “Exchanges” Model)
This format targets your ideal customer’s off-hours interests. A wealth-management firm might run a podcast about the business of professional golf. A B2B software vendor might host a show about high-performance running. The connection to your product is oblique — the goal is to be the show your prospect listens to on a Saturday morning, building brand familiarity before any sales conversation.
This requires a real commitment to the adjacent topic. Listeners spot a thinly-veiled marketing show in two episodes. If your team isn’t genuinely passionate about the adjacent space, pick a different format.
13. Build a Research-Report Companion (The McKinsey Model)
If your firm publishes research, white papers, or industry reports, a companion podcast lets you extend the shelf life of that content by 10x. McKinsey’s podcast routinely turns long-form reports into 25-minute conversations with the authors. Same insights, new format, new audience.
This format is low-effort to produce (the research already exists) and high-value because each episode points back to a downloadable report — a perfect top-of-funnel lead magnet.
14. Run a Daily News Micro-Podcast
News-oriented brands (publishers, financial firms, industry analysts) can build huge audiences with 8–15 minute daily shows. The Daily from the New York Times is the obvious template. The format is brutal — you have to publish every weekday, no exceptions — but the audience-building potential is unmatched because daily shows hook into commute routines.
Only consider this format if you have dedicated editorial staff and a real news beat. A weekly version is far more realistic for most companies.
15. Build a Wellbeing or Culture Show (The Headspace Model)
Headspace’s Radio Headspace is a daily 3–5 minute show about mindfulness — produced in-house, and a perfect extension of the app’s core value proposition. The format works for HR tech, benefits providers, mental health brands, fitness apps, and any company whose product is rooted in a wellbeing theme.
The short length is intentional. A meditation app doesn’t need to compete with Joe Rogan for two-hour blocks — it needs to be the thing you listen to between meetings.
How to Choose the Right Format for Your Company
Most companies start a podcast without answering the strategic questions first, then wonder why it dies after eight episodes. Run through these before you commit to a format:
- Who is the listener? Customers, prospects, employees, or industry peers? Each audience needs a different format.
- What does success look like in 12 months? Pipeline generation, brand awareness, employee engagement, or recruiting? Define this before you record episode one.
- Who hosts? An internal expert with charisma, an outside professional, or a rotating cast? Hosting talent is the single biggest predictor of show survival.
- What’s the publishing cadence? Weekly is the default; biweekly is more sustainable for most teams; monthly is acceptable only for narrative or research-heavy shows.
- How will you distribute it? A public RSS feed for marketing podcasts; a private platform for internal shows. See our podcast hosting guide for the full breakdown.
- What’s the budget? Internal shows can run on $500/month. Narrative branded podcasts can run $30K+ per episode. Match format to budget honestly.
Equipment and Software for Corporate Podcasts
Production quality matters more for corporate podcasts than for indie shows. A consumer listener might forgive bad audio on a niche hobbyist show; a CMO evaluating your brand won’t. The baseline corporate setup:
- Microphones: A pair of broadcast-quality dynamic mics for in-studio recording. Our best podcast microphones guide covers the field.
- Remote recording: Most corporate interviews happen remotely, so you’ll want a tool like Riverside, SquadCast, or Zencastr. See our SquadCast vs. Riverside comparison and Zencastr pricing breakdown.
- Hosting: For public marketing podcasts, our hosting platform comparison is the right starting point. For internal corporate shows, see enterprise podcast solutions.
- Editing: Outsource if you can. The brands with the most sustainable shows almost never edit in-house.
Marketing and Distribution
The hardest part of corporate podcasting isn’t recording — it’s getting people to listen. Most corporate shows die not because the content is bad, but because the company treats publishing as the finish line instead of the starting line. A few non-negotiables:
- Build a dedicated podcast website with full transcripts on every episode page
- Repurpose every episode into LinkedIn posts, short video clips, and email newsletter content
- Use the promotion strategies that actually work for B2B audiences (newsletter swaps, LinkedIn shares, internal email signatures)
- Ask every guest to share their episode — and make it easy for them with pre-written copy and graphics
Frequently Asked Questions
What is a corporate podcast?
A corporate podcast is a branded audio show produced by a company to advance a specific business goal — marketing, employee engagement, customer education, recruiting, or thought leadership. Unlike independent podcasts, corporate podcasts are owned by the brand rather than the host and exist to serve company strategy. Examples range from Shopify Masters (customer education) to Wendy’s The Other Side of the Menu (brand personality) to American Airlines’ Tell Me Why (internal communications).
How much does a corporate podcast cost to produce?
Corporate podcast costs range from roughly $500 per month for a basic in-house show to $30,000+ per episode for high-production narrative series. A mid-tier B2B interview podcast — outside host, professional editing, decent cover art, hosting platform — typically runs $2,000–$5,000 per episode when fully loaded. The biggest cost variable is whether you produce in-house or hire an agency.
What’s the difference between a corporate podcast and a branded podcast?
The terms are often used interchangeably, but there’s a useful distinction: a “corporate podcast” usually refers to any audio content produced by a company, including internal employee shows, while a “branded podcast” specifically refers to a marketing-focused show aimed at an external audience. All branded podcasts are corporate podcasts, but not all corporate podcasts are branded podcasts.
Do corporate podcasts actually generate ROI?
Measured purely on ad revenue, no — most corporate podcasts don’t sell ads. They generate ROI through indirect channels: pipeline influence, brand awareness lift, employee engagement scores, recruiting funnel improvements, and content repurposing efficiency. The right metrics depend on the format. A thought-leadership show should be measured on pipeline; an internal podcast should be measured on engagement and message recall.
How long should a corporate podcast episode be?
Most successful corporate podcasts fall into one of three length buckets: 5–10 minutes for internal employee shows and daily news micro-podcasts, 20–35 minutes for thought-leadership and interview shows, or 45–60 minutes for narrative and deep-dive formats. Avoid landing between these buckets — a 15-minute interview feels rushed, and a 75-minute thought-leadership show loses listeners by minute 40.
How often should a corporate podcast publish?
Weekly is the default expectation for marketing-focused shows, biweekly is more sustainable for most internal teams, and monthly is acceptable only for high-production narrative or research-heavy formats. Daily shows demand dedicated editorial staff. The most damaging cadence is inconsistent publishing — listeners forgive a known schedule, but they unsubscribe from shows that disappear for weeks.
Who should host a corporate podcast?
The best corporate podcast hosts are either professional broadcasters or charismatic internal experts with strong interviewing skills. The trap most companies fall into is assuming the CEO should host. CEOs rarely have the time or the interviewing range to sustain a weekly show. A better pattern is to have the CEO appear as a recurring guest while a dedicated host runs the show day-to-day.
Should a corporate podcast be video or audio only?
Video is increasingly the default — YouTube has become a major podcast distribution channel, and short clips fuel social distribution — but audio-first remains a valid choice for internal podcasts, narrative shows, and content where guests are camera-shy. The pragmatic answer for most corporate podcasts in 2026: record video, distribute both, and prioritize whichever format your audience prefers.
What’s the biggest mistake companies make with corporate podcasts?
The single biggest mistake is starting without a clear audience definition and a defined success metric. Companies launch podcasts because “everyone else has one,” choose a generic interview format, publish twelve episodes, then quietly stop. The fix is mechanical: define the listener, define the metric, choose a format that maps to both, and commit to at least 25 episodes before reassessing.
How do I know if my company should start a podcast at all?
Ask three questions. First, do you have a defined audience who would actively choose to listen to long-form audio about a topic adjacent to your brand? Second, do you have at least one strong potential host on the team or in your budget? Third, can you sustain at least 25 episodes? If any answer is “no,” skip the podcast and invest the budget in better-fit content channels.
The Best Audio Interfaces That Will Instantly Upgrade Your Podcast
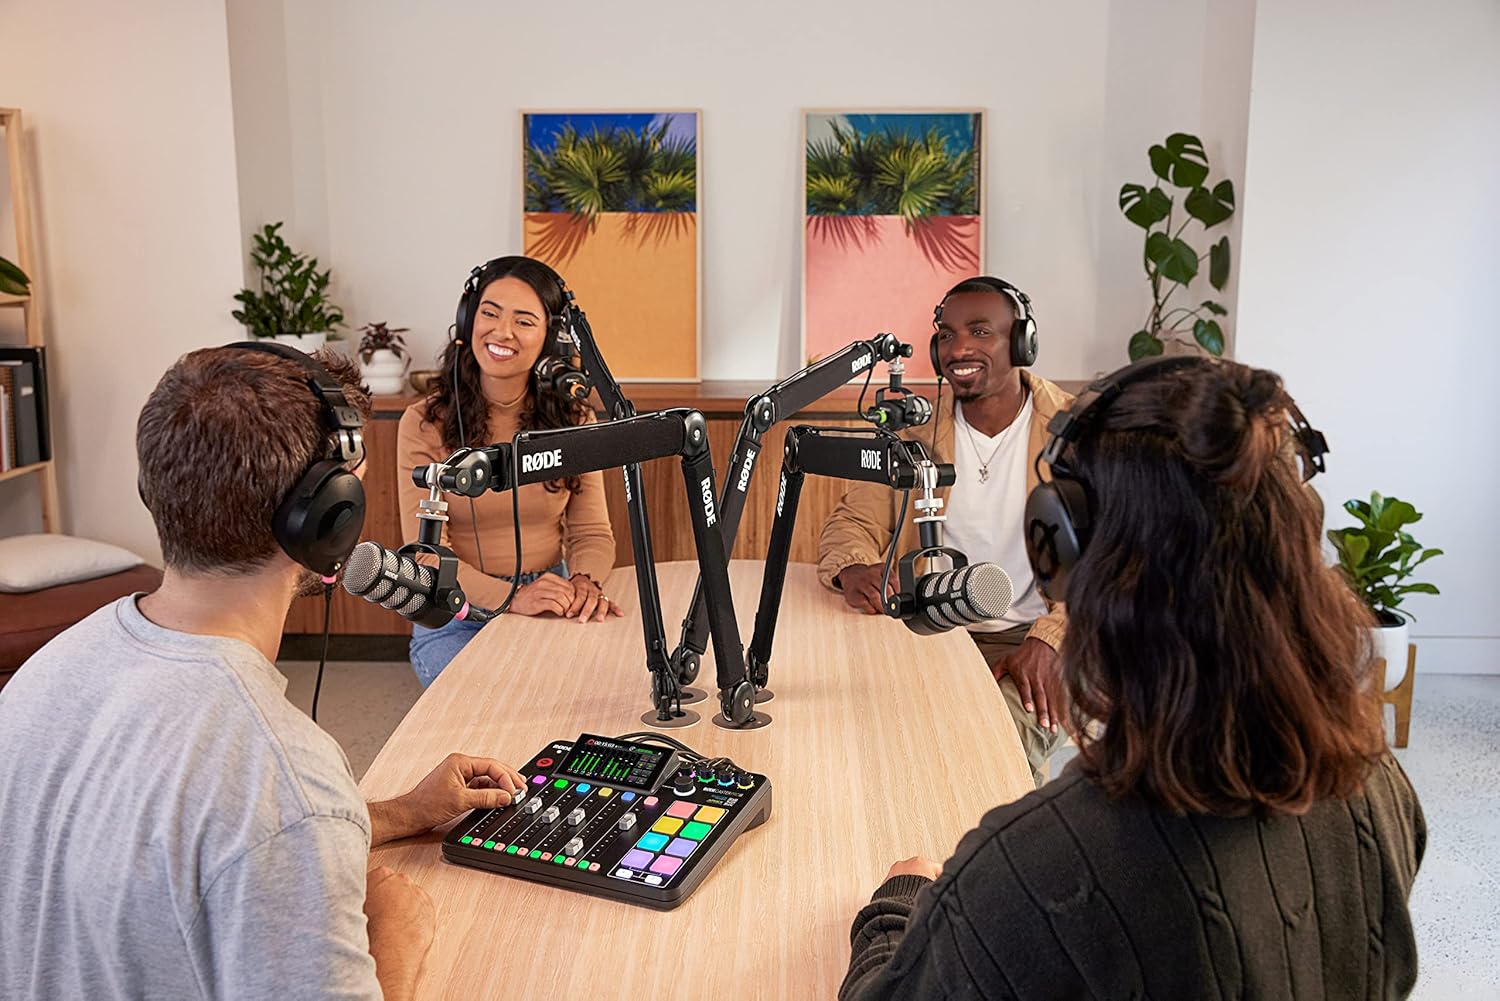 → See the RØDECaster Pro II — Our Top Pick for Serious Podcasters
The best audio interface for most podcasters is the Focusrite Scarlett 2i2 4th Gen ($179) — it delivers clean preamps, Auto Gain, and loopback in a bus-powered unit that works out of the box. If you’re running a solo show with an XLR mic, it’s the right choice at the right price. Need more inputs or podcast-specific features? This guide walks through every tier, from budget to broadcast-grade, matched to your exact setup.
I’ve been podcasting since 2015 and run my studio off XLR mics routed through a proper interface — not a USB mic plugged straight into a laptop. The difference in audio quality is immediately audible, and it’s the single biggest upgrade most podcasters skip. Here’s what actually matters when choosing one.
What Is an Audio Interface and Do You Actually Need One?
An audio interface converts the analog signal from your XLR microphone into a clean digital signal your computer can record. It also provides the microphone preamps (to boost gain), phantom power (for condenser mics), and zero-latency headphone monitoring that your laptop’s built-in sound card simply cannot match.
If you’re using a USB microphone, you technically don’t need an interface — the mic handles conversion internally. But the moment you want to use an XLR microphone, record multiple voices, or eliminate the hiss and noise floor baked into consumer audio hardware, an interface becomes essential.
Related: Podcast Microphone Setup Guide | Home Podcast Setup
Quick Picks: Best Audio Interfaces for Podcasting by Use Case
| Use Case | Best Pick | Price |
|---|---|---|
| Best Overall | Focusrite Scarlett 2i2 4th Gen | ~$179 |
| Best Budget | Audient iD4 MkII | ~$99 |
| Best for Two Hosts | Focusrite Vocaster Two | ~$299 |
| Best Portable (4 Mics) | Zoom PodTrak P4 | ~$199 |
| Best All-in-One Studio Hub | RØDECaster Pro II | ~$699 |
| Best for Large Panels (8 Mics) | Focusrite Scarlett 18i20 | ~$499 |
| Best Pro Studio Sound | UA Apollo Twin X | ~$899+ |
How Many Inputs Do You Actually Need?
This is the most important decision you’ll make — and most buyers get it wrong by under-buying or over-buying. Here’s the simple breakdown:
- Solo show: 1 input is enough. 2 gives you flexibility for a guest mic or instrument.
- Interview / co-host show: Minimum 2 XLR inputs. If you record guests in the same room, you need one input per person.
- Panel discussions or roundtables: 4–8 inputs. Look at the Zoom PodTrak P4 (budget) or RØDECaster Pro II (pro).
- Large studio productions: 8+ inputs via the Scarlett 18i20 or units with ADAT expansion.
Pro tip: Buy one input tier above where you are now. Upgrading your interface later is more expensive and disruptive than spending $50 more upfront. See our podcast equipment guide for co-hosts and groups for more.
The Best Audio Interfaces for Podcasting: Full Reviews
1. Focusrite Scarlett 2i2 4th Gen — Best Overall
The Scarlett 2i2 is the world’s best-selling audio interface for good reason. The 4th generation added features podcasters specifically asked for: Auto Gain (it sets your recording level automatically), Clip Safe (prevents distortion from unexpected loud moments), and three preamp modes — Clean, Air (adds presence), and Drive (adds warmth). At 69 dB of gain, it comfortably powers dynamic mics like the Shure SM7B without a Cloudlifter.
Best for: Solo podcasters and two-person shows who record locally and want professional sound with minimal fuss.
Pros: Industry-standard reliability, excellent preamps for the price, loopback for capturing computer audio, bus-powered via USB-C, works on Mac and Windows out of the box.
Cons: No onboard mixing or sound pads, no SD card recording, not ideal for 3+ person shows.
Price: ~$179 | Check current price on Amazon
2. Audient iD4 MkII — Best Budget Pick
The iD4 MkII punches well above its price point with a genuine console-grade preamp derived from Audient’s professional mixing desk heritage. It has a single XLR input, which is all most solo podcasters need. The scroll-wheel control is smooth and intuitive, and the converters are cleaner than most interfaces in this price range.
Best for: Solo podcasters who want better-than-Scarlett preamp quality at a budget price.
Pros: Excellent preamp quality, class-leading converters for the price, includes JFET instrument input, bus-powered.
Cons: Single XLR input only, no loopback functionality, limited podcast-specific features.
Price: ~$99 | Check current price on Amazon
3. Focusrite Vocaster Two — Best for Two-Host Shows
Focusrite designed the Vocaster series specifically for podcasters — not musicians who podcast. The Vocaster Two has two XLR inputs with independent controls, Auto Gain on both channels, Bluetooth integration (so a phone call goes directly into your mix), loopback for capturing remote guests, and a camera output for video podcasting. It’s purpose-built in a way the Scarlett line isn’t.
Best for: Two-person podcast setups, interview shows, creators who also record video.
Pros: Podcast-specific feature set, Bluetooth/phone integration, auto gain on both channels, includes Hindenburg and SquadCast licenses, camera output for video workflows.
Cons: Pricier than Scarlett 2i2 for similar input count, limited to 2 XLR inputs.
Price: ~$299 | Check current price on Amazon
Also see: Podcast Setup for Two Hosts
4. Zoom PodTrak P4 — Best Portable 4-Input Option
The PodTrak P4 is uniquely suited to multi-person podcasting on a budget. Four XLR inputs, sound pads for jingles and sponsor drops, built-in mix-minus (so remote guests don’t hear themselves echoed back), and SD card recording that works without a computer. It runs on AA batteries, making it genuinely portable for live events and on-location recording.
Best for: Podcasters recording 3–4 people in the same room, mobile recording, live events.
Pros: 4 XLR inputs at a budget price, mix-minus built in, battery-powered, sound pads, SD card recording, headphone output per channel.
Cons: Plastic build feels less premium, preamps are adequate but not exceptional, 16-bit recording vs. 24-bit on studio interfaces.
Price: ~$199 | Check current price on Amazon
Also see our full Zoom PodTrak P4 review.
5. RØDECaster Pro II — Best All-in-One Studio Hub
The RØDECaster Pro II is the interface I point to when someone says they want a proper podcast studio in a single unit. Four Revolution Preamps with 76 dB of gain (more than enough for any dynamic mic), APHEX processing onboard (Aural Exciter, Big Bottom, compressor), 8 SMART pads with 64 programmable actions, dual USB-C (connect two computers simultaneously), Bluetooth, and SD card recording. It’s a serious investment, but it eliminates almost every piece of separate gear you’d otherwise need.
Best for: Serious podcasters who want a complete production hub without patching together multiple devices.
Pros: Broadcast-quality Revolution Preamps, onboard APHEX DSP processing, sound pads, dual USB-C, Bluetooth, SD recording, loopback, mix-minus — it does everything.
Cons: Expensive at ~$699, overkill for solo shows, requires learning its software ecosystem.
Price: ~$699 | Check current price on Amazon
See also: RØDECaster Pro full review | RODECaster Video console guide
6. UA Volt 476P — Best Mid-Tier 4-Input Interface
Universal Audio’s Volt 476P delivers four preamps, analog warmth and compression built into hardware (not software), and UA’s reputation for clean, musical conversion. The “Vintage” switch on each channel adds harmonic richness that most digital interfaces at this price can’t replicate. It hits the sweet spot for podcast studios that want UA quality without Apollo pricing.
Best for: 4-person studio setups that want analog warmth and more musical preamps than the competition at this price.
Pros: 4 XLR inputs, hardware analog compression, Vintage mode per channel, solid build quality, strong preamp gain.
Cons: No SD card recording, no sound pads, limited podcast-specific features compared to RØDECaster.
Price: ~$399 | Check current price on Amazon
7. UA Apollo Twin X — Best Pro Studio Sound
The Apollo Twin X is in a different league from every other interface on this list — it’s for podcasters who also produce music, voice-over, or branded content at the highest level. Thunderbolt 3 connectivity, UAD DSP processing (run Neve, API, and SSL plugins in real-time with near-zero latency), Unison preamp technology, and converters that studio engineers call reference-quality. If your podcast is part of a broader creative production business, this is the hub.
Best for: Pro studios, podcasters who also produce music or premium branded content, anyone who needs UAD plugins.
Pros: Reference-quality converters, real-time DSP with UAD plugins, Thunderbolt 3 (ultra-low latency), Unison preamp tech, future-proof investment.
Cons: Expensive, requires Thunderbolt 3 port (Mac-centric), UAD plugin library adds cost, serious overkill for most podcasters.
Price: ~$899+ | Check current price on Amazon
8. Focusrite Scarlett 18i20 — Best for Large Panels
When you need to mic 5+ people in the same room, the Scarlett 18i20 is the most accessible path to 8 XLR inputs at a non-insane price. Loopback, ADAT expansion (up to 16 inputs total with an external preamp), and Scarlett’s well-proven driver stability. It requires external power (not bus-powered), so it’s a studio-only unit.
Best for: Large panel podcasts, round-table shows, studios that need to scale input count.
Pros: 8 XLR preamps, ADAT expansion, loopback, reliable Scarlett drivers, 24-bit/192kHz.
Cons: Requires external power, bulky for portable use, expensive, most podcasters will never need this many inputs.
Price: ~$499 | Check current price on Amazon
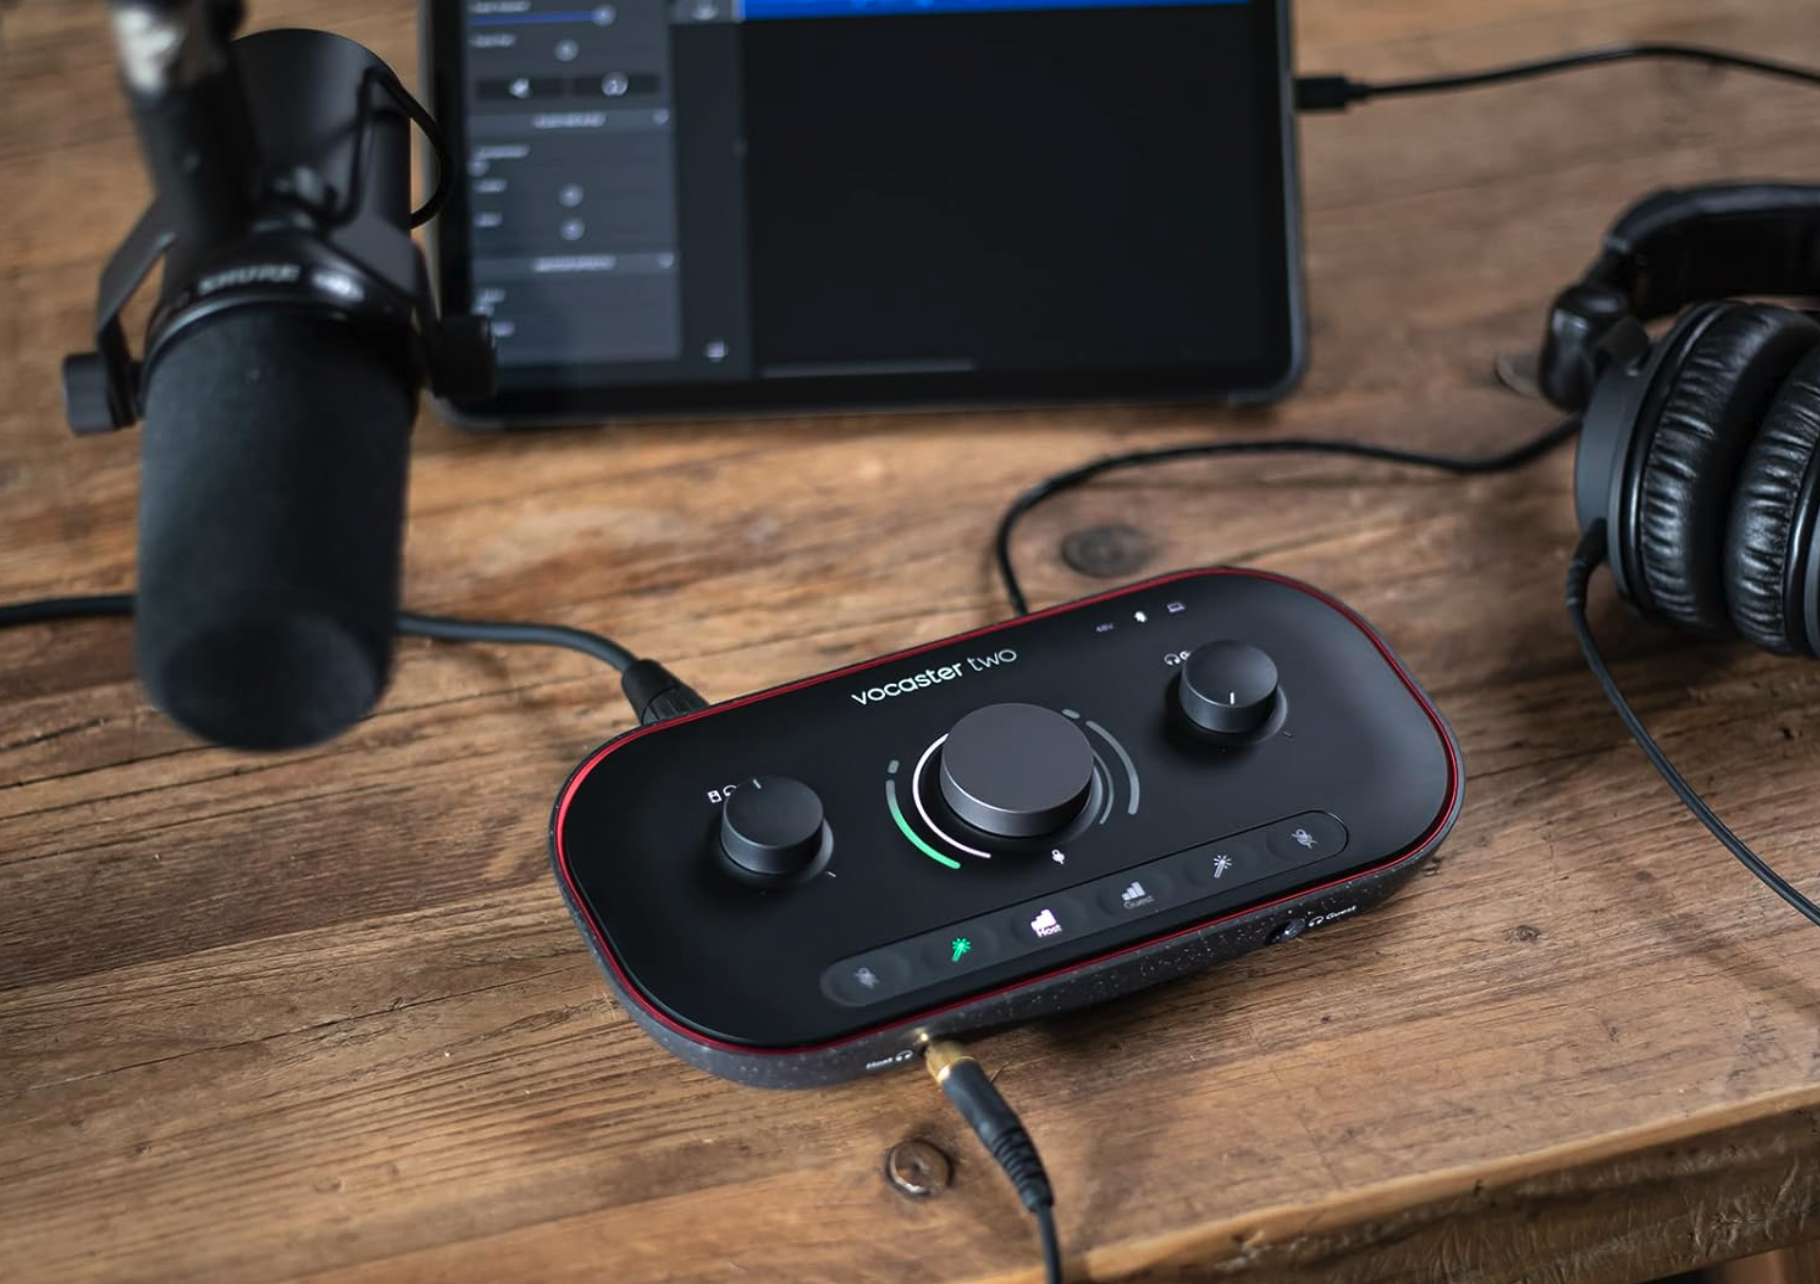
Comparison Table: Best Audio Interfaces by Tier and Input Count
| Inputs Needed | Budget (<$150) | Mid-Tier ($150–400) | High-End ($500+) |
|---|---|---|---|
| 1–2 Mics | Audient iD4 MkII — console-grade preamp, single XLR | Scarlett 2i2 4th Gen — Auto Gain, loopback, proven reliability | UA Apollo Twin X — reference converters, UAD DSP |
| 2 Mics (Podcast-Specific) | Audient iD4 MkII | Focusrite Vocaster Two — Bluetooth, auto gain both channels, video output | RØDECaster Pro II — full studio hub |
| 3–4 Mics | Zoom PodTrak P4 — mix-minus, SD recording, battery-powered | UA Volt 476P — analog warmth, hardware compression | RØDECaster Pro II — 76 dB gain, APHEX DSP, SMART pads |
| 5–8 Mics | Behringer UMC1820 — cheapest path to 8 XLR inputs | Focusrite Scarlett 18i20 — 8 pres, ADAT expansion | Focusrite Clarett+ 8Pre or RME Fireface UFX II |
What Features Actually Matter for Podcasters?
Most buyers focus on specs that rarely matter in practice (sample rate, bit depth) and overlook features that define daily workflow. Here’s what separates podcast-relevant interfaces from general-purpose ones:
Loopback audio — Lets you route computer audio (a YouTube clip, a remote guest’s voice via Zoom) back into your recording without running cables. Essential for interview shows. The Scarlett 2i2 and Vocaster Two both include it. The Audient iD4 does not.
Mix-minus — When recording a remote guest via phone or video call, mix-minus ensures they hear you but not their own voice echoed back with a delay. The PodTrak P4 and RØDECaster Pro II have this built in. Without it, you need to set it up manually in your DAW — doable, but annoying.
Phantom power (48V) — Required for condenser microphones. Every interface on this list includes it. If you’re using a dynamic mic like the Rode PodMic or Shure MV7, you don’t need it — but having it available future-proofs your setup.
Preamp gain headroom — Dynamic mics like the Shure SM7B need a lot of clean gain (60 dB+). Budget preamps hit their noise floor before they reach the gain you need, adding hiss. The Scarlett 4th Gen (69 dB), Vocaster Two, and RØDECaster Pro II (76 dB) all handle the SM7B without a booster. See what a preamp actually does for more detail.
Direct monitoring — Hear yourself in real-time through headphones without software latency. Every interface here has it. Critical for natural delivery — you can’t perform well when you hear yourself 50ms delayed.
Sound pads — Trigger pre-recorded audio clips (intro music, sponsor reads, sound effects) from the interface hardware. Only on the PodTrak P4 and RØDECaster Pro II in this guide. Not essential, but genuinely useful for produced shows.
Also relevant: audio mixer vs audio interface — what’s the difference? | Behringer Xenyx Q802USB review
Do Preamps Really Make a Difference?
For most podcasters: yes, but not in the way you think. The difference between a $99 interface preamp and a $499 one isn’t “warmth” or “character” (that’s a music production conversation) — it’s noise floor and gain headroom. A cheap preamp adds hiss at high gain settings. A better preamp lets you crank the gain on a quiet dynamic mic and still get a clean signal.
If you’re recording with a condenser microphone in a treated room, budget preamps are genuinely fine. If you’re using a passive dynamic mic (SM7B, Shure SM58, Rode PodMic) in an untreated room, better preamps matter — both for gain and for noise handling.
Rule of thumb: if your interface’s preamp can’t drive your microphone to a healthy level without introducing audible hiss, you need either a better interface or an inline preamp booster. The Scarlett 4th Gen largely eliminates this problem at its price point, which is why it remains the default recommendation.
See also: Rode PodMic vs Shure MV7 Plus comparison | best podcast microphones guide
Interface vs. Podcast Hub: Which Type Do You Need?
There are two categories of device that podcasters call “audio interfaces,” and they serve different workflows:
Traditional interfaces (Scarlett 2i2, Audient iD4, Apollo Twin X) connect your mics to your computer and let your DAW handle the rest. They’re clean, flexible, and work well for podcasters who also record music or voiceover. They require recording software like Audacity, GarageBand, Adobe Audition, or other podcast editing tools.
Podcast hubs (RØDECaster Pro II, Zoom PodTrak P4, TASCAM Mixcast 4) are all-in-one production consoles. They mix, record, process, and in some cases store audio independently of a computer. They’re more expensive and more complex, but they compress what used to take five pieces of gear into one unit. Best for podcasters who want to minimize setup and post-production time.
Which is right for you: if you already use editing software and are comfortable in a DAW, a traditional interface gives you more flexibility at lower cost. If you want to minimize production overhead and run a tighter live-to-tape workflow, a podcast hub pays for itself in time saved.
Latency, Connectivity, and Drivers: What to Know Before You Buy
Latency — the delay between speaking and hearing yourself through headphones — is a real problem on cheap interfaces with poor drivers. Most modern interfaces running via USB-C achieve latency low enough that you won’t notice it in normal use. Here’s where it actually matters:
- USB-C: Standard and reliable for all interfaces on this list. Adequate for podcast recording and most live streaming.
- Thunderbolt 3/4 (UA Apollo): Meaningfully lower latency. Matters if you’re monitoring through DSP plugins in real-time or running complex virtual instrument setups simultaneously.
- Driver quality: RME and Focusrite Clarett+ are consistently rated the most stable across Mac and Windows. The Scarlett line has improved significantly in recent generations.
For straight podcast recording — mic in, record audio, edit — latency differences between USB-C interfaces are imperceptible. Don’t pay a premium for Thunderbolt unless you genuinely need DSP processing or near-zero plugin latency.
What to Pair With Your Interface
An interface is one piece of a signal chain. These are the components that complete your setup:
Microphones: Dynamic mics (Shure SM7B, Rode PodMic, Shure SM58) work better in untreated rooms because they reject room noise. Condenser mics (Rode NT1, Audio-Technica AT2020) capture more detail but also more room sound. See our best podcast microphones guide and best budget podcast mics for full breakdowns.
Headphones: Closed-back headphones prevent bleed into open mics during recording. Budget pick: Audio-Technica ATH-M20x. Mid: Beyerdynamic DT770. Pro: Rode NTH-100. See our best podcast headphones guide.
Microphone setup: Boom arms, shock mounts, and pop filters round out your setup. See our full podcast microphone setup guide.
Recording software: Most interfaces bundle DAW software. Focusrite includes Ableton Live Lite; Vocaster Two includes Hindenburg. If you’re starting from scratch, see our best podcast editing software guide.
Remote guests: Once your local audio chain is solid, recording remote guests cleanly is the next challenge. See best remote podcast recording software and how to record a podcast remotely.
Storage: High-resolution audio files add up fast. I use a Synology DS1522+ NAS for archiving sessions and raw audio. See our podcast archiving guide for more.
Budget Breakdown: What to Expect at Each Price Tier
Under $150 — Budget Tier
At this price you get functional preamps, 1–2 XLR inputs, and bus-powered convenience. Expect adequate (not excellent) noise floors, basic build quality, and minimal podcast-specific features. The Audient iD4 MkII is the standout here — its preamp genuinely outclasses everything else at this price. The Behringer UMC22 works but feels disposable. Avoid M-Audio’s cheaper offerings for professional use.
$150–$400 — Mid-Tier (Where Most Podcasters Should Shop)
This range is where the value-to-quality curve peaks for podcasters. You get 2–4 XLR inputs, solid preamps with enough gain for dynamic mics, loopback, and in the Vocaster Two’s case, a full podcast-specific feature set. The Scarlett 2i2 4th Gen and Vocaster Two dominate this tier. The UA Volt 476P is the choice if analog character matters to you.
$500+ — High-End / Professional
At this price you’re buying broadcast-quality preamps, professional DSP, and significantly better converters. The RØDECaster Pro II justifies its price by replacing multiple devices. The Apollo Twin X justifies its price with UAD plugin processing. The Clarett+ 8Pre justifies it with 8 channels of class-leading preamps. Don’t spend here unless you genuinely need what these units provide — the mid-tier is excellent for most podcasting work.
Frequently Asked Questions: Audio Interfaces for Podcasting
What is the best audio interface for a beginner podcaster?
The Focusrite Scarlett 2i2 4th Gen is the best starting point for most podcasters. It’s plug-and-play on Mac and Windows, includes Auto Gain and loopback, and its 69 dB of gain handles dynamic mics reliably. It’s the interface that professional podcasters recommend to beginners most often because it rarely requires upgrading.
Do I need an audio interface if I have a USB microphone?
No. USB microphones have the interface built in — they convert analog to digital internally. You only need an external audio interface if you’re using an XLR microphone. That said, XLR mics paired with a good interface generally outperform USB mics at comparable price points, especially for noise floor and preamp quality.
What’s the difference between an audio interface and a podcast mixer?
A traditional audio interface connects your XLR mic to your computer and lets software handle the mixing. A podcast mixer (like the Zoom PodTrak P4 or RØDECaster Pro II) handles mixing, effects, and in some cases recording internally — without needing a DAW. Mixers add convenience; interfaces add flexibility. See our audio mixer for podcast guide for a full comparison.
Can the Focusrite Scarlett 2i2 power a Shure SM7B?
Yes — the 4th Gen Scarlett 2i2 provides 69 dB of gain, which is enough to drive the SM7B to a healthy recording level without a Cloudlifter. Earlier generations of the Scarlett struggled with this; the 4th Gen addressed it specifically. If you’re using an older Scarlett with the SM7B, a Cloudlifter or inline preamp booster is recommended.
What is loopback audio and do I need it?
Loopback lets you route audio playing on your computer — a YouTube clip, a remote guest’s voice from a Zoom call, a sound effect — directly into your recording without running physical cables. If you record remote guests via software, interview people on video calls, or want to include any computer audio in your podcast, you need loopback. The Scarlett 2i2 4th Gen and Vocaster Two both include it. The Audient iD4 does not.
What is mix-minus and which interfaces have it?
Mix-minus sends your full mix to a remote guest minus their own audio — so they can hear you without hearing themselves echoed back with a delay. It’s essential for phone-in guests and international calls. The Zoom PodTrak P4 and RØDECaster Pro II have hardware mix-minus. On other interfaces, you typically set it up in your DAW, which is possible but more complex.
How many inputs do I need for a two-person podcast?
Exactly two — one XLR input per microphone. The Focusrite Scarlett 2i2 and Vocaster Two both cover this cleanly. If one host is remote (not in the same room), you only need one local XLR input; your remote guest’s audio comes through your computer, and loopback handles routing it into the recording.
Is the RØDECaster Pro II worth the price?
For podcasters who want an all-in-one studio hub that replaces an interface, mixer, recorder, and sound pad controller, yes. If you’re paying an audio engineer’s hourly rate to set up separate gear, the RØDECaster pays for itself quickly. If you record solo or two-person shows and are comfortable with DAW software, the Vocaster Two at half the price covers 90% of the same ground.
Do audio interfaces work with iPhones and iPads?
Most USB-C interfaces work with USB-C iPads and recent iPhones using USB-C directly or a Lightning/USB-C adapter. Bus-powered interfaces like the Scarlett 2i2 generally work. Some require a powered USB hub when connected to iOS devices. Check the manufacturer’s iOS compatibility list before assuming compatibility — it varies by model and iOS version.
What’s the best portable audio interface for podcasting on the road?
The Zoom PodTrak P4 is the best portable option for multi-person recording — it runs on AA batteries, records to SD card without a computer, and has 4 XLR inputs with mix-minus. For solo travel recording, the Focusrite Scarlett 2i2 is bus-powered and compact enough for a laptop bag. See our portable podcast microphone guide for complementary gear.
Final Verdict: Which Audio Interface Should You Buy?
Buy the interface that fits the show you have — not the aspirational version of the show you might build in two years. Over-buying is real: the RØDECaster Pro II is overkill for a solo weekly podcast, and the Audient iD4 will frustrate you the moment you add a co-host.
My recommendations in plain terms:
- Solo podcaster with an XLR mic: Focusrite Scarlett 2i2 4th Gen. Full stop.
- Two-host show or interview podcast: Focusrite Vocaster Two if podcast-specific features matter; Scarlett 2i2 if budget is the priority.
- 3–4 people in the room: Zoom PodTrak P4 for portability, UA Volt 476P for studio quality.
- Serious production studio: RØDECaster Pro II.
- Pro studio with DSP needs: UA Apollo Twin X.
The right interface makes every recording session faster, cleaner, and less frustrating. It’s not the most glamorous piece of gear — but it’s the one that everything else depends on.
Related resources: Full Podcast Equipment Guide | Equipment Guide (Helpful Info) | Podcast Equipment Bundles | What Equipment Do You Need for a Podcast? | Podcast Recording Equipment for Solo Podcasters | How to Set Up Podcast Equipment
Best Podcast Microphone for Beginners in 2026
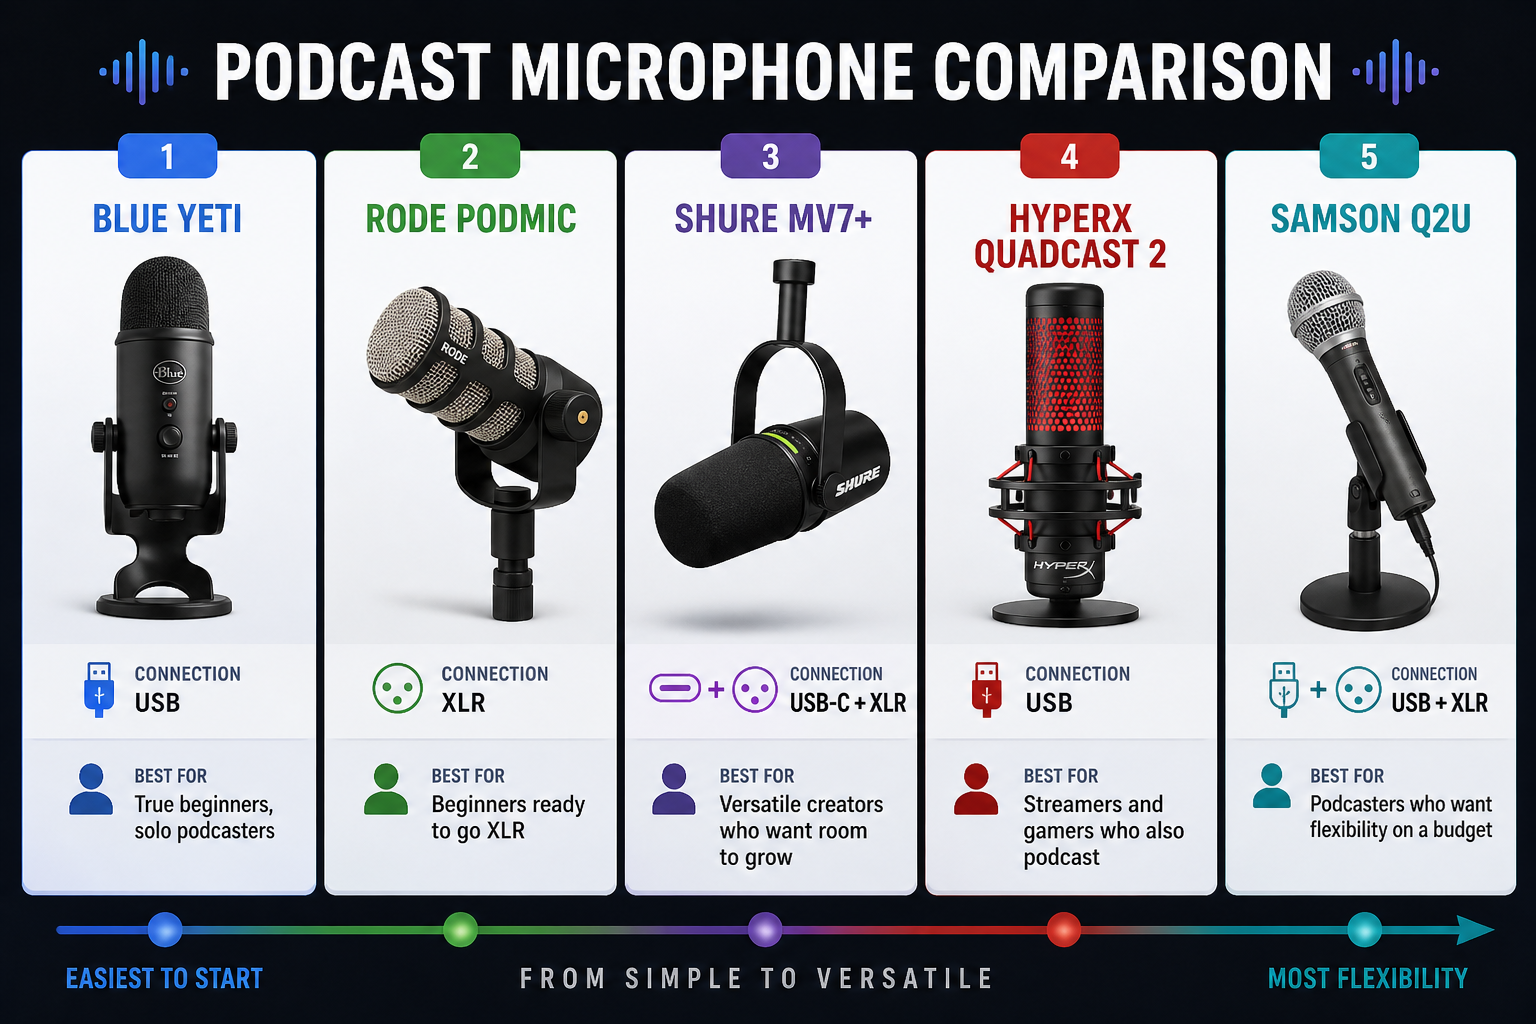
The best podcast microphone for beginners in 2026 is the Blue Yeti. It’s USB plug-and-play, captures broadcast-quality audio without an interface, and costs under $130. If you’re ready to step up to XLR from day one, the Rode PodMic is the best beginner-to-intermediate bridge mic on the market.
Listeners will tolerate a shaky camera, but bad audio ends podcasts. The good news: you don’t need to spend $400 to sound professional. The right beginner mic — matched to your room and workflow — gets you 90% of the way there from your first episode.
→ Check the current price on the Rode PodMic
Best Beginner Podcast Microphones at a Glance
| Microphone | Connection | Price Range | Best For |
|---|---|---|---|
| Blue Yeti | USB | ~$100–$130 | True beginners, solo podcasters |
| Rode PodMic | XLR | ~$100–$120 | Beginners ready to go XLR |
| Shure MV7+ | USB-C + XLR | ~$200–$250 | Versatile creators who want room to grow |
| HyperX QuadCast 2 | USB | ~$120–$150 | Streamers and gamers who also podcast |
| Samson Q2U | USB + XLR | ~$60–$80 | Lowest cost hybrid option |
The 4 Types of Podcast Microphones (And Which One Beginners Actually Need)
Before picking a model, you need to understand the four mic categories. Your room and recording situation matter more than specs.
1. USB Microphones — Best for True Beginners
USB mics combine a microphone and audio interface in one unit. Plug into your laptop or desktop, select it as your input device, and you’re recording. No extra gear required. The Blue Yeti and HyperX QuadCast 2 are the most-recommended in this category.
The tradeoff: USB mics are harder to use in multi-mic setups because most computers only accept one USB audio input cleanly. If you’re planning to eventually record with a co-host in the same room, consider a hybrid or go straight to XLR. See our full breakdown on the XLR vs USB decision before you buy.
2. XLR Dynamic Microphones — Best Bang for the Buck Long-Term
Dynamic mics use a moving coil to capture sound and are forgiving of background noise — the hum of an HVAC, a dog barking down the hall, a keyboard clicking. They require an audio interface or mixer (an extra $50–$100 investment), but the total cost is often comparable to a premium USB mic.
The Rode PodMic is the most popular beginner XLR dynamic for good reason: it sounds like a $300 mic, costs under $120, and is nearly indestructible. For setup guidance, see our podcast microphone setup guide. You’ll also want to check our recommended audio interfaces to pair it with the right interface.
Not sure whether dynamic or condenser is right for your room? Our microphone polar patterns guide explains exactly how pickup patterns affect what your mic hears.
3. XLR Condenser Microphones — Skip These Until Your Room Is Treated
Condensers capture incredible detail — which is the problem. In an untreated bedroom or home office, that sensitivity means they also capture every keyboard click, HVAC rumble, and ambient echo. Unless you’ve foam-treated your walls or record inside a closet, a condenser mic will actually sound worse than a dynamic in most beginner setups.
Once your room is sorted, condensers shine. Popular options include the Audio-Technica AT2020 and Rode NT1-A. For now, start dynamic.
4. USB/XLR Hybrid Microphones — Best for Future-Proofing
Hybrid mics like the Shure MV7+ offer USB simplicity today and XLR capability for later. They cost more upfront but eliminate the need to buy a second mic when you upgrade your setup. If you’re serious about podcasting long-term, the MV7+ is worth the premium. Compare it directly in our Rode PodMic vs Shure MV7+ face-off and the original PodMic vs MV7 comparison.

Best Beginner Podcast Microphones — Full Reviews
1. Blue Yeti — Best USB Mic for Beginners
The Blue Yeti has been the go-to beginner podcast mic for over a decade, and for good reason: it sounds great, it’s simple, and it works on every platform. Four selectable polar patterns (cardioid, bidirectional, omnidirectional, stereo) give you flexibility as your show evolves. Gain control and a zero-latency headphone jack are built in.
The Yeti’s weakness is its size — it’s a large desktop mic that captures more room noise than a dynamic. Keep it 6–8 inches from your mouth in cardioid mode and you’ll get podcast-ready audio. If you upgrade to a boom arm later, the Blue Yeti Nest Boom Arm guide covers the best options.
Verdict: Best first mic for solo podcasters recording in a reasonably quiet room.
2. Rode PodMic — Best XLR Mic for Beginners
The Rode PodMic is a broadcast-style dynamic mic built for close-mic vocal recording. Its tight cardioid pattern and internal shock mount make it forgiving of untreated rooms and table vibrations. You’ll need an interface — a Focusrite Scarlett Solo (~$60) pairs perfectly — but the total cost is competitive with the Yeti.
The PodMic looks the part too, which matters if you’re recording video content alongside your audio. For a complete picture of what comes in a typical XLR beginner setup, see podcast equipment bundles and solo podcaster recording setups.
Verdict: Best XLR beginner mic. Sounds better than its price point suggests.
3. Shure MV7+ — Best Upgrade Mic for Serious Beginners
The MV7+ is Shure’s successor to the wildly popular MV7, adding USB-C connectivity and improved internal preamps. If you’re starting a podcast you plan to monetize or grow aggressively, buying the MV7+ upfront saves you from replacing a cheaper mic in 12 months.
It’s a dynamic mic, so it handles untreated rooms well. The MOTIV app gives you DSP-level control: EQ, compression, limiter, and high-pass filter baked into the firmware. No post-production required if your monitoring game is solid — check our best podcast headphones guide to make sure you can hear what you’re recording.
Verdict: Best mic if you’re investing for the long haul from day one.
4. HyperX QuadCast 2 — Best for Streamers Who Also Podcast
The QuadCast 2 is a USB condenser with a built-in shock mount, LED indicator, and tap-to-mute function. It’s designed for live streaming environments and looks great on camera. It has more pickup than a dynamic, so it’s sensitive to room noise — but if you’re recording in a treated space or small quiet room, it delivers rich, detailed audio.
For streamers using OBS or similar software alongside podcast recording, this mic integrates cleanly. See our StreamYard vs OBS breakdown if you’re also live streaming your podcast.
Verdict: Best beginner mic for creators who record in a treated room and want visual polish on camera.
5. Samson Q2U — Best Budget Beginner Mic
At $60–$80, the Samson Q2U is the best budget hybrid mic available. USB and XLR outputs let you start simple and scale up without buying a new mic. Sound quality is solid for the price — not Blue Yeti-level, but well above built-in laptop audio. If budget is the constraint, this is the call.
Verdict: Best entry-level mic for podcasters who need to start cheap and grow into XLR later.
How to Choose the Right Beginner Podcast Microphone
| Your Situation | Best Choice | Why |
|---|---|---|
| Recording solo in a noisy or untreated room | Rode PodMic (XLR dynamic) | Tight cardioid pattern rejects background noise |
| Want zero extra gear to buy | Blue Yeti (USB) | Plug-and-play, no interface needed |
| Recording with a co-host in the same room | Two Rode PodMics + Behringer mixer | USB doesn’t scale to multi-mic; see our co-host equipment guide |
| Tight budget (<$100 total) | Samson Q2U | USB/XLR hybrid for under $80 |
| Want one mic for 3+ years | Shure MV7+ | Premium build, USB + XLR, DSP processing built in |
| Recording on the go or traveling | See portable podcast mics | Different form factor needed for travel setups |
Essential Accessories for Your First Podcast Setup
The mic is only part of the equation. These accessories separate professional-sounding podcasts from amateur recordings:
Pop Filter: Reduces plosive sounds (the hard “p” and “b” sounds that clip audio). Essential for any condenser mic; helpful for dynamic mics too. Budget ~$10–$20.
Boom Arm or Desk Stand: Keeps the mic at consistent distance from your mouth and isolates it from keyboard vibration. See our microphone setup guide for positioning tips.
Shock Mount: Absorbs desk vibrations before they reach your mic capsule. Most important for condenser mics, but useful for all types.
Closed-Back Headphones: You need to hear what you’re recording in real time. Open-back headphones bleed sound back into the mic. Our best podcast headphones guide covers options at every budget — the Sony MDR-7506 remains the industry standard at ~$100.
Audio Interface (for XLR mics): Converts your XLR mic signal to USB for your computer. See best audio interfaces for podcasting. If you’re considering a mixer with more inputs and built-in effects, the Behringer Xenyx Q802USB is a popular budget option, and the podcast audio mixer overview covers the full category.
Recording Software: Your DAW for editing. See best podcast editing software and editing software for all levels for the full breakdown.
Tips to Get the Best Sound From Any Beginner Mic
Mic distance: Position the mic 6–8 inches from your mouth, slightly off-axis (angled away from your lips). This reduces plosives without a pop filter and keeps the low-end presence that makes voices sound warm.
Treat the room first: Acoustic treatment doesn’t mean expensive foam panels. Heavy curtains, bookshelves full of books, a closet full of clothes, or a duvet draped behind you absorb reflections. If you’re hearing echo in your recordings, read how to fix echo on your mic.
Gain staging: Set your input gain so your voice peaks around -12 to -6 dBFS. Clipping is unfixable in post. Low levels are fixable — see how to increase volume for a podcast audio file.
Monitor with headphones while recording: You can’t fix problems you didn’t hear happening. The right podcast headphones make a measurable difference in your final edit time.
Consistency is everything: Record at the same gain level, same mic position, same time of day if possible. Inconsistent recordings are the hardest to fix in editing.
For a complete overview of your first recording session, see how to record a podcast and home podcast setup. If you’re recording with a remote co-host, how to record a podcast remotely covers the full workflow.
Where This Fits in Your Full Equipment Picture
A great mic is just one piece. For the complete starter setup — mic, interface, headphones, software, and accessories — see the podcast equipment guide and recording equipment for solo podcasters. Budget-focused? The best cheap podcast microphones post covers options under $60. Already thinking about wireless? See wireless podcast microphones.
If you’re also wondering about the total cost of getting started, how much it costs to start a podcast breaks down every budget tier.

Frequently Asked Questions
What is the best microphone for a beginner podcaster?
The Blue Yeti is the best beginner podcast microphone for most people. It connects via USB with no additional gear required, delivers broadcast-quality audio under $130, and works on any computer. For beginners willing to add an audio interface, the Rode PodMic is a better long-term investment at a similar price.
Do I need an audio interface for a beginner podcast microphone?
Not if you buy a USB mic like the Blue Yeti or Samson Q2U. USB mics have the interface built in. If you choose an XLR mic like the Rode PodMic, you’ll need a separate interface — the Focusrite Scarlett Solo (~$60) is the standard beginner recommendation.
Is the Blue Yeti good enough for a professional podcast?
Yes. Hundreds of professional and monetized podcasts use the Blue Yeti. The limiting factor is almost always the room, not the mic. Proper mic technique, acoustic treatment, and clean gain staging matter more than upgrading to an expensive XLR mic.
What’s the difference between a USB and XLR podcast microphone?
USB mics are self-contained — plug directly into your computer and record. XLR mics require an audio interface between the mic and your computer, but offer better signal quality, more gain control, and easier expansion to multi-mic setups. See our full XLR vs USB comparison for a complete breakdown.
Can I use a condenser microphone for podcasting as a beginner?
Only if your recording space is quiet and acoustically treated. Condenser mics are highly sensitive and will capture every background noise, keyboard click, and room echo. In untreated rooms, a dynamic mic like the Rode PodMic will sound significantly better than a condenser at the same price point.
What accessories do I need with a beginner podcast microphone?
Essential: closed-back headphones for monitoring, a pop filter for plosive reduction, and a boom arm or desktop stand for consistent positioning. For XLR mics, add an audio interface. Optional but helpful: a shock mount and basic acoustic panels or foam. See our full podcast equipment bundles guide.
How much should I spend on my first podcast microphone?
Budget $60–$130 for a solid beginner mic. The Samson Q2U at ~$70 is the floor for podcast-quality audio. The Blue Yeti at ~$120 and Rode PodMic at ~$110 are the sweet spot. Spending more than $200 as a first-time podcaster rarely improves your actual sound more than improving your room would. Check how much it costs to start a podcast for full budget planning.
What microphone do professional podcasters use?
The most common professional podcasting microphones are the Shure SM7B (~$400), Electro-Voice RE20 (~$450), and Rode PodMic for shows on a mid-range budget. Many professional shows — including some of the most popular in their categories — still use the Shure MV7 or MV7+. Equipment matters less than technique and room treatment at any level.
Should I buy a dynamic or condenser microphone for podcasting?
Dynamic for most beginners. Dynamic mics reject background noise and are forgiving of untreated rooms — the reality for most home podcasters. Condensers capture more detail and nuance but require a treated, quiet environment to perform well. Our microphone polar patterns guide explains how pickup patterns affect what each type hears.
How do I make my podcast microphone sound better?
The single biggest improvement comes from room treatment — heavy curtains, bookshelves, or recording in a closet. After that: maintain consistent mic distance (6–8 inches), set gain so peaks hit -12 to -6 dBFS, and monitor with closed-back headphones in real time. See microphone techniques for podcasters for the full approach.
Final Verdict
For most beginners, the choice comes down to two mics:
Buy the Blue Yeti if you want zero friction getting started — plug it in and record. It’s the most beginner-friendly podcast mic available at under $130 and will serve you well for years.
Buy the Rode PodMic if you’re willing to pair it with an interface and want a mic that still sounds great two or three setups from now. The total investment is similar to the Yeti and the ceiling is higher.
Either way: treat your room, set your gain correctly, and monitor with headphones. The mic is only as good as the environment you put it in. For everything else you need to build your first professional-sounding setup, start with the complete podcast equipment guide.
How to Convert MP4 to MP3 Safely in 2026 (Free Tools for Podcasters)
The safest way to convert MP4 to MP3 is locally, using free open-source software on your own computer — no uploads, no sketchy websites. FFmpeg is the most powerful option for any platform. HandBrake and VLC are the best GUI alternatives if you prefer a visual interface.
Most online MP4-to-MP3 converters are ad-riddled, privacy-invasive, or outright malicious. This guide covers the tools that actually work, keep your files on your machine, and cost nothing.
[youtube-embed]
Best MP4 to MP3 Converters at a Glance
| Tool | Platform | Batch Support | GUI | Free & Open Source |
|---|---|---|---|---|
| FFmpeg | Win / Mac / Linux | Yes | No (CLI) | Yes |
| HandBrake | Win / Mac / Linux | Yes | Yes | Yes |
| fre:ac | Win / Mac / Linux | Yes | Yes | Yes |
| VLC Media Player | All platforms | Limited | Yes | Yes |
| MediaHuman | Win / Mac | Yes | Yes | Freeware only |
Why You Should Never Use Random Online Converters
Online MP4-to-MP3 converters are one of the most consistently dangerous categories of free web tools. When you upload a file to one of these services, you have no idea where that file goes, how long it’s stored, or who has access to it. Beyond privacy concerns, the sites themselves are frequently loaded with fake “Download” buttons that trigger malware installs, aggressive popup redirects, and tracking scripts.
If a site is free and converts your file instantly, ask yourself: how are they paying for the servers? The answer is usually your data, your attention, or your device’s security.
The good news: every tool in this guide runs locally on your machine. Your files never leave your computer.
Method 1: FFmpeg — Best for Podcasters Who Want Full Control
FFmpeg is a free, open-source command-line tool used by professional video and audio engineers worldwide. It’s what most other converters — including many “free” online tools — run under the hood. Using it directly cuts out the middleman entirely.
Install FFmpeg: Download from ffmpeg.org or install via Homebrew on Mac (brew install ffmpeg) or Chocolatey on Windows (choco install ffmpeg).
Basic MP4 to MP3 conversion:
ffmpeg -i input.mp4 -vn -c:a libmp3lame -q:a 2 output.mp3The -vn flag strips the video stream. The -q:a 2 flag sets quality to near-lossless (scale of 0–9, lower is better). This is the command to use for podcast audio clips where quality matters.
To extract audio without re-encoding (fastest, lossless if source is AAC):
ffmpeg -i input.mp4 -c:a copy output.m4aBatch convert an entire folder:
for f in *.mp4; do ffmpeg -i "$f" -vn -c:a libmp3lame -q:a 2 "${f%.mp4}.mp3"; doneIf you’re already using FFmpeg for other podcast production tasks — trimming files, normalizing audio, or stripping silence — you may also want to read how to transcribe your podcast locally using OpenAI Whisper, which pairs naturally with this workflow.
Best for: Podcasters comfortable with a terminal, batch processing large archives, and anyone who wants maximum quality control.
Method 2: HandBrake — Best GUI Option for Beginners
HandBrake is an open-source media transcoder with a clean graphical interface. While it’s primarily known for video encoding, it can extract and convert audio tracks from MP4 files without touching the video.
How to convert MP4 to MP3 in HandBrake:
- Open HandBrake and drag your MP4 file into the Source window
- Click the Audio tab and set the Codec to MP3
- Set your destination file name (change the extension to .mp3)
- Click Start Encode
HandBrake supports batch processing via the Queue feature — useful if you’re pulling audio from multiple interview recordings or video episodes at once. It’s 100% free with no registration or upsell.
Best for: Beginners who want a visual interface and occasional single-file or batch conversions.
Method 3: fre:ac — Best for Drag-and-Drop Batch Processing
fre:ac (Free Audio Converter) is a lightweight, actively maintained open-source tool designed specifically for audio format conversion. It supports drag-and-drop, handles dozens of formats, and processes batches cleanly without requiring any configuration beyond selecting your output format.
Download from freac.org. Works on Windows, macOS, and Linux. No installer bloatware, no bundled extras.
Best for: Anyone who regularly converts large batches of files and wants a dedicated, distraction-free audio conversion tool.
Method 4: VLC Media Player — Best If You Already Have It Installed
VLC is already on most computers and handles MP4-to-MP3 conversion without any additional installs. It’s slower and less flexible than FFmpeg, but zero-friction for one-off conversions.
How to convert in VLC:
- Open VLC and go to Media > Convert/Save (Ctrl+R on Windows)
- Click Add and select your MP4 file
- Click Convert/Save at the bottom
- Under Profile, select Audio — MP3
- Set your destination file and click Start
VLC doesn’t support true batch processing, so it’s best for occasional single-file conversions.
Best for: One-off conversions when you don’t want to install anything new.
Method 5: MediaHuman Audio Converter — Best Freeware GUI Option
MediaHuman isn’t open-source, but it’s freeware that’s widely regarded as clean — no adware, no bundled software, no usage tracking. It supports drag-and-drop, batch processing, and a wide range of output formats including MP3, WAV, FLAC, and AAC.
Available for Windows and macOS at mediahuman.com.
Best for: Mac users who want a polished GUI and don’t mind using freeware instead of open-source software.
For Podcasters: What to Do With the MP3 After Converting
If you’re extracting audio from video recordings for podcast use, the conversion is just the first step. Here’s what comes next depending on your workflow:
Editing: Import the MP3 into your DAW for cleanup, noise reduction, and leveling. See best podcast editing software and editing software for all levels for the right tool for your skill level. For volume normalization specifically, see how to increase volume for a podcast audio file.
Repurposing: Converted audio clips are ideal for social media snippets. See how to turn your podcast audio into social media content and the broader podcast content repurposing guide.
Transcription: MP3 files work directly with local transcription via OpenAI Whisper or cloud tools like Buzzsprout transcription and Podbean transcription.
Storage: Raw MP4 source files and converted MP3s add up fast. See podcast data storage and the storage mistake that sabotages podcasts for how to manage growing file archives without losing anything.
Format questions: Not sure whether MP3 is the right final format for your podcast host? See best audio format for a podcast.
Frequently Asked Questions
What is the safest way to convert MP4 to MP3?
The safest method is to convert locally using free software like FFmpeg, HandBrake, or VLC — tools that run entirely on your own computer. Your files never leave your machine, eliminating privacy risks, data retention concerns, and the malware exposure common with online converters.
Can I convert MP4 to MP3 without losing quality?
MP3 is a lossy format, so some quality reduction is inherent. Using FFmpeg with -q:a 2 produces near-transparent quality at around 190kbps VBR, which is more than sufficient for podcast audio. If your source MP4 contains AAC audio, you can extract it losslessly using -c:a copy to an M4A container instead.
Is FFmpeg free to use for podcasters?
Yes. FFmpeg is free, open-source software released under the LGPL/GPL license. It has no usage limits, no watermarks, and no registration required. It’s used by professional broadcasters, streaming platforms, and podcast producers worldwide.
Can VLC convert MP4 to MP3?
Yes. VLC can convert MP4 to MP3 using the Media > Convert/Save function. It’s slower than FFmpeg and doesn’t support true batch processing, but it works reliably for single-file conversions and requires no additional software if VLC is already installed.
Why do online MP4 to MP3 converters appear to be free?
Online converters monetize through advertising, user data collection, file retention for unknown periods, and in some cases bundled malware or browser hijackers disguised as download buttons. The actual conversion processing costs real server resources — someone is paying for it, and that someone is usually you in one form or another.
What’s the best audio quality setting for MP3 podcast files?
For spoken-word podcast audio, 128kbps CBR or VBR quality 4–6 (in FFmpeg’s scale) is standard. For music-heavy productions, 192kbps or VBR quality 2 is better. Higher bitrates increase file size without meaningful audible improvement for voice content. See best audio format for podcasts for the full breakdown.
Can I batch convert multiple MP4 files to MP3?
Yes. FFmpeg handles batch conversions via a single shell command. HandBrake and fre:ac also support batch processing through their GUI queue systems. VLC does not natively support true batch conversion.
Does converting MP4 to MP3 remove the video?
Yes. MP3 is an audio-only format. The conversion process extracts the audio stream from the MP4 container and discards the video stream. Your original MP4 file is not modified — the MP3 is a new file. Keep the MP4 as your archival master copy.
Is there a way to convert MP4 to MP3 on iPhone or Android?
Yes, though with more limitations than desktop tools. On iOS, apps like Documents by Readdle can handle basic conversions. On Android, MP3 Video Converter is a commonly used option. For bulk or quality-critical work, desktop tools remain superior. If you’re recording directly on mobile, see how to record a podcast on an iPhone.
What should I do with MP3 files after converting them for my podcast?
Import into your DAW for editing, normalize audio levels, add intro/outro music if needed, then export to your podcast host. See how to edit a podcast for the full post-production workflow. For repurposing audio clips across platforms, see how to turn podcast audio into social media content.
Final Verdict
For podcasters, FFmpeg is the clear first choice — it’s free, professional-grade, runs locally, and handles any conversion task you’ll encounter. The batch processing capability alone makes it worth the 10-minute learning curve.
If the command line isn’t your thing, HandBrake or fre:ac get you the same privacy and quality with a visual interface. VLC works fine for the occasional one-off file.
Avoid online converters. Keep your source MP4 files as archival masters. And make sure your converted MP3s are stored somewhere reliable — see podcast data storage and how to archive and back up your podcast like a pro to build a storage workflow that won’t let you down.
GoPro Mission 1, Mission 1 Pro & Mission 1 Pro ILS Review for Podcasters (2026)
Last Updated: May 1, 2026
👉 Buy the GoPro Mission 1 Pro on Amazon | 👉 Buy the Mission 1 Pro Grip Edition on Amazon
The Bottom Line for Podcasters
The GoPro Mission 1 Pro is the first GoPro that genuinely belongs in a podcast studio. It’s a $699 compact cinema camera with a 50MP 1-inch sensor, 8K60 / 4K240 video, four onboard microphones, 32-bit float audio, Bluetooth 5.3 wireless mic support, and over five hours of continuous recording on a single Enduro 2 battery. For video podcasters, vloggers, and on-location creators, it replaces a webcam, a B-roll camera, a mirrorless rig, and an audio recorder — all in something that weighs 207 grams and fits in a jacket pocket.
If you don’t need the flagship’s high frame rates, the standard Mission 1 ($599) is the sweet spot. If you want interchangeable Micro Four Thirds lenses for cinematic depth-of-field on interview shots, the Mission 1 Pro ILS ($699, Q3 2026) is the only GoPro that can do that.
Quick Comparison: Mission 1 vs Mission 1 Pro vs Mission 1 Pro ILS
| Spec | Mission 1 | Mission 1 Pro | Mission 1 Pro ILS |
|---|---|---|---|
| Price | $599 ($499 sub) | $699 ($599 sub) | $699 ($599 sub) |
| Sensor | 50MP 1-inch | 50MP 1-inch | 50MP 1-inch |
| Processor | GP3 | GP3 | GP3 |
| Lens | Fixed 14mm (159° FOV) | Fixed 14mm (159° FOV) | Micro Four Thirds mount |
| Max Video | 8K30 / 4K120 | 8K60 / 4K240 | 8K60 / 4K240 |
| Open Gate (4:3) | 4K120 | 8K30 / 4K120 | 8K30 / 4K120 |
| Slow Motion | 4K120 / 1080p240 | 4K240 / 1080p960 | 4K240 / 1080p960 |
| 10-Bit GP-Log2 | Yes | Yes | Yes |
| Bitrate | Up to 240 Mbps | Up to 240 Mbps | Up to 240 Mbps |
| Onboard Mics | 4 (32-bit float) | 4 (32-bit float) | 4 (32-bit float) |
| Photos | 50MP RAW | 50MP RAW, 60fps burst | 50MP RAW, 60fps burst |
| Waterproof | 66ft (20m) | 66ft (20m) | Splash-resistant only |
| Weight | ~207g | 207g (+6g hood) | 197g (body only) |
| Autofocus | Fixed focus | Fixed focus | Manual only |
| Ships | May 28, 2026 | May 28, 2026 | Q3 2026 |
Why a GoPro Suddenly Matters for Podcasting
Action cameras and podcast studios used to live in different universes. GoPros lived on dashboards, bike helmets, and ski poles. Podcast cameras were either expensive mirrorless bodies or webcams duct-taped to the top of a monitor. The Mission 1 Series is the first GoPro that actually competes with the cameras most podcasters are already using — and in several ways, it beats them.
The 1-inch sensor is the headline. Every previous GoPro has used a tiny smartphone-class sensor that falls apart in the dim, controlled lighting of a typical home studio. The Mission 1’s sensor is roughly the same size as the one inside the Sony ZV-1 and Canon G7X — cameras that cost more and don’t do half of what this thing does. Pair that with 10-bit GP-Log2 color, 14 stops of dynamic range, and 32-bit float audio recording across all three models, and you’ve got a serious podcast camera that also happens to survive being dropped, splashed, or shoved in a backpack.
If you’re building a video podcast setup right now and weighing your options, this lineup deserves a seat at the table next to a Sony ZV-E10 or Canon R50. We covered the broader landscape in our guide to the best cameras for podcasting, but the Mission 1 Series legitimately shifts the calculus for compact, all-in-one rigs.
Mission 1 Pro: The Flagship
The Mission 1 Pro is GoPro’s headline camera and the one most podcasters should look at first. It’s the $699 model that hits 8K60 video, 4K240 slow motion, 1080p960 burst, and 8K30 Open Gate recording — that last one being a big deal for anyone who repurposes long-form interviews into vertical clips for TikTok, Reels, and Shorts.
Sensor and Image Quality
The 50MP 1-inch stacked CMOS sensor is the heart of the camera. It captures 14 stops of dynamic range, has a 1.6µm pixel pitch (more than double the Hero 13 Black), and supports a Quad Bayer mode that bins pixels for stronger low-light performance. ISO range runs from 100–6400. For podcasters, what this means in practice: your face won’t blow out under ring-light highlights, and you can finally shoot in a softly lit room without grainy mush.
Video Modes That Matter for Podcasters
Most podcasters don’t need 8K60. What you do need is consistent, beautiful 4K at standard frame rates with enough latitude to grade in post — and the Mission 1 Pro nails that. The 240Mbps maximum bitrate, 10-bit color, and GP-Log2 mean your footage drops into a Premiere or DaVinci Resolve timeline alongside footage from a real cinema camera without looking embarrassed.
The Open Gate 8K30 mode is the secret weapon. It records the full 4:3 sensor, giving you a taller frame than 16:9. After the interview, you can crop the same master file into a horizontal 16:9 export for YouTube and a vertical 9:16 export for Shorts/Reels/TikTok — without re-shooting and without losing resolution. If you’ve been wrestling with how to turn podcast content into social media clips, Open Gate quietly solves half the problem.
Audio: Four Mics, 32-Bit Float, and Bluetooth 5.3
This is where the Mission 1 Pro stops being a camera and starts being a podcast tool. Four built-in microphones — a stereo pair on the front, one rear-facing toward the shooter, and a side-mounted drain mic — capture stereo audio with active wind-noise reduction. All four can record in 32-bit float, which is the format that prevents your audio from clipping no matter how loud your guest gets or how close you sit to the camera.
32-bit float matters because clipping is the #1 sin in podcast audio. With a standard 16-bit or 24-bit recording, if your levels go past zero, the waveform gets chopped off and the audio is permanently destroyed. With 32-bit float, that same loud peak is recorded with so much headroom that you can pull the gain down in post and recover a clean signal. For solo vloggers shooting outdoors or interviewers who can’t constantly babysit their levels, this is genuinely a workflow upgrade.
Bluetooth 5.3 lets you pair the camera directly with GoPro’s new Wireless Mic system (or potentially other Bluetooth audio devices), turning the Mission 1 Pro into a wireless lavalier rig with no receiver dongle. The new GoPro Wireless Mic Complete Kit adds two 10-gram magnetic clip-on transmitters with up to 150 meters of range, 6.5 hours of battery per mic, and 24-bit/48kHz audio with dynamic noise reduction. If you’ve been comparing options, our breakdown of DJI Mic 3 vs DJI Mic 2 is the closest competitor benchmark — GoPro’s kit is squarely targeting that segment.
Battery Life and Thermal Performance
The new Enduro 2 battery delivers 5+ hours at 1080p30, 3+ hours at 4K30, 101 minutes at 4K120, 96 minutes of continuous 8K Open Gate recording, and 74 minutes of 8K60 with proper airflow. For a full 90-minute podcast interview shot in 4K, you’ll comfortably finish on a single battery. For long-form documentary work, swap batteries (the new dual charger fast-charges two at once). The Enduro 2 is also backward-compatible with Hero 13 Black bodies, though you won’t get fast charging on the older camera.
Mission 1 (Standard): The Smart Choice for Most Podcasters
The base Mission 1 is, for a lot of podcasters, the better buy. It uses the exact same 50MP 1-inch sensor and GP3 processor as the Pro. Photo quality is identical. Low-light performance is identical. Audio is identical. The four onboard mics, 32-bit float recording, Bluetooth 5.3, and waterproofing all carry over.
What you give up: 8K30 caps out instead of 8K60. Open Gate maxes at 4K120 instead of 8K30. Slow motion tops out at 4K120 / 1080p240 — no 4K240 and no 1080p960 burst. If your podcast involves zero high-speed action, fast cuts, or extreme slow motion, you’ll never miss any of those features. You save $100 ($499 with a GoPro subscription).
For a host shooting weekly interviews in a home studio and reusing the footage on YouTube, the Mission 1 is the camera. The Pro is for creators who actually need 4K240 — adventure podcasters, sports interviewers, anyone shooting B-roll that needs cinematic slow motion.
Mission 1 Pro ILS: The Mirrorless Curveball
The Mission 1 Pro ILS is the most interesting and most flawed model in the lineup. Same sensor, same processor, same video specs as the Pro — but the fixed 14mm lens is replaced with a Micro Four Thirds mount. Body weight drops to 197g (plus whatever lens you mount).
The use case for podcasters is shallow depth-of-field. The native GoPro lens is wide and deep — fine for vlogs and B-roll, but it can’t deliver that creamy out-of-focus background you see on Joe Rogan’s Sony cinema cameras. With the ILS, you can mount a fast 25mm f/1.4 MFT prime and shoot interview footage that finally looks like cinema instead of a security camera.
The catches:
- No autofocus. The mount supports manual lenses only, with no AF support. GoPro says they’re exploring it for the future, but at launch, you nail focus by hand or you don’t nail it.
- Not waterproof. The interchangeable lens mount breaks the seal. Splash-resistant only with a weather-sealed lens; needs a housing for underwater work.
- Sensor/mount mismatch. The 1-inch sensor is smaller than the MFT image circle, so MFT lenses on this body have a roughly 2x crop relative to their MFT-native field of view. Plan focal lengths accordingly.
- Q3 2026 release. You can’t buy it yet at launch.
For a podcaster who already owns a small library of MFT primes (from a Panasonic GH or Olympus body), the ILS is a compelling B-camera. For everyone else, the fixed-lens Mission 1 Pro is more practical.
Mission 1 Pro Grip Edition: What You Get
The Grip Edition bundles the Mission 1 Pro with the new Point-and-Shoot Grip — a 2-in-1 ergonomic handle that turns the camera into something closer to a Sony ZV-1 form factor. The grip is fully mechanical (no electronics in the handle), so it doesn’t compromise the camera’s 66ft waterproof rating. For solo podcasters doing on-location interviews, walking-and-talking vlogs, or run-and-gun B-roll, the Grip Edition is the configuration that makes the Mission 1 Pro feel like a real handheld camera instead of a brick.
👉 Check the GoPro Mission 1 Pro Grip Edition on Amazon
How the Mission 1 Pro Fits a Podcast Workflow
As Your Main Video Podcast Camera
Mount the Mission 1 Pro on a tripod, point it at your interview chair, set it to 4K30 with GP-Log2, plug in headphones via the Media Mod for audio monitoring, and you’ve got a primary camera that costs $699 and produces footage indistinguishable from a $1,500 mirrorless setup at typical viewing sizes. If you’re sourcing a tripod, our best tripods for podcasters guide covers the options.
As a B-Roll and Cutaway Camera
This is where the GoPro DNA actually pays off. Want a wide overhead shot of your studio? Mount it. Want a low-angle shot of the mic and hands? Stick it on a small clamp. Want a guest reaction shot from across the room? Magnetic mount on a bookshelf. The Mission 1 Pro can go places a mirrorless camera physically can’t.
As an On-Location Recording Rig
For podcasters who interview people in the wild — at conferences, on hikes, in noisy bars — the combination of 32-bit float audio, the optional Wireless Mic Kit, and 66-foot waterproofing makes the Mission 1 Pro the closest thing to a one-body field-recording rig that exists. Pair with our portable podcast microphones guide for hybrid setups.
For Live Streaming
The Media Mod’s Micro HDMI output supports up to 4K60 to external monitors, recorders, and switchers — meaning you can plug the Mission 1 Pro into an Atomos recorder, a YoloBox, or directly into OBS via a capture card. If you’re going down the live route, our capture cards for podcasters guide walks through the integration. Or compare the major livestreaming platforms for podcasters to figure out where to send the feed.
Pros and Cons for Podcasters
Mission 1 Pro Pros
- 50MP 1-inch sensor delivers genuinely cinematic image quality in compact form
- 32-bit float audio across all four onboard mics — clipping is no longer your problem
- 10-bit GP-Log2 and 14 stops of dynamic range for serious color grading
- 8K Open Gate enables one-take horizontal + vertical deliverables
- Bluetooth 5.3 wireless mic support without proprietary receivers
- 5+ hour battery runtime at 1080p30, 3+ hours at 4K30
- Waterproof to 66ft with no housing
- Timecode sync for multi-camera shoots
- USB-C external mic support (no proprietary mic required)
- Smaller and lighter than any 8K cinema camera on the market
Mission 1 Pro Cons
- Fixed 14mm lens means no shallow depth-of-field on talking-head shots
- Pricing strategy can get expensive once you add Media Mod, Wireless Mic Kit, and accessories
- Smaller sensor than a Sony FX3 or Canon C70 — still not a true cinema camera
- microSD-only storage; cards rated for high bitrates required
- Pro-level audio features (32-bit float to external mic, etc.) require the Media Mod
- No native iPhone/Android tethered streaming workflow
- Heavier than a Hero 13 Black (208g vs 159g) — noticeable on chest mounts and gimbals
Frequently Asked Questions
Is the GoPro Mission 1 Pro good for podcasting?
Yes. The 50MP 1-inch sensor, 10-bit GP-Log2 color, four onboard microphones with 32-bit float audio, Bluetooth 5.3 wireless mic support, and 5+ hour battery life make it a legitimate primary or B-camera for video podcasts. It’s the first GoPro with a sensor large enough to compete with mirrorless cameras like the Sony ZV-E10 in dim studio lighting.
What’s the difference between the Mission 1 and Mission 1 Pro?
Same sensor, same processor, same audio, same waterproofing. The Mission 1 Pro adds 8K60 video, 4K240 slow motion, 1080p960 burst slow motion, and 8K30 Open Gate recording. The standard Mission 1 caps at 8K30 video, 4K120 slow motion, and 4K120 Open Gate. Mission 1 is $599; Mission 1 Pro is $699.
Does the Mission 1 Pro support 32-bit float audio?
Yes. All four built-in microphones on the Mission 1, Mission 1 Pro, and Mission 1 Pro ILS support 32-bit float recording. This format prevents clipping even at high signal levels by giving you enough headroom to recover loud peaks in post-production. Note: 32-bit float on external microphones requires the optional Media Mod.
How long does the Mission 1 Pro battery last?
The Enduro 2 battery delivers 5+ hours at 1080p30, 3+ hours at 4K30, 101 minutes at 4K120, 96 minutes of continuous 8K Open Gate, and 74 minutes of 8K60 with proper airflow. The new dual charger can fast-charge two batteries simultaneously, and Enduro 2 batteries are backward-compatible with the Hero 13 Black.
Can I use the Mission 1 Pro as a webcam for podcasts?
Yes, via the optional Media Mod’s Micro HDMI output (up to 4K60) feeding into a capture card connected to your computer. There’s also USB-C output for direct webcam-style use, though the cleanest live-streaming workflow goes through the HDMI-to-capture-card path with software like OBS or vMix.
Is the Mission 1 Pro Grip Edition worth the extra money?
For solo podcasters doing on-location vlogs, walk-and-talk interviews, or handheld B-roll, yes. The Point-and-Shoot Grip transforms the camera’s ergonomics into something closer to a compact handheld, and the grip is fully mechanical so it doesn’t compromise the 66ft waterproof rating. For studio-only podcasters, you don’t need it.
Does the Mission 1 Pro ILS have autofocus?
No. The Micro Four Thirds mount supports manual focus only, even with MFT lenses that have AF motors. GoPro has stated they’re exploring autofocus support for the future, but at launch, the ILS is a manual-focus camera. This is the single biggest practical limitation for podcasters considering the ILS as an interview camera.
Can I pair the GoPro Wireless Mic with the Mission 1 Pro over Bluetooth?
Yes. The Mission 1 Series uses Bluetooth 5.3 to pair directly with GoPro’s new Wireless Mic transmitters, eliminating the need for a separate receiver. Two transmitters are supported simultaneously for two-person interviews. Range is up to 150 meters, with 6.5 hours of runtime per mic and 24-bit/48kHz audio with dynamic noise reduction.
What microSD card do I need for the Mission 1 Pro?
For 8K and 4K240 recording at the maximum 240Mbps bitrate, you need a V60 or V90-rated microSD card. UHS-I U3 cards rated A2 will handle most 4K30 work. Storing high-bitrate 8K Open Gate footage will eat space fast — plan for high-capacity cards (256GB minimum) and a robust archive workflow. Our podcaster’s guide to RAID and NAS storage walks through long-term archiving.
When can I buy the Mission 1 Series?
The Mission 1, Mission 1 Pro, and Mission 1 Pro Grip Edition began preorders on May 21, 2026, with global on-shelf availability May 28, 2026. The Mission 1 Pro ILS, Creator Edition, and Ultimate Creator Edition are scheduled for Q3 2026.
Mission 1 Pro vs The Competition
For podcasters specifically, the Mission 1 Pro slots into a competitive landscape that already includes the DJI Osmo Action 6, Insta360 Ace Pro 2, and traditional mirrorless cameras like the Sony ZV-E10 II and Canon EOS R50.
Against the DJI and Insta360 action cams, GoPro wins on sensor size (1-inch vs. smaller types), audio capability (32-bit float, 4 mics, Bluetooth 5.3), and Open Gate flexibility for vertical content. The DJI and Insta360 are cheaper and lighter, which matters more for sports than studio work.
Against entry-level mirrorless cameras, the Mission 1 Pro wins on durability, waterproofing, audio integration, and form factor — but loses on autofocus performance, lens flexibility (until you buy the ILS), and the established native cinema-camera workflow. A $699 Sony ZV-E10 II body gets you better autofocus tracking but no waterproofing, no built-in 32-bit float, and a much bigger physical footprint.
For most video podcasters, the right answer is to pick the Mission 1 Pro or a mirrorless body, not both — and the deciding factor is whether you ever shoot outside, on location, or in conditions where a mirrorless camera would be at risk.
Setting Up Your Mission 1 Pro Studio
If you’re new to building a video podcast studio around a compact camera, the Mission 1 Pro doesn’t change the fundamentals. You still need:
- A real microphone for your voice. The onboard mics are good for B-roll and on-location work, but for studio podcasts you’ll want a dedicated mic. See our roundup of the best podcast microphones.
- Good lighting. Even a 1-inch sensor needs help. Our podcast lighting setups guide covers the basics.
- A monitor for color grading. If you’re shooting 10-bit GP-Log2, you’ll want to grade properly — see best monitors for color grading a podcast.
- Storage. 8K footage piles up fast. Our best NAS for video editing guide covers serious storage options. I personally use a Synology DS1522+ for my podcast workflow and it handles 8K footage without breaking a sweat.
- Editing software. Premiere Pro, DaVinci Resolve, and Final Cut Pro all handle GoPro’s HEVC files cleanly. See our roundup of the best podcast editing software for all levels.
Final Verdict
The GoPro Mission 1 Series is the first time a GoPro has belonged on a serious “best cameras for podcasting” list, and it lands on it strongly. The combination of a 50MP 1-inch sensor, 10-bit GP-Log2 color, 4-mic 32-bit float audio, Bluetooth 5.3, and 5+ hour battery runtime — at $599 to $699 — is genuinely class-leading.
For most video podcasters: buy the standard Mission 1 ($599). The image quality is identical to the Pro, and you’ll never miss the high frame rates.
For creators who actually use slow motion, fast B-roll, or adventure-podcast footage: buy the Mission 1 Pro ($699), ideally as the Grip Edition for handheld work.
For filmmakers who want shallow depth-of-field on interviews and already own MFT lenses: wait for the Mission 1 Pro ILS in Q3 2026, but understand that manual focus is a real workflow constraint.
Whatever you choose, it should be paired with a proper podcast microphone for studio work — the onboard mics are fantastic for what they are, but a Shure MV7 or Rode PodMic still wins for fixed-position interviews. The Mission 1 series is the camera; the mic is still the mic.
👉 Buy the GoPro Mission 1 Pro on Amazon | 👉 Buy the Mission 1 Pro Grip Edition on Amazon
Manual Action Items for WordPress paste:
- YouTube embed: Replace the [YOUTUBE EMBED PLACEHOLDER] near the top with a relevant hands-on or B-roll YouTube embed (DC Rainmaker, MKBHD, Newsshooter, or your own video).
- Featured image: Add a hero image of the Mission 1 Pro from GoPro’s press kit or your own.
- Meta title (60 chars max): “GoPro Mission 1 Pro Review for Podcasters (2026)”
- Meta description (155 chars max): “Full review of the GoPro Mission 1, Mission 1 Pro & Mission 1 Pro ILS for podcasters: 50MP 1-inch sensor, 8K, 32-bit float audio, $599–$699.”
- Schema markup: Add Article + FAQPage + Product schema via your SEO plugin (Rank Math / Yoast / SEOPress).
- Suggested URL slug:
/helpful-info/gopro-mission-1-pro/or/uncategorized/gopro-mission-1-pro/depending on your category strategy. - Internal-link audit: All 14 internal links in the article are verified against the current sitemap (best-cameras-for-podcasting, social-media-content, dji-mic-3-vs-dji-mic-2, best-tripods-for-podcasters, capture-cards, livestreaming-platforms, portable-mics, RAID/NAS guide, best-podcast-microphones, podcast-lighting-setups, color-grading monitors, best-nas-for-video-editing, synology-ds1522, best-podcast-editing-software).
- Affiliate links: Both Amazon links use your existing /3QIga4k (Grip Edition) and /48vfOUI (Mission 1 Pro) shortlinks. Consider adding a third for the standard Mission 1 once it’s live on Amazon.
- Pricing freshness: Re-verify $599 / $699 pricing once cameras ship May 28, 2026. Update if discounted at retail.
- Cannibalization check: No existing GoPro or Mission 1 content on the site — this page should rank cleanly without competing internally. The “best cameras for podcasting” hub will need to be updated to include this model.