episode
What Is Streamyard, This Weird Tool That Helps You Run a Professional Live Show
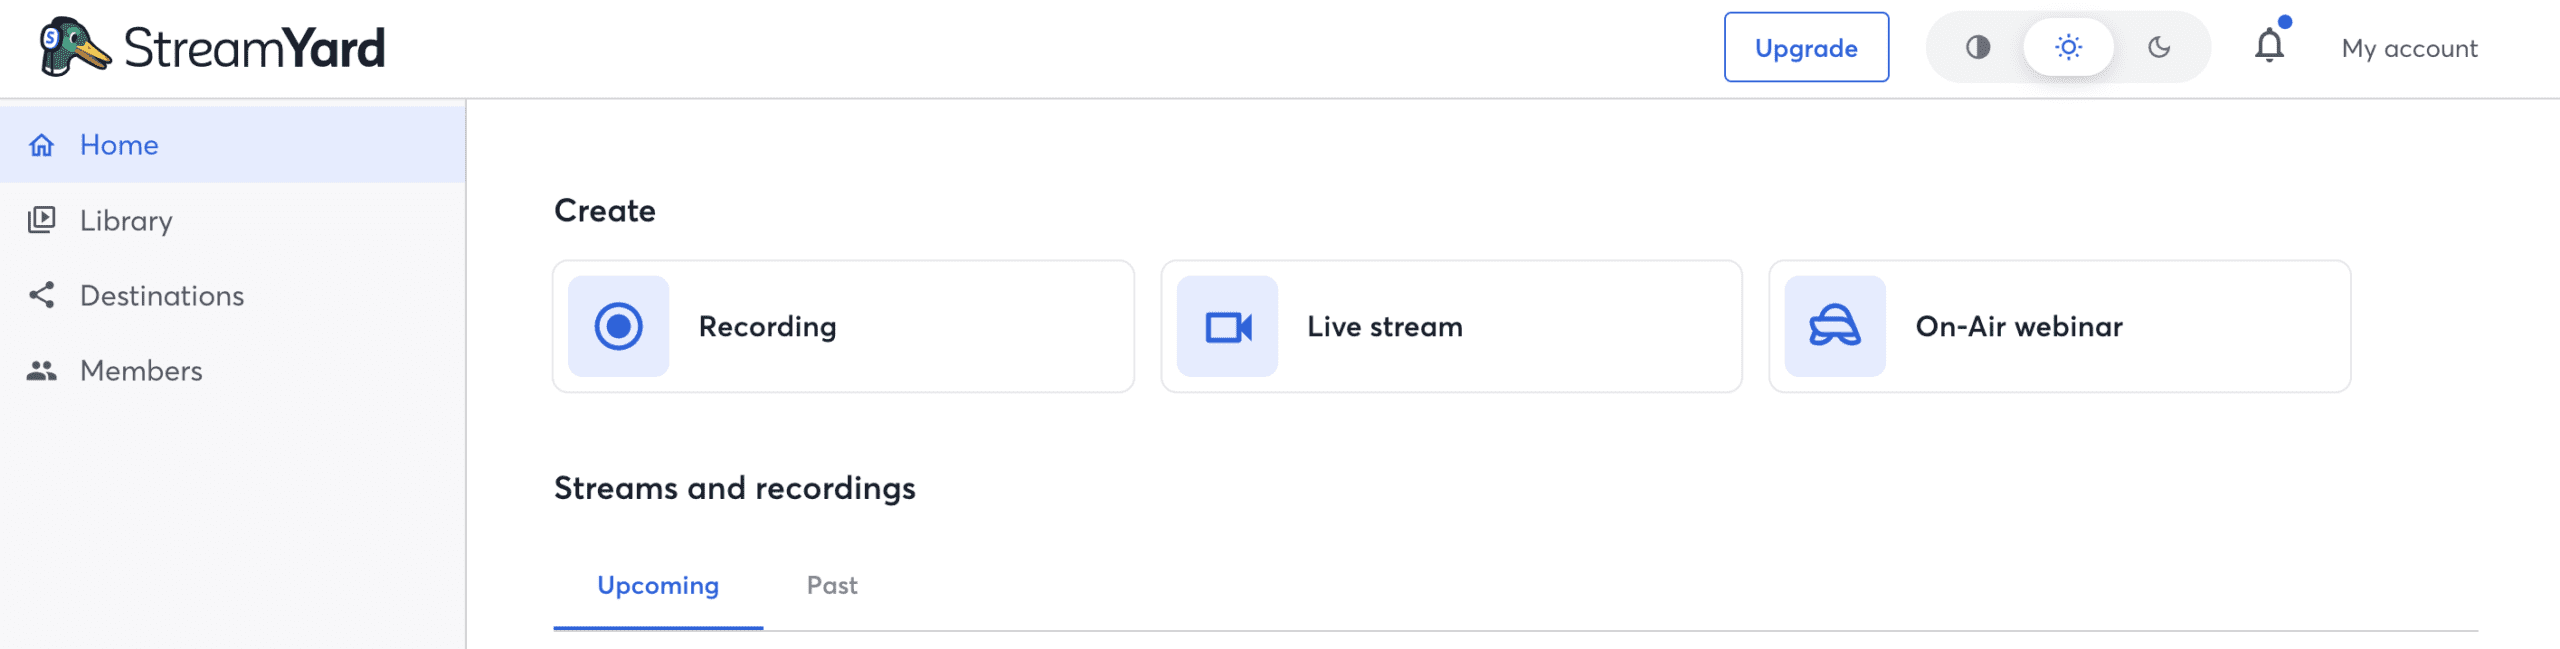
What Is StreamYard?
StreamYard is a browser-based tool for live streaming and recording video where you can bring on guests, add branding (logos, banners, lower-thirds), and broadcast to platforms like YouTube, Facebook, LinkedIn, and more—without installing software.
In simple terms: StreamYard helps you run a professional-looking live show (or recorded interview) from your web browser, with a studio-style control panel that’s designed to be easy to use.
What StreamYard Does (In Plain English)
- Go live on major platforms (or record content without going live).
- Invite guests with a link—no complicated setup for them.
- Show comments on-screen and manage chat while streaming.
- Add branding like overlays, tickers, intros, and name tags.
- Record your stream so you can repurpose it into clips later.
Who StreamYard Is Best For
StreamYard is popular with creators and businesses who want a clean, reliable way to look professional on camera without learning complex software.
- Podcasters who want video interviews and live episodes remotely (click to see how)
- YouTubers doing live Q&A, interviews, or panels
- Coaches & consultants hosting webinars and live trainings
- Small businesses running live demos or community streams
- Teams producing internal or public video updates
See StreamYard Pricing & Plans
Key StreamYard Features
1) Guest-Friendly Interview Setup
You can invite guests by sending a link. They join from their browser, so it’s beginner-friendly compared to many streaming tools.
2) On-Screen Branding
Add your logo, lower-thirds (name tags), banners, and overlays so your stream looks like a real show—not a basic video call.
3) Multistreaming
Stream to multiple platforms at once (depending on your plan), which helps you reach more people without doing separate live sessions.
4) Comment & Chat Overlays
Pull viewer comments onto the screen during your stream—great for Q&A and community engagement.
5) Recording for Repurposing
Record your show so you can cut clips for TikTok/Shorts/Reels, turn episodes into podcasts, or reuse content in ads.
StreamYard Pros and Cons
Pros
- Very easy to use (works in a web browser)
- Guests can join quickly with minimal tech friction
- Strong live-show tools (branding, layouts, on-screen comments)
- Good for consistency and speed
Cons
- Not a full video editor (you’ll still want editing tools for heavy post-production)
- Advanced “broadcast” automation is limited compared to OBS
- Recording quality depends on your internet/browser/device
StreamYard vs Zoom vs OBS (Quick Comparison)
- StreamYard: Best for live shows, branding, guest interviews, and simplicity.
- Zoom: Best for meetings; okay for webinars; not designed for “show-style” streaming.
- OBS Studio: Best for advanced production control; harder to learn and manage live.
Is StreamYard Free?
StreamYard typically offers a free plan with limits (such as StreamYard branding or feature restrictions), and paid plans that unlock more destinations, branding options, and higher-quality tools.
If you’re streaming professionally or using your live videos for marketing, you’ll usually want a paid plan for full branding control.
FAQ
Do I need to download StreamYard?
No. StreamYard runs in your browser (Chrome is the most common choice).
Can StreamYard record without going live?
Yes—many creators use it to record interviews and then upload the finished video later.
Can I use StreamYard for a podcast?
Yes. It’s commonly used for video podcasts, remote interviews, and live podcast episodes.
What’s the biggest reason people choose StreamYard?
It’s simple and reliable for live streaming, especially when you want guests and on-screen branding without complicated setup.
Bottom Line
If you want an easy way to go live, record interviews, bring on guests, and look professional without learning complex broadcasting software, StreamYard is one of the most straightforward tools to start with.
See StreamYard Pricing & Plans
StreamYard vs. Riverside: Stop Comparing Features, Start Comparing Risks
Most reviews will tell you that StreamYard is for live streaming and Riverside is for recording. While true, that advice is useless when you are staring at a “Buy Now” button.
The real difference isn’t about features; it is about friction.
If you are a creator, a marketer, or a business owner, you aren’t just buying software. You are buying a workflow. You are choosing between Live Safety (StreamYard) and Studio Quality (Riverside).
This guide ignores the marketing fluff to put both platforms through the “Reality Test”—focusing on what happens when the internet drops, the guest isn’t tech-savvy, or you’re running late on a deadline.
Click here to try StreamYard for free →
Feature Comparison: StreamYard vs. Riverside
| Feature | StreamYard | Riverside |
|---|---|---|
| Local Recording | No | Yes (up to 4K video, 48kHz WAV audio) |
| Multistreaming | Yes | Yes (select plans) |
| Guest Capacity | Up to 10 guests | Up to 8 guests |
| Branding Tools | Custom overlays, banners, logos | Branding on recordings |
| Ease of Use | Very easy (browser-based) | Easy but more advanced tools |
| Video Quality | Up to 1080p | Up to 4K |
| Audio Quality | Good | Excellent (uncompressed WAV) |
| Editing Tools | None built-in | AI-powered, timeline & text-based |
| Transcription | No | Yes |
| Pricing | Free + paid plans | Paid plans (with free trial) |
-
StreamYard is a Broadcaster. It processes video in the cloud. It prioritizes keeping the stream alive above all else. If your internet dips, the quality lowers, but the show goes on.
-
Riverside is a Recorder. It processes video locally on your computer (and your guest’s computer). It prioritizes resolution (4K) above all else. It uploads massive files in the background while you talk.
We Recommend Checking Out StreamYard Pricing & Plans (2026)
Risk Factor 1: The “Guest Friction” Test
The Scenario: You are interviewing a VIP guest who is using an older laptop (a “potato”) on weak hotel Wi-Fi.
The Riverside Reality: High Reward, High Risk
Because Riverside records “locally” (on the guest’s actual device), it demands significant processing power (CPU).
-
The Risk: If your guest opens Riverside on an old laptop with 20 Chrome tabs open, their fan will start spinning, and their browser might freeze.
-
The Bottleneck: After the interview ends, the guest must keep their browser open to finish uploading the high-quality file. If they close the tab too early, you lose the high-quality footage. This can be awkward to enforce with VIP guests.
The StreamYard Reality: The “it Just Works” Factor
StreamYard is incredibly lightweight because the heavy lifting is done on StreamYard’s servers, not your laptop.
-
The Benefit: It works on tablets, phones, and old computers without issue.
-
The Trade-off: You are recording the internet feed. If the guest has bad Wi-Fi, their video will look pixelated (blocky) because you are capturing what is coming over the wire, not what is on their camera sensor.
The Verdict: If you control the environment (e.g., internal team meetings), choose Riverside. If you interview strangers with unknown tech skills, choose StreamYard for safety.
Risk Factor 2: The “Sync Panic” (Audio Drift)
The Scenario: You record a 60-minute episode. When you open the files to edit, the guest’s lips are moving 2 seconds after their voice is heard.
The Riverside Reality
Variable frame rates and local recording glitches can sometimes cause “Audio Drift.” While Riverside has improved this massively in 2024/2025, it is a known risk of browser-based local recording.
-
The Workflow Cost: If drift happens, you (or your editor) must manually cut and slide the audio track every few minutes to get it back in sync. It turns a 1-hour edit into a 4-hour nightmare.
The StreamYard Reality
Because StreamYard is processing a live feed, the audio and video are “baked” together in real-time.
-
The Benefit: It is nearly impossible for a StreamYard recording to be out of sync. The file you download is exactly what you saw on screen.
-
The Trade-off: The audio is compressed. It sounds like a good phone call or Zoom call, not a studio WAV file.
The Verdict: Do you have an editor? If yes, they can handle Riverside’s quirks. If you are a “one-man band,” StreamYard offers peace of mind.
Risk Factor 3: Post-Production Speed
The Scenario: The recording finishes at 2:00 PM. You want it on YouTube by 3:00 PM.
StreamYard: The “Zero-Edit” Workflow
StreamYard is designed to be “Live-to-Tape.” You can add your logo, lower-third name tags, and intro videos while you are recording.
-
The Result: When you hit “End Broadcast,” the video is essentially finished. You can download it and upload it to YouTube immediately. No rendering, no syncing, no branding to add in post.
Riverside: The “Pro-Edit” Workflow
Riverside gives you the raw ingredients: a high-quality video track and a high-quality audio track for every guest.
-
The Result: You must edit these. You have to sync them, color correct them (since they are raw), and add your branding in software like Premiere Pro or Descript.
-
Note: Riverside has added AI editing tools (“Magic Clips”), but for full episodes, most users still export to an external editor for fine-tuning.
The Comparison Matrix: Risks & Rewards
Here is the breakdown of what you are actually signing up for:
| Feature | StreamYard (The “Broadcaster”) | Riverside (The “Filmmaker”) |
| Primary Goal | Reliability. “The stream must not fail.” | Fidelity. “The video must look 4K.” |
| Video Quality | Good (1080p). Dependent on internet speed. | Excellent (4K). Independent of internet speed. |
| Guest Requirements | Low. Works on weak Wi-Fi & old devices. | High. Needs strong CPU & Chrome/Edge. |
| The “Silent” Risk | Pixelated video if connection drops. | Audio Drift or guest closing tab too early. |
| Editing Workflow | Fast. “Baked-in” branding means zero editing. | Slow. Requires syncing & mixing tracks. |
| Best For… | Solopreneurs, Live Streamers, Non-Techies. | Podcast Networks, production teams, “Clip” creators. |
Final Recommendation: Which “Anxiety” Can You Handle?
You aren’t choosing a tool; you are choosing which problem you prefer to deal with.
Buy StreamYard If:
-
You are a Solo Creator: You don’t have time to edit multitrack audio. You want to hit “Record,” have your name tag appear automatically, and upload the file instantly.
-
You Value “Live” Engagement: You want to highlight user comments on the screen in real-time to build community.
-
Your Guests are Unpredictable: You interview people who might struggle with technology.
Buy Riverside If:
-
You are Building a Brand Asset: You want your podcast clips to look like Netflix quality on TikTok/Instagram (4K vertical video).
-
You Have an Editor: Or you are a patient editor. You are willing to spend time fixing audio levels or sync issues to get perfect quality.
-
You Hate “Zoom Quality”: You refuse to accept the grainy video look that comes with internet streaming.
The Bottom Line: If you want to be a broadcaster, get StreamYard. If you want to be a filmmaker, get Riverside.
StreamYard Pricing & Plans
StreamYard vs Streamlabs: One Is Overrated, The Other Is a Game-Changer
In the competitive world of live streaming, creators need platforms that are powerful yet accessible. Two of the most popular options—StreamYard and Streamlabs—make it easier than ever to go live, engage your audience, and build a brand.
But which one is the right fit for you? In this guide, we’ll break down their features, pricing, ease of use, and unique strengths so you can make an informed decision.
An Overview of StreamYard and Streamlabs
StreamYard: The Master of Simplicity
StreamYard is a browser-based live streaming studio designed for ease of use. With features like custom branding, overlays, guest interviews, and multistreaming, anyone can produce professional broadcasts without complex setup. It’s a favorite for YouTubers, podcasters, and businesses that want to connect live with minimal hassle.
Streamlabs: The All-in-One Creator Platform
Streamlabs has grown into a full ecosystem for creators. While it offers a browser-based studio, it also provides a desktop app and tools for monetization, audience engagement, and growth. From tipping and donations to an integrated merch store and app marketplace, Streamlabs is built for creators who want to go beyond streaming and build a career.
Feature Comparison
| Feature | StreamYard | Streamlabs |
|---|---|---|
| Platform | Browser-based | Browser + desktop app |
| Ease of Use | Extremely easy | Easy, but more complex |
| Guest Management | Up to 10 guests | Up to 12 guests |
| Multistreaming | Built-in | Built-in |
| Branding | Logos, overlays, backgrounds | Custom themes, overlays, logos |
| Monetization | Relies on platform tools | Yes (tipping, donations, merch) |
| App Store | No | Yes (hundreds of extensions) |
| Video Quality | Up to 1080p | Up to 1080p with dynamic bitrate |
| Pricing | Free & paid plans | Free & Streamlabs Ultra ($19/mo) |
Core Strengths
-
StreamYard: Simple, user-friendly, and reliable for professional-looking live events.
-
Streamlabs: Feature-packed with advanced monetization and customization options.
Unique Features
-
StreamYard: A backstage area to prep with guests before going live.
-
Streamlabs: A massive app store and “Collab Cam,” which lets guests join as a second camera source from their phone.
Pricing
-
StreamYard: Free plan (20 hrs/month with branding). Paid plans start at $20/month, unlocking custom branding, higher limits, and multistreaming.
-
Streamlabs: Free plan with limited features. Streamlabs Ultra is $19/month, adding unlimited multistreaming, monetization tools, premium themes, and full app store access.
Ease of Use
-
StreamYard: Beginner-friendly; no downloads required. Up and running in minutes.
-
Streamlabs: Still accessible, but its advanced features and desktop app can overwhelm beginners. Best suited for those ready to dive deeper.
Video & Audio Quality
-
StreamYard: Up to 1080p, reliant on your internet connection.
-
Streamlabs: Up to 1080p with dynamic bitrate to maintain stability if your connection fluctuates.
Guest Management
-
StreamYard: Up to 10 participants; guests join via link—no account required.
-
Streamlabs: Up to 12 participants; Collab Cam adds extra flexibility for mobile guests.
Integrations
-
StreamYard: Works with major platforms like YouTube, Facebook, LinkedIn, Twitch, plus services like Restream and Ecamm Live.
-
Streamlabs: Integrates through its app store—covering chat moderation, analytics, sound effects, and more.
Customer Support
-
StreamYard: 24/7 live chat, community forum, and extensive help docs.
-
Streamlabs: 24/7 live chat, help center, and a large creator community.
Who Should Use Each?
-
StreamYard is best for:
-
Beginners who want the fastest path to polished live streams.
-
Businesses running webinars, events, and interviews.
-
Creators who value simplicity over complexity.
-
-
Streamlabs is best for:
-
Streamers who want to monetize via donations, tips, or merch.
-
Power users who love customization and apps.
-
Brands building a professional, revenue-driven channel.
-
Conclusion: The Final Verdict
Both StreamYard and Streamlabs are excellent—but they serve different goals:
-
Choose StreamYard if you want a straightforward, professional studio for live streaming.
-
Choose Streamlabs if you want monetization tools, deep customization, and long-term growth potential.
Since both have free plans, the best way to know which is right for you is to test them yourself.
StreamYard vs OBS: Why Most Creators Pick the Wrong One
In the dynamic world of live streaming, creators face a crucial decision: which broadcasting software is the right fit? The choice often comes down to a trade-off between simplicity and power.
On one side, there’s StreamYard—a browser-based studio celebrated for ease of use. On the other, OBS (Open Broadcaster Software)—a free, open-source powerhouse offering unmatched customization.
In this guide, we’ll break down features, pricing, and strengths of both StreamYard and OBS so you can choose the platform that best fits your streaming goals.
An Overview of StreamYard and OBS
StreamYard: The Epitome of Simplicity
StreamYard makes it easy for anyone to stream professional-looking shows. From custom branding to guest interviews and multistreaming, everything is built right into the browser. No technical expertise required—making it ideal for YouTubers, podcasters, and businesses.
OBS: The Powerhouse of Customization
OBS is an open-source favorite among pros. It allows complete control over scenes, layouts, and sources, making it perfect for gamers and power users. With plugins and limitless flexibility, OBS is the tool of choice for streamers who want full creative control.
Feature Comparison
| Feature | StreamYard | OBS |
|---|---|---|
| Platform | Browser-based | Desktop app (Windows, macOS, Linux) |
| Ease of Use | Extremely easy | Steeper learning curve |
| Customization | Limited (branding, overlays) | Full (scenes, plugins, sources) |
| Guest Management | Yes (up to 10 guests) | No (requires third-party tools) |
| Multistreaming | Built-in | Requires plugins/services |
| Video Quality | Up to 1080p | 4K+ (depends on hardware) |
| Audio Quality | Good | Excellent (with tuning) |
| Resource Usage | Low | High (hardware intensive) |
| Pricing | Free & paid plans | 100% free, open-source |
Core Differences
-
StreamYard focuses on ease of use with features like guest management and multistreaming baked in.
-
OBS is all about control, letting you fine-tune resolution, bitrate, and effects for pro-level production.
Pricing
-
StreamYard: Free plan (20 hrs/month with branding). Paid plans start at $20/month, unlocking multistreaming, branding, and higher limits.
-
OBS: Completely free. No tiers, no limits.
Ease of Use
-
StreamYard: Beginner-friendly, intuitive interface, live in minutes.
-
OBS: Powerful but technical—setup requires time, knowledge, and configuration.
Video & Audio Quality
-
StreamYard: Streams at up to 1080p. Internet stability impacts quality.
-
OBS: Supports 4K+, full control over encoding, resolution, and bitrate. Audio can be tuned for professional results.
Guest Management
-
StreamYard: Up to 10 guests with simple link invites + backstage prep area.
-
OBS: No built-in guest tools—requires Discord, Zoom, or similar integrations.
Integrations
-
StreamYard: Connects with YouTube, Facebook, LinkedIn, Twitch, Restream, and more.
-
OBS: Vast plugin ecosystem—everything from chat overlays to advanced audio processing.
Support
-
StreamYard: 24/7 live chat, knowledge base, and forums.
-
OBS: No official support, but a strong community via forums, Discord, and Reddit.
Who Should Use Each?
-
StreamYard is best for:
-
Beginners who value simplicity.
-
Creators hosting interviews or business live events.
-
Those who want multistreaming with minimal setup.
-
-
OBS is best for:
-
Professional streamers who want complete customization.
-
Gamers and creators with strong technical setups.
-
Budget-conscious streamers (since it’s free).
-
Conclusion: The Final Verdict
Both platforms are excellent but serve different audiences:
-
Choose StreamYard if you want the easiest, most beginner-friendly way to host polished streams with guests.
-
Choose OBS if you need maximum power and flexibility, and don’t mind a learning curve.
Since both have free options, the best move is to test them and see which matches your workflow.
StreamYard vs. Zoom: Which Platform Reigns Supreme for Live Streaming and Webinars?
When it comes to online communication, two platforms stand out: StreamYard and Zoom. While both allow real-time video and audio, they serve very different purposes. StreamYard is a browser-based live streaming studio built for creators, while Zoom is the go-to video conferencing tool for businesses, schools, and organizations.
So which is better for your needs—broadcasting, webinars, or meetings? Let’s dive into a head-to-head comparison.
An Overview of StreamYard and Zoom
StreamYard: The Live Streaming Studio
StreamYard is designed for simplicity. With no downloads required, it lets creators multistream across platforms like YouTube, Facebook, LinkedIn, and Twitch. Features like custom branding, banners, overlays, and guest interviews make it easy to run professional broadcasts.
Zoom: The Video Conferencing Giant
Zoom is a household name for virtual meetings, webinars, and online events. Known for reliability and scalability, Zoom is widely used by businesses, schools, and organizations worldwide. While it’s primarily a conferencing tool, Zoom also supports live streaming webinars to larger audiences.
Feature Comparison
| Feature | StreamYard | Zoom |
|---|---|---|
| Primary Use | Live streaming & broadcasting | Video conferencing & webinars |
| Platform | Browser-based | Desktop & mobile apps |
| Guest Management | Up to 10 on-screen participants | Up to 1,000 webinar participants |
| Multistreaming | Built-in (multiple platforms) | Yes (one platform at a time) |
| Branding | Logos, overlays, backgrounds | Limited (virtual backgrounds, name tags) |
| Ease of Use | Very easy | Easy, but more advanced features |
| Video Quality | Up to 1080p | Up to 1080p |
| Recording | Local & cloud | Local & cloud |
| Pricing | Free & paid plans | Free & paid plans |
Core Differences
-
StreamYard: Built for broadcasting, with easy multistreaming and custom branding tools.
-
Zoom: Built for meetings and webinars, with breakout rooms, polling, Q&A, and large-scale participant support.
Unique Features
-
StreamYard: A backstage area for prepping guests before going live.
-
Zoom: Breakout rooms, perfect for group discussions during webinars and workshops.
Pricing
-
StreamYard: Free plan (20 hrs/month, with branding). Paid plans start at $20/month, unlocking multistreaming, branding, and higher streaming limits.
-
Zoom: Free plan allows 100 participants for 40 minutes. Paid plans start at $14.99/month, with longer meetings, cloud recording, and webinar options up to 1,000 participants.
Ease of Use
-
StreamYard: Extremely beginner-friendly, minimal setup, live in minutes.
-
Zoom: Also user-friendly, but its advanced features (like breakout rooms and reports) come with a learning curve.
Video & Audio Quality
Both offer up to 1080p.
-
StreamYard: Great for streaming, but quality depends on your internet connection.
-
Zoom: Optimized for stability—even in low-bandwidth environments—though quality can dip with larger participant counts.
Guest Management
-
StreamYard: Up to 10 guests on-screen; link-based invites make joining seamless.
-
Zoom: Supports 100–1,000 participants; powerful tools like registration, breakout rooms, and webinar modes.
Integrations
-
StreamYard: Integrates with YouTube, Facebook, LinkedIn, Twitch, plus services like Restream and Ecamm Live.
-
Zoom: Vast app marketplace, with integrations for scheduling, CRMs, project management, and marketing.
Customer Support
-
StreamYard: 24/7 live chat, knowledge base, and forums.
-
Zoom: 24/7 phone, chat, and email support, plus a large help center and community.
Who Should Use Each?
-
StreamYard is best for:
-
Live streamers and podcasters.
-
Creators who want multistreaming and branding.
-
Businesses hosting live virtual events.
-
-
Zoom is best for:
-
Businesses and organizations needing reliable meetings.
-
Schools and educators hosting classes.
-
Large-scale webinars and corporate events.
-
Conclusion: The Final Verdict
Both are excellent platforms, but they serve different purposes:
-
Choose StreamYard if your priority is professional live streaming with branding and multistreaming.
-
Choose Zoom if you need a scalable video conferencing platform with advanced webinar tools.
Both offer free plans, so the best way to decide is to test them yourself.
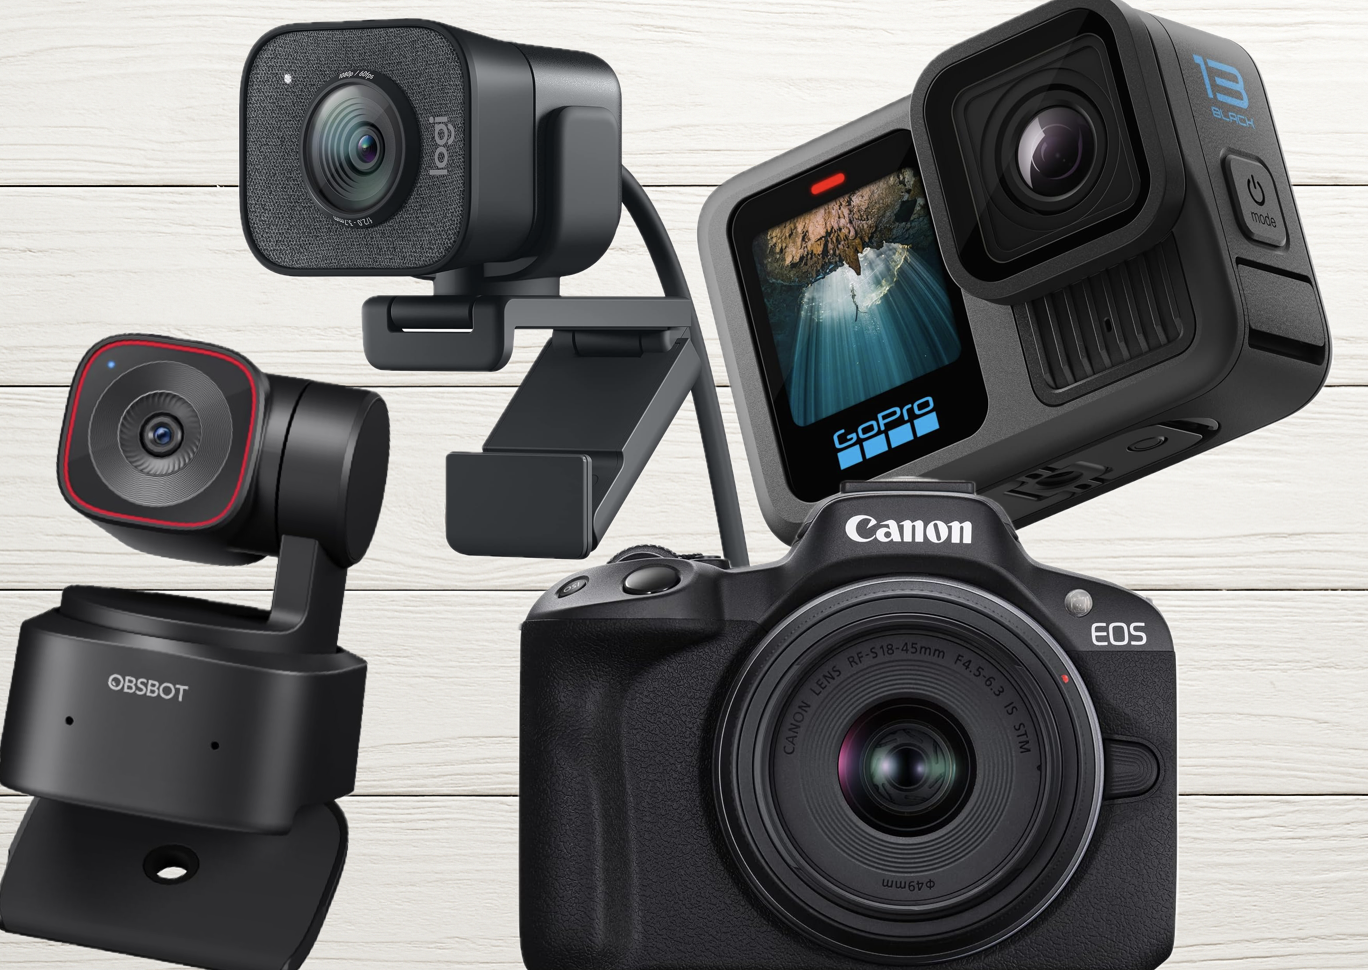
The Ultimate Guide to Choosing Cameras and Lenses for Podcasting
Click to see our top camera pick
Why Your Camera Choice Matters in Podcasting
Video podcasts are on the rise, and for good reason. A high-quality video setup enhances audience engagement, boosts your brand’s professionalism, and opens doors to monetization. Choosing the right camera and lens will help create a polished, professional look that captures attention. In this guide, we’ll explore everything you need to know about cameras, lenses, and setups for podcasting success.
Podcasting Camera Types
Click here for my favorite all-around podcast camera
When selecting a camera for your podcast, it’s important to understand the pros and cons of each type. Your ideal choice depends on your podcasting style, content goals, and budget.
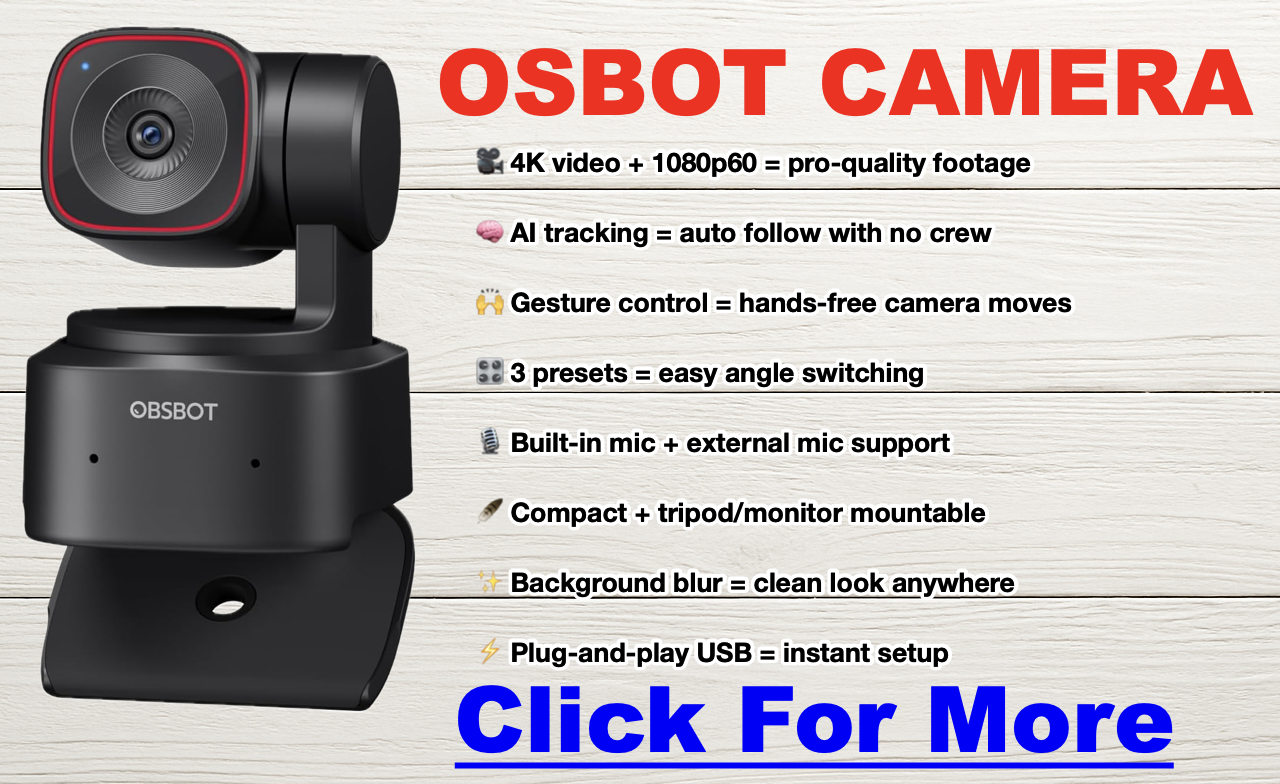
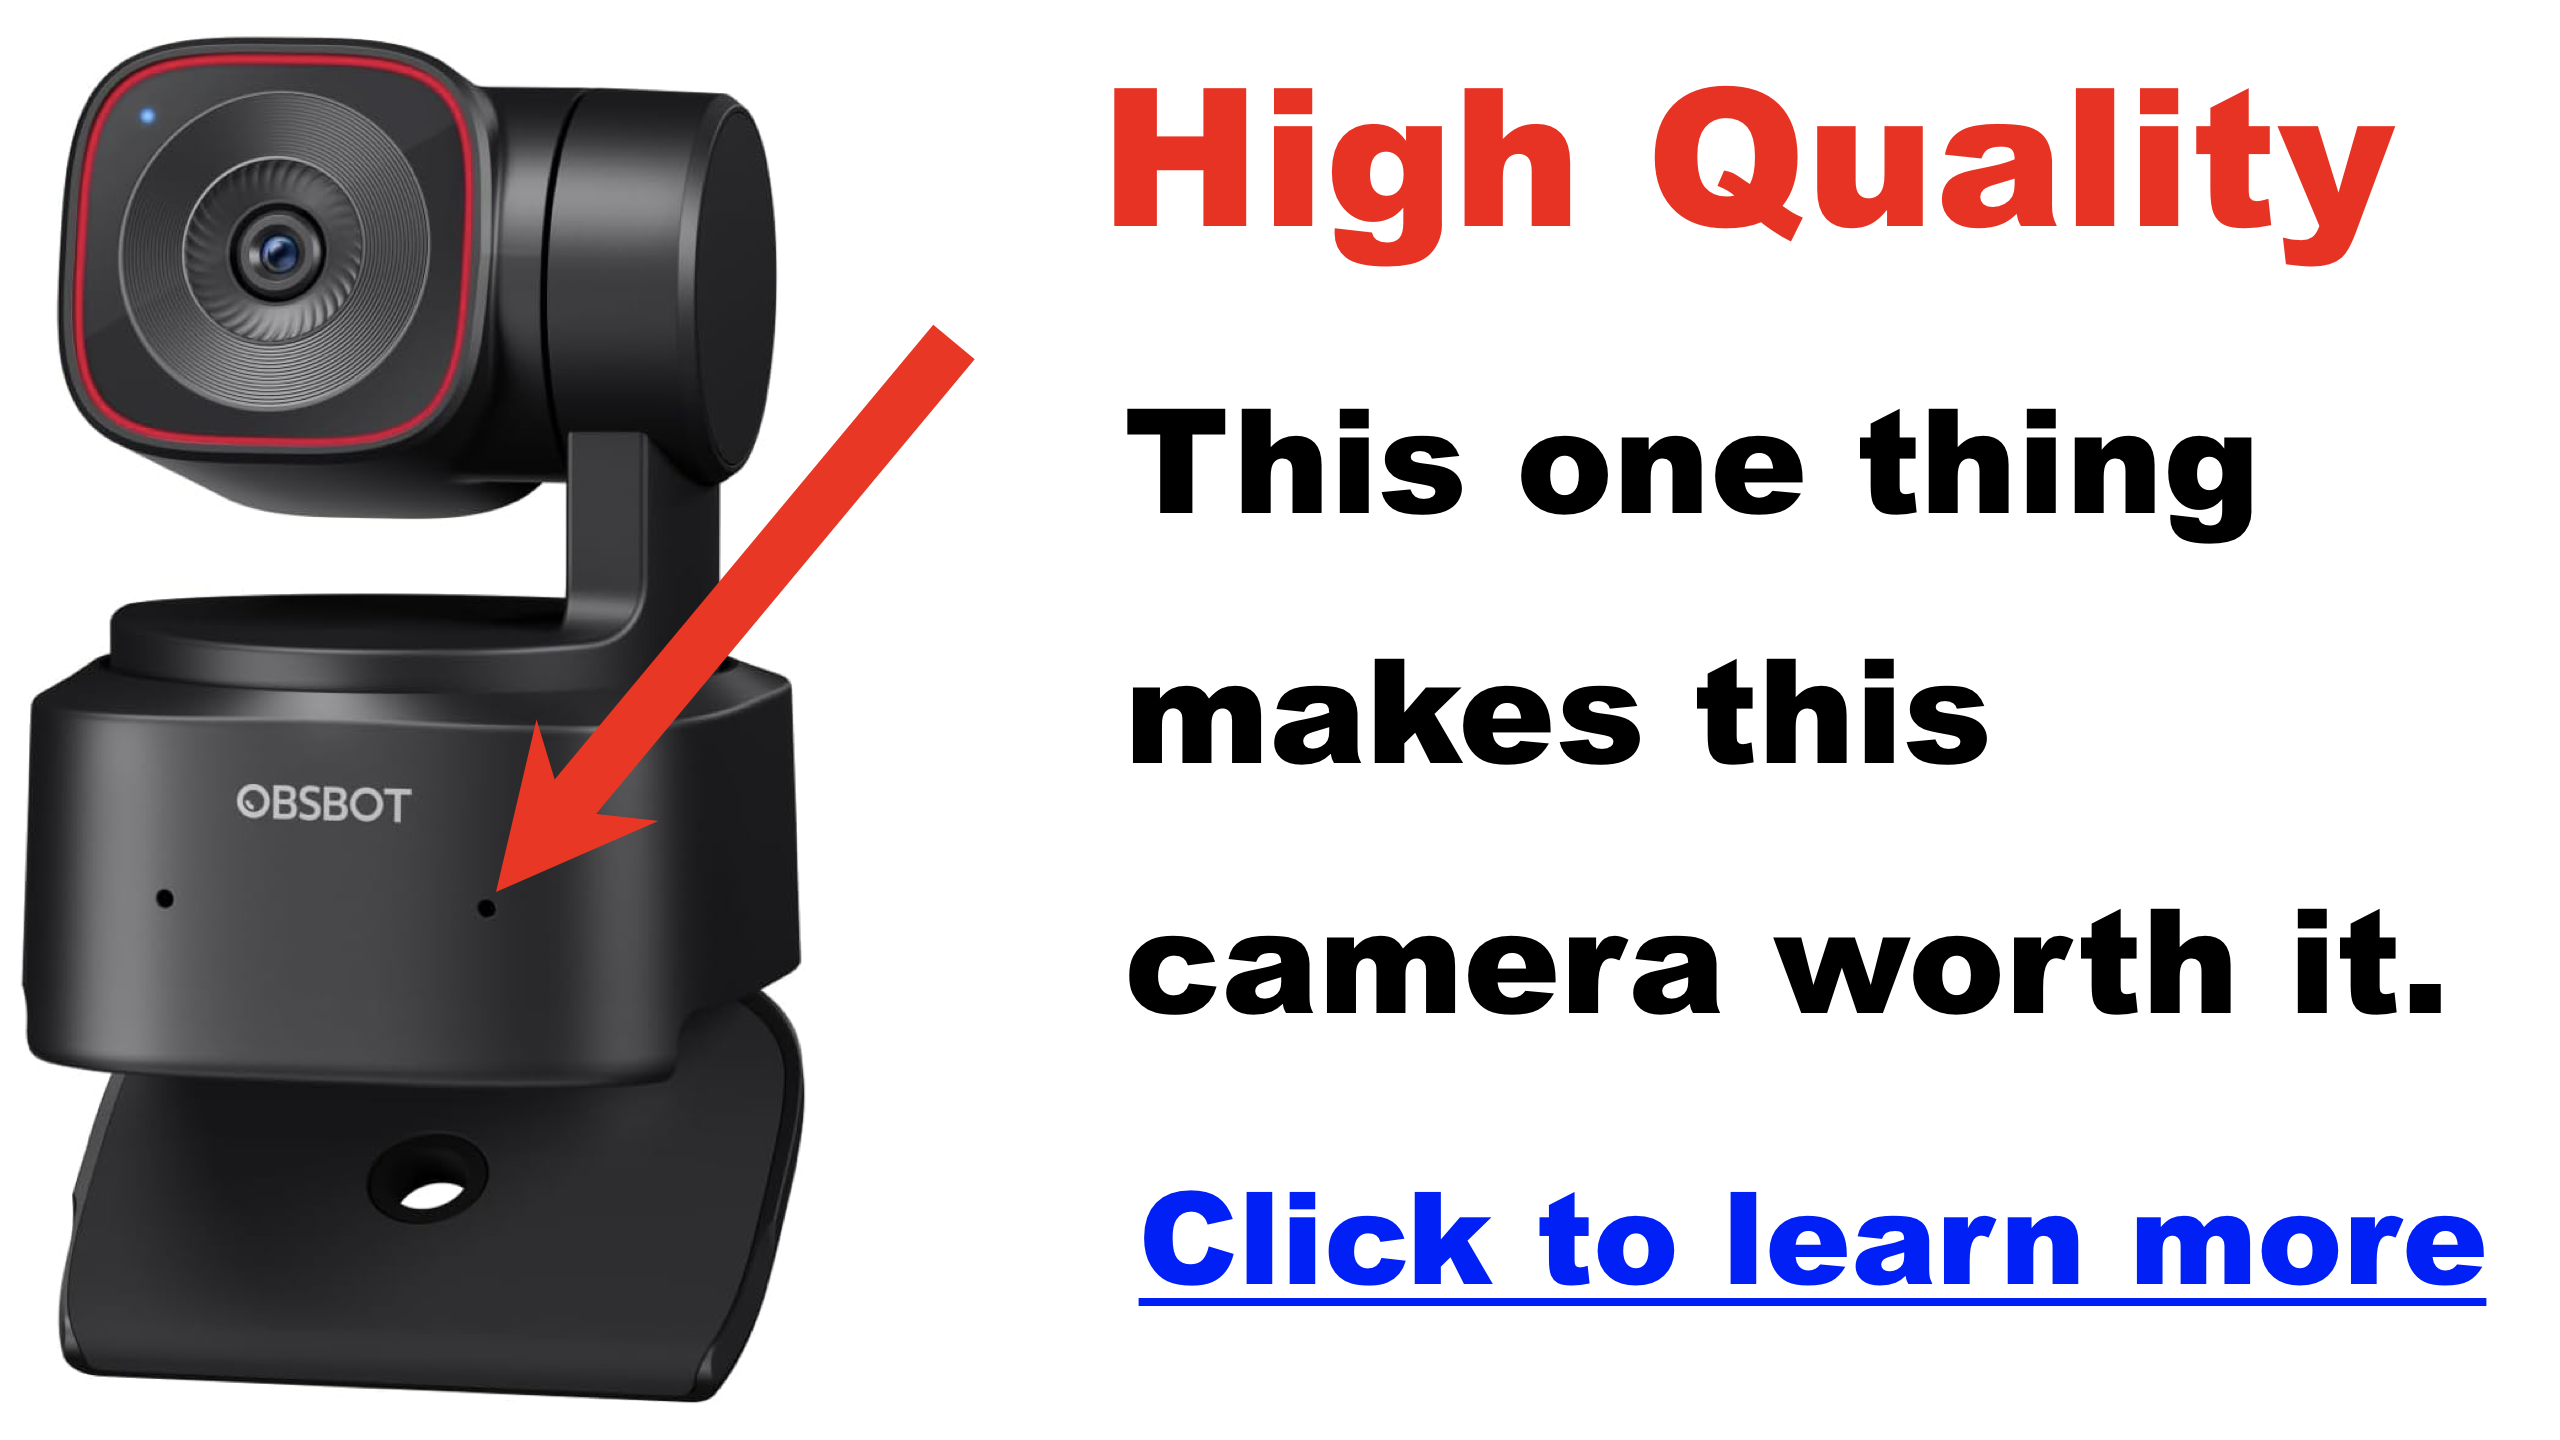
Webcams: Webcams are a go-to choice for beginners and anyone looking for a straightforward, reliable way to capture video. Many modern options offer impressive image quality, and some models include advanced features like motorized framing and face tracking. These tools can follow your movement or stay locked in place, depending on your setup and preference—perfect for podcasters who like to move around or want a dynamic, hands-free camera experience.
We have a few to look at in the table below. Be sure to check out the Elgato + the Osbot, which has awesome video quality for a “webcam” + has motor control + face tracking you can turn on and off so it will either follow you, or you can adjust it during a recording.
If you go the route of using a webcam to record your podcast, I highly recommend you look into a capture card for your computer. Capture card devices offload the work from the computer, and drastically increase the quality of the recording allowing you to capture crystal clear video. I highly recommend checking the Elgato brand out, they make some of the best hardware in the game. The HD60X is a great start.
- Pros: Affordable, easy to use, plug-and-play, minimal setup.
- Cons: Limited image quality, minimal control over settings, fixed lenses.
- Ideal for: Beginners, casual podcasters, streamers.

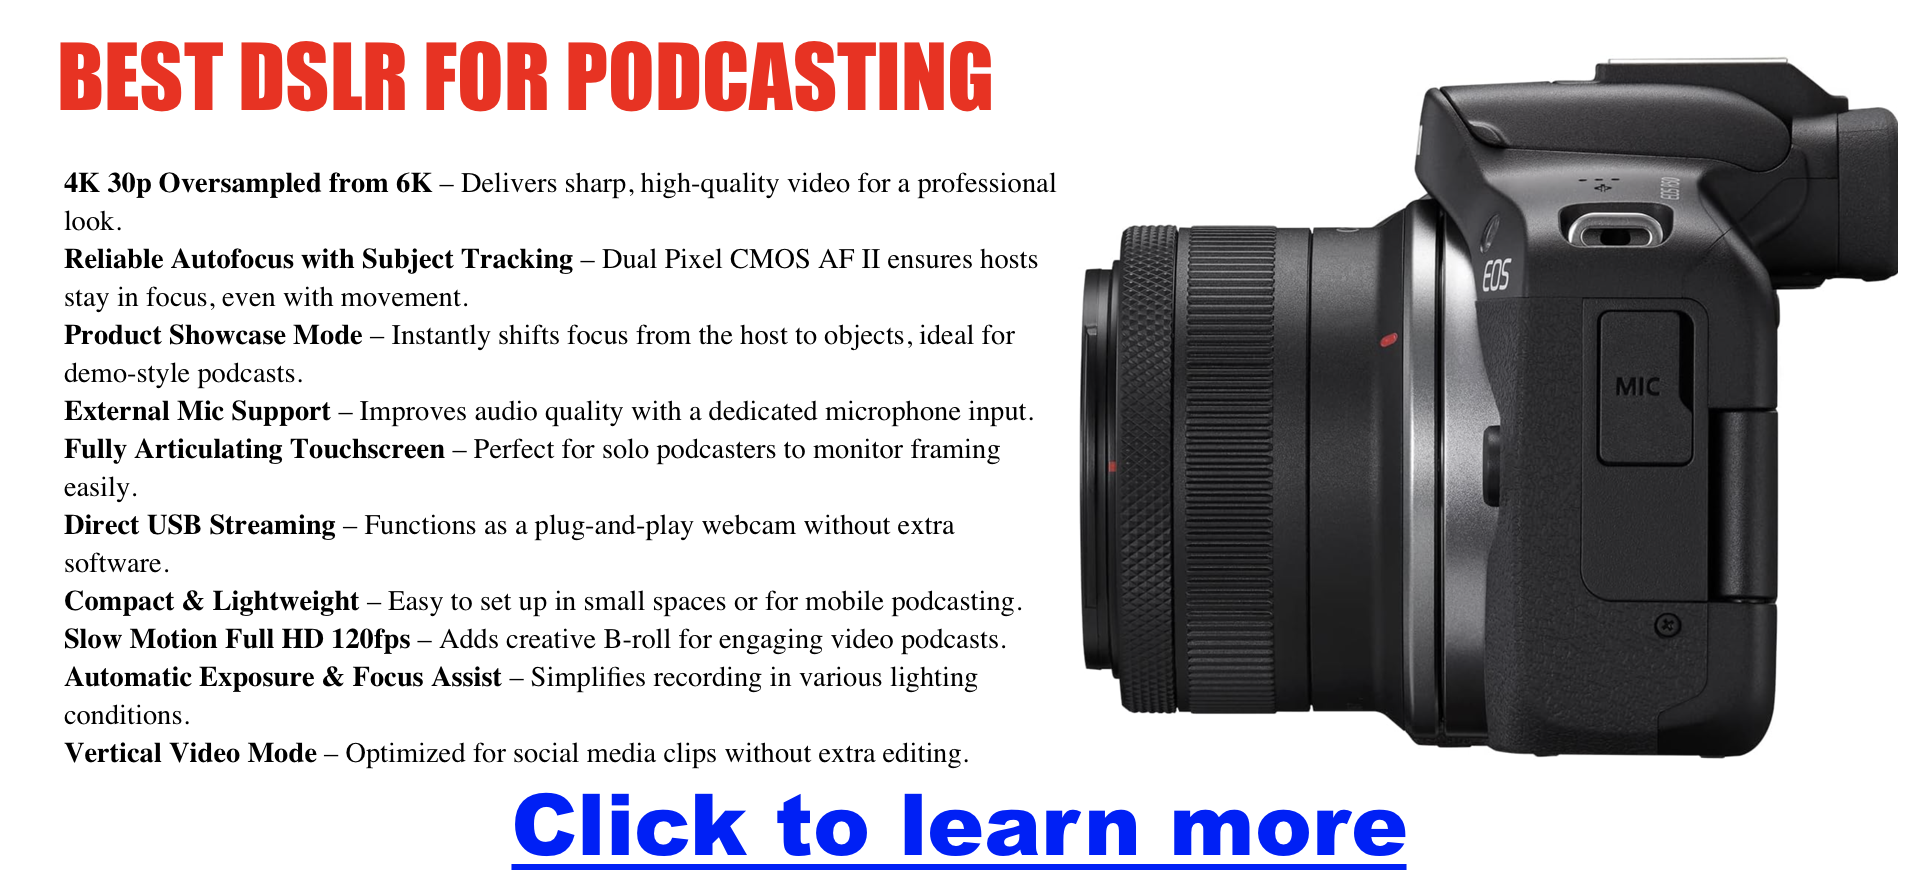
DSLR Cameras DSLRs provide flexibility and professional image quality, suitable for podcasters aiming for a polished look.
DSLRs crush webcams for podcasting because they offer larger sensors, superior low-light performance, and interchangeable lenses, giving you that crisp, cinematic look webcams simply can’t match. With pro-level autofocus, depth-of-field control, and external mic support, DSLRs provide the flexibility and quality needed to make your podcast stand out—whether you’re streaming live or recording in a studio setup.
The Canon 5D Mark IV is one of the best cameras on the market with 4K video — however DSLRs are known to have recording limits of about 30 minutes.
- Pros: Superior image quality, interchangeable lenses, depth-of-field control, versatility.
- Cons: Larger size, more expensive, additional equipment (like capture cards) needed for streaming, limited onboard recording.
- Ideal for: Professional-quality podcasts, interviews, detailed video.
Mirrorless Cameras Mirrorless cameras combine DSLR image quality with a smaller form factor, providing versatility and ease of use.
Mirrorless cameras can also deliver cinematic 4K video, razor-sharp autofocus, and pro-level low-light performance without the bulk of DSLRs. With silent operation, advanced eye-tracking, and direct USB streaming, they offer the perfect blend of portability and power, making them the go-to choice for podcasters who want a professional, high-quality look without the hassle.
The Canon EOS R5 Mark ii delivers cinematic 4K and 8K video, razor-sharp autofocus, and pro-level image quality that make podcast recordings look like a high-budget production.
- Pros: Excellent image quality, compact size, interchangeable lenses, good autofocus.
- Cons: Higher initial cost, battery life may vary, can require additional accessories for extended recording.
- Ideal for: Intermediate to advanced podcasters, content creators seeking high-quality visuals.
Action Cameras Action cameras are designed for durability and capturing dynamic or unconventional shots.
I would look into the latest GoPro offerings, the DJI Osmo, and the Insta360 — however please know that the quality of the video in a studio setting is generally not as good as a decent webcam.
- Pros: Compact, durable, versatile, great for dynamic and wide-angle shots.
- Cons: Limited zoom capability, generally not ideal for standard podcast formats.
- Ideal for: Outdoor podcasts, adventure-based or action-driven content.
Smartphone Cameras Smartphones today offer high-quality cameras suitable for beginners or budget-conscious podcasters.
Personal Story: I use an iPhone 15 Pro for almost everything I shoot because it is incredibly versatile, inexpensive when compared to DSLR options, and overall packs a huge punch with ability to record locally to a computer using OBS. While this setup isn’t for everyone, it is definitely a good option for most.
I highly suggest you watch the video below which talks about why they may be more than what you need to record or stream your podcast. Limitations are generally a flatter look, lighting requirements, and the battery draining faster than it can charge. While that is true when compared to much more expensive options; the iPhone has good depth of field, and overall has great color and clarity.
- Pros: Readily available, high-quality video recording, versatile and mobile.
- Cons: Limited control, fixed lenses, may require additional equipment for stability and quality.
- Ideal for: Budget-conscious podcasters and beginners testing video podcasts.
Find the Best Camera for Your Podcast
Click here for my favorite all-around podcast camera
| Camera Type | Model | Resolution | Best For | Notes |
|---|---|---|---|---|
| Webcam | Logitech C920x HD Pro | 1080p | Beginners, live-streaming | Affordable, plug-and-play simplicity. |
| Elgato Facecam | 1080p at 60fps | Streamers, high-quality streams | Low latency, great for streaming. | |
| Razer Kiyo Pro | 1080p at 60fps | Low-light environments | Built-in light adjustment. | |
| Logitech StreamCam | 1080p at 60fps | Content creators, portrait video | Portrait mode support for vertical content. | |
| DSLR | Canon EOS M50 Mark II | 4K (cropped) | Professional-quality podcasts | Great autofocus and flip-out screen. |
| Nikon D5600 | 1080p at 60fps | Sharper videos, flexibility | Excellent lens compatibility. | |
| Canon EOS Rebel T7 | 1080p at 30fps | Affordable DSLR setup | Beginner-friendly and reliable. | |
| Sony Alpha a6100 | 4K | Compact, high-quality videos | Amazing autofocus performance. | |
| Mirrorless | Sony ZV-E10 | 4K | Content creators, vlogging | Optimized for creators, interchangeable lenses. |
| Panasonic Lumix GH5 | 4K at 60fps | Advanced users, cinematic production | Exceptional video quality. | |
| Sony Alpha a6400 | 4K | Portable and versatile | Reliable, sharp results. | |
| Fujifilm X-T4 | 4K at 60fps | Color-rich, smooth footage | In-body stabilization is a bonus. | |
| Action Camera | GoPro Hero 13 Black | 5.3K at 60fps | Dynamic, wide-angle shots | Durable and versatile. |
| DJI Osmo Action 3 | 4K at 60fps | Compact and affordable | Great stabilization. | |
| Camcorder | Sony FDR-AX53 | 4K | Long recording sessions | Ideal for extended podcasts. |
| Canon Vixia HF G50 | 4K | Long sessions with simple setup | Easy to use for beginners. | |
| Smartphone | iPhone Pro Max | 4K at 60fps | Budget-friendly setups | Flagship phone with cinematic mode. |
| Samsung Galaxy S23 Ultra | 8K at 30fps | High-end detail and versatility | Outstanding video quality. |
Best Lenses That Make Your Podcast Shine
When setting up your podcasting studio for video recordings, the lens you select can dramatically affect your visual quality, aesthetics, and viewer engagement. Here’s a clear breakdown of the types of lenses to consider, their advantages and disadvantages, and practical recommendations tailored specifically for podcasting studios.
Types of Lenses to Consider:
1. Prime Lenses
Prime lenses have a fixed focal length (e.g., 35mm, 50mm, 85mm) and typically offer superior image quality and wider apertures (f/1.8, f/1.4, or f/1.2).
Pros:
- Excellent image sharpness and clarity.
- Great in low-light conditions due to wide apertures.
- Beautiful background blur (bokeh) helps focus viewers on the subject.
Cons:
- Limited flexibility; requires physical repositioning of the camera to change framing.
Recommended Primes for Podcast Studios:
- Sony FE 50mm f/1.8: Versatile, affordable, and great for portrait-style framing.
- Canon RF 85mm f/2 Macro: Ideal for tighter headshots with stunning clarity.
2. Zoom Lenses
Zoom lenses allow varying focal lengths within one lens (e.g., 24-70mm, 70-200mm), providing versatility in framing without moving the camera.
Pros:
- Highly versatile; quickly switch framing between wide, medium, and close-up shots.
- Ideal for multi-camera setups or dynamic podcast formats.
Cons:
- Slightly less sharp than prime lenses.
- Usually heavier and more expensive.
Recommended Zooms for Podcast Studios:
- Sigma 24-70mm f/2.8 DG DN: Excellent image quality, highly versatile for various studio setups.
- Tamron 28-75mm f/2.8: Cost-effective, sharp optics, and great value for money.
3. Wide-Angle Lenses
Wide-angle lenses (e.g., 16mm, 24mm) capture broader scenes and are excellent for showing off a podcast studio space or accommodating multiple hosts.
Pros:
- Great for group podcasts or studio tours.
- Provides engaging perspectives and dynamic visuals.
Cons:
- Potential distortion if subjects are too close to the camera.
- Less effective for close-up, intimate visuals.
Recommended Wide-Angles for Podcast Studios:
- Sony FE 20mm f/1.8 G: Outstanding optical quality with minimal distortion.
- Canon RF 16mm f/2.8: Compact and affordable; great for small spaces.
Choosing the Right Lens for Your Needs:
- Portrait-Focused Podcasts: Prime lenses like the 50mm or 85mm give superior sharpness and beautiful backgrounds, ideal for single-host or interview formats.
- Dynamic, Multi-Angle Podcasts: Zoom lenses such as 24-70mm offer framing flexibility, essential for quickly adjusting compositions.
- Group or Panel Podcasts: Wide-angle lenses effectively capture everyone clearly and give viewers a sense of your studio environment.
Tips for Podcast Studio Lens Setup:
- Consider the space available: smaller rooms might benefit from wider lenses (20-35mm).
- Prioritize aperture: lenses with f/2.8 or wider ensure excellent low-light performance and professional background blur.
- Balance cost and quality: Invest in a high-quality prime or zoom lens for your primary camera, supplementing with affordable lenses for secondary angles.
| Lens Type | Focal Length (Aperture) | Best For | Notes |
|---|---|---|---|
| Prime | 35mm (f/1.8 or f/1.4) | Medium-wide shots, small spaces | Natural perspective, versatile. |
| 50mm (f/1.8 or f/1.4) | Head-and-shoulder shots | Classic framing, beautiful depth of field. | |
| 85mm (f/1.8) | Close-ups with blurred backgrounds | Ideal for interviews and isolation shots. | |
| Wide-Angle | 24mm (f/2.8) | Group shots, tight spaces | Wider framing without distortion. |
| 18mm (f/2.8) | Multi-host setups in small rooms | Ultra-wide view, perfect for tight spaces. | |
| Zoom | 24-70mm (f/2.8) | Versatile for varied setups | Covers wide, mid, and close framing. |
| 18-55mm (f/3.5-5.6) | Budget-friendly multi-use lens | Affordable and flexible. | |
| 70-200mm (f/2.8) | High-quality close-ups in larger spaces | Stunning compression and sharpness. | |
| Macro/Specialty | 100mm Macro (f/2.8) | Close-ups of products or details | Extremely sharp for close-up shots. |
| 11-16mm (f/2.8) | Ultra-wide, creative shots | Captures the entire setup. |
Click for Lens Options at a Glance
How to Set Up Multiple Cameras for Your Podcast
Adding multiple camera angles can elevate your podcast by making it more dynamic and engaging. Here’s how to create a multi-camera setup:
Why Go Multi-Camera?
Switching between angles keeps your audience engaged and provides flexibility in post-production. You can highlight individual hosts, showcase reactions, or capture wide shots of the entire setup.
Essential Tools for Multi-Camera Setups
| Equipment | Purpose |
|---|---|
| Cameras | Matching models ensure consistent quality. |
| Capture Cards | Connect cameras to your computer (e.g., Elgato Cam Link). |
| Video Switchers | For live switching between feeds (e.g., ATEM Mini). |
| Lighting | Ensures consistent exposure for all angles. |
| Tripods/Mounts | Keeps cameras stable at the right angles. |
| Audio Recorder | High-quality audio recording (e.g., Zoom H6). |
Wrapping It All Up
The right camera and lens can transform your podcast into a visual experience that captivates your audience. But without great podcast lighting, you’ll be shooting in the dark! Be sure to have a good studio set up with great audio gear too. Whether you’re working with a single camera or a multi-camera setup, the key is to choose tools that match your goals and budget. With the tips and recommendations in this guide, you’re well on your way to creating a standout video podcast.
🚀 Want to Turn Your Podcast Into a Money-Making Machine?
Most podcasters never figure out how to make real money from their show. Don’t be one of them. Click here to learn why your podcast needs a website immediately.
📈 Steal the exact playbook top podcasters use to turn listeners into cash.
🎥 FREE video training reveals the monetization secrets nobody is telling you.
📩 Stop guessing. Start making. Drop your email & get the guide for free.
Zencastr or Squadcast? The Showdown Every Podcaster Needs to Read
Choosing the right remote recording platform is one of the most important decisions you’ll make as a podcaster. Two of the top contenders in this space are Squadcast and Zencastr. Both platforms have earned a reputation for high-quality audio, reliability, and user-friendly interfaces. But which one is the right choice for you? In this comprehensive comparison, we’ll explore the features, pricing, and unique strengths of both Squadcast and Zencastr to help you make an informed decision.
An Overview of Squadcast and Zencastr
Squadcast: The High-Fidelity Recording Studio
Squadcast is known for its commitment to pristine audio and reliability. With progressive upload technology and local recording, your sessions remain secure and uncompromised—even with unstable internet connections. It’s a go-to choice for professional podcasters and media companies that demand top-tier audio.
Zencastr: The All-in-One Podcasting Platform
Zencastr has evolved into a comprehensive solution for podcasters. Beyond recording, it now offers editing, unlimited hosting, and distribution features. With AI-powered tools and an intuitive interface, Zencastr appeals to creators looking for an all-in-one workflow.
Detailed Feature Comparison
| Feature | Squadcast | Zencastr |
|---|---|---|
| Local Recording | Yes (up to 4K video, 48kHz WAV audio) | Yes (up to 4K video, 48kHz WAV audio) |
| Progressive Upload | Yes | Yes |
| Cloud Backup | Yes | Yes |
| Video Quality | Up to 4K | Up to 4K |
| Audio Quality | Excellent (uncompressed WAV) | Excellent (uncompressed WAV) |
| Editing | Integration with Descript | Built-in editor, AI-powered |
| Transcription | Yes (via Descript) | Yes (automatic) |
| Guest Management | Up to 10 participants | Up to 12 participants |
| Hosting | No | Yes (unlimited hosting) |
| Pricing | Paid plans with a free trial | Paid plans with a free trial |
Core Features
Both platforms focus on local recording, capturing audio and video directly on each participant’s computer. This eliminates internet-related glitches and ensures studio-quality results. Progressive uploads save data to the cloud in real-time, protecting against crashes or disconnections.
-
Squadcast shines with its Descript integration, enabling text-based editing that simplifies post-production.
-
Zencastr goes further by combining recording, editing, hosting, and distribution in one place—a major draw for creators who want simplicity.
Unique Features
-
Squadcast: A green room for guest prep, device checks, and pre-session coordination.
-
Zencastr: AI editing tools that remove filler words, long pauses, and background noise automatically.
Pricing and Plans
Squadcast
Plans start at $20/month, covering local recording, progressive uploads, and cloud backups. Higher tiers provide more hours, advanced features, and dedicated support.
Zencastr
Plans also start at $20/month, but include unlimited hosting, AI-powered editing, and built-in distribution tools alongside high-quality recording.
Ease of Use
Both are browser-based and accessible without software downloads.
-
Squadcast: Extremely intuitive, with a minimal learning curve.
-
Zencastr: Slightly more complex due to its broader feature set, but supported by thorough documentation and strong customer support.
Video and Audio Quality
-
Squadcast: Records uncompressed WAV audio and up to 4K video, meeting professional standards.
-
Zencastr: Matches these specs, while adding Magic Audio, an AI feature that enhances clarity and removes background noise.
Guest Management
-
Squadcast: Supports up to 10 participants, with link-based invites and no account required for guests. The green room helps sessions start smoothly.
-
Zencastr: Allows up to 12 participants, plus a producer mode for behind-the-scenes management without appearing on camera.
Integrations
-
Squadcast: Works with Descript, Adobe Audition, Hindenburg, Zapier, and Dropbox.
-
Zencastr: Integrates with Adobe Premiere Pro, Final Cut Pro, Descript, and Zapier.
Customer Support
-
Squadcast: 24/7 live chat, knowledge base, and a community forum.
-
Zencastr: 24/7 live chat, help center, and community forum.
Who is it for?
-
Squadcast is best for:
-
Professional podcasters prioritizing flawless audio quality.
-
Media companies needing scalability and reliability.
-
Creators who want a straightforward recording-first solution.
-
-
Zencastr is best for:
-
Creators seeking an all-in-one platform for recording, editing, hosting, and distribution.
-
Podcasters who want to streamline workflows and minimize post-production time.
-
Anyone aiming to produce professional video podcasts with minimal effort.
-
Conclusion: The Final Verdict
Both Squadcast and Zencastr excel at what they do, but they cater to slightly different needs.
-
Choose Squadcast if you prioritize the absolute best audio fidelity and a streamlined recording experience.
-
Choose Zencastr if you prefer an integrated platform that handles everything from recording to publishing.
Both platforms offer free trials, so the best way to decide is to try them out and see which aligns with your creative process.
Squadcast vs. Riverside: The Ultimate Remote Recording Showdown
For podcasters, journalists, and content creators, the ability to record high-quality remote interviews is no longer a luxury—it’s a necessity. The rise of remote work has led to a surge in demand for platforms that can deliver studio-quality audio and video from anywhere in the world. Two of the leading contenders in this space are Squadcast and Riverside. Both platforms have earned a reputation for their reliability, high-fidelity recordings, and user-friendly interfaces. But which one is the right choice for you? In this comprehensive comparison, we’ll explore the features, pricing, and unique strengths of both Squadcast and Riverside to help you make an informed decision.
An Overview of Squadcast and Riverside
Before we dive into a detailed comparison, let’s take a high-level look at each platform.
Squadcast: The Reliable and High-Fidelity Recording Studio
Squadcast has established itself as a trusted name in the world of remote recording. It’s known for its exceptional audio quality, thanks to its progressive upload technology and local recording capabilities. This ensures that your recordings are safe and sound, even if your internet connection is unstable. Squadcast is a favorite among professional podcasters and media companies that demand the highest level of reliability and audio fidelity.
Riverside: The All-in-One Recording and Editing Platform
Riverside has quickly become a popular choice for creators who want a comprehensive solution for their remote recording and editing needs. Like Squadcast, it offers local recording to ensure high-quality audio and video. But Riverside goes a step further by providing a suite of AI-powered editing tools, including a text-based video editor, that make post-production a breeze. This makes it an ideal choice for creators who want to streamline their workflow and create polished content with minimal effort.
Detailed Feature Comparison
| Feature | Squadcast | Riverside |
|---|---|---|
| Local Recording | Yes (up to 4K video, 48kHz WAV audio) | Yes (up to 4K video, 48kHz WAV audio) |
| Progressive Upload | Yes | Yes |
| Cloud Backup | Yes | Yes |
| Video Quality | Up to 4K | Up to 4K |
| Audio Quality | Excellent (uncompressed WAV) | Excellent (uncompressed WAV) |
| Editing | Integration with Descript | Text-based video editor, AI-powered tools |
| Transcription | Yes (with Descript integration) | Yes (automatic transcription) |
| Guest Management | Yes (up to 10 participants) | Yes (up to 8 participants) |
| Pricing | Paid plans with a free trial | Paid plans with a free trial |
Core Features
Both Squadcast and Riverside are built on a foundation of high-quality local recording. This means that they record each participant’s audio and video directly on their computer, which eliminates the risk of internet-related quality issues. Both platforms also offer progressive uploads, which means that your recordings are saved to the cloud in real-time.
Squadcast’s integration with Descript is a major selling point. Descript includes a powerful audio and video editing tool that enables editing recordings by simply editing the transcript text. This can save you a significant amount of time and effort in post-production.
Riverside’s built-in editing tools are also a major advantage. The text-based video editor is incredibly intuitive, and the AI-powered tools can help you create a polished final product with minimal effort.
Unique Features
-
Squadcast: The “green room” feature lets you prepare for your session, chat with guests, check audio/video, and ensure everyone is ready before recording.
-
Riverside: The “Magic Editor” automates editing by switching between speakers, removing background noise, and creating a polished final product.
Pricing and Plans
Squadcast Pricing
Plans start at $20 per month, including local recording, progressive uploads, and cloud backups. Higher-tier plans add more recording hours, advanced features, and priority support.
Riverside Pricing
Plans start at $15 per month, including local recording, AI-powered editing tools, and automatic transcription. Higher-tier plans provide more hours, premium features, and dedicated support.
Ease of Use
Both platforms are browser-based with user-friendly interfaces.
-
Squadcast: Extremely intuitive and quick to set up, ideal for beginners.
-
Riverside: Slightly steeper learning curve due to advanced features, but excellent documentation and support ease the process.
Video and Audio Quality
-
Squadcast: Records uncompressed WAV audio and up to 4K video, ensuring professional results.
-
Riverside: Matches with 48kHz WAV audio and up to 4K video, plus “Magic Audio” to remove noise and enhance clarity.
Guest Management
-
Squadcast: Up to 10 participants with browser-based access and a helpful green room for pre-show prep.
-
Riverside: Up to 8 participants, with the addition of a producer mode for managing sessions without being on camera.
Integrations
-
Squadcast: Works with Descript, Adobe Audition, Hindenburg, Zapier, and Dropbox.
-
Riverside: Works with Adobe Premiere Pro, Final Cut Pro, Descript, and Zapier.
Customer Support
-
Squadcast: 24/7 live chat, knowledge base, and community forum.
-
Riverside: 24/7 live chat, detailed help center, and community forum.
Who is it for?
-
Squadcast is best for:
-
Professional podcasters prioritizing top-tier audio quality.
-
Media companies needing reliability and scale.
-
Creators who prefer a straightforward recording platform.
-
-
Riverside is best for:
-
Creators seeking an all-in-one recording and editing platform.
-
Podcasters aiming to streamline workflow and reduce editing time.
-
Video podcasters who want polished, professional results.
-
Conclusion: The Final Verdict
Both Squadcast and Riverside deliver outstanding performance for remote recording.
-
Choose Squadcast if pristine audio and reliability are your top priorities.
-
Choose Riverside if you want a comprehensive recording + editing solution with AI-powered enhancements.
The best way to know which fits your workflow is to try them both. Each offers a free trial so you can see firsthand which aligns better with your creative process.
Still Struggling to Turn Your Podcast Into Reels? Try This Genius Free Workflow
One of the most frustrating challenges podcasters face today? Turning long-form audio into short-form video that actually performs. It’s not just a nice-to-have anymore—social clips are expected. But the tools we’ve been using haven’t kept up.
Maybe you’ve tried automated tools like Opus. Maybe you’ve spent hours scrubbing through audio. And maybe you’re wondering: why is this still so hard?
This post tackles one of podcasting’s present problems head-on—and offers a smarter, AI-powered workflow that makes creating engaging, on-brand social clips easier than ever.
🚫 What’s Broken with Clip Tools Like Opus
The rise of short-form video has forced podcasters into unfamiliar territory—editing. And tools like Opus tried to fill the gap. But here’s the problem:
Most of these tools use shallow AI models that don’t understand tone, nuance, or context. They:
- Miss your best moments
- Chop up thoughts mid-sentence
- Create captions that feel generic or robotic
- Strip away your voice and vibe
You’re left with awkward clips that don’t convert.
✅ A Smarter Workflow for 2025 and Beyond
Instead of hoping a tool gets it right, build a simple system that combines your transcript, GPT, and your own creative direction.
Here’s the framework:
1. 🎙 Start With a Transcript
Use a tool like Descript, Riverside, or a free Whisper-based transcriber to convert your full episode into text.
2. 🧠 Use AI to Find the Gold
Feed your transcript into a GPT prompt designed to find:
- Tension or conflict
- Strong opinions
- Humor or surprise
- Quotable takeaways
Pro Tip: Use a prompt like “Pull 3–5 short moments ideal for Reels or TikTok. Include timestamps, catchy clip titles, and format tips.”
3. 📝 Get Back Structured Clip Ideas
You’ll receive:
- Timestamped segments
- Suggested hooks and titles
- Visual formatting recommendations (e.g., 9:16 with captions)
4. 🎨 Style With Templates
Use CapCut, Canva, or Veed to:
- Add branding
- Format for social
- Insert captions and motion elements
We even offer free templates if you need a head start.
⚙️ Want to Automate the Whole Thing?
Use this free n8n automation template that does all of this for you:
👉 Download the Free AI Clip Generator Template
You’ll also get:
- Setup instructions
- Bonus templates
- Support if you get stuck
💡 Final Thought: Podcasting’s Present Problem Is Visibility
If you’re making great episodes but struggling to be seen, short-form content isn’t optional anymore. It’s the new front door to your podcast.
This AI-powered workflow helps you consistently show up where your audience scrolls—without burning out.
Podcasting for Goodness’ Sake: How to Create Purpose-Driven Content That Helps, Inspires, and Grows
In a world saturated with content, it’s easy to feel like your voice might get lost. But when your podcast is driven by a genuine desire to help, uplift, or inform, it stands out in the best possible way.
It’s about podcasting with purpose. Whether you’re sharing stories that heal, offering actionable tips, or simply creating space for laughter in tough times, your voice has power.
This guide is for podcasters who want to make an impact—whether you’re just starting or feeling stuck.
🧬 Define What “Goodness” Means for You
Before you plan your next episode, ask yourself:
- Who do I want to help or serve?
- What transformation do I want my audience to experience?
- What values drive this show?
Create a “Goodness Statement.” For example:
“I help first-time moms navigate postpartum life with compassion, humor, and science-backed tools.”
Align every episode with that statement.
🎧 Craft a Mission-Driven Format & Voice
Your show doesn’t need to follow industry norms. Choose a format that reflects your strengths:
- Solo reflections for personal insights
- Interviews with everyday heroes or experts
- Stories that celebrate kindness, creativity, or resilience
Stay consistent with your voice. Speak how you write. Laugh. Share. Be you. The right listeners will connect.
Example: The “Kind World” podcast tells short stories about real acts of kindness. Simple. Powerful. Memorable.
📚 Content Ideas That Teach, Heal, or Entertain
Here are purpose-driven topic ideas you can adapt:
Educate
- “Budgeting for single parents”
- “How to talk to kids about grief”
- “Quick mental health resets for stressful days”
Inspire
- “Stories of second chances”
- “Interview with a burn survivor turned coach”
- “How I left my job and started a nonprofit”
Entertain
- “Wholesome prank stories”
- “Uplifting headlines of the week”
- “Things that restored my faith in humanity this month”
🤔 Frequently Asked Questions
What does “Podcasting for Goodness’ Sake” mean?
It means using your platform to make a positive impact—whether that’s through education, inspiration, humor, or storytelling.
I want to help people, but I don’t know where to start.
Start with who you want to help and how you want them to feel after listening. Clarity comes from service.
Can I still make money doing this?
Yes. Monetization can come from aligned sponsors, memberships, listener support, and digital products. Trust drives conversions.
I’m not an expert—can I still teach or inspire?
Yes. Share your journey, research insights, or bring others on. Your perspective matters.
What if I don’t have a big audience?
Serve the listeners you do have deeply. Word-of-mouth growth is powerful in mission-driven podcasting.
How do I stay consistent without burning out?
Batch episodes, allow imperfection, and protect your creative joy. You don’t need to be everywhere—just present.
💰 Monetize Without Selling Your Soul
You don’t need to choose between purpose and profit. Instead, use trust-based monetization:
- Invite ethical sponsors who align with your message.
- Offer a course or guide that extends your mission.
- Use listener support platforms like Patreon or Buy Me a Coffee.
Transparency, value, and mission alignment build income that feels good to earn.
📊 Growth Through Goodness
Marketing doesn’t have to feel spammy. Try this instead:
- Share impactful episode clips on social.
- Build a newsletter that adds value, not clutter.
- Partner with other creators on guest episodes.
- Create content people are proud to share.
Goodness spreads naturally—you just need to make it easy to share.
♻️ Stay Consistent Without Burning Out
Even mission-driven work can drain you. Here’s how to stay sustainable:
- Keep episodes short and batch when possible.
- Use templates for outlines and show notes.
- Take breaks and communicate with your audience honestly.
- Ask for help. Collaborate.
Your well-being is part of the mission.
Click Here To Learn More About Finding The Audience & Monetizing
- Best Podcast Cameras in 2026: Creator Picks for Every Budget
- Yamaha MGX Series for Podcasting: The Practical Guide (MGX12 vs MGX16 vs MGX-V)
- What Is Streamyard, This Weird Tool That Helps You Run a Professional Live Show
- What the “Async” Rebrand Actually Means for Your Old Podcast Files
- Why Serious Podcasters Are Moving to 10GbE NAS