helpful-info
StreamYard Business Plan Review: Is It Worth $299/Month for Teams?
StreamYard’s Business plan costs $299/month ($249/month billed annually) and targets teams, agencies, and organizations that have outgrown individual creator plans. If you are already familiar with StreamYard’s pricing tiers, you know the Free, Core, and Advanced plans cover most solo creators and small operations. The Business plan is a different animal — built for multi-show operations, team collaboration, and enterprise-grade production at scale.
This page breaks down what makes the Business plan different, who actually needs it, and whether the price tag is justified for your operation. If you want a side-by-side of all four StreamYard tiers, head to our full StreamYard pricing comparison.
Click here to try StreamYard Business →
Who Is the StreamYard Business Plan For?
The Business plan is not for solo podcasters or hobbyists. It is designed for organizations running multiple shows with multiple people involved in production. That includes podcast networks managing several feeds, marketing agencies producing live streams for clients, companies using live video for all-hands meetings and video podcasts, and media teams that need centralized billing, role-based access, and priority support.
If you are a solo creator wondering whether to jump from Advanced to Business, the answer is almost certainly no. The Advanced plan at $88.99/month already gives you 4K recording, 8 destinations, and backstage support. The Business plan’s value is in team management and organizational control — features that only matter once you have multiple people producing content under one roof.
Click here to try StreamYard Business →
StreamYard Business Plan Features That Matter
Every Business plan feature also includes everything in the Advanced tier. The features below are what you are paying the premium for — the capabilities that do not exist on any lower plan.
Spaces and Team Organization
Spaces let you organize content by show, client, or department. If your agency produces a business podcast for one client and a live stream series for another, each one gets its own Space with separate branding, recordings, and team members. This is the feature that separates the Business plan from everything below it — no other tier lets you silo content and permissions this cleanly.
Role-Based Access Control
The Business plan introduces three distinct user roles: Admin, Creator, and Cohost. Admins manage billing, team settings, and Spaces. Creators can build and run shows within their assigned Spaces. Cohosts can join studios but cannot manage settings or access other teams’ content. For agencies and podcast networks, this is essential — you want producers to have full creative control without giving them access to billing or other clients’ assets.
Up to 10 Seats
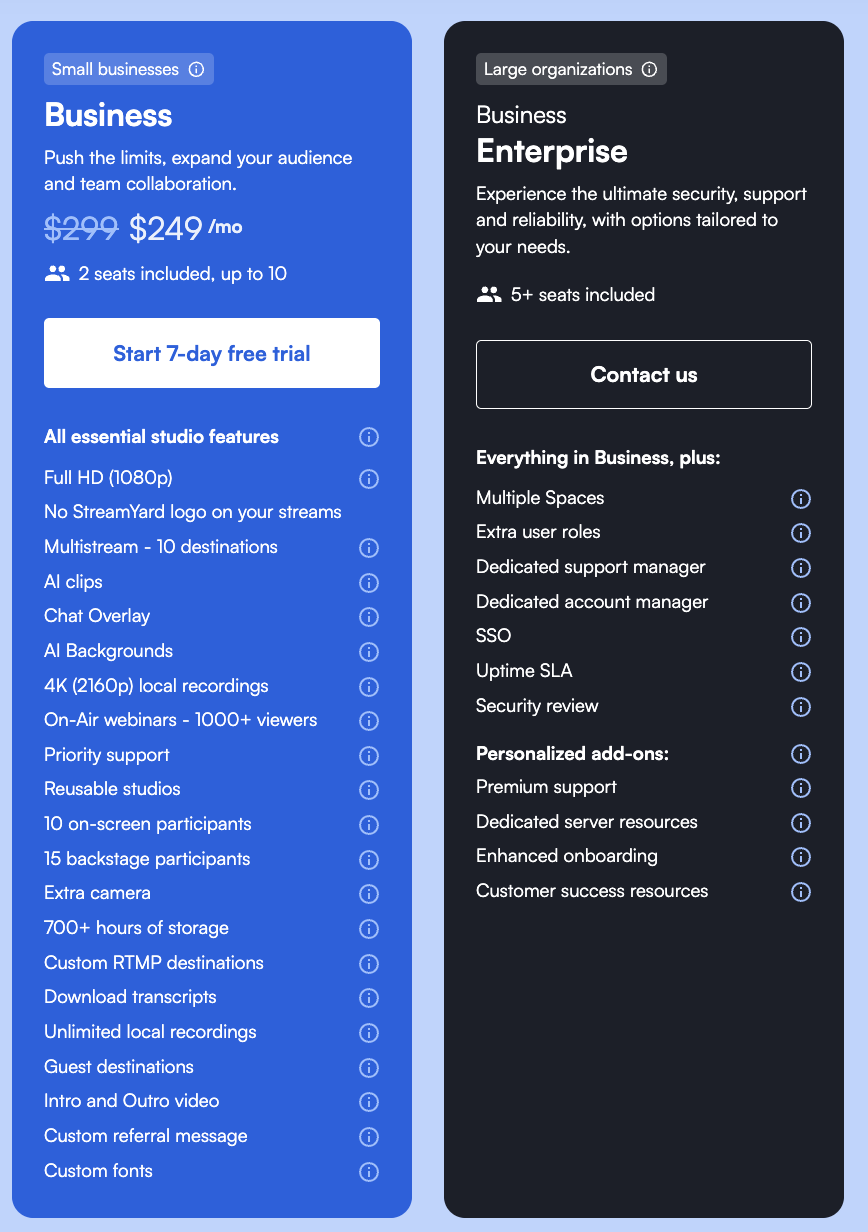
The Business plan supports 2 to 10 seats, meaning up to 10 team members can have their own login and role within the account. Compare this to the Advanced plan, which offers only 2 seats. If you have a multi-person production team — hosts, producers, editors, social media managers — you need those seats. The per-seat model means everyone works from the same account rather than juggling multiple individual subscriptions, which also simplifies your podcasting cost structure.
Priority Support
Business plan users get priority email support, which means faster response times when something goes wrong. For organizations running live events or scheduled client broadcasts, a 48-hour support turnaround is not acceptable. Priority support does not guarantee instant resolution, but it moves you to the front of the queue.
SSO (Single Sign-On)
If your organization uses an identity provider like Okta, Azure AD, or Google Workspace for centralized authentication, the Business plan integrates with SSO. This matters for IT departments that need to enforce security policies, manage onboarding and offboarding, and ensure that departing employees lose access immediately. Solo creators will never need this; enterprise podcast operations absolutely do.
Centralized Invoicing and Uptime SLA
Business plan customers get a single annual invoice — useful for procurement departments that need a PO-based purchasing flow rather than monthly credit card charges. The plan also includes an uptime SLA (Service Level Agreement), which guarantees a minimum level of platform availability. This is a standard enterprise requirement and gives you contractual recourse if the platform experiences extended downtime during a critical broadcast.
On-Air Webinars (1,000+ Viewers)
StreamYard’s webinar feature lets you broadcast to a large audience directly through the platform, rather than relying solely on third-party destinations like YouTube or Facebook. The Business plan supports 1,000+ concurrent webinar viewers, compared to 100+ on the Advanced plan. If you are using StreamYard for webinars, client presentations, or company all-hands, this capacity matters.
10 Simultaneous Destinations
The Business plan allows streaming to up to 10 destinations at once — YouTube, Facebook, LinkedIn, Twitch, custom RTMP, and more. The Advanced plan caps at 8. For most creators, 8 is plenty. But if you are a media operation broadcasting across multiple brand channels, regional pages, or client accounts, those two extra destinations can make the difference between covering your full distribution footprint or leaving gaps. For a broader look at livestreaming platforms and how StreamYard compares, we have a dedicated guide.
700+ Hours of Cloud Storage
StreamYard’s Business plan includes over 700 hours of permanent cloud storage for recordings. That is a significant step up from the Advanced plan’s storage allotment and means your team can maintain a deep archive of past broadcasts without constantly downloading and clearing space. If you are producing multiple shows per week, this storage buffer becomes critical — especially when you need to repurpose content weeks or months after the original broadcast.
Greenroom for Guest Management
The Greenroom is a backstage holding area where up to 25 guests can wait, test their equipment, and have private video calls with hosts before going live. While the Greenroom is available on Advanced as well, the Business plan’s higher participant capacity and team roles make it more practical for large-scale events. Hosts can message guests directly, verify audio and video quality, and move people into the studio when ready — all without interrupting the live broadcast. If you regularly manage guests for interviews or panel discussions, our guide on recording podcasts remotely covers best practices for making that process smooth.
Custom Branding Per Space
The Business plan lets you upload custom fonts and apply unique branding — overlays, logos, backgrounds, lower thirds — for each Space independently. An agency running three different client shows can maintain completely separate visual identities without swapping assets between broadcasts. This is a workflow improvement over the Advanced plan, where branding is tied to the account rather than segmented by project.
StreamYard Business Plan Pricing Breakdown
Here is what the Business plan costs compared to the tier most people upgrade from:
| Feature | Advanced | Business |
|---|---|---|
| Monthly price | $88.99 | $299 |
| Annual price (per month) | $68.99 | $249 |
| Seats | 2 | 2–10 |
| Destinations | 8 | 10 |
| Webinar viewers | 100+ | 1,000+ |
| Spaces | No | Yes |
| SSO | No | Yes |
| Role-based access | Limited | Admin / Creator / Cohost |
| Priority support | No | Yes |
| Uptime SLA | No | Yes |
| Centralized invoicing | No | Yes |
| Cloud storage | Included | 700+ hours |
The jump from $68.99 to $249/month (annual) is steep — roughly 3.6x the cost. But if you are comparing the Business plan against buying multiple individual Advanced subscriptions for your team, the math changes. Three separate Advanced accounts would cost $206.97/month (annual), and you would lose Spaces, SSO, centralized billing, and role-based access. At that point, the Business plan’s per-seat cost actually makes more sense.
For a complete breakdown of all four StreamYard plans including the Free and Core tiers, see our full StreamYard pricing guide.
Use Cases: When the Business Plan Pays for Itself
Podcast Networks Running Multiple Shows
If you manage a podcast network with several active shows, each with its own host, branding, and production schedule, Spaces and role-based access keep everything organized. Each show gets its own environment. Hosts can access their studio without seeing other shows’ recordings or settings. This is the same organizational logic behind how larger networks structure their podcasting operations.
Marketing Agencies Producing Client Content
Agencies producing video podcasts or live streams for multiple clients need clean separation between accounts. The Business plan’s per-Space branding means you never accidentally go live with the wrong client’s logo. Centralized invoicing means one bill for your entire streaming operation rather than chasing individual subscriptions across team members.
Companies Using StreamYard for Internal Communications
Some companies use StreamYard for internal all-hands meetings, training broadcasts, and company-wide updates. The 1,000+ viewer webinar capacity, SSO integration, and uptime SLA make it viable for this purpose. If your company already has a podcast or content strategy, adding internal broadcasting under the same platform reduces tool sprawl.
High-Volume Live Streamers
If you broadcast daily or multiple times per week across many platforms, the 10-destination limit and 700+ hours of storage become practical necessities rather than nice-to-haves. Combine that with the ability to delegate production tasks across team members using role-based access, and you have a production workflow that scales without bottlenecking on a single account holder.
StreamYard Business vs. Alternatives
The Business plan does not exist in a vacuum. Here is how it stacks up against alternatives that teams often evaluate:
StreamYard Business vs. Restream: Restream supports 30+ destinations but focuses more on distribution than production. StreamYard’s strength is its in-browser studio with layouts, overlays, guest management, and branding — Restream is better thought of as a multistreaming relay. If production quality and team management matter more than destination count, StreamYard Business wins.
StreamYard Business vs. Riverside: Riverside focuses on local recording quality rather than live streaming. If your primary use case is recording high-fidelity remote podcast interviews for post-production, Riverside may be the better fit. If you need live broadcasting with team features, StreamYard Business is the stronger choice.
StreamYard Business vs. OBS + Restream: Power users sometimes combine OBS with a cloud relay for maximum control. That setup gives you unlimited customization but zero team management, no browser-based access for remote team members, and a much steeper learning curve. The Business plan trades some flexibility for dramatically simpler team workflows.
StreamYard Business vs. Zoom Webinars: Zoom is purpose-built for meetings and webinars but lacks StreamYard’s multistreaming, branding, and production features. If your webinars also need to go out live on YouTube, LinkedIn, and Facebook simultaneously, StreamYard Business handles that natively.
What the Business Plan Does Not Include
A few things worth noting that the Business plan does not solve:
There is no built-in analytics dashboard. You still need to check performance metrics on each individual platform (YouTube Studio, Facebook Insights, etc.) or use separate podcast analytics tools.
There is no native monetization or ticket sales for webinars. If you want to charge attendees, you need a third-party tool like Eventbrite or a payment processor, then stream through StreamYard. For broader monetization strategies, our guide on podcast monetization covers the landscape.
Password-protected or private streams are handled at the platform level (unlisted YouTube links, private Facebook groups), not within StreamYard itself. If you need a private podcast platform, that is a separate tool.
StreamYard is browser-based, which means it works on any device without software installation — but it also means you are dependent on browser performance and internet stability. For a team spread across different locations, this is usually an advantage. For a single studio setup where you want maximum hardware control, a dedicated recording setup might complement StreamYard rather than replace it.
Is the StreamYard Business Plan Worth It?
The StreamYard Business plan is worth the cost if you meet at least two of the following criteria: you have three or more people involved in content production, you manage multiple shows or clients under one operation, you need SSO or centralized billing for organizational compliance, or you run webinars that regularly exceed 100 concurrent viewers.
If you are a solo creator or a two-person team, the Advanced plan gives you 4K, 8 destinations, backstage, and two seats — that is more than enough for most independent podcasters. Save the $180/month difference and put it toward better equipment, lighting, or cameras.
But if you are running a content operation at scale — and especially if you are currently managing multiple individual StreamYard accounts to work around team limitations — the Business plan consolidates everything into a single, manageable system. The organizational features alone (Spaces, roles, SSO, SLA) justify the price for the right team.
Click here to try StreamYard Business →
StreamYard Business Plan FAQs
How many seats does the StreamYard Business plan include? The Business plan supports 2 to 10 seats. Each seat is a separate login with its own assigned role (Admin, Creator, or Cohost).
Can I try the Business plan before committing? StreamYard offers a 7-day money-back guarantee on your first charge. You can also start with a lower tier and upgrade when your team needs scale. Check current Business plan availability here.
What is the difference between Spaces and branding kits? Spaces are separate environments within your Business account — each with its own recordings, team members, and settings. Branding (overlays, logos, custom fonts) is applied per Space, so each show or client gets a completely independent visual identity.
Do I need the Business plan if I only have two team members? Probably not. The Advanced plan includes 2 seats and covers 4K, 8 destinations, and backstage. The Business plan’s value kicks in when you need more seats, Spaces, SSO, or priority support.
Does StreamYard Business include local recording? Yes, unlimited local recording is included, same as the Advanced plan. Recordings are available in up to 4K resolution.
Can I use StreamYard Business for private or internal company broadcasts? StreamYard itself does not have built-in access controls for private viewing. You would use platform-level privacy settings (unlisted YouTube, private Facebook groups) or the webinar feature with registration for controlled access.
Is there a StreamYard Enterprise plan beyond Business? Yes, StreamYard offers custom Enterprise pricing for organizations needing custom SLAs, dedicated account management, and additional compliance features. Contact StreamYard for Enterprise details.
How does StreamYard Business compare to buying multiple Advanced accounts? Three separate Advanced accounts at $68.99/month each ($206.97 total) give you less than one Business account at $249/month — you lose Spaces, SSO, centralized invoicing, role-based permissions, and priority support. The Business plan is almost always the better value once you have 3+ producers.
What is the annual cost of the StreamYard Business plan? Billed annually, the Business plan costs $249/month ($2,988/year). Monthly billing is $299/month ($3,588/year). Annual billing saves $600/year. For a full comparison of all StreamYard plans and their annual discounts, see our StreamYard pricing breakdown.
Where can I find the most current StreamYard Business pricing? Click here for the official StreamYard pricing page with the latest Business plan details.
Related Resources
- StreamYard Pricing (2026): Full Plan Comparison
- What Is StreamYard?
- StreamYard vs. OBS
- StreamYard vs. Riverside
- StreamYard vs. Streamlabs
- StreamYard vs. Zoom
- Restream vs. StreamYard
- Livestreaming Platforms for Podcasters
- Best Remote Podcast Recording Software
- How to Record a Podcast Remotely
- Best Video Podcast Platforms
- Are Video Podcasts Back?
- Live Podcast Streaming
- Live Streaming Equipment
- Podcast Lighting Setups
- Best Cameras for Podcasting
- Podcast Equipment Guide
- Podcast Equipment for Co-Hosts and Groups
- Podcast Networks for Small Podcasts
- Who Owns Who in Podcasting
- Podcast Branding
- Podcast Analytics Tools
- Monetizing Your Podcast
- Podcast Business Plan
- How Much Does It Cost to Start a Podcast?
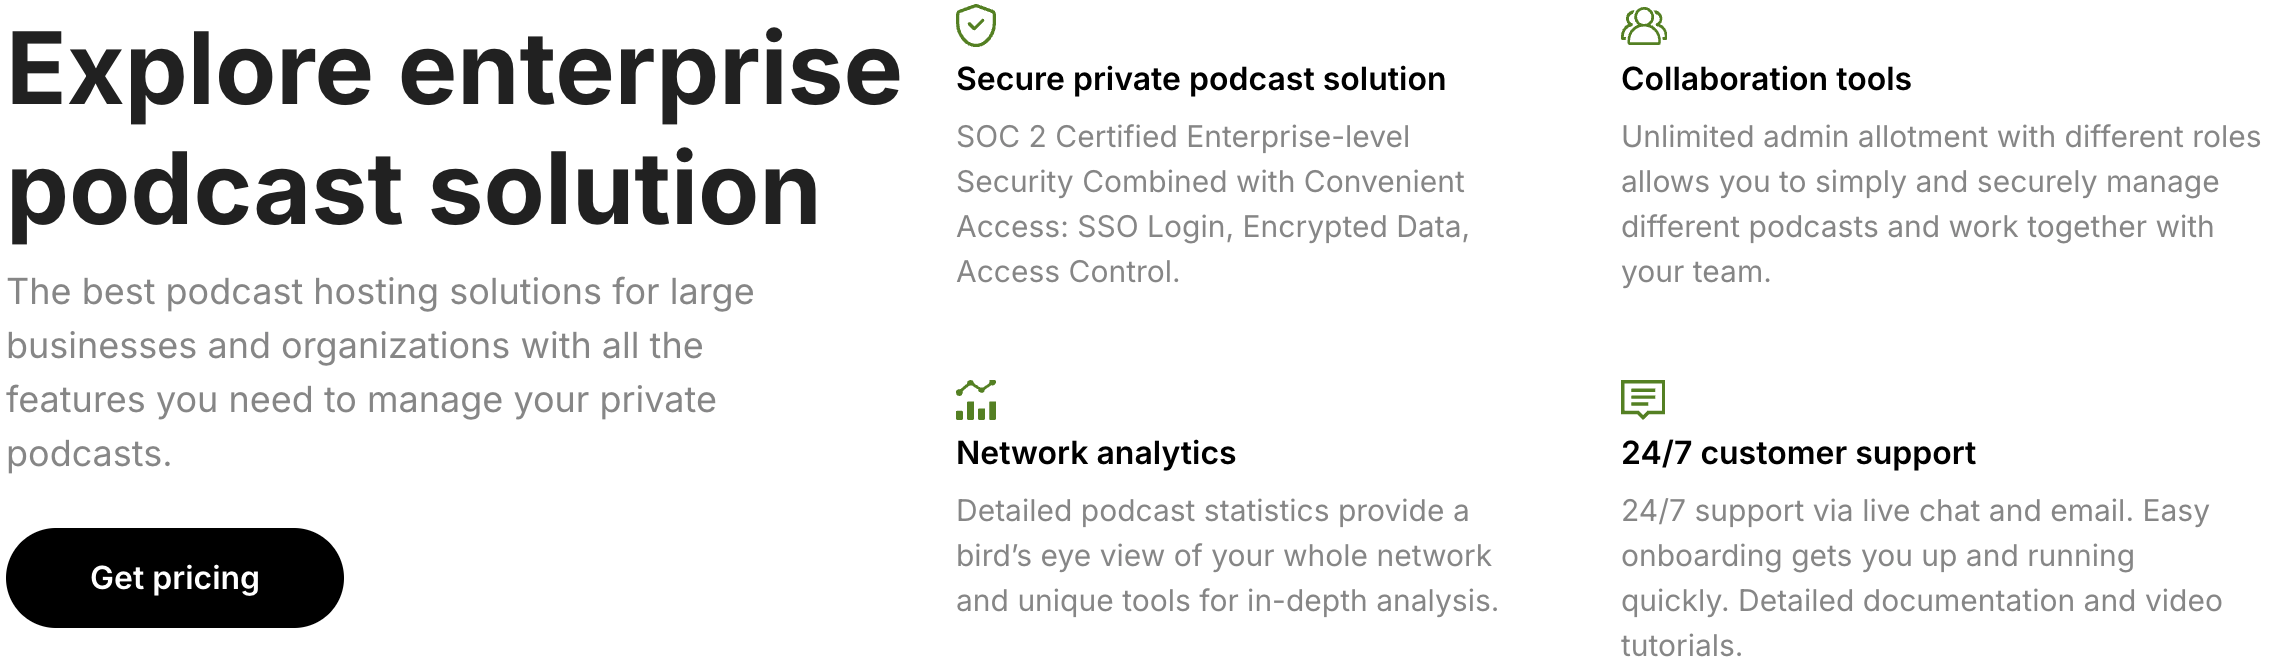
- Enterprise Podcast Solutions
- Best Private Podcast Platforms
- Best Podcast Recording Software
- Free Podcasting Tools
- How to Repurpose Podcast Content
- Podcasts for Small Business Owners
- Aligning Your Podcast and Business Brand
- Content Strategies for Your Podcast’s 3 Different Audiences
- Content Strategy
- Focus Collaboration for Focused Audience Growth
- Should You Join or Form a Podcast Network?
- Podcast Segment Ideas
- Best Podcast Platform for Monetization
- How to Present Information Clearly on Your Podcast
- Live Podcasting Is Not Dead Simple
- Mevo Live Event Camera
- Best Audio Interfaces for Podcasting
- RØDECaster Video Production Console
- Podcast Recording Equipment for Solo Podcasters
- SEO for Podcasters
- Podcast SEO: Is It Worth the Effort?
- How to Promote a Podcast
- How to Promote a Podcast on Social Media
- Best Podcast Editing Software
- SquadCast vs. Riverside
- SquadCast vs. Zencastr
- Zencastr Pricing
- SquadCast Pricing
- Podbean Pricing
- Buzzsprout Pricing
- Async (Podcastle) Pricing
- Acast Pricing
- Transistor Pricing
- Castmagic Pricing
- Castos Pricing
- Podcast Hosting
- Free Podcast Hosting
- OBS Encoding Overloaded Fix
- OBS High CPU Usage
Synology DS1525+ for Podcasters: What You Need to Know Before You Buy
If you’re a podcaster shopping for a 5-bay NAS, the Synology DS1525+ is going to show up at or near the top of every recommendation list. And for good reason — it’s the successor to the DS1522+, which I’ve been running daily in my own podcast production workflow for over a year.
I’m not going to pretend I own the DS1525+. I don’t. But I know the Synology ecosystem inside and out because I use it every day — the DSM software, Hyper Backup, Synology Drive, the NVMe caching, the RAID configurations, all of it. That puts me in a strong position to walk you through what’s changed, what matters for podcasters specifically, and whether the DS1525+ is worth the upgrade over the unit I already trust with my files.
Click Here to Check the Current Price of the Synology DS1525+ on Amazon
What Is the Synology DS1525+?
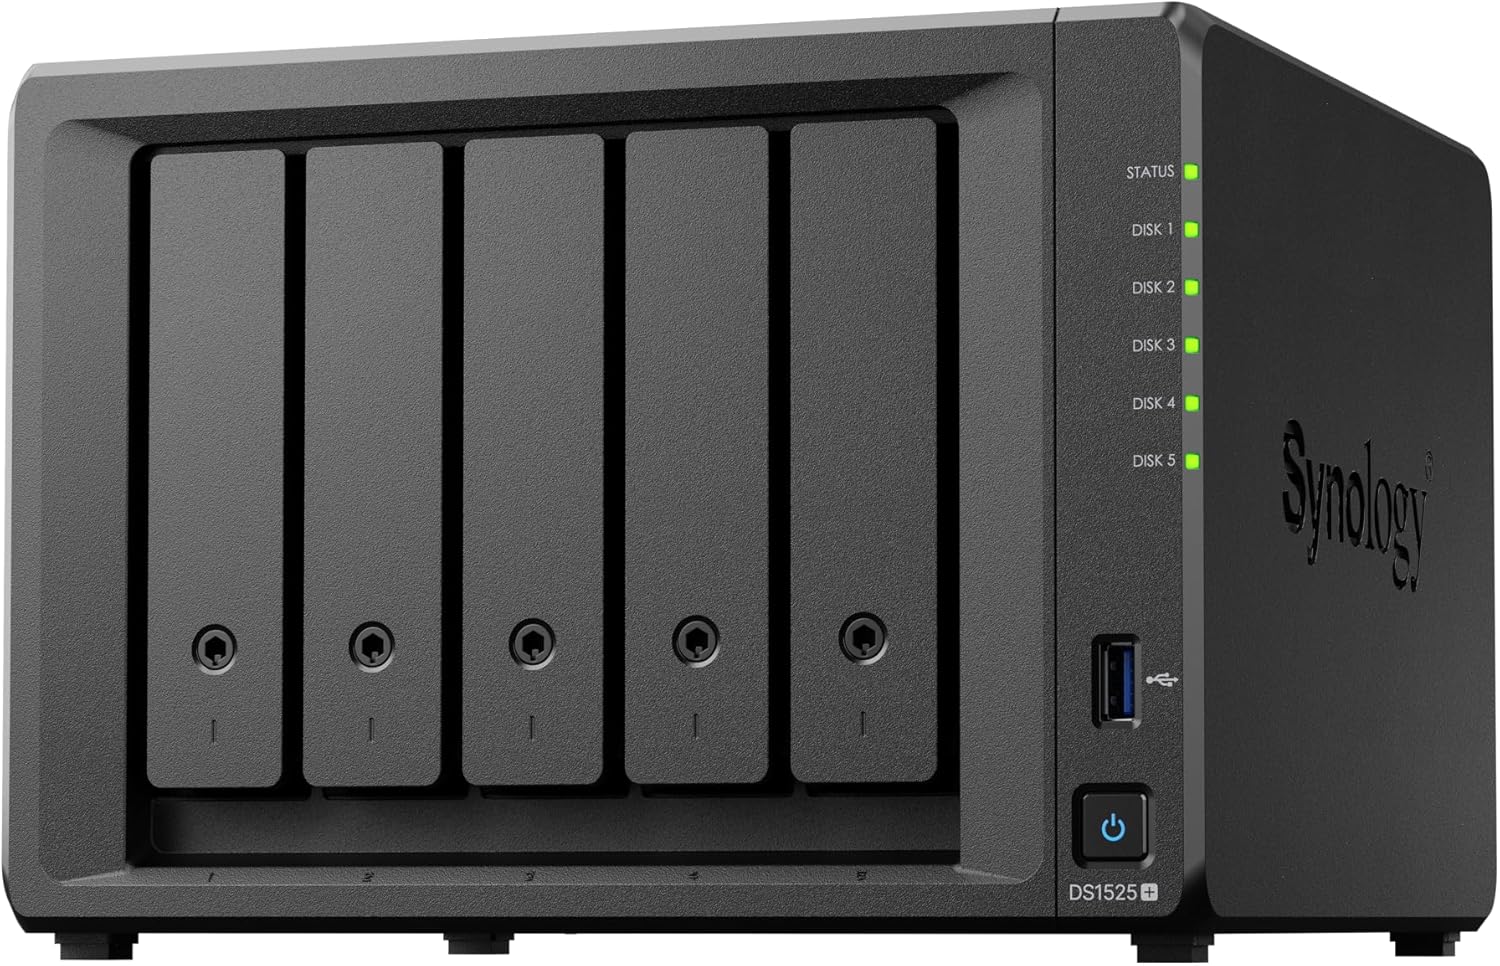
The DS1525+ is Synology’s 2025 refresh of their 5-bay Plus series NAS. It’s a diskless enclosure — meaning you buy the unit and add your own hard drives — designed for small businesses, creative professionals, and power users who need centralized, protected, network-accessible storage.
For podcasters, that translates to a single device that holds all of your episode archives, multitrack recording sessions, video files, images, and show assets in one protected location. You can access those files from any computer on your network, share folders with editors or co-hosts remotely through remote collaboration tools, and set up automated backups so you never lose an episode to a dead drive.
If you’re still working off external USB drives or free cloud storage tiers, this is the category of device that replaces all of that with something centralized, redundant, and expandable. I explain the broader case for NAS storage in my podcast data storage guide, but the short version is: once your show grows past a handful of episodes, scattered files across drives and cloud accounts becomes a real productivity problem.
DS1525+ Specifications at a Glance
Here’s what you’re getting inside the box (diskless — drives sold separately):
| Spec | Synology DS1525+ |
|---|---|
| Drive Bays | 5 (expandable to 15 with two DX525 units) |
| CPU | AMD Ryzen V1500B quad-core, 2.2 GHz |
| RAM | 8 GB DDR4 ECC (expandable to 32 GB) |
| Network Ports | 2x 2.5GbE (link aggregation supported) |
| 10GbE Upgrade | Yes — via E10G22-T1-Mini module (sold separately) |
| M.2 NVMe Slots | 2 (for SSD caching or storage pools) |
| USB Ports | 2x USB-A 3.2 Gen 1, 2x USB-C (expansion) |
| Max Raw Storage | 100 TB native / 300 TB with expansion |
| RAID Support | SHR, RAID 0, 1, 5, 6, 10, JBOD |
| Read/Write Speed | Up to 696 MB/s read / 862 MB/s write |
| Retail Price (diskless) | ~$800 |
| Warranty | 3 years (extendable to 5) |
The quad-core V1500B processor is a meaningful step up from the dual-core R1600 in the DS1522+. If you’re running Docker containers, automated transcription workflows, or multiple background tasks alongside file serving, the extra cores and threads make a noticeable difference. For more on why ECC memory matters for podcasters running NAS devices, I break that down in a separate guide.
What Changed from the DS1522+ (and Why Podcasters Should Care)
Since I run the DS1522+ every day, I can speak directly to what these upgrades mean in a real podcast workflow. Here’s what Synology changed and whether each improvement actually matters for audio and video creators.
Upgraded CPU: Dual-Core to Quad-Core
The DS1522+ runs an AMD Ryzen R1600 — dual-core, four threads. The DS1525+ bumps that to the AMD Ryzen V1500B — quad-core, eight threads. This is the single biggest hardware improvement in the refresh.
For podcasters, this matters most if you’re doing anything beyond basic file storage. Running local transcription with Whisper, automating show notes generation, or using Docker containers for podcast workflow automation all benefit from additional CPU headroom. On my DS1522+, heavy background tasks can slow down file access noticeably — the V1500B should handle that kind of multitasking more gracefully.
Built-In 2.5GbE Networking (Replaces 1GbE)
The DS1522+ ships with four 1GbE ports. The DS1525+ replaces those with two 2.5GbE ports. That’s 2.5 times the per-port speed, and with link aggregation you can bond them into an effective 5GbE connection.
If you’re editing video directly from the NAS, this is a big deal. Transferring a 10 GB multitrack recording session that took over a minute on gigabit now finishes in roughly 30 seconds. For audio-only podcasters, gigabit was already fine — but if you’re doing any video podcasting at all, faster networking changes how you work.
For those who need even more speed, the DS1525+ also retains the PCIe slot for a 10GbE network upgrade module, which is the same upgrade path available on the DS1522+.
USB-C Expansion (Replaces eSATA)
The DS1522+ uses eSATA to connect expansion units. The DS1525+ switches to USB-C, using the new DX525 expansion unit instead of the older DX517. This is a modernization move — USB-C is far more common and easier to source cables for — though the actual transfer speed through the expansion port tops out at about 6 Gbps, which is adequate but not blazing.
The expansion potential is significant for podcasters who archive everything: with two DX525 units, the DS1525+ scales to 15 total drive bays and up to 300 TB of raw storage. That’s enough to archive years of multitrack audio, video masters, and raw footage without ever deleting anything. I talk more about long-term archiving strategy in my podcast backup and archiving guide.
More RAM Out of the Box
The DS1522+ ships with 8 GB but uses DDR4 ECC in a single-slot configuration. The DS1525+ also ships with 8 GB of DDR4 ECC but leaves one slot open for expansion up to 32 GB. Both units support the same maximum, but the DS1525+ makes the upgrade path slightly more straightforward.
DSM 7.3 and the Drive Compatibility Situation
This is worth addressing directly. When Synology launched their 2025 models, they initially required Synology-branded drives only — a move that generated significant backlash. In October 2025, Synology reversed course with DSM 7.3, restoring support for third-party SATA drives from brands like Western Digital and Seagate.
If you’re buying a DS1525+ today, third-party NAS drives work fine. Just make sure DSM 7.3 or later is installed. This is relevant for podcasters on a budget because Synology-branded drives carry a premium — being able to use standard NAS drives like the WD Red Plus or Seagate IronWolf keeps the total cost of ownership much more reasonable. For more on choosing the right RAID configuration and drive setup, I have a dedicated guide for that too.
DS1525+ vs DS1522+: Side-by-Side Comparison
| Feature | DS1525+ | DS1522+ |
|---|---|---|
| CPU | AMD Ryzen V1500B (4-core / 8-thread) | AMD Ryzen R1600 (2-core / 4-thread) |
| Base RAM | 8 GB DDR4 ECC | 8 GB DDR4 ECC |
| Max RAM | 32 GB | 32 GB |
| Network Ports | 2x 2.5GbE | 4x 1GbE |
| 10GbE Upgrade | Yes (E10G22-T1-Mini) | Yes (E10G22-T1-Mini) |
| M.2 NVMe Slots | 2 | 2 |
| Expansion | USB-C (DX525) | eSATA (DX517) |
| Max Drives (with expansion) | 15 | 15 |
| Drive Bays (native) | 5 | 5 |
| Price (diskless) | ~$800 | ~$700 |
My Take as a DS1522+ Owner
If I were buying brand new today, I’d go DS1525+ without hesitation. The quad-core CPU and 2.5GbE networking are genuine improvements that affect daily workflow, not just spec-sheet wins.
But if you already own a DS1522+ — like I do — this is not a “drop everything and upgrade” situation. The DS1522+ still runs beautifully. The DSM software is identical. If you’ve already added the 10GbE module to your DS1522+, you’re actually getting faster single-connection speeds than the DS1525+’s stock 2.5GbE ports. The upgrade makes the most sense for podcasters buying their first NAS or replacing an older 2-bay or 4-bay unit that they’ve outgrown.
How Podcasters Would Actually Use the DS1525+
Here’s where my real-world DS1522+ experience translates directly, because the DSM software and workflow are identical across both units.
Centralized Episode Storage and Asset Management
Every raw recording, multitrack session, edited master, image asset, and show note file lives on the NAS. No more hunting across external drives or cloud folders. This is the single biggest quality-of-life improvement when you move to a NAS — I cover the full case for it in my podcast data storage overview.
With five bays in a RAID 5 or SHR configuration, you get both substantial storage capacity and protection against a single drive failure. Using 8 TB drives, that’s roughly 32 TB of usable space — enough for thousands of podcast episodes with room to spare, even if you’re archiving video.
Automated Backups with Hyper Backup
Hyper Backup is one of Synology’s best features. You can schedule automatic backups to an external USB drive, a remote NAS at another location, or a cloud service like Backblaze B2, Google Drive, or Synology’s own C2 cloud. I run nightly backups and it’s completely hands-off — the kind of set-and-forget backup strategy that every podcaster needs but few actually implement.
Remote Collaboration with Synology Drive
If you work with an editor, co-host, or virtual assistant, Synology Drive lets you share specific folders with granular permissions. Your editor gets access to the raw recordings folder with read/write access. Your VA gets read-only access to the finished episodes. Nobody can accidentally delete your masters. It works across Mac, Windows, Linux, iOS, and Android — and you’re not paying monthly cloud storage fees for the privilege.
NVMe Caching for Faster DAW Access
Both the DS1522+ and DS1525+ have two M.2 NVMe slots. Using these as a read/write cache dramatically speeds up access to frequently-used files — like the current episode project you’re actively editing in your DAW. If you’re working in podcast editing software that reads multiple tracks from the NAS simultaneously, the SSD cache keeps those files ready without waiting on spinning hard drives.
Time Machine and Workstation Backup
The DS1525+ works natively as a Time Machine target for Mac users and supports standard backup protocols for Windows. This means your editing workstation — whether it’s a laptop or a desktop — gets backed up to the NAS automatically. If your computer dies, your entire system can be restored. I walk through the setup process in my Synology NAS setup guide with Time Machine instructions.
What About Total Cost? It’s Not Just the NAS.
The DS1525+ retails for around $800 diskless. But the total investment includes drives, and optionally RAM upgrades and the 10GbE module. Here’s a realistic breakdown for a podcaster:
Budget Build (~$1,400 total): DS1525+ ($800) plus 5x 4 TB WD Red Plus drives (~$120 each). Gives you roughly 16 TB usable in SHR, enough for years of audio-only podcasting.
Mid-Range Build (~$2,000 total): DS1525+ ($800) plus 5x 8 TB Seagate IronWolf drives (~$180 each) plus a 16 GB RAM upgrade (~$80). Around 32 TB usable — comfortable for video podcasters archiving footage.
Power User Build (~$2,500+): Add the E10G22-T1-Mini 10GbE module (~$110) and NVMe cache drives (~$100–150) to the mid-range build. This is the setup for podcasters editing video directly from the NAS or running multiple concurrent workflows.
For a broader look at what it costs to get a show off the ground, check out my complete podcast startup cost breakdown. A NAS isn’t a day-one purchase for most people — it’s the upgrade you make when your show has outgrown external drives and free cloud tiers.
Click Here to Check the Current Price of the Synology DS1525+ on Amazon
Who Should Buy the DS1525+ (and Who Shouldn’t)
The DS1525+ Is a Great Fit If You:
Are buying your first serious NAS for podcast production and want room to grow. The five bays give you RAID 5/6 options that 2-bay and 4-bay units can’t match, and the expansion potential means you won’t outgrow it for years.
Produce a video podcast and need fast, centralized access to large files. The 2.5GbE networking and optional 10GbE upgrade make working with video-size files over the network actually practical. If you’re shooting with a dedicated podcast camera, those files add up fast.
Want to consolidate scattered storage into a single, backed-up hub. If your podcast assets currently live across a mix of USB drives, Dropbox, Google Drive, and your computer’s internal storage, the DS1525+ replaces all of that with one organized, protected system.
Run automated workflows — transcription, show notes, clip generation — that benefit from a more powerful CPU. The quad-core V1500B handles Docker containers and background processing tasks better than the dual-core chip in the DS1522+.
You Might Want to Look Elsewhere If You:
Already own a DS1522+ and are happy with it. The software is identical. Unless you specifically need the faster networking or extra CPU headroom, your DS1522+ will serve you well for years to come.
Only need basic storage for an audio-only podcast. A 2-bay unit like the Synology DS225+ at around $300 might be all you need if you’re not archiving video or running heavy workflows. Pair it with two mirrored drives and you’ve got reliable, protected storage at a fraction of the cost.
Need hardware transcoding for a media server. The DS1525+ uses an AMD processor without Intel Quick Sync, which means no hardware-accelerated video transcoding. If Plex or Jellyfin transcoding is important to you, the Intel-based DS423+ or DS225+ would be a better fit for that specific use case.
Are on a tight budget. At $800 before drives, the DS1525+ is a serious investment. Check out my dirt-cheap NAS storage guide for more affordable entry points that still get you centralized, protected podcast storage.
How the DS1525+ Fits Into the 2026 Synology Lineup
Synology refreshed most of their desktop NAS lineup in 2025. Here’s where the DS1525+ sits relative to the other models podcasters might consider:
| Model | Bays | CPU | Networking | Price (diskless) | Best For |
|---|---|---|---|---|---|
| DS225+ | 2 | Intel J4125 | 1x 2.5GbE | ~$300 | Budget starter / backup NAS |
| DS923+ | 4 | AMD R1600 | 2x 1GbE (10GbE upgradeable) | ~$600 | Value pick with 10GbE path |
| DS925+ | 4 | AMD V1500B | 2x 2.5GbE | ~$640 | Mid-range workhorse |
| DS1525+ | 5 | AMD V1500B | 2x 2.5GbE (10GbE upgradeable) | ~$800 | Power user / growing podcasts |
| DS1522+ | 5 | AMD R1600 | 4x 1GbE (10GbE upgradeable) | ~$700 | Still excellent if found discounted |
| DS1825+ | 8 | AMD V1500B | 2x 2.5GbE | ~$1,100 | Production teams / heavy video |
The DS1525+ occupies the sweet spot for most serious podcasters. Five bays is the magic number — it’s enough for RAID 5 or RAID 6 with meaningful storage capacity, without the price jump to 8-bay territory. If you want to understand the broader podcast equipment ecosystem and where storage fits in, my equipment guide covers the full picture.
Frequently Asked Questions
Can I edit my podcast directly from the DS1525+?
Yes. With 2.5GbE or 10GbE networking, you can open multitrack audio sessions directly from the NAS in your editing software without copying files to your local drive first. Audio files are relatively small compared to video, so even the stock 2.5GbE connection handles this comfortably. For video editing, I’d recommend the 10GbE module — I cover the details in my NAS for video editing guide.
Do I need Synology-branded hard drives?
Not anymore. After backlash over the initial 2025 drive restrictions, Synology reversed course with DSM 7.3 (released October 2025). Standard NAS drives from Western Digital (Red Plus) and Seagate (IronWolf) work without restriction. Just make sure your unit is running DSM 7.3 or later.
Is the DS1525+ overkill for an audio-only podcast?
It depends on your workflow. If you record, edit, and publish a straightforward audio show with no video, a 2-bay or 4-bay NAS might be all you need. But if you archive raw recordings, run automated workflows, collaborate with editors, or plan to add video eventually, the DS1525+ gives you room to grow without replacing hardware. Planning for growth is a theme I come back to often — it’s part of treating your podcast like a business, which I discuss in my podcast business plan guide.
Should I upgrade from a DS1522+ to a DS1525+?
Probably not, unless you specifically need the faster stock networking or the extra CPU power for Docker and automation tasks. The DSM software experience is identical, and if you’ve already added a 10GbE module to your DS1522+, you’re ahead of the DS1525+’s base configuration on raw network speed. Save the money for drives or other podcast tools.
What RAID configuration should I use?
For most podcasters, Synology Hybrid RAID (SHR) is the best choice. It protects against a single drive failure while making efficient use of mixed-capacity drives. If you want deeper protection, RAID 6 or SHR-2 guards against two simultaneous drive failures at the cost of more storage overhead. I break down all the options in my RAID and reliable storage guide.
What happens if a drive fails?
In a RAID or SHR configuration, you pull the failed drive (hot-swappable, no downtime), slot in a replacement, and the NAS rebuilds automatically. Your data stays accessible through the entire process. If you’ve ever lost files to a dead external drive, this alone is worth the investment. For worst-case scenarios, I also have a guide on recovering a failed drive.
Can I access my files remotely?
Yes. Synology’s QuickConnect feature gives you secure remote access through a web browser or mobile app without any port forwarding or networking knowledge required. Your editor in another city can access shared folders as if they were on your local network. This is one of DSM’s strongest features and something I use regularly.
Is there a quieter or smaller alternative?
If five bays feels like more than you need, the 4-bay DS925+ (~$640) uses the same upgraded CPU and 2.5GbE networking in a slightly smaller chassis. For the absolute smallest footprint, the 2-bay DS225+ (~$300) is whisper-quiet and handles basic podcast storage duties well.
Final Verdict
The Synology DS1525+ is the NAS I’d buy today if I were starting from scratch. It takes everything I already trust about the DS1522+ — the rock-solid DSM software, the backup ecosystem, the collaboration features, the expansion potential — and adds meaningfully better hardware underneath it. The quad-core CPU and built-in 2.5GbE networking aren’t incremental spec bumps; they make a real difference in how fast you can work.
At ~$800 before drives, it’s not an impulse buy. But for podcasters who are serious about protecting their content library, streamlining their production workflow, and building infrastructure that grows with their show, the DS1525+ is about as future-proof as storage hardware gets.
If your podcast is still small and your budget is tight, start with something from my budget NAS storage guide and upgrade when you’re ready. But if you’ve outgrown external drives and you’re ready to treat your storage like the backbone of your podcast operation, the DS1525+ earns its spot at the top of the recommendation list.
Click Here to Check the Current Price of the Synology DS1525+ on Amazon
StreamYard Pricing (2026): Full Comparison of Plans, Differences, Features & Discounts
StreamYard Pricing & Plans (2026) – Click here to learn more
Last updated: early-2026 — All prices and features current as of this update.
StreamYard is one our favorite podcast recording software, especially for those recording remotely. Below is the latest pricing from StreamYard.
Click here for the official StreamYard pricing page.
| Plan | Monthly | Annual (per mo.) | Destinations | On-screen Participants |
Video Quality | Local Recording | Branding | Support |
|---|---|---|---|---|---|---|---|---|
Free |
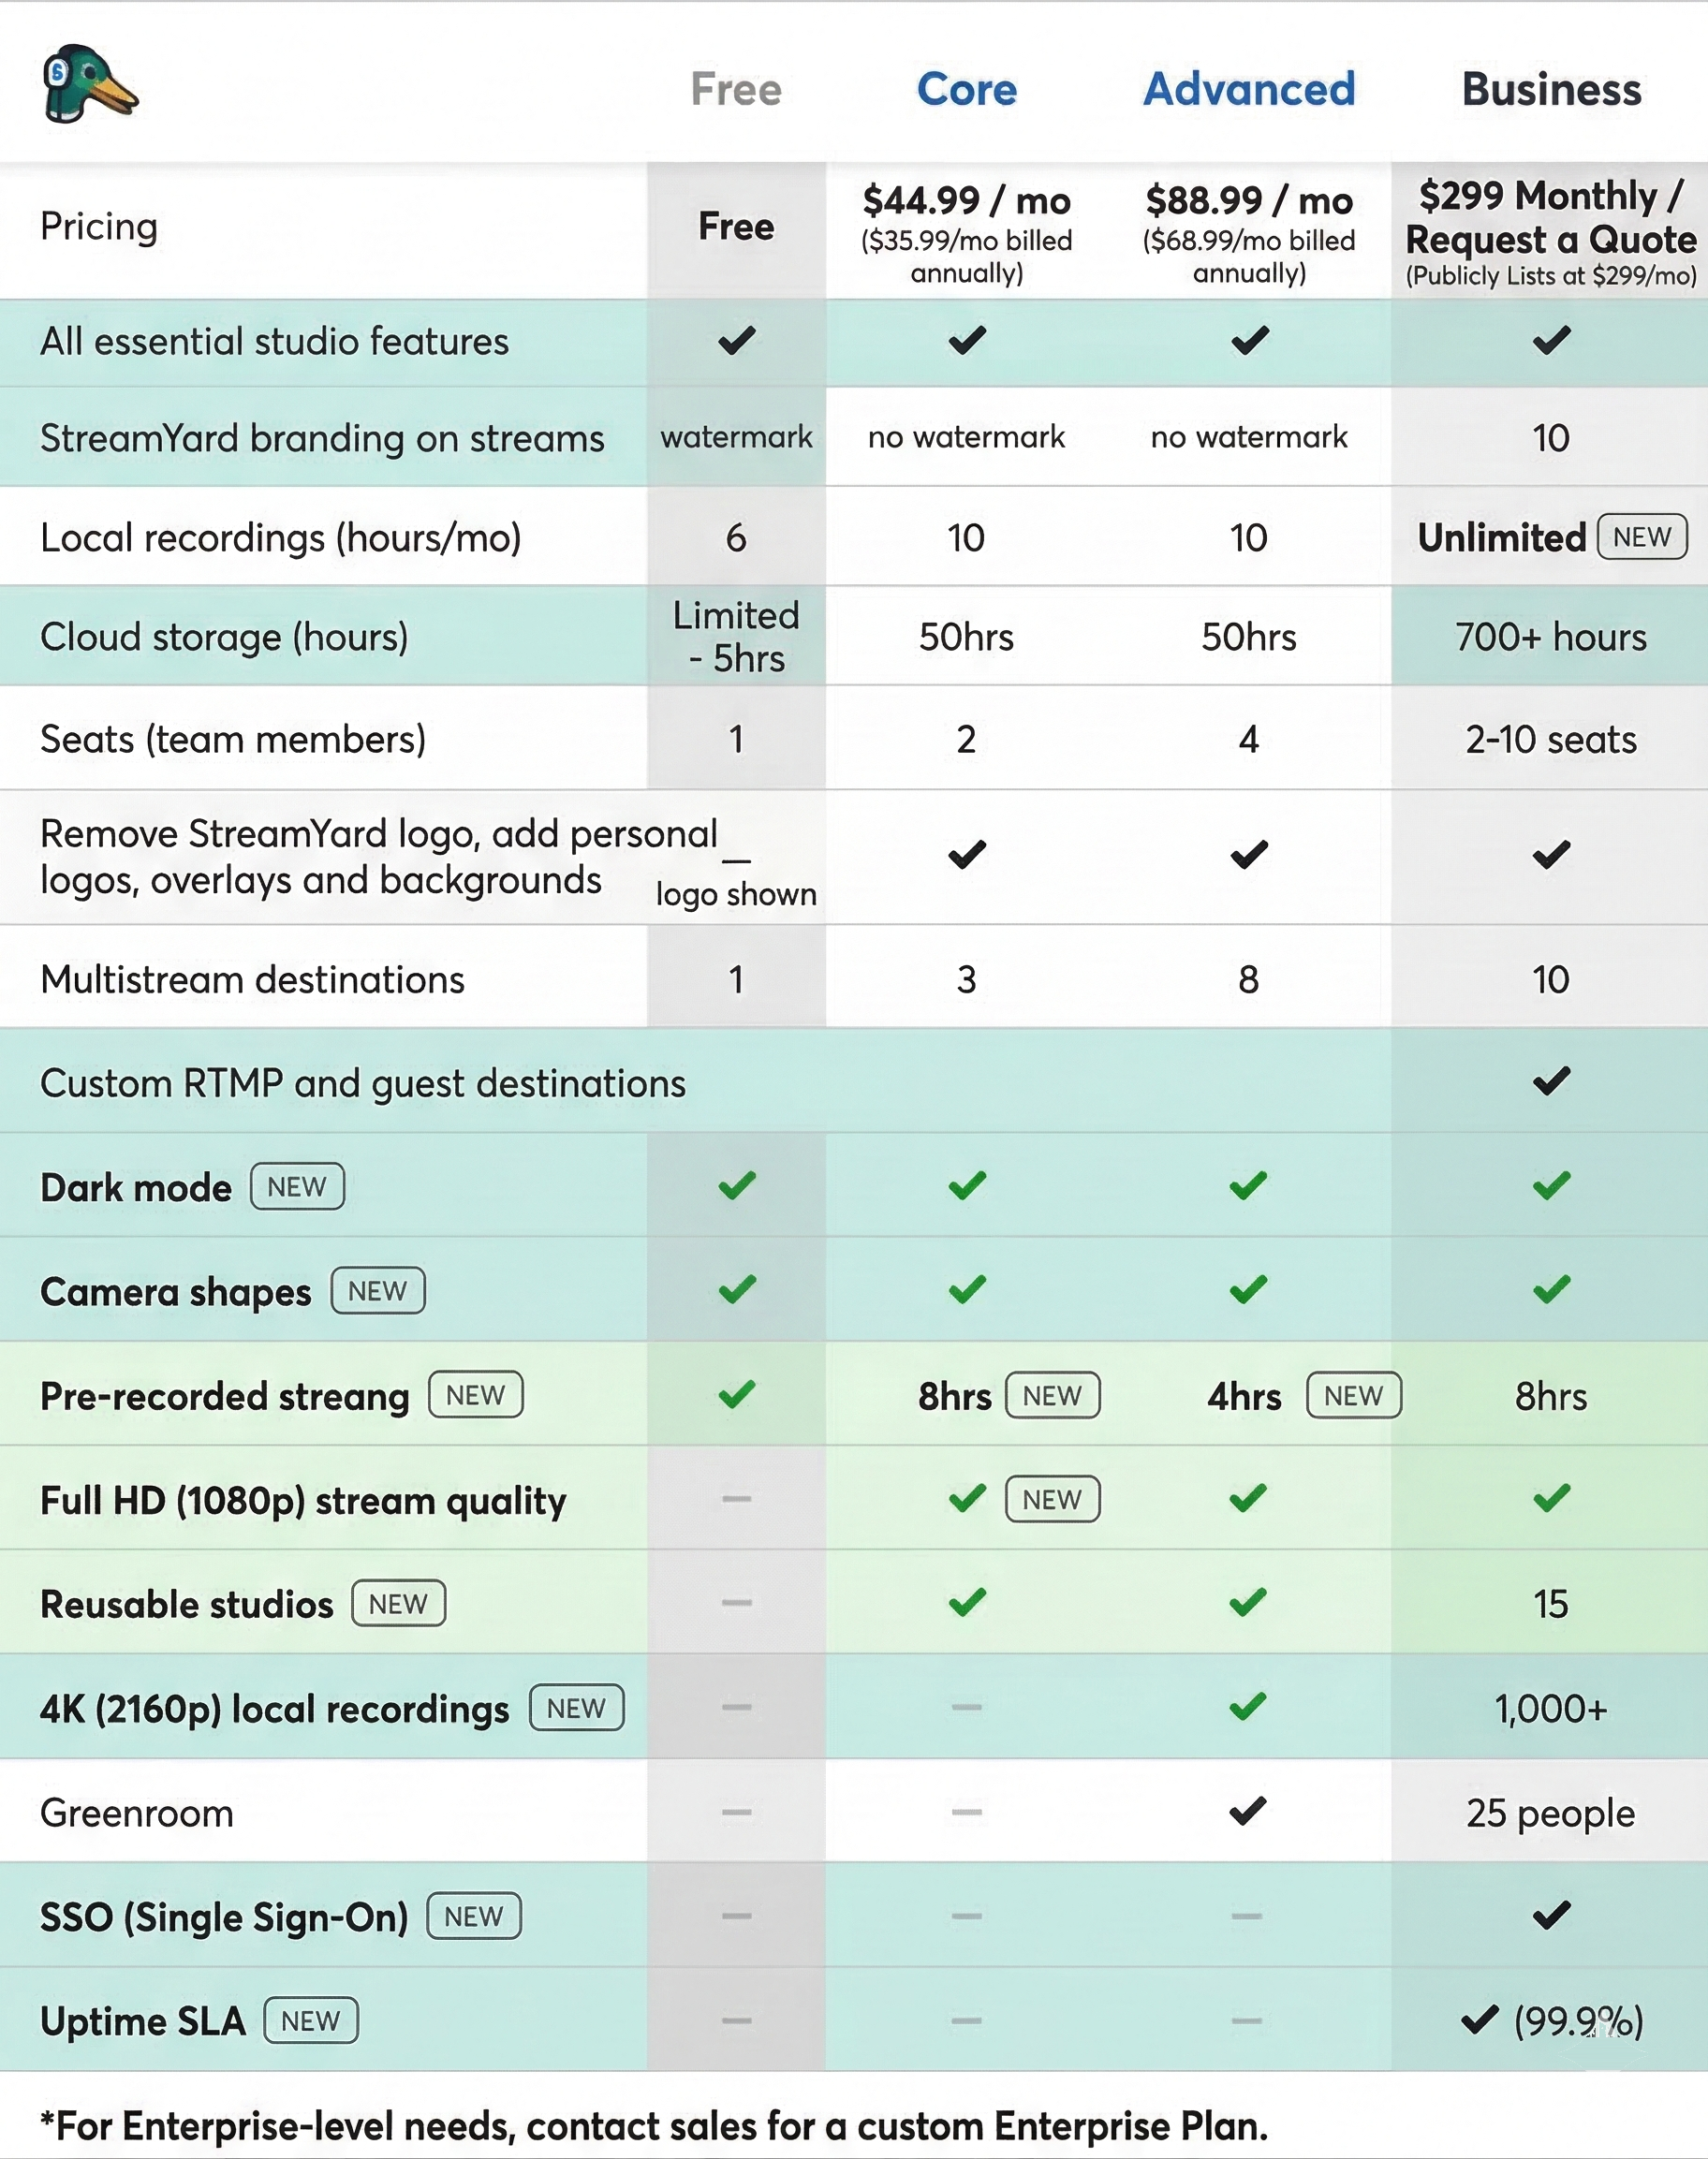
$0 | – | 1 | 6 | SD (est. 720p) | 2 hrs/mo | StreamYard logo | Standard |
Core |
$44.99 | $34.99 | 3 | 10 | 1080p | Unlimited | Custom | Standard |
Advanced |
$88.99 | $68.99 | 8 | 10 (+15 backstage) | 4K | Unlimited | Full custom | Standard |
Business |
$299 | $249 | 10 | 10 (+15 backstage) | 4K | Unlimited | Full custom | Priority |
StreamYard Plans Explained
Free Plan ($0/month)
- Who it’s for: New streamers & hobbyists looking to test the waters.
- Pros: No cost, easy access, all core features, try before you buy.
- Cons: StreamYard branding, storage/recording limits, limited destinations.
- Key Features:
- 2 hours/month local recording
- Up to 6 on-screen participants
- 1 streaming destination
- Basic overlays, backgrounds, dark mode
Core Plan ($44.99/month or $34.99/month billed annually)
- Who it’s for: Growing creators & professionals needing branding and more power.
- Pros: 1080p HD, no StreamYard logo, up to 10 on-screen, 3 destinations, unlimited recordings.
- Cons: Big price jump from free, still some feature limits for teams.
- Key Features:
- Custom branding: overlays, logos, video clips, intro/outro
- Unlimited live/local recording
- Guest destinations, custom RTMP, AI Clips, chat overlays
- 50 hours permanent storage
Advanced Plan ($88.99/month or $68.99/month billed annually)
- Who it’s for: Power users & organizations needing 4K, advanced production, and larger events.
- Pros: 4K video, up to 8 destinations, 10+15 backstage, advanced branding, transcripts.
- Cons: Higher cost, features may exceed needs for most solo streamers.
- Key Features:
- 4K local recording
- 8 streaming destinations
- Downloadable transcripts, custom fonts
- On-Air webinars (100+ viewers), 2+ seats for team streaming
Business Plan ($299/month or $249/month billed annually)
- Who it’s for: Teams, agencies & enterprises needing premium features, collaboration, and scale.
- Pros: Unlimited everything, priority support, 10 seats, webinars up to 1000 viewers, 700+ hrs storage.
- Cons: High monthly cost, best for organizations & heavy users.
- Key Features:
- 10 destinations, 10 on-screen, 15 backstage
- Unlimited local recording, extra camera support, greenroom
- Priority support, advanced custom branding, custom referral messages
- Reusable studios, on-air webinars (1000+ viewers)

StreamYard Pricing FAQs
- Can I use StreamYard for free? Yes, StreamYard offers a free plan with basic features and the StreamYard logo.
- Is there an annual discount? Yes, annual billing saves you 20–30% versus monthly rates.
- What’s the main difference between Core and Advanced? Advanced offers 4K video, more destinations, and better team/event tools.
- This YouTube video explains the plans
- Is there a trial for paid plans? You can upgrade anytime and cancel or downgrade easily if it’s not for you.
- Can I switch plans? Yes, upgrade/downgrade at any time from your StreamYard dashboard.
- Where can I find the most current prices? Click here for the latest official pricing
-
Podbean Pricing: The Best Podcast Hosting Platform for Getting Started?
Podbean Pricing Plans (2026): Every Tier Compared
Click Here For Podbean Deals
Podbean is one of the longest-running podcast hosting platforms on the market, and its pricing has evolved to match how modern creators actually work. Whether you publish a solo audio show, run a video podcast, or manage a private internal feed for your company, there is a Podbean plan built for your workflow.
This guide breaks down every Podbean plan, what each tier includes, how the AI credit system works, and who each plan is best for—so you can pick the right one without overpaying. If you are still deciding between hosts, start with our broader podcast hosting comparison or our overview of the top paying podcasting platforms.
Podbean Pricing at a Glance (2026)
👉 Limited Deal: Risk-Free 30-Day Podbean Trial
Click Here For More Podbean Pricing
Podbean offers a free Basic tier plus four paid plans. All paid plans include unlimited total storage, a customizable podcast website, one-click distribution to major directories, and access to Podbean’s AI tools. Prices listed below reflect annual billing; monthly billing is also available at a higher rate.
| Plan | Annual Price | Monthly Price | Monthly Upload Limit | Channels | AI Credits/Mo. | Best For |
|---|---|---|---|---|---|---|
| Basic (Free) | $0 | $0 | 5 hrs / 100 GB bandwidth | 1 | — | Testing the waters |
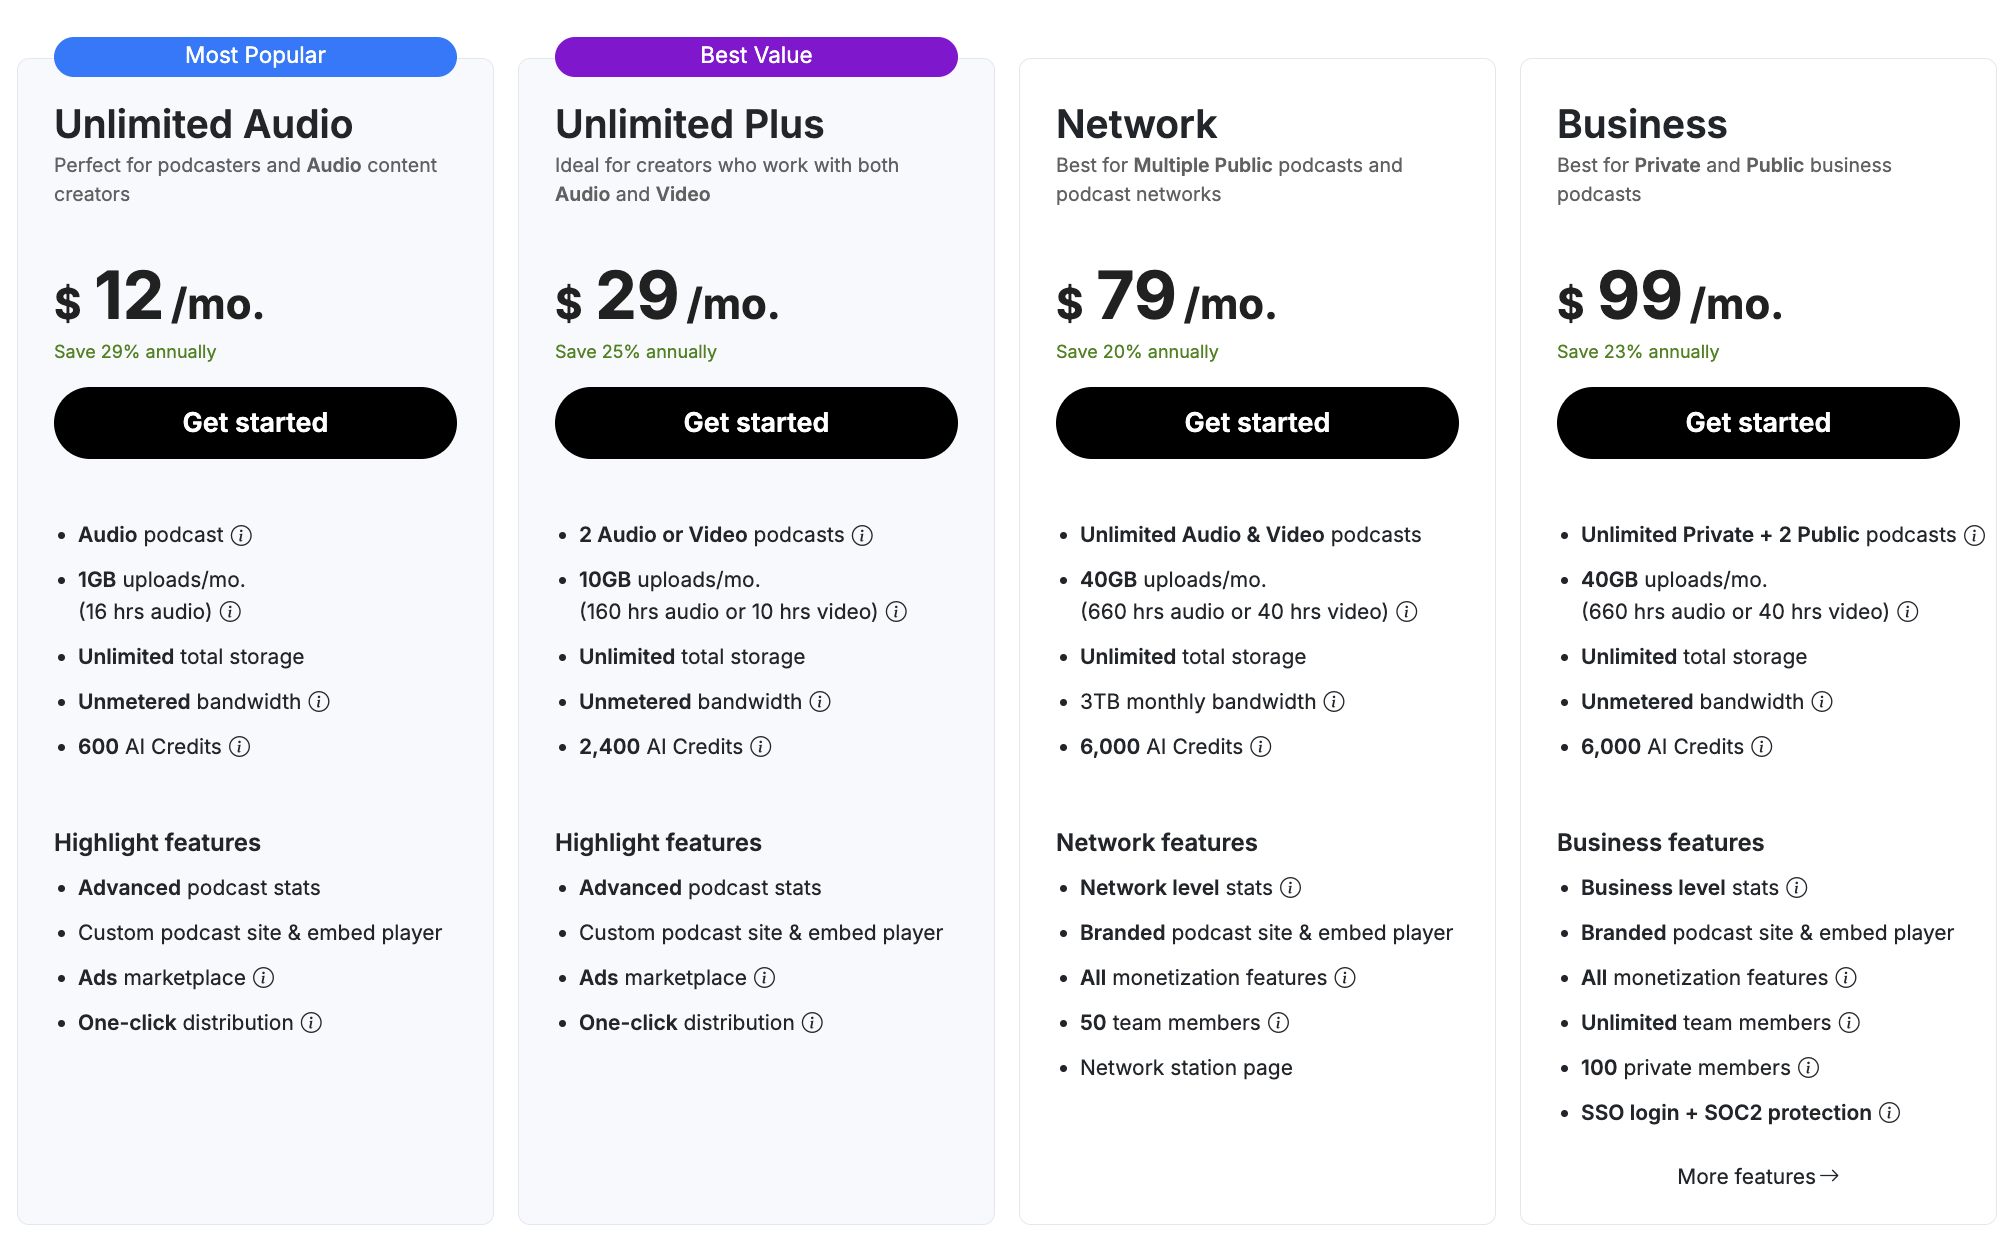
| Unlimited Audio | $12/mo | $17/mo | 1 GB (~16 hrs audio) | 1 | 600 | Solo audio podcasters |
| Unlimited Plus | $29/mo | $39/mo | 10 GB (~160 hrs audio / ~10 hrs video) | 2 | 2,400 | Audio + video creators |
| Network | $79/mo | $99/mo | 40 GB (~660 hrs audio / ~40 hrs video) | Unlimited | 6,000 | Podcast networks |
| Business | $99/mo | $129/mo | 40 GB (~660 hrs audio / ~40 hrs video) | Unlimited private + 2 public | 6,000 | Private and internal podcasts |
All paid plans include unlimited total storage, unmetered bandwidth (Network is capped at 3 TB/month), advanced podcast analytics, and access to Podbean’s Ads Marketplace. You can upgrade or downgrade at any time—upgrades take effect immediately, and downgrades apply after your current billing cycle ends. For a detailed breakdown of how much it costs to start a podcast, our cost guide covers hosting alongside gear and software expenses.
Free Basic Plan
Podbean’s free tier lets you publish up to 5 hours of podcast content with 100 GB of monthly bandwidth, generate an RSS feed, and get a basic podcast website. It is designed for creators who want to test the platform before committing to a paid subscription. The free plan includes basic statistics, a custom embeddable player, and access to the Podbean mobile app for recording and publishing on the go. You do not get access to Podbean AI, monetization tools, advanced analytics, or the ability to map a custom domain on this tier.
One important caveat: once you upgrade to a paid plan, you cannot downgrade back to the free tier. If you are just getting started and want to compare free hosting options, check out our full guide to free podcast hosting. You can also explore how to start a podcast for free or see whether SoundCloud podcast hosting or Squarespace podcast hosting might be better free or low-cost alternatives for your situation. For podcasters migrating away from Spotify for Podcasters (formerly Anchor), our guide on what happened to Anchor and what to use instead of Anchor explains your options.
Unlimited Audio — $12/mo (Annual)
The Unlimited Audio plan is Podbean’s most popular tier and the entry point for creators who are serious about publishing consistently. At $12 per month on annual billing ($17 month-to-month), it gives you everything the free plan offers plus unlimited total storage, unmetered bandwidth, and access to the full Podbean feature set for a single audio podcast channel.
Your monthly upload limit is 1 GB, which translates to roughly 16 hours of audio content per month—more than enough for a weekly show. You also get 600 AI credits per month, advanced podcast statistics with listener location, device, and source breakdowns, episode trends and comparison tools, basic user engagement intel, and eligibility for the Ads Marketplace and Apple Podcasts Subscriptions integration.
PodAds dynamic ad insertion is available on this tier at $1 CPM. If you are looking for ways to monetize your podcast, this plan gives you the core tools to start earning through advertising and premium content. For additional monetization strategies, our guide on making real money in podcasting covers paths beyond traditional ads.
Who Should Choose Unlimited Audio?
This plan is ideal for solo creators running a single audio podcast who want professional-grade hosting with monetization options baked in. If you are producing a weekly show and want access to analytics that go beyond basic download counts, this is the sweet spot. For context on what kind of numbers matter, see our breakdown of podcast download numbers and what they actually mean, or use our podcast revenue calculator to estimate your earning potential.
If you are concerned about outgrowing a budget-friendly host, our post on hitting the limits of low-cost podcast hosting explains when it makes sense to upgrade.
Unlimited Plus — $29/mo (Annual)
The Unlimited Plus plan adds video podcast hosting and a much larger monthly upload limit. At $29 per month on annual billing ($39 month-to-month), you get 10 GB of uploads per month—enough for roughly 160 hours of audio or 10 hours of video—and can manage up to two podcast channels (audio or video) from a single account.
AI credits jump to 2,400 per month, giving you significantly more room for automated show notes, transcripts, chapter markers, and AI audio optimization. Like the Unlimited Audio plan, PodAds is available at $1 CPM, and you have full access to the Ads Marketplace and Apple Podcasts Subscriptions.
The key upgrade here is native video podcast support. Podbean’s Video to Podcast feature lets you auto-sync a YouTube playlist or video RSS feed and transform that content into podcast episodes. If you are already producing YouTube podcast content, this integration can save a lot of manual republishing work. For creators considering the shift to video, our post on whether video podcasts are back covers the strategic case.
Who Should Choose Unlimited Plus?
This plan fits creators who publish in both audio and video formats, or anyone who needs a second podcast channel without paying for a full network plan. It is also the right choice for podcasters who lean heavily on AI-assisted post-production—the 4x jump in AI credits from the Audio plan makes a meaningful difference if you are using transcription, chapter markers, and noise reduction on every episode. If you want to compare video-friendly platforms more broadly, see our guide to the best video podcast platforms. For remote recording workflows that complement Podbean’s hosting, check out our roundup of remote podcast recording software and our comparison of SquadCast vs. Zencastr.
Network Plan — $79/mo (Annual)
The Network plan is built for creators or organizations that manage multiple public podcasts under a single brand. At $79 per month on annual billing ($99 month-to-month), you get unlimited audio and video podcast channels, 40 GB of monthly uploads, 6,000 AI credits, and up to 50 team members with role-based access (owner, admins, channel-admins, analysts, and contributors).
This is also the first tier where PodAds dynamic ad insertion is included for free (lower plans pay $1 CPM). You get network-level analytics that aggregate performance data across all your shows, a branded network station page, full-customized embeddable players, live chat support, and the ability to remove Podbean branding from your site and players.
The one trade-off at this tier is bandwidth: the Network plan caps you at 3 TB per month rather than offering unmetered bandwidth. For most podcast networks, 3 TB is more than sufficient, but if you expect very high download volumes across many shows, it is worth keeping in mind.
Who Should Choose Network?
This plan is the right fit for podcast networks with multiple shows, media companies consolidating their audio content under one account, or prolific creators who run several feeds. If you are exploring the podcast network model, our guide on what to check before joining a podcast network covers the key considerations. You can also explore our directory of podcast networks for small podcasts to see what network affiliation options exist beyond self-hosting.
Business Plan — $99/mo (Annual)
The Business plan is Podbean’s solution for organizations that need private podcast hosting alongside public feeds. At $99 per month on annual billing ($129 month-to-month), you get everything in the Network plan plus unlimited private podcast channels, unlimited team members, 100 private members (with the option to purchase more), SSO login integration, and SOC 2-certified data protection.
Bandwidth is unmetered on this tier (with premium bandwidth included), and user engagement analytics are upgraded to the Advanced level—giving you deeper insight into listener behavior including plays, skips, relistens, and consumption trends. The mobile app experience also upgrades to the Pro Podcast app, and you get live chat support.
For organizations with larger needs, Podbean offers custom Enterprise pricing with white-label app development, custom integrations, private groups, dedicated support, and development support for custom features. You can explore those options on their enterprise pricing page.
Who Should Choose Business?
This plan is designed for companies using podcasts for internal communication, employee training, onboarding, or client-facing private content. If you need access control, SSO, and compliance-grade security, this is the only standard Podbean plan that delivers all three. For a broader look at private and enterprise solutions, see our roundup of enterprise podcast solutions and our guide to private podcast platforms. If you want to explore setting up a private feed on a tighter budget first, we also cover how to make a private podcast for free.
👉 Limited Deal: Risk-Free 30-Day Podbean Trial
Full Feature Comparison by Tier
The pricing table above covers the headline numbers, but several features differ between tiers in ways that matter for day-to-day use. Here is how the details break down across all four paid plans.
| Feature | Unlimited Audio ($12/mo) | Unlimited Plus ($29/mo) | Network ($79/mo) | Business ($99/mo) |
|---|---|---|---|---|
| Audio Hosting | Yes | Yes | Yes | Yes |
| Video Hosting | No | Yes | Yes | Yes |
| Podcast Channels | 1 (add-on $) | 2 (add-on $) | Unlimited | Unlimited private + 2 public |
| Bandwidth | Unmetered | Unmetered | 3 TB/mo | Unmetered + premium |
| User Engagement Analytics | Basic | Basic | Basic | Advanced |
| Network-Level Analytics | No | No | Yes | Yes |
| PodAds (Dynamic Ad Insertion) | $1 CPM | $1 CPM | Free | Free |
| Embeddable Players | Customized | Customized | Full-customized | Full-customized |
| Mobile App | Podbean app | Podbean app | Podbean app | Pro Podcast app |
| Team Members | — | — | 50 | Unlimited |
| Remove Podbean Branding | No | No | Yes | Yes |
| Private Podcasting / SSO | No | No | No | Yes |
| Live Chat Support | No | No | Yes | Yes |
All four paid plans include advanced podcast stats, episode trends and comparison, Apple Podcasts Subscriptions integration, Ads Marketplace access, unlimited live streaming, RSS feed generation, one-click directory distribution, auto-sharing to social media, custom domain mapping, and a professional podcast website. For a closer look at how podcast analytics tools work across platforms, our roundup covers what metrics actually matter.
Podbean AI: How the Credit System Works
One of the most significant additions to Podbean in recent years is its built-in AI toolkit, which is available on all paid plans. Podbean uses a unified credit system—each plan includes a set number of AI credits per month, and credits are consumed at different rates depending on the tool you use.
There are three main categories of Podbean AI tools:
AI Audio Optimization uses 600 credits per hour of processed audio. This includes noise reduction, intelligent leveling, filler word and silence removal, and advanced filtering with AutoEQ. If you have been using external tools for silence removal or background audio removal, Podbean’s built-in option may simplify your workflow. For more on fixing bad audio, see our post on the tool that fixes bad audio and our guide to improving podcast sound quality.
AI Content Assistant uses 300 credits per hour of source audio. This generates automated episode titles, show notes, chapter markers, and AI-enhanced transcripts. For creators who want to improve discoverability, auto-generated show notes and transcripts tie directly into SEO for podcasters and the broader topic of whether podcast SEO is worth the effort. If you prefer to handle transcription outside Podbean, our guide to Podbean transcription explains your options, and our post on transcribing your podcast locally with OpenAI Whisper covers a free DIY alternative. You can also explore podcast transcription tools more broadly.
AI Podcast Creator uses 600 credits per hour and lets you turn text, files, blog posts, or ideas into fully produced podcast episodes. The companion Blog to Podcast feature auto-syncs your blog feed into AI Podcast Creator, which is a compelling option if you are already repurposing podcast content or want to go the other direction and turn written content into audio. For more on content repurposing workflows, see our guide on turning podcast audio into social media content and our overview of turning your podcast into passive income with AI.
AI credits reset monthly on your billing cycle date (at 00:00 GMT). If you need more than your plan includes, you can purchase additional credits through your account dashboard under Add-on Features. Credits are shared across all channels on your account, including channels managed by Company Admins and Channel Admins.
Here is a quick reference for how many episodes you can process per tier:
| Plan | AI Credits/Mo. | Audio Optimization (hrs) | Content Assistant (hrs) | AI Podcast Creator (hrs) |
|---|---|---|---|---|
| Unlimited Audio | 600 | 1 hr | 2 hrs | 1 hr |
| Unlimited Plus | 2,400 | 4 hrs | 8 hrs | 4 hrs |
| Network | 6,000 | 10 hrs | 20 hrs | 10 hrs |
| Business | 6,000 | 10 hrs | 20 hrs | 10 hrs |
Keep in mind that most creators use a mix of AI tools on each episode, so your actual throughput will depend on which features you apply. If you are comparing AI-assisted post-production options across platforms, our guide to the best podcast editing software and our overview of Castmagic pricing cover the alternatives.
Podbean Monetization Features
Podbean offers more built-in monetization pathways than most hosting platforms. Every paid plan includes access to three core revenue tools:
Ads Marketplace connects you with advertisers directly through Podbean. Your podcast must pass a content safety review to qualify, but once approved, you can earn through sponsorship placements without managing advertiser relationships yourself. For a broader look at how podcast advertising works, see our guides on how to get ads on your podcast, podcast advertising platforms, and making your niche podcast more attractive to advertisers. If you are curious about ad economics, our posts on how much podcast ads cost and how much podcasts make from ads break down the numbers.
PodAds (Dynamic Ad Insertion) lets you insert your own ads or sponsored content into episodes dynamically. On the Unlimited Audio and Unlimited Plus plans, this costs $1 CPM. On the Network and Business plans, PodAds is included for free. For more on structuring your show around advertising, see our episode on restructuring your podcast to be advertising-friendly.
Apple Podcasts Subscriptions integration lets you create and manage premium episodes for paying subscribers directly from the Podbean dashboard. This gives you a direct path to subscription revenue through Apple’s ecosystem without needing a separate membership platform. For more on premium content strategy, see our guide to podcast premium content.
Podbean also supports live streaming with virtual gifting and Fan Club memberships, which creates an additional income stream beyond traditional advertising. For more on live podcasting, see our guide to livestreaming platforms for podcasters and our episode on live podcasting. If you are weighing different platforms for podcast monetization, Podbean’s built-in options are among the most comprehensive available without third-party tools. For a complete overview of every revenue strategy available to podcasters, see our podcast money guide and our breakdown of how podcasters make money. You can also run the numbers through our podcast revenue calculator or Patreon fees calculator if you are considering a membership model alongside Podbean’s tools.
Podbean Analytics and Distribution
All paid Podbean plans include advanced podcast statistics with IAB-certified download tracking. You get breakdowns by listener location, device type, listening source, and episode-level performance trends. Episode trends and comparison tools let you track performance over time and compare episodes side by side. The Network and Business tiers add aggregated network-level analytics so you can track growth across multiple shows from a single dashboard, while the Business plan further upgrades user engagement intel to the Advanced level with play, skip, relisten, and consumption trend data.
For more on understanding your podcast data, see our guide to podcast analytics tools, our post on OP3 podcast analytics, and our episode on how listener data can improve your podcast.
Distribution is handled through one-click submission to Apple Podcasts, Spotify (audio only), Amazon Music, iHeartRadio, and the Podbean app. Episodes can be auto-shared to Facebook, LinkedIn, YouTube, Tumblr, and WordPress. For a deeper dive into getting your show listed everywhere, see our guide on how to upload your podcast to all platforms, our guide to getting on Spotify, and our post on how to distribute a podcast.
Each plan includes a customizable podcast website with your own domain mapping, an embeddable player, and an RSS feed for each podcast channel. If you need help setting up your feed, our guide on creating an RSS feed for a podcast and our RSS feed generator can help. If you are thinking about whether your podcast needs its own site beyond what Podbean provides, we cover that decision in detail in our post on why every business podcast needs its own website, our roundup of website builders for podcasts, and our look at what a Buzzsprout podcast website is and isn’t for comparison.
Podbean vs. Competitors: How Pricing Compares
Podbean sits in the mid-range of podcast hosting pricing, but its feature density—especially around monetization and AI—puts it ahead of many competitors at similar price points. Here is how it stacks up against the platforms podcasters most often compare it to.
| Feature | Podbean ($12/mo) | Buzzsprout ($12/mo) | Libsyn ($5–$20/mo) | Transistor ($19/mo) | Castos ($19/mo) |
|---|---|---|---|---|---|
| Unlimited Storage | Yes | No (3 hrs/mo) | Plan-dependent | Yes | Yes |
| Video Podcast Support | No (Plus plan+) | No | Yes (higher tiers) | No | Yes |
| Built-in Monetization | Ads Marketplace, PodAds, Apple Subs | Affiliate Marketplace | Libsyn Ads | No | No |
| AI Tools | Yes (600 credits/mo) | Limited (add-on) | No | No | Limited |
| Live Streaming | Yes (unlimited) | No | No | No | No |
| Multiple Podcasts | Add-on ($) | Add-on ($) | Separate plans | Included (unlimited) | Included (3+) |
| Private Podcasting | Business plan only | No | Yes | Yes | Yes |
For detailed pricing breakdowns of each competitor, see our individual guides: Buzzsprout pricing (also see Buzzsprout pricing plans), Transistor pricing, Acast pricing, Async (Podcastle) pricing, Castos pricing, StreamYard pricing, Zencastr pricing, and SquadCast pricing.
For a side-by-side look at Podbean specifically, we also have dedicated comparison posts for Podbean vs. Buzzsprout, Podbean vs. Libsyn, Podbean vs. Anchor, and Spreaker vs. Podbean. If you want even more hosting comparisons, check out Buzzsprout vs. Libsyn, Buzzsprout vs. Captivate, and Buzzsprout vs. Anchor.
Podbean Pros and Cons
What Podbean Does Well
All-in-one monetization. Few hosting platforms match Podbean’s built-in revenue tools. Between the Ads Marketplace, PodAds dynamic insertion, Apple Podcasts Subscriptions, and live streaming with virtual gifting, you can pursue multiple income streams without leaving the platform. For more on the full spectrum of how podcasters make money, we cover every major path in our monetization guide. You can also check our post on Spotify podcast monetization and how to monetize with Acast to see how other platforms compare on the revenue side.
AI-powered post-production. The integrated AI tools for noise reduction, leveling, filler word removal, transcription, show notes, and chapter markers are a genuine time-saver. Competing platforms either lack these features entirely or charge separately for them. If you are evaluating your editing workflow more broadly, our guide to the best podcast editing software and our overview of podcast editing software cover the full landscape.
Flexible plan structure. The tiered approach—from a free starter plan through enterprise-grade private hosting—means you do not have to switch platforms as your podcast grows. You can start on the Unlimited Audio plan and scale up to Network or Business without migrating your content.
Reliable uptime and distribution. Podbean includes a global CDN, one-click distribution to every major directory, and auto-sharing to social platforms. For a broader look at how hosting platforms handle distribution, see our podcast hosting platforms comparison and our guide to easy podcast hosting. If you are also exploring the hosting ecosystem, our guide to Anchor podcast hosting explains where Spotify for Podcasters fits in the landscape today.
Where Podbean Falls Short
Upload limits are measured in GB, not hours. While Podbean provides approximate hour equivalents, the 1 GB monthly limit on the Unlimited Audio plan can feel restrictive for creators who produce long-form content or record at higher bitrates. Podcasters who care about audio quality settings should review our post on podcasting bitrate to understand how file size and quality interact, and our guide to the best audio format for podcasts for format recommendations.
Website customization has limits on lower tiers. Podbean’s built-in podcast website is functional but not as flexible as a full WordPress site. Customization improves on higher tiers, and you can map your own domain on any paid plan, but if web design control matters to you, a dedicated podcast website builder or WordPress podcast setup may serve you better. For more website options, see our podcast website examples and our podcast website checklist.
No downgrade path back to free. Once you move to a paid plan, you cannot return to the free tier. This is worth knowing before you commit, especially if you are still in the experimentation phase.
Video distribution is Spotify audio-only. While Podbean supports video hosting on the Unlimited Plus plan and above, Spotify distribution is currently audio-only. If your primary strategy is getting your podcast on Spotify with video, this is a limitation to weigh against other video podcast platforms.
No built-in remote recording. Unlike platforms such as Riverside or SquadCast, Podbean focuses on hosting and distribution rather than multitrack recording. If remote interviews are central to your workflow, you will need a separate tool. Our comparisons of SquadCast vs. Riverside and remote video recording software can help you choose the right companion tool.
How to Get Started with Podbean
Signing up for Podbean starts with a free account. From there, you can explore the dashboard, set up your RSS feed, and publish a few test episodes before deciding on a paid plan. If you are migrating from another host, Podbean offers free import via RSS feed on all plans.
For creators who are still in the planning phase, our starting a podcast checklist walks through everything you need to have in place before launch. See also our guides on how to start a successful podcast, how to start a podcast with no audience, and 5 podcast launch mistakes to avoid. If you need help with the gear side, our podcast equipment guide covers microphones, interfaces, headphones, and recording setups at every budget level. For more targeted equipment recommendations, check out our guides to recording equipment for solo podcasters, equipment for co-hosts and groups, best cheap podcast microphones, and best podcast headphones. You can also explore our full directory of podcast tools for software recommendations across every stage of your workflow.
Frequently Asked Questions
Is Podbean free?
Yes. Podbean offers a free Basic plan with 5 hours of upload space, 100 GB monthly bandwidth, basic statistics, and a simple podcast website. It is a good way to test the platform, but it does not include AI tools, monetization features, or advanced analytics. Keep in mind that once you upgrade to a paid plan, you cannot downgrade back to free.
How much does Podbean cost per month?
Podbean’s paid plans start at $12 per month on annual billing for the Unlimited Audio plan. Monthly billing starts at $17 per month. The most expensive standard plan is the Business tier at $99 per month on annual billing ($129 monthly). Custom enterprise pricing is also available for organizations that need white-label apps, custom development, and dedicated support.
Can I switch Podbean plans later?
Yes. You can upgrade or downgrade between paid plans at any time. Upgrades take effect immediately, while downgrades apply after your current billing cycle ends. Annual subscriptions include a discounted rate compared to monthly billing.
Does Podbean support video podcasts?
Yes, starting with the Unlimited Plus plan ($29/mo annual). The Unlimited Audio plan is audio-only. Video to Podcast functionality lets you auto-sync YouTube playlists into podcast episodes. For more on video podcasting, see our guide to the best video podcast platforms and our episode on whether video podcasts are back.
What are Podbean AI credits?
Podbean AI credits are a unified currency for using Podbean’s built-in AI tools, including audio optimization (600 credits/hr), content generation like show notes, titles, transcripts, and chapters (300 credits/hr), and AI Podcast Creator (600 credits/hr). Each plan includes a set number of credits per month (600 to 6,000 depending on your tier), credits reset monthly on your billing cycle date, and you can purchase additional credits if needed. Credits are shared across all channels on your account.
Does Podbean offer private podcasting?
Yes, but only on the Business plan ($99/mo annual) and Enterprise plans. Private podcasting includes access control, SSO login, SOC 2-certified security, private groups, and private member management. For a broader comparison, see our guide to the best private podcast platforms and our overview of enterprise podcast solutions.
How does Podbean compare to Buzzsprout?
Both platforms are popular choices for podcast hosting. Podbean offers more built-in monetization tools and AI features, while Buzzsprout is known for its simplicity and beginner-friendly interface. Podbean includes unlimited storage on all paid plans; Buzzsprout limits upload hours by tier. For a detailed comparison, see our Podbean vs. Buzzsprout breakdown. You can also compare Buzzsprout pricing side by side, or read our take on whether Buzzsprout is the right choice.
Can Podbean help me make money from my podcast?
Yes. Podbean includes an Ads Marketplace for sponsorship revenue, PodAds for dynamic ad insertion, Apple Podcasts Subscriptions for premium content, and live streaming with virtual gifting. These tools are available on all paid plans, though PodAds is only free on Network and Business tiers (lower plans pay $1 CPM). For a complete overview of podcast revenue strategies, see our guide on whether you can make money from a podcast and our podcast money guide.
How does Podbean compare to Libsyn?
Podbean and Libsyn are both established podcast hosting platforms, but they take different approaches. Podbean offers unlimited storage on all paid plans and includes AI tools at every tier, while Libsyn uses storage-based pricing without built-in AI. Podbean’s monetization suite is more comprehensive, with Ads Marketplace, PodAds, Apple Podcasts Subscriptions, and live streaming. Libsyn offers its own ad marketplace and supports video on higher tiers. For a full breakdown, see our Podbean vs. Libsyn comparison.
Does Podbean include transcription?
Yes. Podbean’s AI Content Assistant generates AI-enhanced transcripts as part of the credit system (300 credits per hour of source audio). This is included on all paid plans. For more details, see our guide to Podbean transcription and our broader overview of podcast transcription options.
Get Started with Podbean Today – Try It Risk-Free
Final Verdict
Podbean remains one of the strongest all-in-one podcast hosting platforms available in 2026. Its combination of unlimited storage, built-in monetization, AI-powered post-production, and live streaming capabilities makes it particularly compelling for creators who want to consolidate their toolkit into a single platform rather than stitching together multiple services.
The Unlimited Audio plan at $12/month (annual) is the right starting point for most solo audio podcasters. If you also produce video content, the Unlimited Plus plan at $29/month adds that capability without a steep jump in price. Podcast networks should look at the Network plan at $79/month, and organizations needing private feeds with enterprise-grade security will find those features exclusively on the Business plan at $99/month.
If you are still weighing your hosting options, start with our broader comparison of podcast hosting platforms, check out our podcast hosting platforms overview, or jump straight into our podcast tools directory to see how hosting fits into the bigger picture of your production workflow.
SquadCast Pricing Explained: Every Plan, Feature, and Trade-Off Worth Knowing
What Is SquadCast?
SquadCast is a browser-based remote recording studio built for podcasters, video creators, and content teams. It captures each participant’s audio and video locally on their own device and progressively uploads it to the cloud in real time, so your recording quality doesn’t depend on anyone’s internet connection. Every speaker gets a separate track, making post-production editing significantly easier.
Founded by Zachariah Moreno and launched as a standalone product, SquadCast was acquired by Descript and now comes bundled with every Descript subscription at no extra cost. That means when you subscribe to SquadCast, you also get access to Descript’s full editing suite — and vice versa. The two tools are currently in a transitional phase: SquadCast still operates as a standalone app, but Descript plans to fully integrate SquadCast’s recording technology directly into the Descript editor in a future update.
How SquadCast Pricing Works Now
Since joining Descript, SquadCast’s pricing is tied directly to Descript’s plan structure. When you subscribe to any Descript plan, you get SquadCast included. When you subscribe through SquadCast, you get Descript included. It’s effectively two tools for the price of one.
There are four tiers: Free, Hobbyist, Creator, and Business. Annual billing saves up to 35% compared to monthly. All paid plans include SquadCast remote recording plus Descript’s full editing, transcription, and AI tools.
The Four Plans at a Glance
Free — $0/mo
Best for: Testing the waters before committing
The Free plan gives you 1 recording hour per editor per month, 1 show, up to 10 participants per session, and 1 integration. You get isolated and mixed audio tracks, video and screen recording, and 1 hour of transcription per month. Exports are limited to 720p and include watermarks. AI features are available as a limited trial only.
Hobbyist — $24/mo ($16/mo billed annually)
Best for: Solo podcasters and casual creators
Hobbyist expands to 10 recording hours per editor per month, 5 shows, 10 participants, and 2 integrations. You get 10 hours of transcription per month, unlimited watermark-free exports up to 1080p, the Basic AI suite with 20 uses per month (including filler word removal, Studio Sound, green screen, clip creation, and social post drafting), 30 minutes of AI speech per month, and limited stock library access.
Creator — $35/mo ($24/mo billed annually)
Best for: Serious creators who produce regularly
Creator includes 30 recording hours per editor per month, unlimited shows, and unlimited integrations. Transcription expands to 30 hours per month. Video exports go up to 4K resolution. You get unlimited access to both Basic and Advanced AI features, 2 hours of AI speech per month, full access to the royalty-free stock library, and Dolby-powered master audio for professional sound quality.
Business — $40/mo (billed annually)
Best for: Teams and professional production operations
Business offers 40 recording hours per editor per month, plus everything in Creator. It adds free Basic seats for team collaboration, the full Professional AI suite with advanced features like translation proofreading, 5 hours of AI speech, SLA priority support, and unlimited overdub and regeneration capabilities.
💡 Note: Unused recording hours roll over automatically. The rollover cap is twice your monthly allotment — so on the Hobbyist plan, you can bank up to 20 hours. If you run out mid-session, SquadCast won’t cut you off; instead, you’ll be prompted to purchase additional hours at $5 per hour.
Feature-by-Feature Comparison
Here’s a detailed look at what each tier includes — covering both the SquadCast recording features and the bundled Descript editing tools.
| Feature | Free ($0) | Hobbyist ($24/mo) | Creator ($35/mo) | Business ($40/mo) |
|---|---|---|---|---|
| Annual Price (per mo) | $0 | $16 | $24 | $40 |
| Recording Hours / Editor / Mo | 1 | 10 | 30 | 40 |
| Unused Hours Rollover | ❌ | ✅ (up to 2× monthly) | ✅ (up to 2× monthly) | ✅ (up to 2× monthly) |
| Shows | 1 | 5 | Unlimited | Unlimited |
| Participants per Session | 10 + 10 Backstage | 10 + 10 Backstage | 10 + 10 Backstage | 10 + 10 Backstage |
| Integrations | 1 | 2 | Unlimited | Unlimited |
| Separate Audio Tracks (Iso + Mix) | ✅ | ✅ | ✅ | ✅ |
| Video + Screen Recording | ✅ | ✅ | ✅ | ✅ |
| Progressive Upload (Cloud Backup) | ✅ | ✅ | ✅ | ✅ |
| Video Export Quality | 720p (watermarked) | 1080p (no watermark) | 4K | 4K |
| Transcription Hours / Mo | 1 hr | 10 hrs | 30 hrs | 40 hrs |
| AI Filler Word Removal | Limited trial | ✅ (20 uses/mo) | ✅ Unlimited | ✅ Unlimited |
| Studio Sound (AI Enhancement) | Limited trial | ✅ (20 uses/mo) | ✅ Unlimited | ✅ Unlimited |
| AI Clips for Social Media | Limited trial | ✅ (20 uses/mo) | ✅ Unlimited | ✅ Unlimited |
| AI Speech (Voice Clones / Stock) | Limited trial | 30 min/mo | 2 hrs/mo | 5 hrs/mo |
| Stock Media Library | ❌ | Limited | ✅ Full / Unlimited | ✅ Full / Unlimited |
| Master Audio (Dolby) | ❌ | ❌ | ✅ | ✅ |
| Advanced AI Suite | ❌ | ❌ | ✅ Unlimited | ✅ Unlimited |
| Team Seats | ❌ | ❌ | ❌ | ✅ Free Basic seats |
| Overdub / Regenerate | ❌ | Limited | Limited | ✅ Unlimited |
| Translation Proofread | ❌ | ❌ | ❌ | ✅ |
| Priority Support (SLA) | ❌ | ❌ | ❌ | ✅ |
| Backstage / Green Room | ✅ | ✅ | ✅ | ✅ |
| Team Roles (Owner, Manager, Talent, File Manager) | ✅ | ✅ | ✅ | ✅ |
| In-Session Chat | ✅ | ✅ | ✅ | ✅ |
| Descript Editing Suite Included | ✅ (limited) | ✅ | ✅ | ✅ |
Pros and Cons of SquadCast
Here’s a balanced look at what SquadCast does well and where it comes up short, based on user reviews and hands-on evaluation.
✅ Pros
- Local recording with progressive upload — Audio and video are captured directly on each participant’s device and uploaded to the cloud in real time, so connection issues don’t ruin your recording. This is SquadCast’s signature feature and a genuine differentiator.
- Separate tracks for every participant — Each speaker gets their own isolated audio and video tracks, making editing, noise removal, and level adjustments far easier in post-production.
- Zero-download guest experience — Guests join via a browser link with no software to install. The onboarding process is consistently praised by users as smooth and intuitive.
- Descript included at no extra cost — Every paid plan bundles the full Descript editing suite, giving you text-based editing, transcription, AI tools, and export capabilities alongside your recording platform.
- Backstage mode — Producers, PR reps, or anyone else can join a session without being on camera or mic, and communicate via chat. This is a unique feature for managing professional recordings.
- Recording hours roll over — Unused hours carry forward (up to 2× your monthly limit), so you’re not penalized for lighter recording months.
- No audio drift — Because tracks are recorded locally, there’s no gradual desync between audio and video over long sessions — a common pain point with other remote tools.
- Strong customer support reputation — Users consistently highlight responsive and helpful support from the SquadCast team.
- Free plan available — Unlike some competitors, SquadCast still offers a functional free tier with 1 hour of recording per month.
❌ Cons
- Recording hours are capped — Unlike platforms that offer unlimited recording, SquadCast limits hours per plan. Heavy recorders may find themselves buying extra time at $5/hour.
- No podcast hosting or distribution — SquadCast is a recording and editing tool only. You’ll need a separate podcast host (like Buzzsprout, Transistor, or Podbean) to publish and distribute your show.
- 4K video locked to Creator plan and above — The Hobbyist tier maxes out at 1080p. If you need 4K video, you’ll need the Creator plan at $24/month (annual).
- No built-in monetization — There are no ad insertion, sponsorship marketplace, or revenue tools built into the platform.
- Occasional glitches when starting sessions — Some users report freezing or hiccups when initiating calls, though recordings themselves are typically unaffected once started.
- No mobile recording app — SquadCast is browser-based only. There’s no dedicated native app for recording on mobile, which may limit flexibility for on-the-go creators.
- Internet connection still required — While local recording protects quality, you still need an active connection to start and participate in sessions. There’s no true offline mode.
- Transitional state with Descript — SquadCast currently operates as a standalone app alongside Descript. The planned full integration hasn’t shipped yet, so workflows between the two tools aren’t completely seamless.
- AI features limited on lower tiers — The Basic AI suite on Hobbyist is capped at 20 uses per month. Unlimited AI access requires the Creator plan.
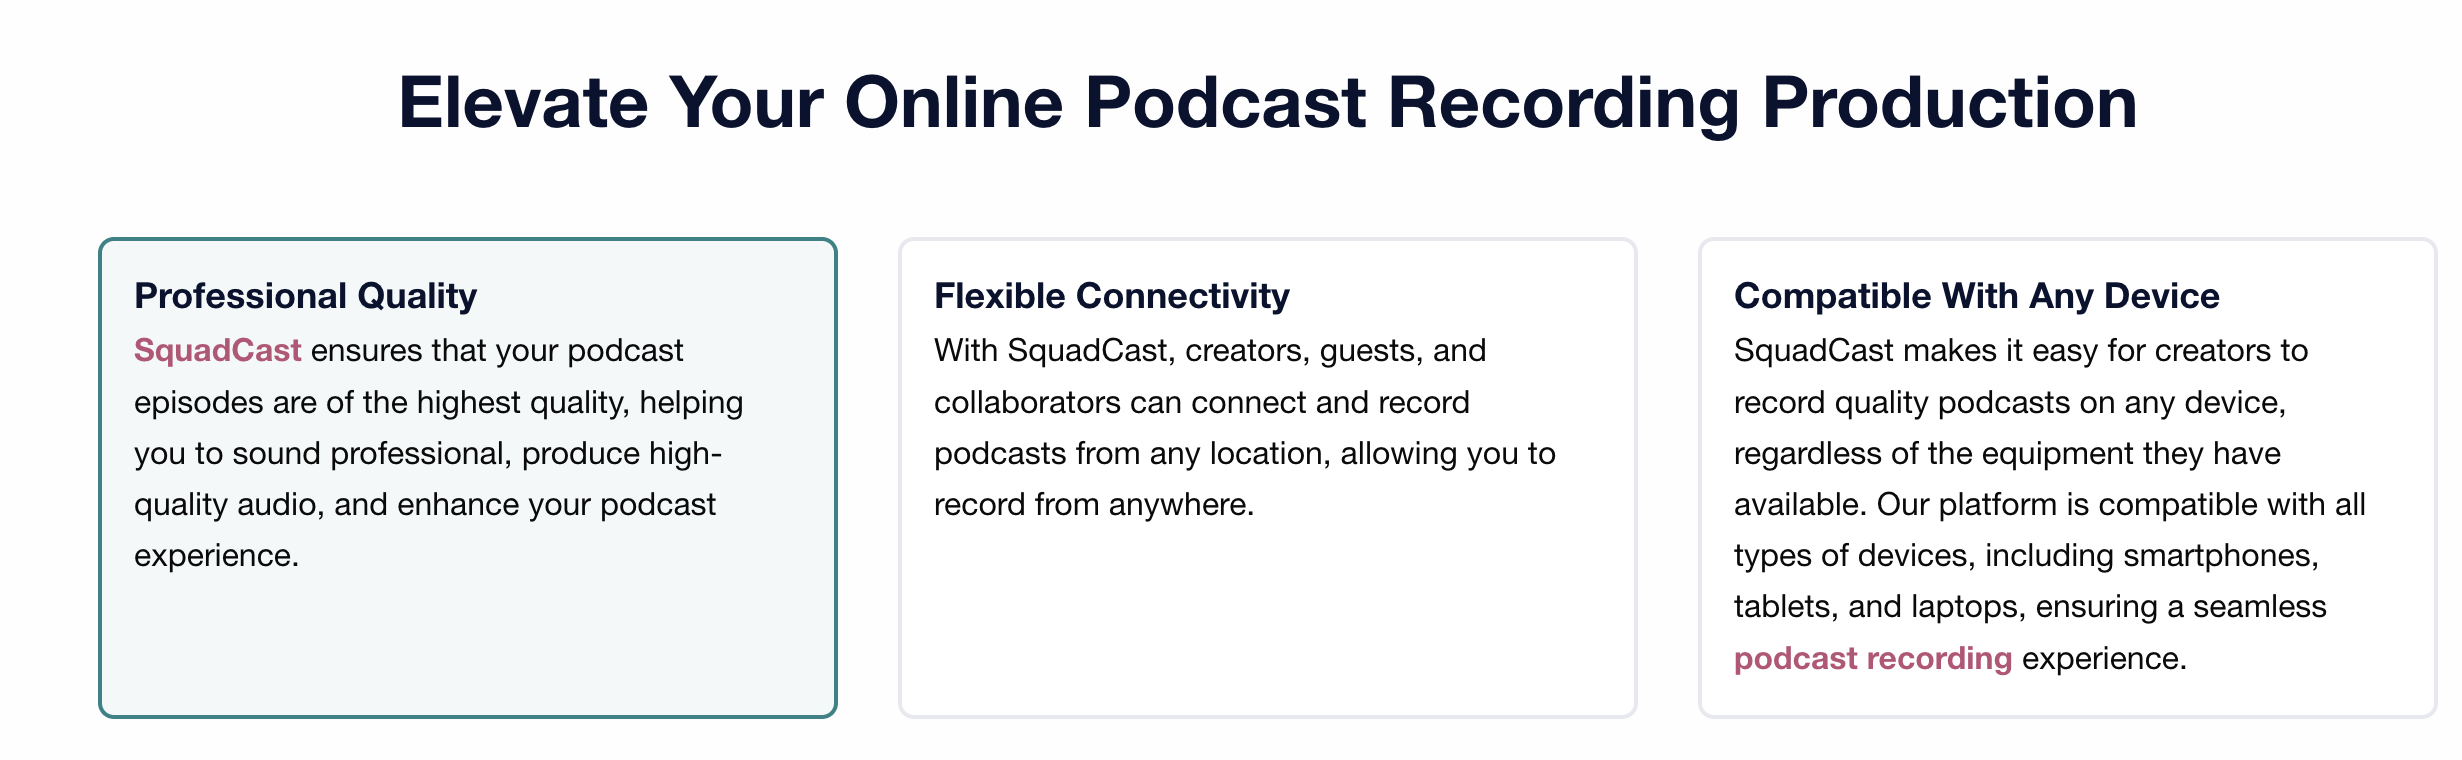
Who Should Pick Which Plan?
Free ($0/mo) — The Test Drive
The Free plan is a genuine trial of the platform — not a stripped-down teaser. You get 1 hour of recording per month, 10 participants, separate tracks, and video recording. It’s enough to run a test session or two and evaluate whether SquadCast fits your workflow before spending anything. Exports are watermarked at 720p, so it’s not viable for publishing, but it works perfectly for evaluation.
Hobbyist ($24/mo or $16/mo annually) — The Casual Creator
With 10 recording hours per month, 5 shows, 1080p exports, and the Basic AI suite, Hobbyist covers most solo podcasters who record a few episodes per month. The included Descript editing tools — text-based editing, filler word removal, and transcription — add significant value. You also get 30 minutes of AI speech for voice cloning or stock voices. This is a solid entry point for creators who want quality recording with integrated editing and don’t need 4K.
Creator ($35/mo or $24/mo annually) — The Serious Producer
Creator is where SquadCast becomes a professional-grade tool. You get 30 recording hours, unlimited shows and integrations, 4K video exports, Dolby-powered master audio, 30 hours of transcription, and unlimited access to both Basic and Advanced AI features. If you publish regularly, produce video podcasts, or need top-tier audio quality, this is the tier to target. The jump from Hobbyist is meaningful — 4K video, master audio, and unlimited AI access are all significant upgrades.
Business ($40/mo annually) — The Team Operation
Business adds team collaboration with free Basic seats, SLA priority support, 40 recording hours, 5 hours of AI speech, and unlimited overdub/regeneration. The Professional AI suite includes advanced capabilities like translation proofreading. This plan is built for production teams, agencies, and organizations that need multi-user access and guaranteed support response times. The price jump from Creator is modest ($16/month on annual billing), making it an easy upgrade for any team of two or more.
The SquadCast + Descript Bundle: What It Means for You
The biggest development in SquadCast’s recent history is its acquisition by Descript. In practical terms, this means every SquadCast subscription includes the full Descript editing platform, and every Descript subscription includes SquadCast recording. You’re effectively getting a remote recording studio and a professional editing suite for a single subscription fee.
Right now, the two tools are still separate apps — you record in SquadCast and your files appear in Descript for editing. Descript has announced plans to fully integrate SquadCast’s recording technology directly into the Descript app, which would make the entire record-to-publish workflow a single-app experience. That integration hasn’t shipped yet, but when it does, it could make this the most streamlined podcasting workflow on the market.
The Bottom Line
SquadCast’s core strength is recording reliability. Its local-first capture and progressive upload technology mean your recordings are protected even when internet connections aren’t perfect — and the separate tracks for each participant make editing dramatically easier. The Descript bundle adds genuine value by including professional editing, transcription, and AI tools at no extra cost.
For most podcasters, the Creator plan at $24/month (annual) is the sweet spot. It unlocks 4K video, Dolby master audio, 30 hours of recording, and unlimited AI features — all with Descript’s editing suite included. If you’re just starting out, the Hobbyist plan at $16/month (annual) gives you everything you need to record and edit professional episodes.
The main trade-offs to consider: SquadCast caps your recording hours (unlike platforms that offer unlimited recording), doesn’t include podcast hosting or distribution, and has no built-in monetization tools. If those are priorities for you, you may want to factor in the additional cost of a separate hosting service.
The free plan is a genuine evaluation tool — use it before committing. And keep an eye on the Descript integration roadmap, because when full integration ships, the combined platform could become the most compelling all-in-one podcasting workflow available.
Frequently Asked Questions
Does SquadCast have a free plan?
Yes. The Free plan includes 1 recording hour per month, 10 participants, separate tracks, video recording, and 1 hour of transcription. Exports are limited to 720p with watermarks.
What happens if I run out of recording hours mid-session?
Your session won’t be interrupted. SquadCast provides a grace period and then prompts you to purchase additional hours at $5 per hour. You can also upgrade your plan at any time.
Do unused recording hours carry over?
Yes. Unused hours roll over automatically each month. The cap is twice your plan’s monthly allotment — so on the 10-hour Hobbyist plan, you can accumulate up to 20 hours.
Does SquadCast include podcast hosting?
No. SquadCast is a recording and editing platform. You’ll need a separate podcast host (such as Buzzsprout, Transistor, Captivate, or Podbean) to publish and distribute your episodes.
Is Descript really included for free?
Yes. Since SquadCast joined Descript, all SquadCast plans include access to the corresponding Descript editing plan at no additional cost. The reverse is also true — Descript subscribers get SquadCast recording included.
Can guests join without creating an account?
Yes. Guests join via a simple browser link. No downloads, no installations, and no account creation required.
What audio and video formats can I export?
SquadCast supports WAV and MP3 for audio, and MP4 or WebM for video. Each participant gets separate tracks, and a mixed track is also available for quick previews.
Is there a mobile app?
SquadCast is primarily browser-based. There is no standalone mobile recording app, though guests can join sessions from mobile browsers.
Pricing and features accurate as of early 2026. Always verify current details on squadcast.fm/pricing. This page is not affiliated with SquadCast or Descript.
Zencastr Pricing Explained: Which Plan Actually Fits Your Podcast?
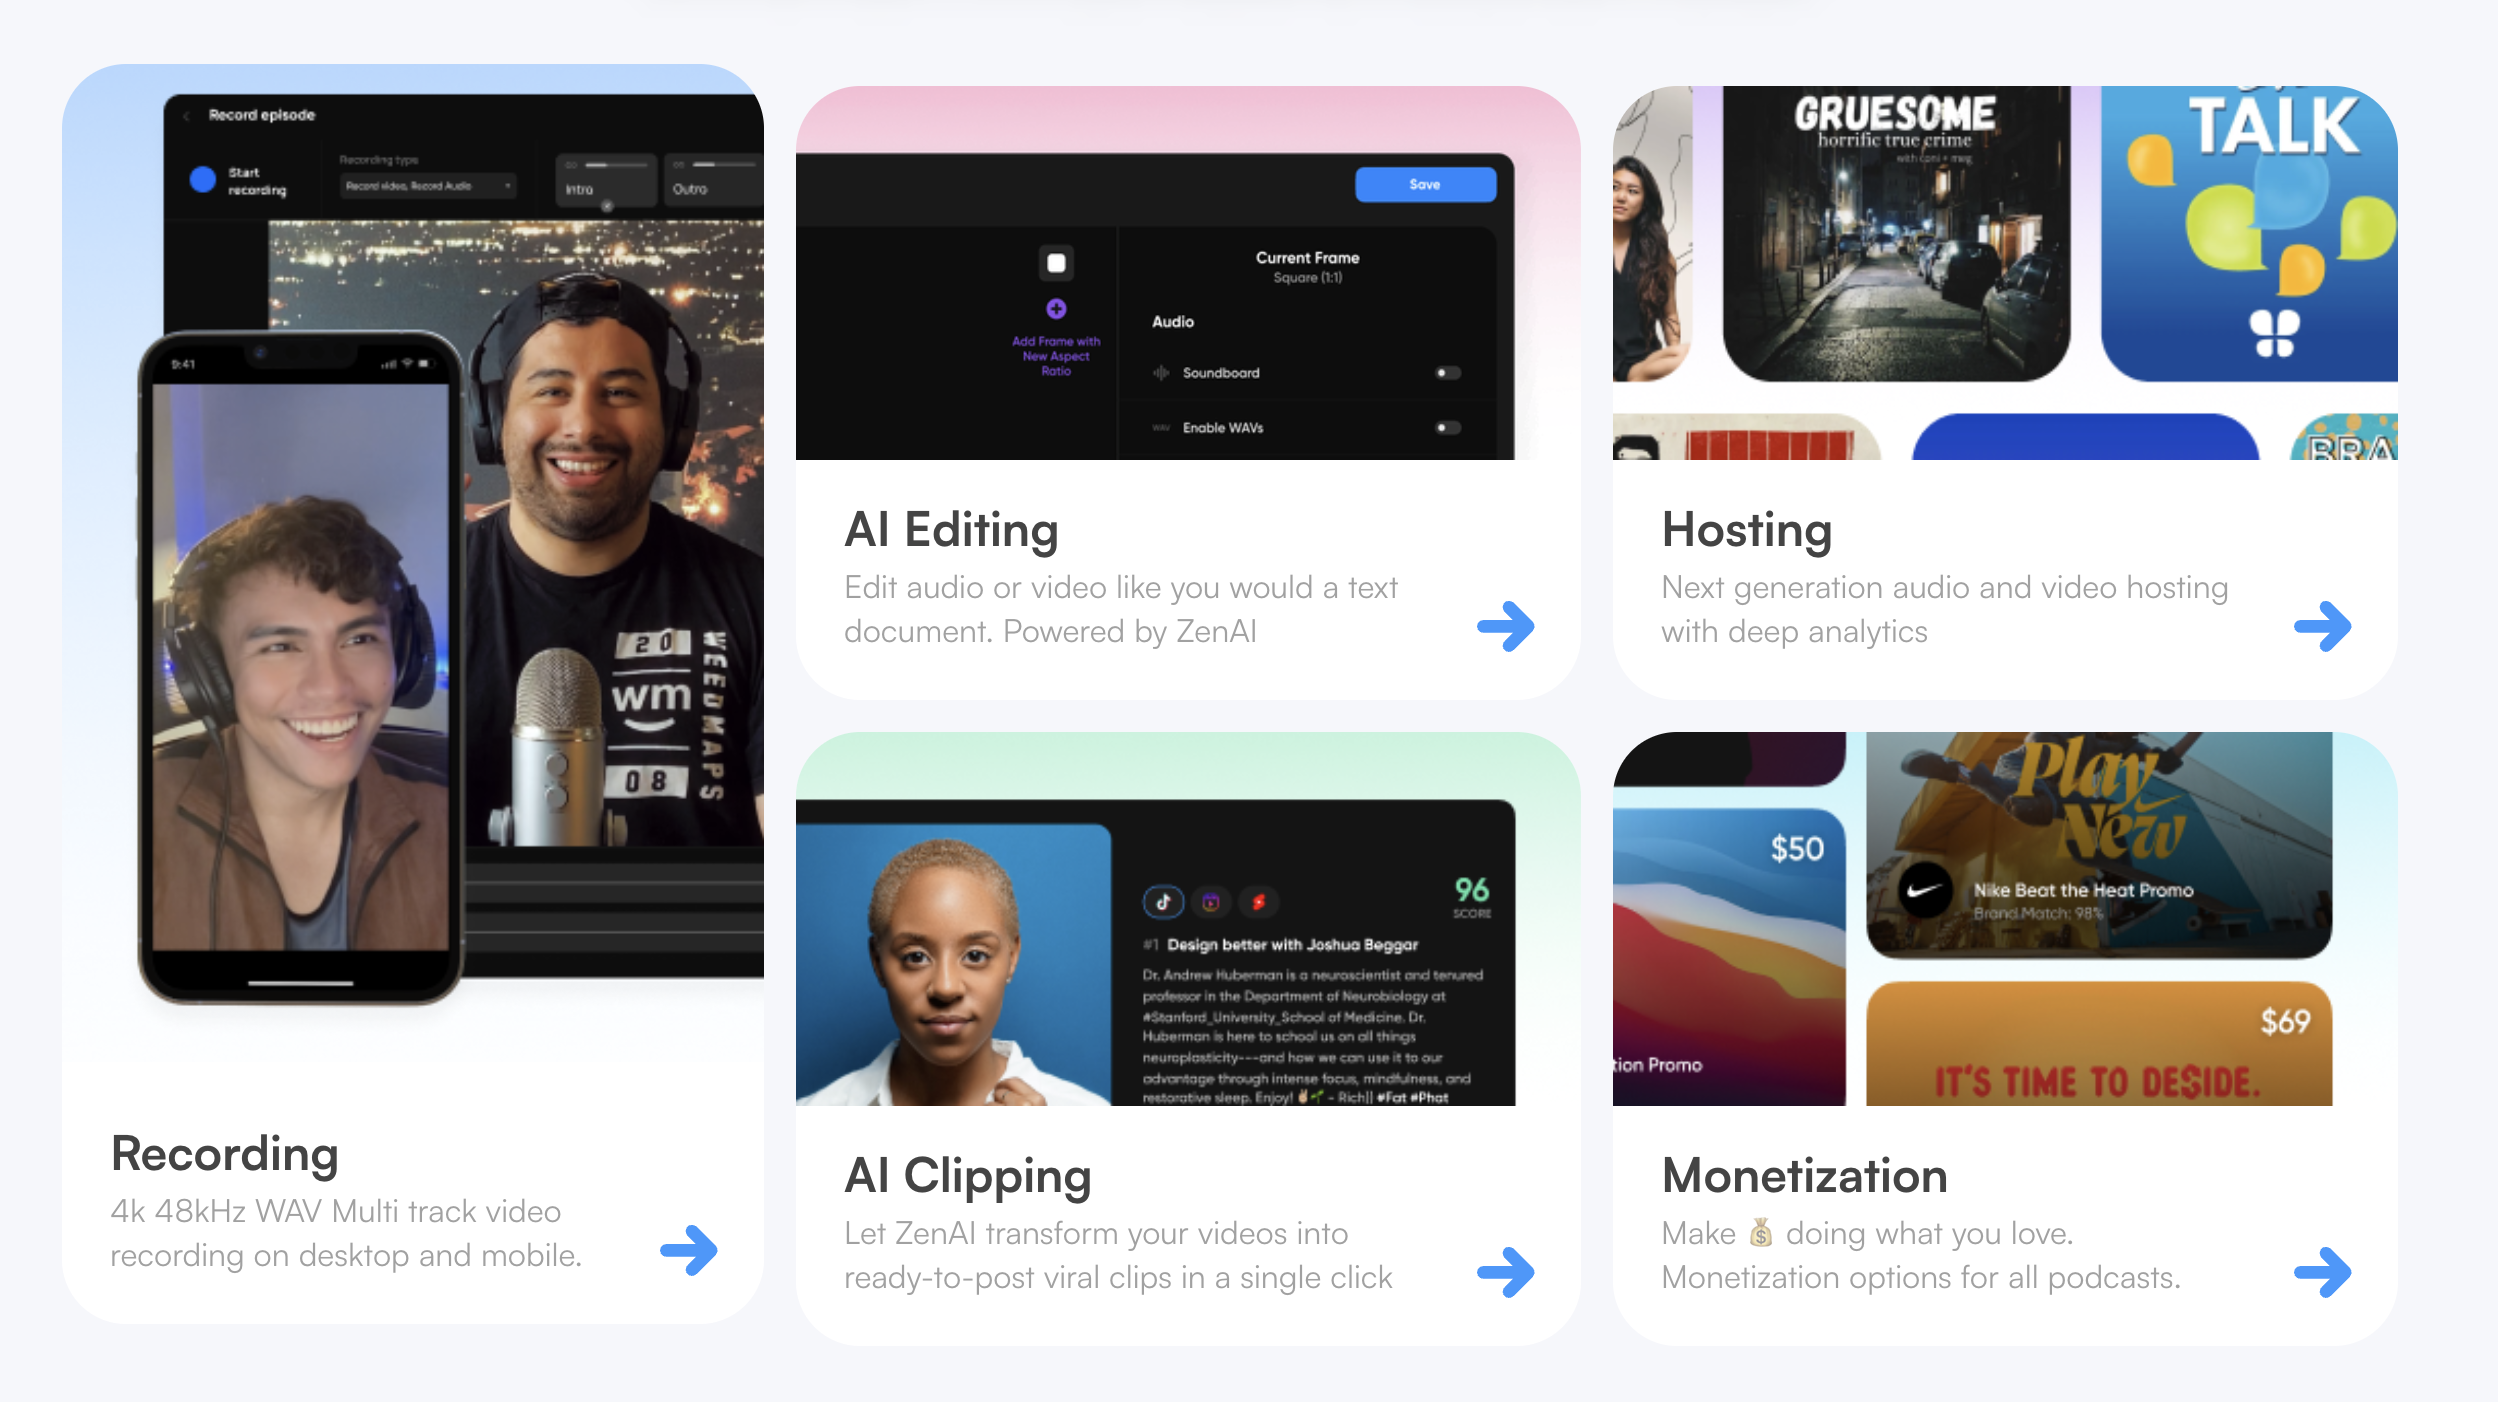 What Is Zencastr?
Zencastr is a browser-based, all-in-one podcasting platform that combines remote recording, AI-powered editing, podcast hosting, distribution, and monetization into a single dashboard. Guests join via a link — no downloads required — and each participant’s audio is recorded locally in lossless 16-bit 48kHz WAV quality, so your final product doesn’t depend on anyone’s internet connection.
Since launching in 2014, Zencastr has grown from a simple audio recording tool into a full production suite used by over 100,000 creators. The platform now supports video recording up to 4K, AI clipping for social media, text-based editing, and built-in monetization through its Creator Network.
The Four Plans at a Glance
Zencastr currently offers four paid tiers (monthly pricing shown below). All plans come with a 14-day free trial with no credit card required. Annual billing is available and typically saves 10–20%.
Standard — $20/mo (~$18/mo billed annually)
Best for: Solo creators getting started
The Standard plan covers all the essentials. You get unlimited recording hours, 1080p video, multitrack recording in high-quality WAV audio, the ZenAI editing suite, unlimited transcriptions, full podcast hosting and distribution, up to 1,000 video downloads per month, and a live soundboard. This plan supports 1 show and 1 user seat.
Grow — $30/mo (~$24/mo billed annually) ⭐ Most Popular
Best for: Creators building an audience
The Grow plan includes everything in Standard and adds 4K video recording, automatic filler-word removal across 20+ words, ZenAI social clips with captions, direct publishing to TikTok, Instagram Reels, and YouTube Shorts, and full-video publishing to YouTube. It still includes 1 show and 1 user seat.
Scale — $50/mo (~$40/mo billed annually)
Best for: Growing teams and multi-show operations
Scale includes everything in Grow and expands to 2 shows and 2 team seats. You also get 2,000 video downloads per month, dynamic ad insertion, advanced social scheduling, and publishing to Facebook, LinkedIn, and X.
Business — $100/mo (~$80/mo billed annually)
Best for: Podcast networks and content studios
The Business plan includes everything in Scale and extends to 5 shows and 4 team seats. You get 6,000 video downloads per month, unlimited ZenAI editing credits, priority customer support, and advanced monetization tools.
💡 Tip: Zencastr also offers custom Enterprise plans for large organizations. If you run a media company or large podcast network, contact their sales team for tailored pricing and features.
Feature-by-Feature Comparison
Here’s a detailed look at what’s included and excluded across every tier.
| Feature | Standard ($20/mo) | Grow ($30/mo) | Scale ($50/mo) | Business ($100/mo) |
|---|---|---|---|---|
| Annual Price (per mo) | ~$18 | ~$24 | ~$40 | ~$80 |
| Recording Hours | Unlimited | Unlimited | Unlimited | Unlimited |
| Audio Quality | 16-bit 48k WAV | 16-bit 48k WAV | 16-bit 48k WAV | 16-bit 48k WAV |
| Video Quality | 1080p | 4K | 4K | 4K |
| Multitrack Recording | ✅ | ✅ | ✅ | ✅ |
| Shows Included | 1 | 1 | 2 | 5 |
| Team Seats | 1 | 1 | 2 | 4 |
| Video Downloads / mo | 1,000 | 1,000 | 2,000 | 6,000 |
| ZenAI Editing Suite | ✅ | ✅ | ✅ | ✅ Unlimited |
| Transcriptions | Unlimited | Unlimited | Unlimited | Unlimited |
| Transcription-Based Editing | ✅ | ✅ | ✅ | ✅ |
| AI Filler Word Removal | ❌ | ✅ (20+ words) | ✅ (20+ words) | ✅ (20+ words) |
| ZenAI Social Clips | ❌ | ✅ | ✅ | ✅ |
| Publish to TikTok, IG, Shorts | ❌ | ✅ | ✅ | ✅ |
| Publish to FB, LinkedIn, X | ❌ | ❌ | ✅ | ✅ |
| Advanced Social Scheduling | ❌ | ❌ | ✅ | ✅ |
| YouTube Full-Video Publish | ❌ | ✅ | ✅ | ✅ |
| Dynamic Ad Insertion | ❌ | ❌ | ✅ | ✅ |
| Monetization Tools | ❌ | ❌ | ✅ | ✅ Advanced |
| Podcast Hosting | Unlimited | Unlimited | Unlimited | Unlimited |
| Distribution (Spotify, Apple, etc.) | ✅ | ✅ | ✅ | ✅ |
| Live Soundboard | ✅ | ✅ | ✅ | ✅ |
| Priority Support | ❌ | ❌ | ❌ | ✅ |
| Free Trial | 14 days | 14 days | 14 days | 14 days |
Pros and Cons of Zencastr
No platform is perfect. Here’s a balanced look at what Zencastr does well and where it falls short.
✅ Pros
- Studio-quality audio — 48kHz WAV recorded locally on each device, not dependent on internet quality
- Zero friction for guests — Participants join via a browser link with no downloads or account creation
- True all-in-one platform — Record, edit, host, distribute, and monetize from one dashboard
- AI-powered editing — Text-based editing, automatic filler-word removal, and noise reduction speed up post-production dramatically
- Unlimited hosting included — All paid plans include unlimited audio and video podcast hosting with distribution to Spotify, Apple Podcasts, YouTube, and more
- Multi-language transcriptions — Automatic transcriptions included on every tier at no extra cost
- Social content automation — ZenAI clips generate social-ready short-form content with captions automatically (Grow and above)
- No credit card trial — 14-day free trial on all plans with no payment info required upfront
- Built-in monetization — Programmatic ads, dynamic insertion, and Creator Network opportunities help you earn from your content
❌ Cons
- No free plan — The free tier was retired, leaving only paid options with a trial period
- Key features gated behind higher tiers — 4K video and AI filler-word removal require the Grow plan ($30/mo); team collaboration requires Scale ($50/mo) or above
- Internet-dependent — Requires a stable internet connection during recording with no offline recording mode available
- Recording storage limits — Recordings on lower tiers may be deleted after 30 days if not downloaded or backed up
- No live streaming — Zencastr is strictly a recording and production platform with no broadcast capabilities
- Mixed customer support reviews — Some users have reported slower response times and difficulty resolving issues, with priority support only available on the Business plan
- No refund policy — Zencastr does not offer refunds, making the trial period your only risk-free evaluation window
- Can be expensive for casual use — At $20+/month, the cost adds up for hobbyists or creators who only record occasionally
Who Should Pick Which Plan?
Standard ($20/mo) — The Solo Starter
The Standard plan gives you everything you need to launch and run a podcast: unlimited recording in high-quality audio and 1080p video, multitrack separation, basic ZenAI editing, transcriptions, and full hosting with distribution. It’s the right entry point if you’re a solo host producing one show and don’t yet need 4K video or social clipping tools. Since it bundles recording and hosting together, it can actually save money compared to paying for separate tools — most standalone podcast hosts charge $12–$15/month just for hosting.
Grow ($30/mo) — The Audience Builder
This is where Zencastr starts to shine for creators who are serious about growth. The jump from Standard gives you 4K video, automatic filler-word removal across 20+ words, AI-generated social clips with captions, and direct publishing to YouTube, TikTok, Instagram Reels, and YouTube Shorts. If you’re actively trying to grow your audience through short-form content and want a polished video product, the extra $10/month over Standard is well spent.
Scale ($50/mo) — The Multi-Show Team
Scale unlocks team collaboration with 2 seats and 2 shows, dynamic ad insertion for monetization, expanded social scheduling across Facebook, LinkedIn, and X, and doubles your video download cap to 2,000/month. This tier makes sense when your podcast operation involves another person — whether that’s a co-host, editor, or producer — or when you’re running more than one show and need to manage them from a single account.
Business ($100/mo) — The Network Operator
Built for content studios and podcast networks, the Business plan supports up to 5 shows and 4 team members, offers unlimited ZenAI editing credits, 6,000 video downloads per month, advanced monetization tools, and priority customer support. If you’re managing a portfolio of shows or running a media operation, this tier gives you the headroom and administrative control to scale without hitting walls.
The Bottom Line
Zencastr’s biggest strength is consolidation. Instead of paying separately for a recorder, editor, host, and distribution tool, you get everything under one roof. For most independent podcasters, the Grow plan at $24/month (billed annually) hits the sweet spot — it unlocks 4K video, AI filler removal, and social clipping tools that would otherwise require additional subscriptions elsewhere.
If you’re just starting out and want to test the waters, the Standard plan at $18/month (annual) is a perfectly capable launchpad. And if you’re running a team or network, the Scale and Business tiers offer meaningful collaboration and monetization features that justify the step-up in cost.
The 14-day free trial is genuinely useful — take advantage of it before committing, especially since Zencastr doesn’t offer refunds. Just remember to download your recordings promptly, as storage policies on lower tiers can catch you off guard.
Frequently Asked Questions
Does Zencastr still have a free plan?
Zencastr previously offered a free tier, but it has since been retired. All plans now require a paid subscription, though every tier includes a 14-day free trial with no credit card required.
Can I switch plans after signing up?
Yes. Zencastr allows you to upgrade or downgrade your plan at any time. Changes take effect on your next billing cycle.
What payment methods are accepted?
Zencastr accepts major credit cards and PayPal. Both monthly and annual billing cycles are available.
Is there a refund policy?
No. According to Zencastr’s terms of service, they do not offer refunds. This makes the 14-day trial especially important for evaluating whether the platform fits your needs before committing.
Does Zencastr have a mobile app?
Yes. Zencastr offers an iOS app that supports remote recording and session monitoring, making it easier to record on the go.
Always verify current details on zencastr.com/pricing. This page is not affiliated with Zencastr.
Best Podcast Cameras in 2026: Creator Picks for Every Budget
The podcasting world isn’t just audio anymore. With YouTube, Spotify Video, and TikTok pushing video-first discovery, having a sharp, reliable camera setup is essential. Whether you’re livestreaming, batch-recording interviews, or building a full studio, the right camera can elevate your podcast from amateur to professional, without blowing your budget.
In this guide, we’ll break down the best podcast cameras in 2026 by type, budget, and use case—plus answer the most common video gear questions podcasters ask.
TL;DR: Top Podcast Cameras
- OBSBOT Tiny 2 – 4K video with auto-tracking and gesture control; great for solo or dynamic recording
- Logitech Brio – 4K webcam with adjustable field of view; strong balance of cost and quality
- Elgato Facecam MK.2 – Tuned for streamers; works beautifully in studio lighting with pro settings
For the folks interested in mirrorless DSLR and more advanced cameras, please click here.
🎥 Why Your Camera Setup Matters
- First impressions count – Grainy video lowers perceived credibility, especially on platforms like YouTube.
- Retention and monetization – Better visuals increase watch time and help unlock sponsorships, YouTube Partner Program, and premium memberships.
- Multi-platform repurposing – A camera with crisp detail allows you to create reels, shorts, and clips from full episodes.
🔍 Camera Types for Podcasting (Quick Comparison)
| Camera Type | Strength | Best For |
|---|---|---|
| Webcam | Plug-and-play, budget-friendly | Beginners, remote hosts |
| Mirrorless | Cinematic quality, compact body | Solo creators, studio upgrades |
| DSLR | Pro-level quality, lens flexibility | Experienced podcasters, videographers |
| Camcorder | Long recording, built-in zoom | Full episodes, live events |
| Streaming Cam | AI tracking, USB-C ready | Livestreams, solo recordings |
| Smartphone | Highly portable, surprisingly capable | Budget creators, clip-based shows |
💡 Best Podcast Cameras by Type
🧩 Top Webcams
-
OBSBOT Tiny 2 – 4K video with auto-tracking and gesture control; great for solo or dynamic recording
-
Logitech Brio – 4K webcam with adjustable field of view; strong balance of cost and quality
-
Elgato Facecam MK.2 – Tuned for streamers; works beautifully in studio lighting with pro settings
Pro Tip: Pair a webcam with proper lighting (like the Elgato Key Light Air) and you’ll outperform many mirrorless cameras in poorly lit setups.
🎬 Best Mirrorless & DSLR Cameras
-
Sony ZV-E10 – Built for creators: flip-out screen, USB-C streaming, fantastic autofocus
-
Canon EOS R50 – Affordable entry into DSLR podcasting with clean HDMI and a mic input
-
Canon 5D Mark IV – Pro-level 4K DSLR with legendary Canon color and lens flexibility
Mirrorless cameras are often the sweet spot for podcasters who want cinematic looks without overheating issues or DSLR bulk.
📹 Top Camcorders & Streaming Cams
-
Canon Vixia HF G70 – No recording limit, crisp 4K, long battery life; ideal for long podcast sessions
-
Panasonic HC-V770 – Affordable full-HD camcorder with great audio input options
-
Elgato Facecam Pro – Clean HDMI and 4K60fps for streamers or hybrid creators
🔎 Best Podcast Cameras by Use Case
| Use Case | Recommended Cameras |
|---|---|
| Budget under $200 | Logitech C920, OBSBOT Tiny 2 |
| Studio with pro quality | Sony ZV-E10, Canon R5 Mark II |
| Remote interviews | OBSBOT Tiny 2, Elgato Facecam MK.2 |
| Multi-cam podcast setup | Panasonic Lumix G7, Fujifilm X-S20 |
| Batch/live recording | Canon Vixia HF G50, Panasonic HC-V770 |
| Clip-based content | iPhone 15 Pro, Samsung Galaxy S23 Ultra |
❓FAQ: What Podcasters Ask About Cameras
Do I need a capture card?
Only if your camera doesn’t support USB streaming or clean HDMI. The Elgato Cam Link 4K or HD60X is a solid choice if you’re using a DSLR or camcorder.
Is 1080p enough for podcasting?
Yes. Most viewers won’t notice the difference unless you’re cropping or creating cinematic edits. 1080p is standard for Spotify Video and YouTube Podcasts.
What’s more important: camera or lighting?
Lighting. Even a $100 webcam can look great under soft, balanced lighting. Consider starting with lights before upgrading your camera.
How do I stop my camera from shutting off?
Disable sleep/auto-off settings and use a dummy battery or AC adapter. Most mirrorless and DSLR cameras have workarounds.
How do I sync audio and video?
Use a visual/audio sync point (like a hand clap) and sync in post using software like Final Cut, Premiere Pro, or Descript. Or record audio externally into a Zoom H6 or Rodecaster Pro II.
🎯 Final Thoughts: Picking the Right Camera
The best podcast camera isn’t the most expensive one—it’s the one that fits your space, budget, and workflow. Here’s a simple way to decide:
-
Just getting started? Grab a quality webcam and some lights.
-
Want pro visuals? Go mirrorless with a wide-aperture lens.
-
Recording long episodes or events? Use a camcorder with clean HDMI.
📦 Don’t forget: Your camera is just part of the setup. A great mic, good lighting, and a solid recording plan are just as important.
Yamaha MGX Series for Podcasting: The Practical Guide (MGX12 vs MGX16 vs MGX-V)
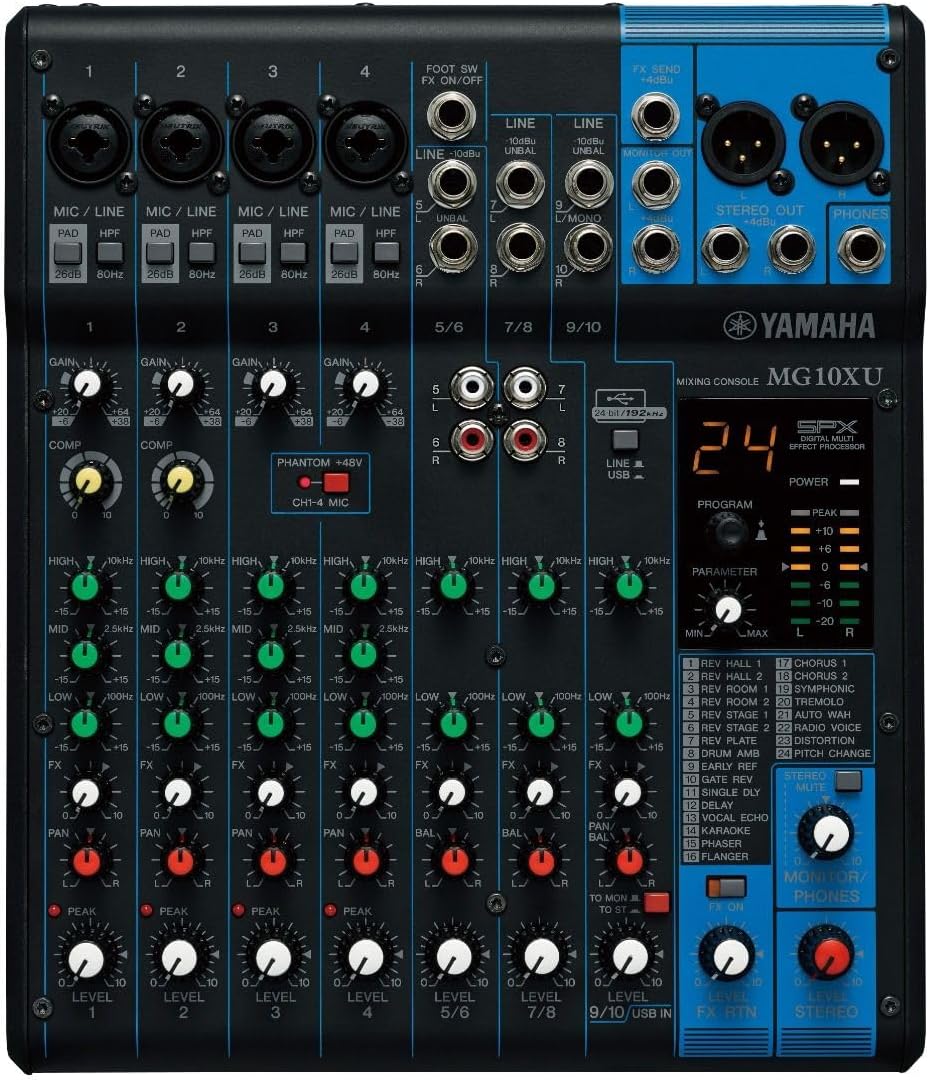
If you’re shopping for a podcast mixer and the Yamaha MGX series is on your radar, you’re probably not looking for “good enough.” You want clean mic preamps, simple monitoring for multiple hosts, and a workflow that won’t fall apart when you add remote guests, livestreaming, or video.
That’s where MGX is genuinely different: it’s a compact digital mixing console that keeps an “analog-ish” hands-on workflow, but adds modern creator features like dual USB, multitrack recording, Bluetooth input, and (on V models) an HDMI-USB video interface. Yamaha positions MGX specifically for applications like podcasting/live streaming and hybrid production. (See Yamaha’s MGX overview.)
External references:
MGX10XU
MGX12V
MGX16XU
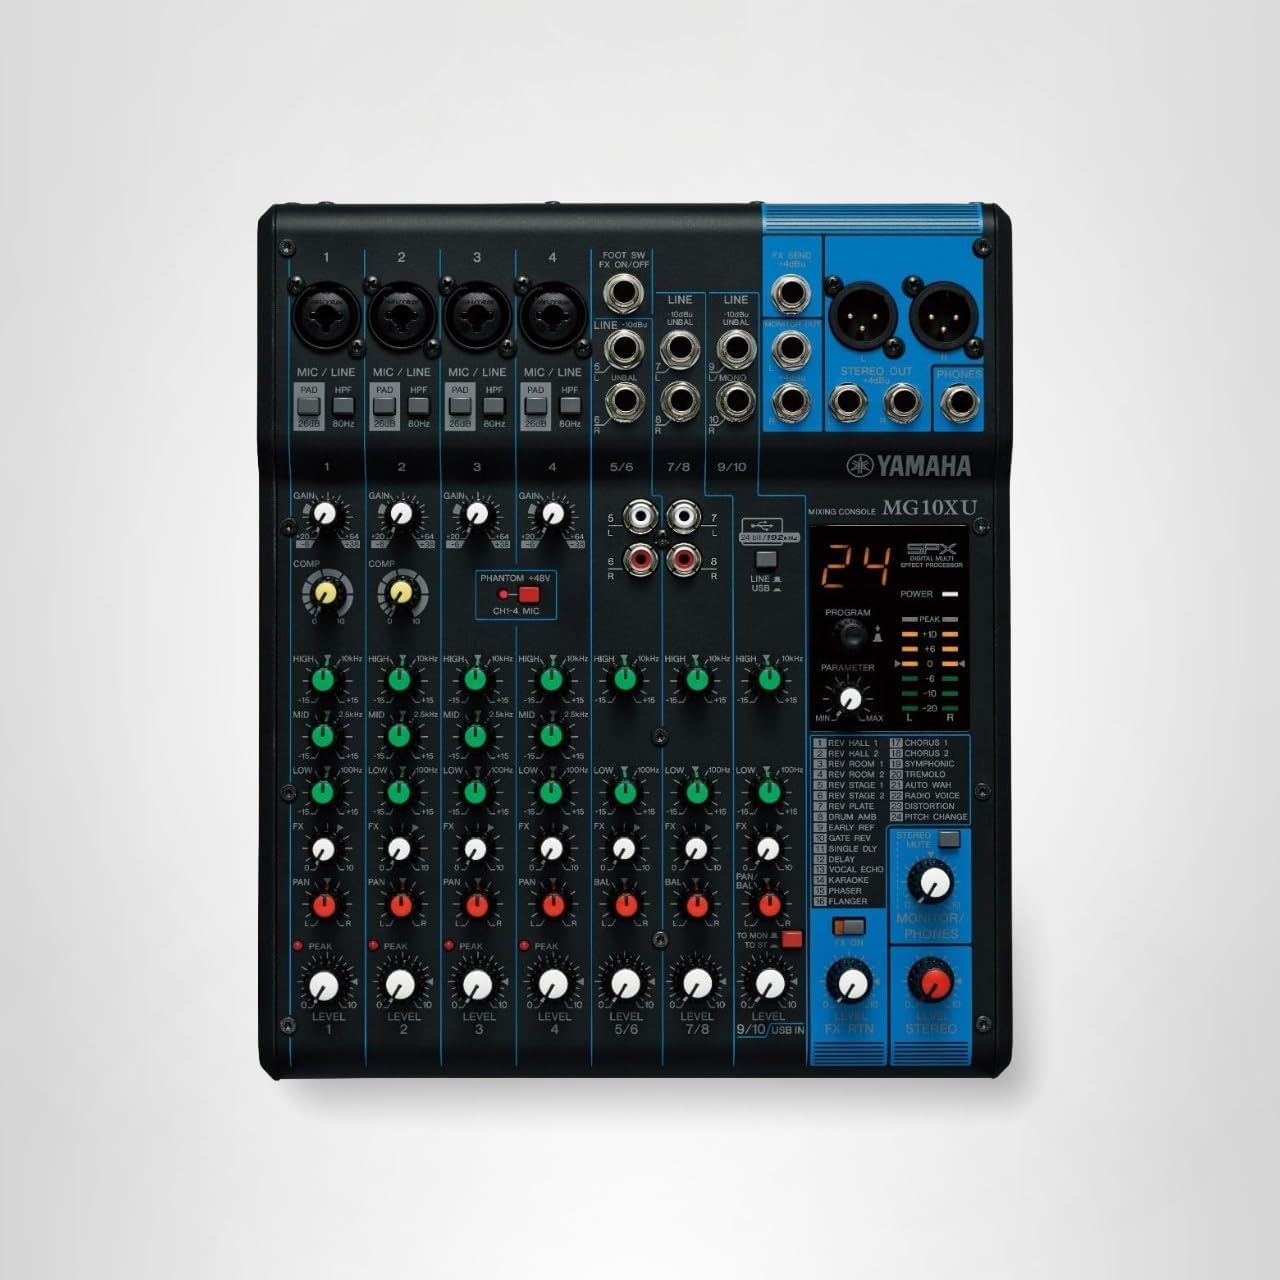
Quick Verdict: Who Should (and Shouldn’t) Buy a Yamaha MGX for Podcasting?
MGX is worth it if you:
- Run a 2–4 person podcast and want proper monitoring (no cheap splitters).
- Need multitrack recording so you can fix each mic in post.
- Livestream and record at the same time (or want a backup recording that doesn’t depend on your computer).
- Want a “real mixer” feel, but with digital routing and creator-friendly I/O.
MGX is probably overkill if you:
- Record solo and never plan to add co-hosts or guests.
- Just want one-button recording with minimal learning curve.
- Only need a basic USB interface and don’t care about multitrack or routing.
If you’re still deciding what category of gear you actually need, this internal guide can help:
Audio Mixer for Podcast: How to Pick the Right One.
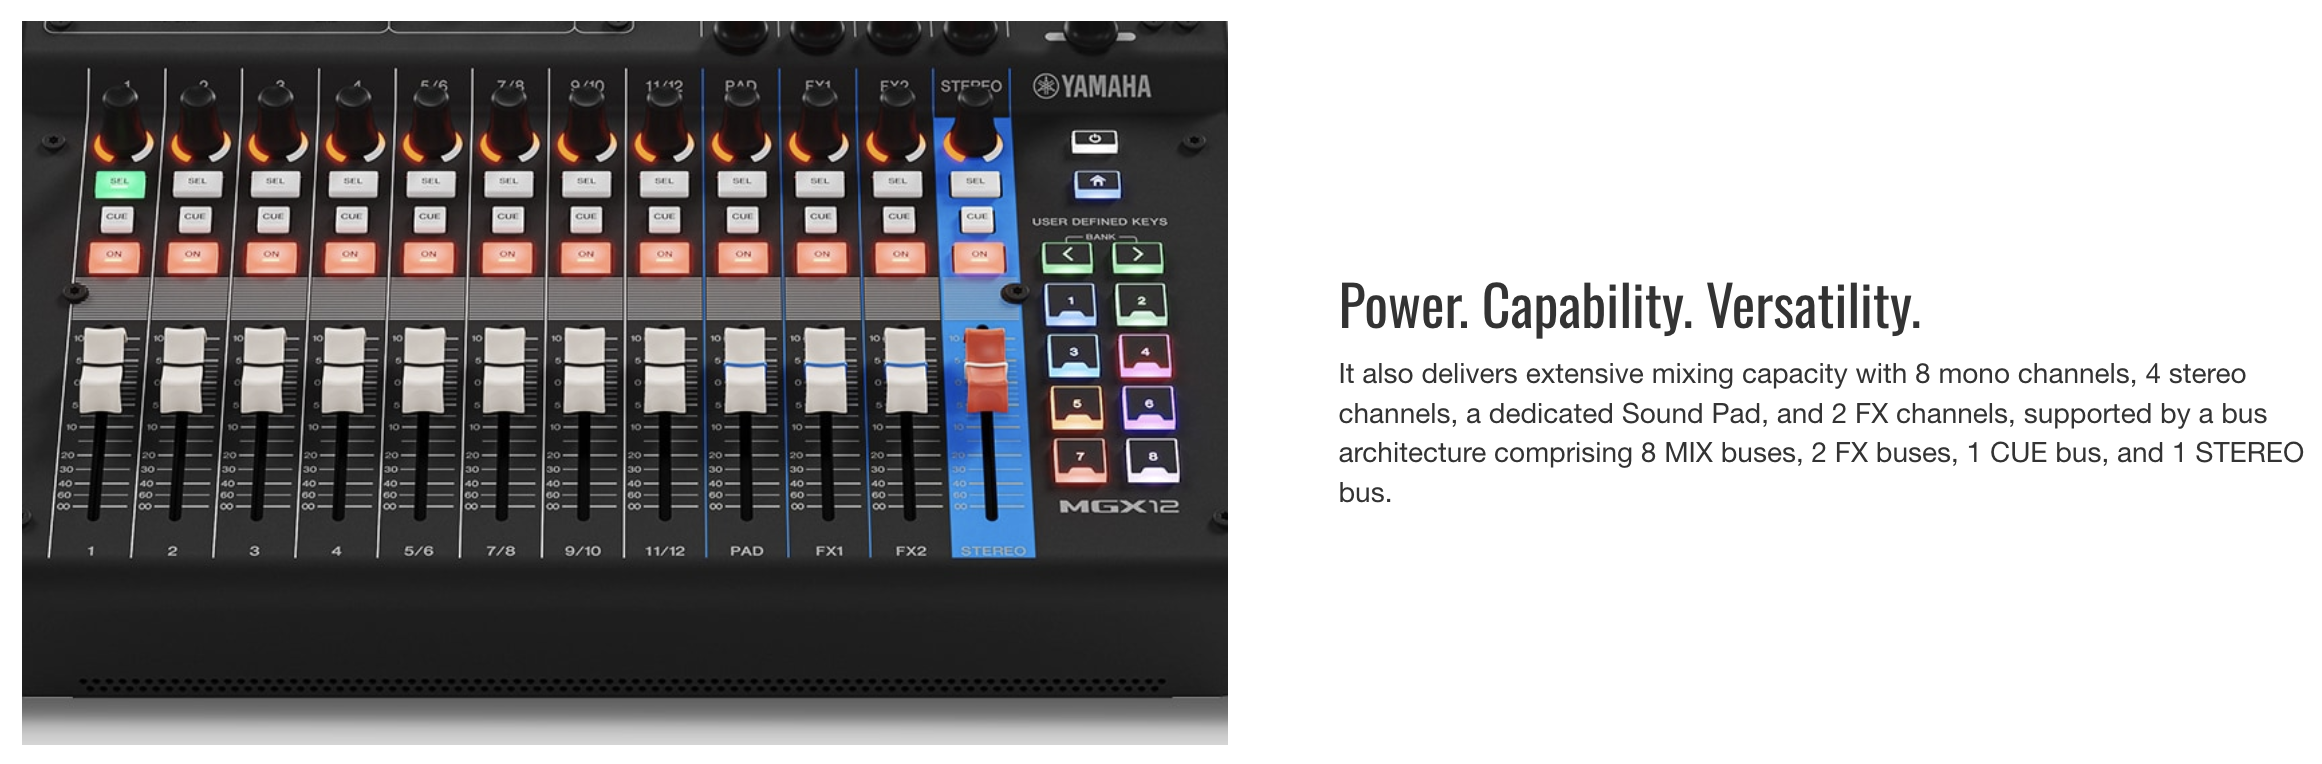
What Makes Yamaha MGX “Podcast-Ready” (In Real-World Terms)
1) Four headphone outputs = no more monitoring hacks
One of the most annoying “small podcast studio” problems is monitoring. Many mixers and interfaces give you one headphone out, then you’re forced into splitters (and volume fights). MGX consoles are built for collaboration—Yamaha lists multiple headphone ports on models like the MGX16, which is exactly what you want for multi-host shows.
Podcast tie-in: If your show has co-hosts, this also matters for performance and pacing—people talk over each other less when they can hear cleanly. If you want a deeper gear breakdown for group shows, link this internally:
Podcast Equipment for Co-Hosts and Groups.
2) Multitrack recording (USB) for real editing control
The MGX series supports multitrack recording over USB—meaning you can capture isolated tracks instead of a single stereo “baked” mix. That’s the difference between “I hope this sounds okay” and “I can fix anything later.”
When it matters most:
- Guests who are too quiet (or too loud)
- Rooms that aren’t acoustically treated
- Shows with frequent interruptions / cross talk
- Any podcast where the host wants “broadcast clean”
If you’re comparing mixer-based recording to a classic audio interface workflow, this internal explainer helps frame it:
XLR vs USB.
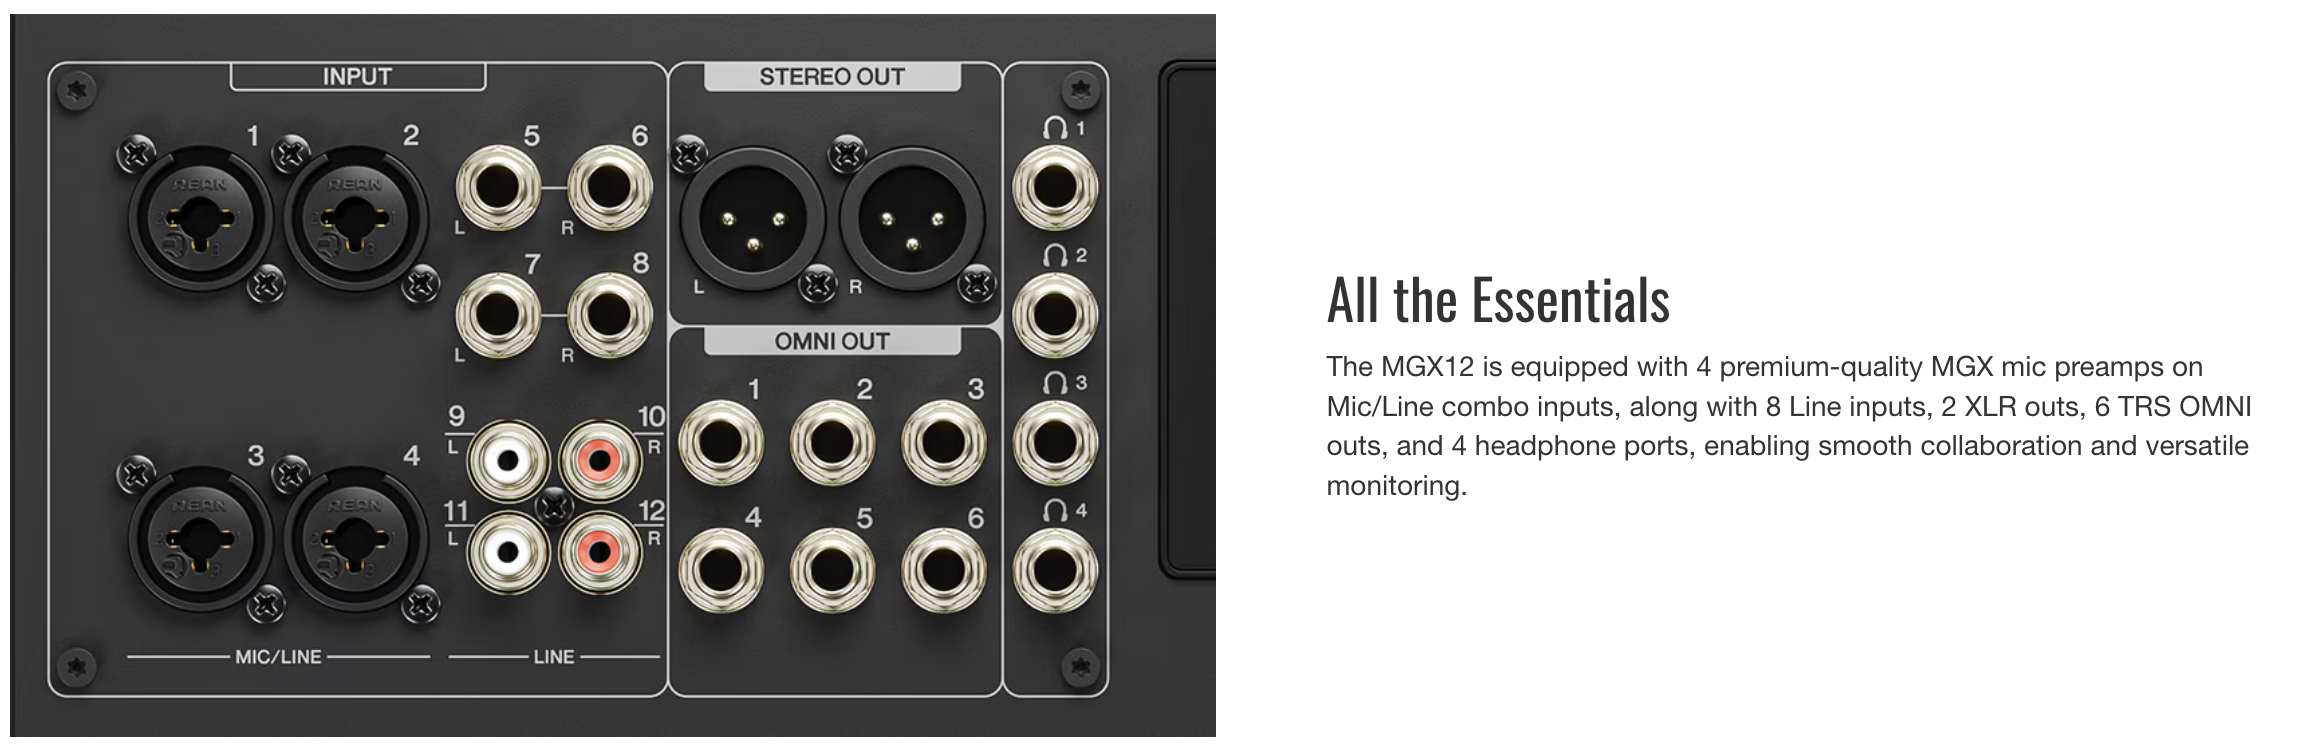
3) microSD recording = the “oh no, my computer died” safety net
Yamaha highlights microSD multi-track recording/playback as a core MGX feature. For podcasters, this is huge: you can record without trusting a laptop, a DAW, or OBS. It’s also a backup strategy if you stream and record simultaneously.
Want to level up your overall “never lose an episode” strategy? This internal article fits perfectly as a supporting link:
How to Archive and Back Up Your Podcast Like a Pro.
4) Dual USB Type-C (MAIN / SUB) + multi-stream workflows
Yamaha’s MGX lineup emphasizes dual USB ports and flexible routing. In a podcast workflow, that can look like:
- Record multitrack to a production computer while sending a clean stereo mix to a streaming computer.
- Run your DAW and OBS in parallel without constantly re-patching.
- Keep a second system ready for redundancy.
If you livestream your show (or want to), link this internally:
Live Podcast Streaming.
5) Bluetooth input (A2DP): useful, but don’t overthink it
MGX includes Bluetooth audio input, which is nice for playing intro music, bumpers, or reference audio. But Bluetooth is not ideal for latency-critical call-ins. Think “playback and utility,” not “main program audio.”
For music workflows and legal caution around music in podcasts, these internal links can make sense depending on your editorial angle:
Podcast Intro Music and
Can You Play Music on a Podcast?.
MGX12 vs MGX16: Which One Is Better for Podcasting?
Choose MGX12 if you want the “sweet spot” for 2–4 people
The MGX12 is the model that naturally fits most podcast studios: enough mic inputs for a typical roundtable, modern routing, multitrack recording, and the same MGX ecosystem approach.
Best for:
- 2–4 mic shows
- Interview podcasts
- Creators who livestream occasionally
- Studios that want pro routing without a massive footprint
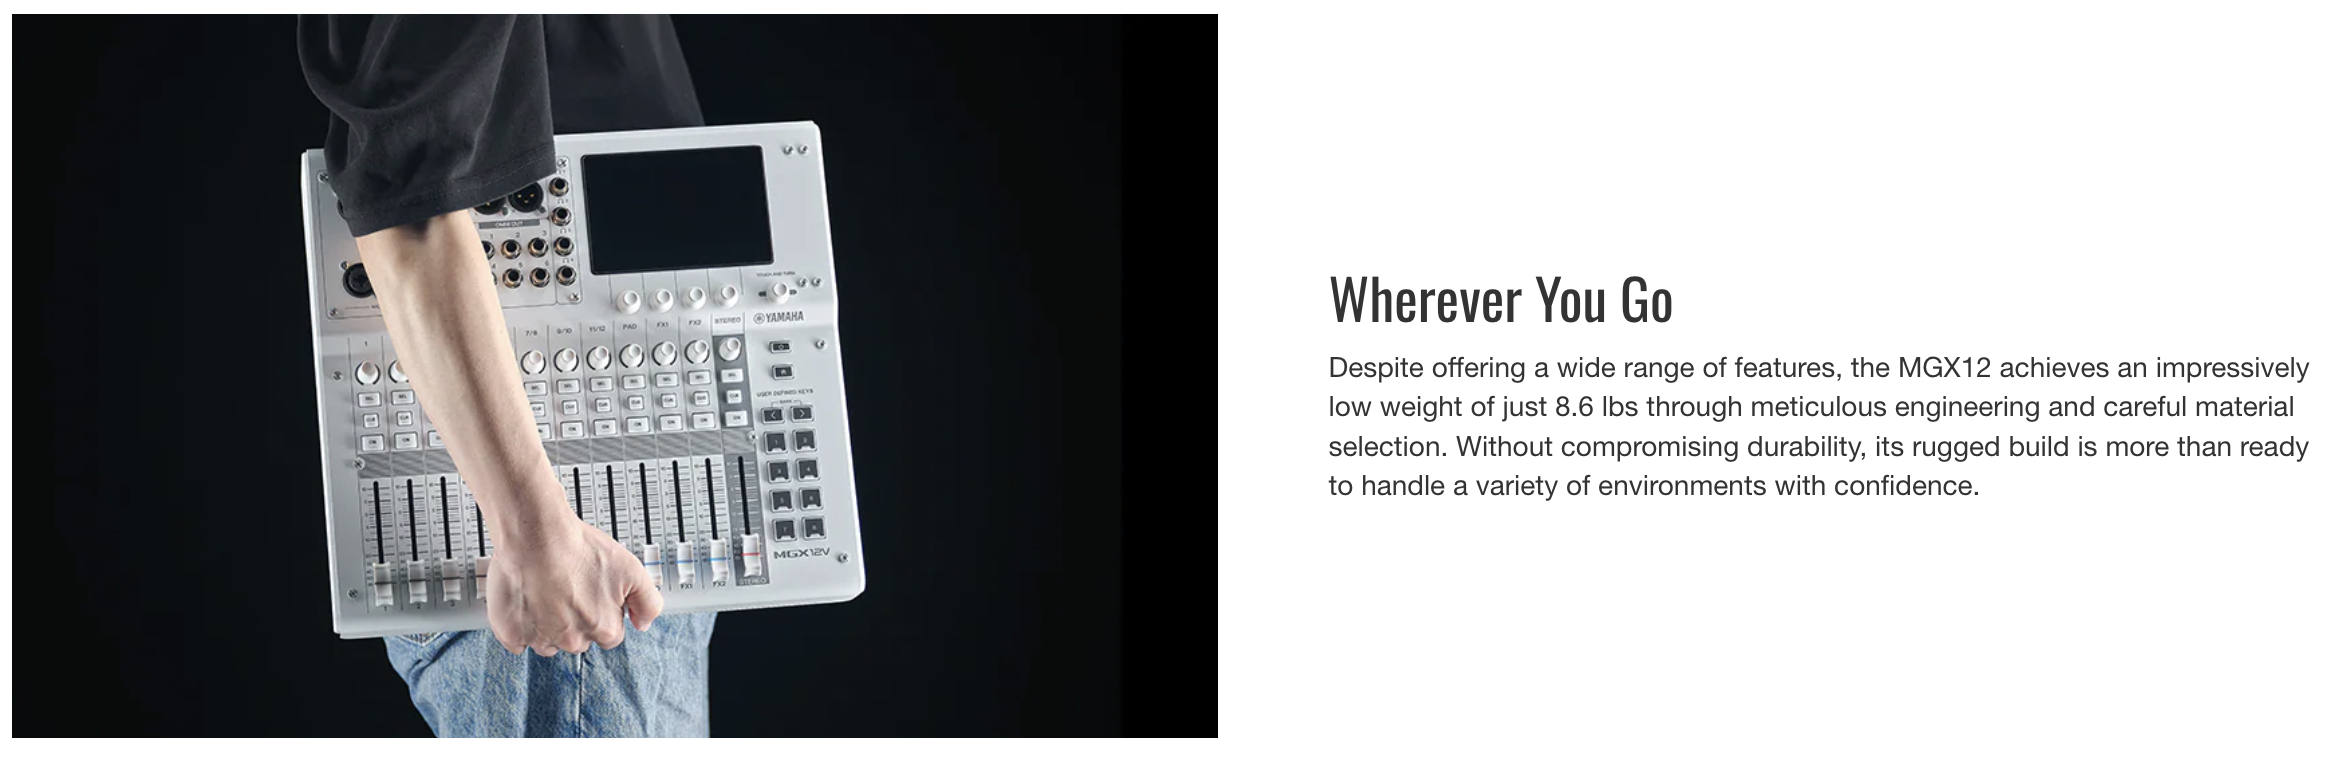
Choose MGX16 if you want headroom for growth (or complex shows)
The MGX16 adds more input flexibility and is built for busier sessions—extra mics, more sources, more routing options, and more monitoring complexity. Yamaha highlights the MGX16’s collaboration-friendly I/O, including multiple headphone ports, as part of its “All the Essentials” positioning.
Best for:
- Panel shows or frequent multi-guest formats
- Shows that integrate more sources (music, remote feeds, multiple computers)
- Podcast + live events / small venue crossover
Should You Get the MGX-V Models for a Video Podcast?
The MGX12V and MGX16V include Yamaha’s HDMI-USB video interface concept (Yamaha calls out the video interface on the V model product pages). If you’re building a video podcast workflow, that’s potentially a big simplifier: fewer boxes, fewer failure points, and tighter audio/video integration.
Buy MGX-V if:
- You run a video podcast regularly (not “maybe someday”).
- Your workflow revolves around OBS / livestreaming / virtual events.
- You want HDMI pass-through/capture style integration inside the same ecosystem as your audio mixer.
Skip MGX-V if:
- You’re audio-first and edit in a DAW later.
- You already have a capture solution you like.
Internal links that pair well here:
A Simple Yamaha MGX Podcast Setup (2–4 Mics)
What you’ll need
- Microphones (XLR) — 2 to 4, depending on your show
- Headphones — one per host
- Microphone cables (XLR)
- Computer for recording/editing (optional if you rely on microSD)
Helpful internal links:
Basic routing approach (clean + editable)
- Set each mic gain so normal speaking hits a healthy level without clipping.
- Record multitrack so each mic is isolated for editing.
- Send a separate “program” mix to streaming (if livestreaming), with conservative limiting/compression.
- Keep a backup recording (microSD or second system) for anything important.
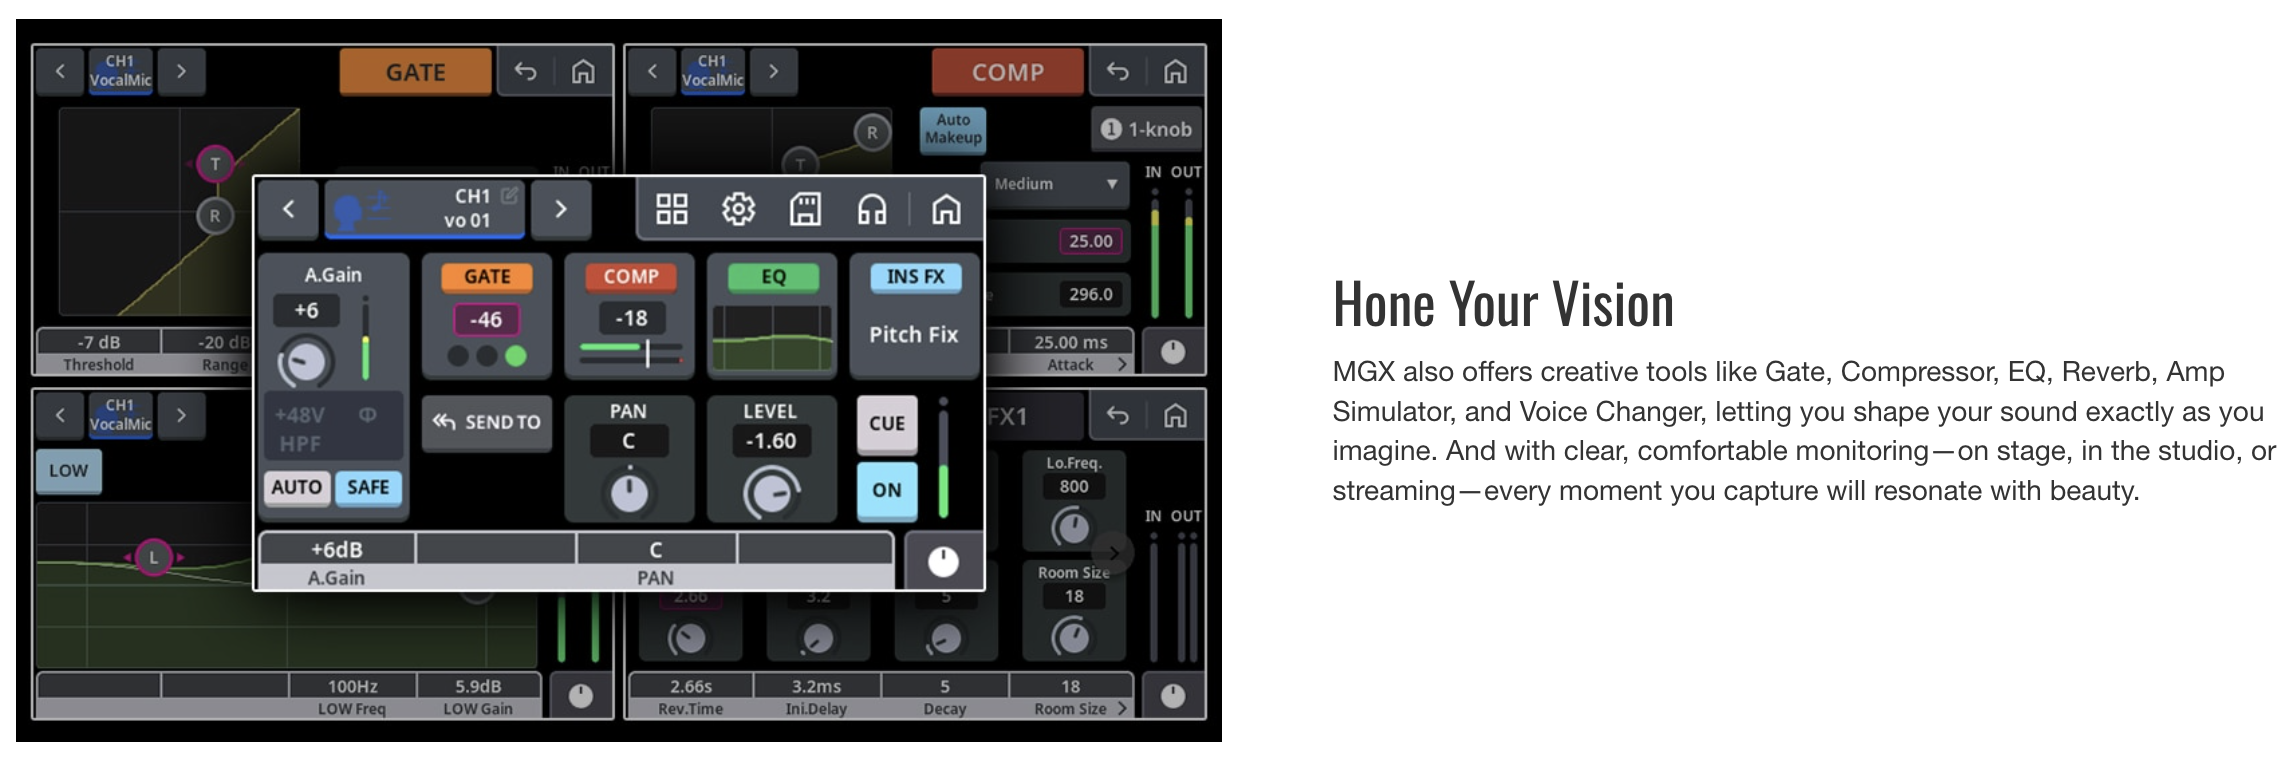
Remote Guests: Where MGX Helps (and Where It Doesn’t)
Remote guests are where many podcasts get messy: echo, weird routing, and unpredictable levels. MGX helps because it’s designed around flexible routing and creator workflows. But you still need a good remote recording platform and a plan for monitoring.
If you’re doing remote shows, add these internal links:
MGX vs “Podcast Consoles” (RØDECaster, GoXLR, etc.) — The Honest Difference
Podcast-centric consoles tend to win on simplicity: one record button, built-in pads, and fewer decisions. MGX wins when you want:
- More professional mixing/routing that scales with your show
- Real multitrack workflows for post-production
- Better monitoring for multiple hosts
- Hybrid audio + livestreaming (and video integration on MGX-V models)
If your audience is “serious hobbyist” to “working creator,” this is the kind of nuance that helps you rank—and helps readers trust you.
Relevant internal comparison-style hub links (optional, but can boost topical authority):
FAQ: Yamaha MGX for Podcasting
Is Yamaha MGX good for a 4-person podcast?
Yes—MGX is explicitly positioned for multi-person creator workflows, and the series is designed with collaborative monitoring and routing in mind (including multiple headphone outputs on models like MGX16). It’s a strong fit when you want each mic isolated for post editing.
Do I need the MGX-V models for podcasting?
No for audio-only shows. MGX-V is mainly worth it if you’re doing a video podcast or livestream and want HDMI/USB video integration in the same system.
Is Bluetooth on MGX useful for podcasts?
Yes for playback (music beds, bumpers, reference audio). Not ideal for latency-sensitive call-in audio.
Can I record without a computer?
MGX supports standalone-style workflows via storage recording features Yamaha highlights as part of the MGX lineup (microSD multi-track recording/playback). That makes it attractive for redundant capture and “just hit record” sessions.
Bottom Line: Which Yamaha MGX Should You Buy?
- Most podcasters: MGX12 (best balance for 2–4 mics)
- Growing shows / more inputs / more complexity: MGX16
- Video podcast + streaming focus: MGX12V or MGX16V
Why Serious Podcasters Are Moving to 10GbE NAS
If you’re a podcaster still moving files over Google Drive, Dropbox, or a USB SSD, you’ve probably felt it:
-
Multi-camera episodes take forever to copy
-
Editors complain about download times
-
Backups happen eventually (or not at all)
-
Your “studio storage” is a pile of drives and folders
This is where 10 Gigabit Ethernet (10GbE) stops being a networking flex and starts being a production upgrade.
The Synology DS1522+ is one of the most interesting NAS options for podcasters right now—not because it’s flashy, but because it’s built to move large media files fast and reliably.
This article breaks down what podcasters actually need from a 10GbE NAS, where the DS1522+ shines, and where you need to be careful.
The Real Podcasting Problem Isn’t Recording — It’s File Movement
Modern podcasting isn’t just audio anymore:
-
4K or 6K video podcast recordings
-
Multi-track audio sessions (Riverside, SquadCast, local WAVs)
-
Project files moving between hosts, editors, and producers
-
Redundant backups that must be trustworthy
Gigabit Ethernet caps you at ~113 MB/s.
That means:
-
A 200 GB episode = ~30 minutes to copy
-
Every revision compounds the delay
-
Editors wait on transfers instead of editing
10GbE raises the ceiling to 1,250 MB/s, which fundamentally changes how a podcast team works.
Why the DS1522+ Is a Better Fit for Podcasters Than Older Synology Models
A CPU Chosen for Throughput, Not Transcoding
The DS1522+ uses an AMD Ryzen Embedded R1600, instead of the Intel Celeron chips found in older “media-friendly” NAS units.
For podcasters, this is actually a win.
-
Better handling of large sustained file transfers
-
More reliable network I/O under load
-
ECC memory support for long-term archive integrity
You lose hardware video transcoding—but podcasters shouldn’t be transcoding on the NAS anyway. Your NAS should store, serve, and protect media—not process it.
This design choice makes the DS1522+ much better suited for:
-
Shared project folders
-
Large sequential reads/writes
-
Editor pull/push workflows over 10GbE
How Podcasters Actually Get 10GbE on the DS1522+
The E10G22-T1-Mini Upgrade
 10GbE on the DS1522+ is optional and unlocked via Synology’s E10G22-T1-Mini.
What matters for podcasters:
-
Single 10GbE port (RJ-45)
-
Works with CAT6 / CAT6a
-
Supports 2.5G and 5G if you’re mid-upgrade
This isn’t a “fake” 10GbE slot—the PCIe bandwidth is sufficient to saturate the link if your storage can keep up.
Real-World Podcast File Speeds (What Editors Will Actually See)
With a properly configured setup, podcasters can expect:
-
600–800 MB/s typical large-file transfers
-
900+ MB/s reads in optimized scenarios
-
6–8× faster than 1GbE
What this means in practice:
-
A 200 GB episode copies in ~4–6 minutes
-
Editors can pull entire projects locally without waiting
-
You stop “planning around transfer time”
This is the difference between:
“I’ll send it overnight”
and
“I’ll grab it and start cutting now.”
The Hidden Bottleneck Podcasters Miss: Drive Count
Here’s the trap: 10GbE doesn’t help if your drives are too few or too slow.
A single HDD tops out around ~250 MB/s.
That means:
-
2–3 drives → wasted 10GbE potential
-
5 drives → finally enough throughput
Best RAID Choice for Podcast Production
RAID 5 / SHR-1
-
Best balance of speed + capacity
-
~700 MB/s writes with 5 drives
-
Ideal for large media libraries
RAID 10
-
Faster writes, better latency
-
Loses 50% capacity
-
Awkward in a 5-bay unit
For most podcasters:
👉 5-drive RAID 5 is the sweet spot.
NVMe Cache: Why It Helps Podcasters (and When It Doesn’t)
The DS1522+ includes two NVMe slots—but they’re not magic speed buttons.
Where NVMe does help podcasters:
-
Faster browsing of large episode libraries
-
Quicker project file open/save operations
-
Smoother experience over the network
Where it doesn’t by default:
-
Large sequential video/audio transfers
Synology skips sequential writes to protect SSD lifespan. If you want NVMe to absorb incoming episode uploads at full 10GbE speed, you must:
-
Use a read-write NVMe cache (RAID 1)
-
Disable “Skip Sequential I/O”
This is optional—but powerful for studios ingesting footage daily.
Reliability Matters More Than Raw Speed for Podcast Archives
This is where the DS1522+ needs honest discussion.
Heat Is the Biggest Risk
The 10GbE module uses a Marvell (Aquantia) chipset that runs hot.
Under load:
-
60–70°C idle
-
90°C+ sustained transfers
If unmanaged, this can cause:
-
Speed drops
-
Network disconnects
-
Forced reboots
Podcaster fix:
-
Set NAS fans to Cool Mode
-
Keep the unit well-ventilated
-
Don’t bury it in a soundproof cabinet
Best Practices for Podcast Studios Using the DS1522+
If you’re building this as your podcast “source of truth,” do these from day one:
-
Use a static IP for 10GbE (avoid random dropouts)
-
Fully populate the drive bays
-
Use CAT6a cabling
-
Enable Jumbo Frames end-to-end
-
Treat the NAS as storage, not a media server
-
Back it up to a second NAS or cloud
This turns the DS1522+ into:
-
A shared studio vault
-
An editor handoff point
-
A reliable archive for years of episodes
Final Take: A 10GbE NAS That Actually Fits Podcast Production
The Synology DS1522+ isn’t trying to be a Plex box or a toy server.
For podcasters, that’s a good thing.
Configured correctly, it becomes:
-
A fast, centralized episode library
-
A friction-killer for editors and collaborators
-
A serious upgrade from drives and cloud folders
But it demands intent:
-
Enough drives
-
Proper cooling
-
A real network
If your podcast is growing into a media operation—not just a hobby—this is the kind of infrastructure shift that pays dividends every single episode.
Is the Shure MV88+ Video Kit Good for Podcasting?

Click For Shure MV88+ Details
What Is the Shure MV88+ Video Kit?
- MV88+ microphone
- Manfrotto mini tripod
- Phone clamp
- USB-C + Lightning cables
- Foam windscreen
- Carrying case
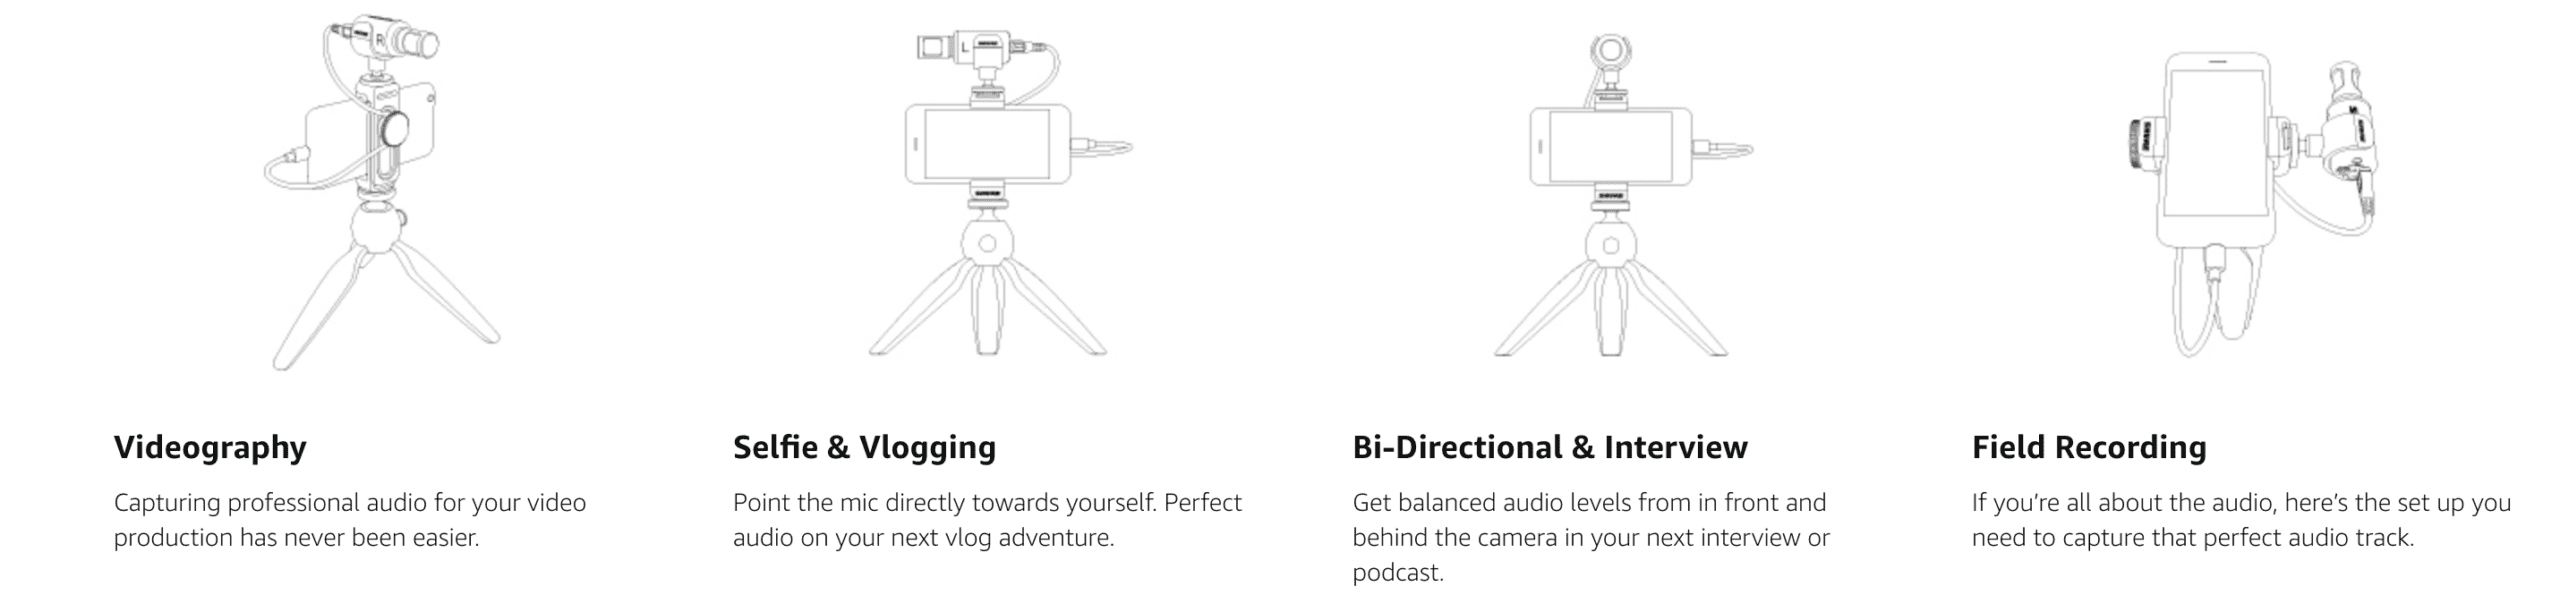
The #1 Question Podcasters Ask:
“Is the audio quality good enough for a podcast?”
- Built-in phone mics
- Lavalier mics
- Budget USB microphones
Background Noise: The Honest Truth
What it does well
- Captures voices with excellent clarity
- Handles outdoor and mobile environments better than most podcast mics
- Includes built-in DSP (compression, EQ, limiting)
Where you need to be careful
- It will pick up room noise in untreated spaces
- It’s more sensitive than dynamic podcast mics (like the MV7 or SM7B)
How podcasters should set it up
- Use mono cardioid or Speech mode in the Shure MOTIV app
- Keep the mic close to your mouth (6–12 inches)
- Avoid wide stereo settings for spoken podcasts
Can You Use It With Podcasting Apps?
- iPhone & iPad
- Most modern Android phones
- Mac & Windows computers
- Record directly in the Shure MOTIV app
- Or use any podcasting or recording software (Audacity, GarageBand, Hindenburg, Adobe Audition, Zoom, Riverside, etc.)
Pro tip: You can set your mic settings in the MOTIV app, then record in your preferred podcast app.
Monitoring & Latency (A Big Win)
- You hear your voice in real time
- No echo
- No delay
- No guessing if your levels are right
Editing & Post-Production Workflow
What podcasters should know:
- You’ll usually want mono audio for spoken podcasts
- If you record in stereo, you can convert to mono in seconds during editing
- Files import cleanly into all major DAWs
- Flat recording (do all processing later)
- Or light processing baked in (compression/EQ)
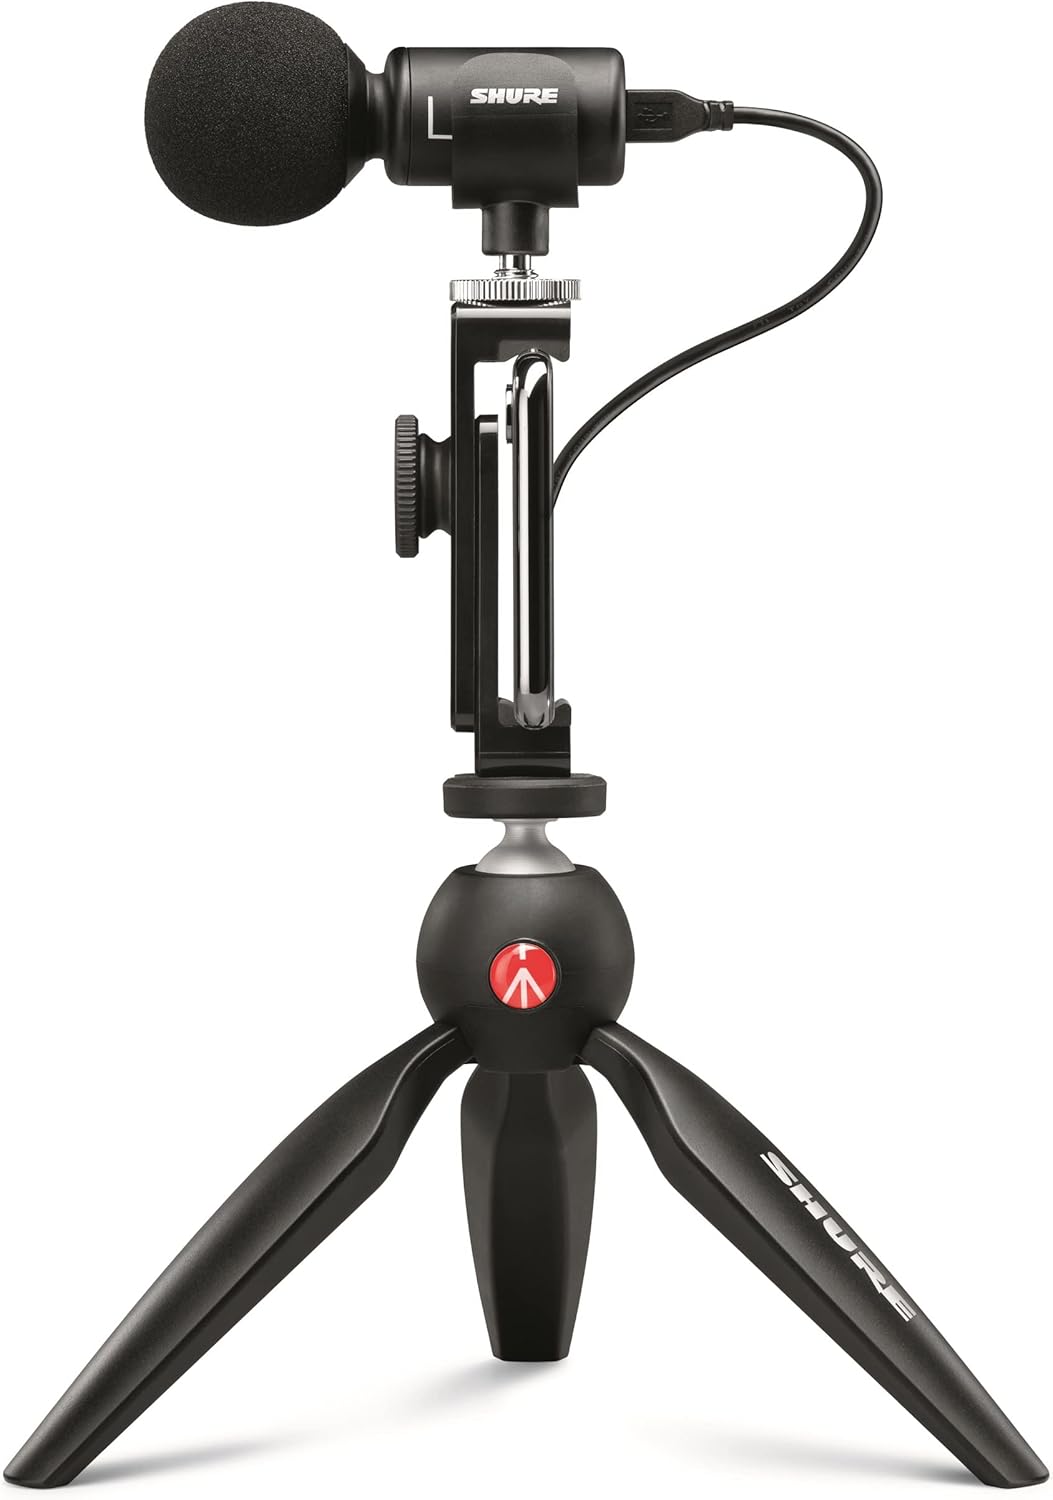
Portability: Where This Mic Shines
- Entire kit fits in a small case
- No audio interface required
- No power supply needed
- Sets up in under a minute
- Record on location
- Podcast while traveling
- Combine podcasting with video
Is It Worth It for Podcasting?
The MV88+ is a great choice if you:
- Want high-quality audio on your phone
- Record podcasts on the go
- Do interviews, travel shows, or video podcasts
- Want one mic that works across multiple devices
You may want a different mic if you:
- Record exclusively at a desk
- Have a noisy, untreated room
- Want maximum vocal isolation
Final Verdict for Podcasters
- The Ultimate Guide to Choosing Cameras and Lenses for Podcasting
- StreamYard Business Plan Review: Is It Worth $299/Month for Teams?
- Synology DS1525+ for Podcasters: What You Need to Know Before You Buy
- StreamYard Pricing (2026): Full Comparison of Plans, Differences, Features & Discounts
- Podbean Pricing: The Best Podcast Hosting Platform for Getting Started?