helpful-info
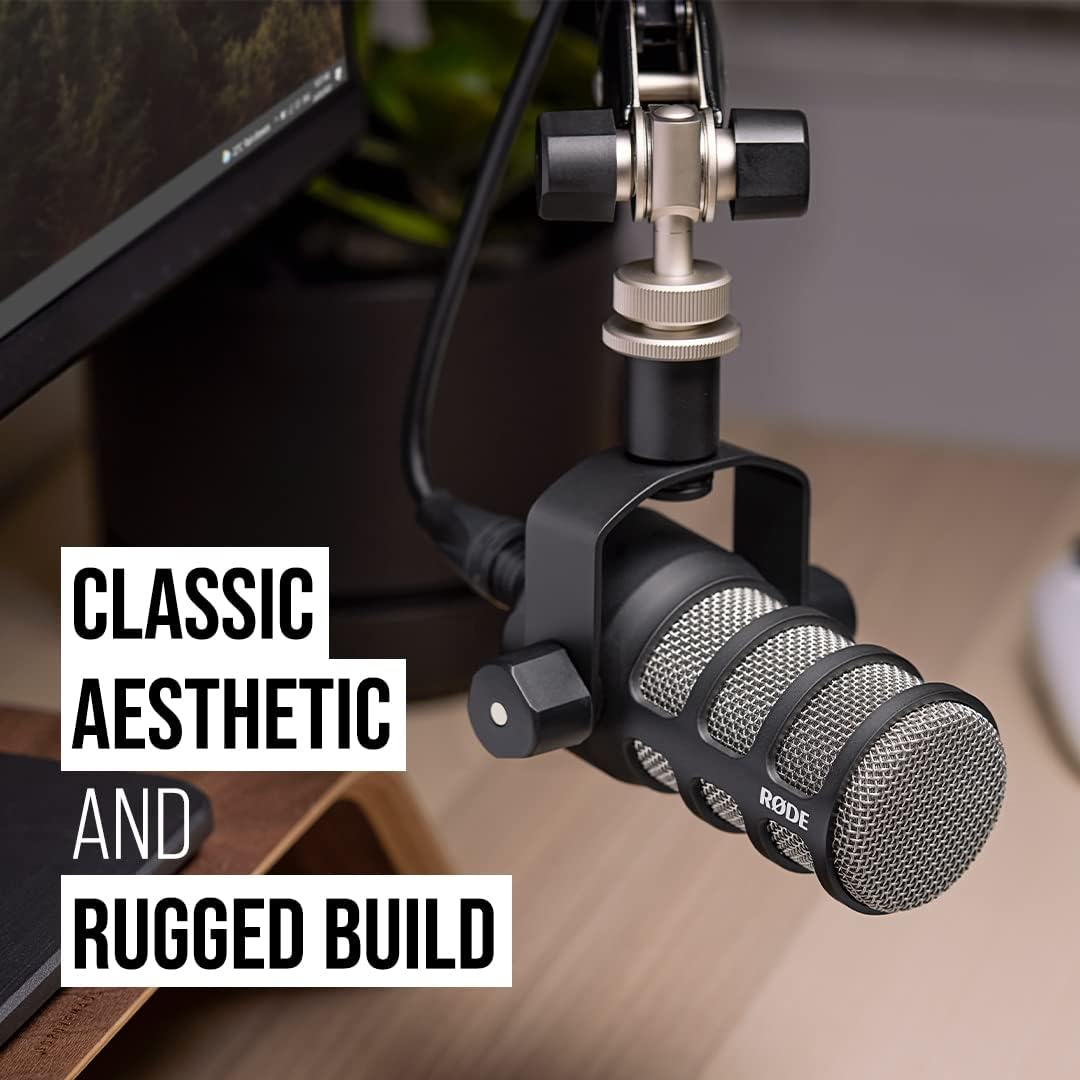
Rode PodMic vs. Shure MV7+ (And What’s New vs the Original MV7)
Choosing the right microphone can define the quality of your podcast or voice content. If you’re comparing the Rode PodMic with the newer Shure MV7+, you’re likely weighing affordability versus flexibility, simplicity versus built-in features. In this post, we’ll break down the key differences, explore what’s new in the MV7+, and help you decide which mic fits your needs.
 Click Here for Detailed Specs on Shure MV7+
Quick Comparison: Rode PodMic vs Shure MV7+
| Feature | Rode PodMic | Shure MV7+ |
|---|---|---|
| Connection | XLR only | USB-C & XLR |
| Onboard DSP | No | Yes: Reverb, Denoiser, Pop Filter, Auto Level |
| Software Support | None | Shure MOTIV Mix (multi-track, mixer, EQ, FX) |
| Build & Design | All-metal, rugged | Premium metal body, RGB mute panel, longer grille |
| Use Case | Studio setups with interface | All-in-one creator setups, live streaming, travel |
| Price Range | ~$100–$120 | ~$280–$300 |
Rode PodMic: Simple, Solid, and Built to Last
The Rode PodMic is an XLR-only dynamic microphone purpose-built for podcasting and broadcasting. With its robust metal construction, internal pop filter, and excellent background noise rejection, it remains one of the best values for creators who already have an audio interface.
Pros:
- Affordable and durable
- Excellent vocal clarity for voiceovers
- No software or drivers needed
Cons:
- Requires an audio interface
- No onboard DSP or customization
Ideal for: Podcasters on a budget, fixed home studios, voiceover artists using XLR setups.
Shure MV7+: Next-Gen Flexibility for Modern Creators
Shure’s new MV7+ builds on the popularity of the original MV7 with upgraded internals, better connectivity, and powerful real-time DSP features.
What’s New in the MV7+:
- USB-C replaces Micro-USB for better compatibility and durability
- Real-Time DSP: Built-in Denoiser, Digital Pop Filter, Reverb FX
- Touch Panel Enhancements: Tap-to-mute with customizable RGB lighting
- MOTIV Mix Software: Multi-track recording, virtual mixing, sound customization
Pros:
- Hybrid connectivity (USB-C + XLR)
- Great for live streamers, solo creators, and podcasting
- Out-of-the-box sound polish, no interface required
Cons:
- Higher price point
- Not suited for instrument or multi-voice group recordings
Ideal for: Content creators needing plug-and-play ease with pro-level sound control.
MV7+ vs Original MV7: Key Differences
| Feature | MV7 (Original) | MV7+ |
|---|---|---|
| USB Port | Micro-USB | USB-C |
| DSP Capabilities | Basic (via app) | Advanced: Reverb, Pop Filter, Denoiser |
| Pop Protection | Standard windscreen | Longer grille, Digital Pop Filter built-in |
| Touch Controls | Physical sliders | Tap-to-mute + RGB lighting |
| Software | ShurePlus MOTIV | Shure MOTIV Mix |
MV7+ is more creator-focused, offering polished sound and convenience — especially for those who don’t want to tinker with external processing or plugins.
Click Here for Detailed Specs on PodMic
Which Should You Choose?
Choose the PodMic if:
- You already have an audio interface
- You prefer analog gear and plan to EQ or mix in post
- You want maximum value under $150
Choose the MV7+ if:
- You want USB and XLR options
- You need built-in DSP and easier setup
- You plan to stream, travel, or record in less-than-ideal spaces
Already have an MV7? If you felt limited by Micro-USB, missed advanced EQ or noise control, or found the interface too basic — the MV7+ solves all of that.
Final Thoughts
Both the Rode PodMic and the Shure MV7+ are exceptional microphones aimed at voice-first creators. The PodMic continues to punch above its price point with analog reliability, while the MV7+ brings high-end digital control and a seamless user experience. Choose the one that fits your workflow, gear, and growth plans.
The Ultimate Podbean Hack: How to Create a Podcast RSS Feed in 5 Easy Steps!
Want your podcast to reach the masses without lifting a finger? The secret sauce is a powerful RSS feed – and with Podbean, setting it up is as easy as hitting ‘Publish.’ Podbean, a popular podcast hosting platform, makes it simple to generate and manage RSS feeds without technical expertise. This guide provides a comprehensive, step-by-step tutorial for creating and optimizing your podcast RSS feed using Podbean.
What’s an RSS Feed and Why Should You Care?
Think of an RSS feed as your podcast’s VIP pass to every listener’s playlist. If you’re not using one, you’re basically throwing your episodes into a black hole. It’s the magic link between your content and platforms like Spotify and Apple Podcasts. Without one, your podcast is basically invisible.
Why Podbean? Why Not Something Else?
- Automated episode delivery to podcast directories
- Boost your discoverability and SEO
- Reach a bigger audience without lifting a finger
- Manage everything from one simple dashboard
Getting Your Podbean Account Up and Running
Jump on over to Podbean.com and create your account. The free plan is great for beginners, but if you want the good stuff – like advanced analytics and unlimited hosting – it’s worth upgrading.
Setting Up Your Podcast
- Head to ‘Create a Podcast’ and fill in the basics: title, description, cover art.
- Choose a category that fits your content.
- Click ‘Save’ to lock it in.
Uploading Your First Episode (Yes, It’s Time)
- Go to ‘Episodes’ and click ‘Publish.’
- Upload your audio file, enter episode details, and hit ‘Publish.’
Unlocking the Magic Link – Your RSS Feed URL
- Navigate to ‘Settings’ > ‘Feed.’
- This link is the golden ticket that gets your episodes delivered to Spotify, Apple Podcasts, and beyond. Don’t just copy it – own it.
Getting Your Podcast Seen Everywhere
Time to share that RSS feed with every directory you can think of:
- Apple Podcasts: Submit via Apple Podcasts Connect.
- Spotify: Drop it into Spotify for Podcasters.
- Google Podcasts: Submit through Google Podcasts Manager.
- Stitcher, Pandora, iHeartRadio – don’t forget these!
Troubleshooting Podbean RSS Feed Issues – Don’t Panic, Fix It
- Missing episodes? Check your upload settings. Confirm that each episode has a unique title, description, and upload date. Also, verify that the episode isn’t marked as ‘Draft’ or ‘Private,’ as these won’t appear in the RSS feed.
- Wrong artwork? Re-upload and resync. Ensure the artwork meets Podbean’s size and format requirements (usually 1400×1400 pixels in JPEG or PNG). Double-check that the artwork is correctly assigned to each episode.
- Feed not updating? Validate it through Podbean’s tools. Check for common issues like incorrect episode order, missing episode titles, or mismatched episode artwork. If all else fails, try re-uploading the episode or manually updating the feed.
Level Up Your RSS Feed Settings
- Custom Episode Links: Direct listeners to landing pages or specific URLs.
- Email Verification: Add a contact email to prove you own the feed.
- SEO Settings: Make sure episode titles and descriptions are optimized.
Burning Questions About Podbean RSS Feeds
- Can I set up an RSS feed without episodes?
- How do I move my existing feed to Podbean?
- Can I run multiple podcasts under one account?
The Big Takeaway: Why Podbean is Your Podcast’s Best Friend
Your podcast deserves to be heard, and a well-optimized RSS feed is how you make that happen. Follow the steps, submit your feed, and watch your listener count grow. Ready to go live? Sign up for Podbean here.
From Basic to Broadcast-Quality: How the Mevo Core Instantly Levels Up Your Podcast Studio
The difference between a hobby podcast and a professional show often comes down to one thing: production quality. If your podcast looks polished, you build instant credibility with your audience. That’s where the Mevo Core comes in — a compact, wireless 4K camera designed to take your podcast from basic to broadcast-level without the complexity.

Click here to learn more about the Mevo Core
Why video quality matters more than ever
Audio-only podcasts aren’t enough anymore. Video podcasts on YouTube, Spotify, and TikTok are exploding. Great visuals boost trust, grow your audience, and open doors for sponsorships. A professional look isn’t a bonus — it’s the baseline.
Why Video Matters:
- Builds audience trust
- Boosts retention and watch time
- Increases monetization opportunities
- Expands reach through social media clips
How the Mevo Core Live Event Camera upgrades your podcast
Cinematic 4K video for a polished, pro look
The Mevo Core’s 4K Micro Four Thirds sensor delivers stunning video that instantly elevates your production. Thanks to interchangeable lenses, you can create:
- Blurred backgrounds for a cinematic look
- Tight close-ups for interviews
- Wide-angle group shots
Multi-camera setups made simple
Wirelessly connect multiple Mevo Cores and control them using the Mevo Multicam app.
Multi-Cam Benefits:
- No expensive hardware switchers needed
- Live switch between angles on your phone
- Easily scale from one camera to a full studio setup
Wireless freedom keeps your studio clean
The Mevo Core connects over Wi-Fi 6E, giving you a strong, stable link without cable clutter.
Wireless Advantages:
- Set up cameras anywhere in the room
- Move and adjust angles easily
- Maintain a clean, professional-looking studio
Broadcast-level streaming and recording
Whether you’re going live or recording for later, the Mevo Core delivers pro-grade results.
| Feature | Details |
|---|---|
| Streaming Protocols | NDI, SRT, RTMP |
| Video Recording | Crisp 4K files for editing and archiving |
| Livestream Platforms | YouTube, Facebook, Twitch |
Better audio built right in
The Mevo Core includes a 3-microphone array with noise-canceling technology and a 3.5mm input for external mics.
Audio Options:
- Built-in backup audio with noise cancellation
- External mic support for podcast-quality sound
- Seamless video and audio sync
Real-world wins for podcasters
The Mevo Core isn’t just built for controlled studio settings. It’s versatile enough for:
- Recording at conferences or events
- Capturing outdoor interviews
- Shooting behind-the-scenes episodes
- Creating vertical clips for TikTok, Instagram, and YouTube Shorts
What you should know before diving in
Before upgrading your podcast studio, here’s what to keep in mind:
| Consideration | Details |
| Camera Body Only | You’ll need to purchase a compatible Micro Four Thirds (MFT) lens separately. |
| Lighting | Good lighting will significantly improve video quality; consider softboxes or LED panels. |
| Audio Recording | While external mics plug in easily, high-end podcasters might prefer recording audio separately for full control. |
| App Ecosystem | The free Mevo Multicam app is excellent; cloud recording features are available via optional paid plans. |
| Price Range | Premium-priced, geared toward creators serious about production quality. |
| Mounting Options | 1/4-20 mounts on multiple sides for flexible setup with stands, booms, or mounts. |
Is the Mevo Core worth it for podcasters?
If you’re serious about growing your podcast and standing out with pro-quality content, the Mevo Core is a smart investment. It blends cinematic quality, wireless flexibility, multicam simplicity, and professional-grade features into one creator-friendly package. It’s not just an upgrade — it’s the bridge to a whole new level of podcasting.
Ready to level up your podcast?
Creating broadcast-quality content doesn’t have to mean building an entire studio from scratch. The Mevo Core sets you apart with a professional look, a smooth workflow, and tools that grow with your success. Capture your podcast the way it deserves to be seen.
Easy Synology NAS Setup for Photo & Video Creators (With Time Machine Instructions)
Thinking about upgrading your podcast or creative studio setup? This guide walks you through setting up a Synology NAS the easy way—especially if you’ve ever lost files or outgrown your old external drives. If you’ve already read the article titled “The Shocking Storage Mistake That’s Sabotaging Your Podcast—And How to Fix It,” this is your next step to fix it for good.
What You Need
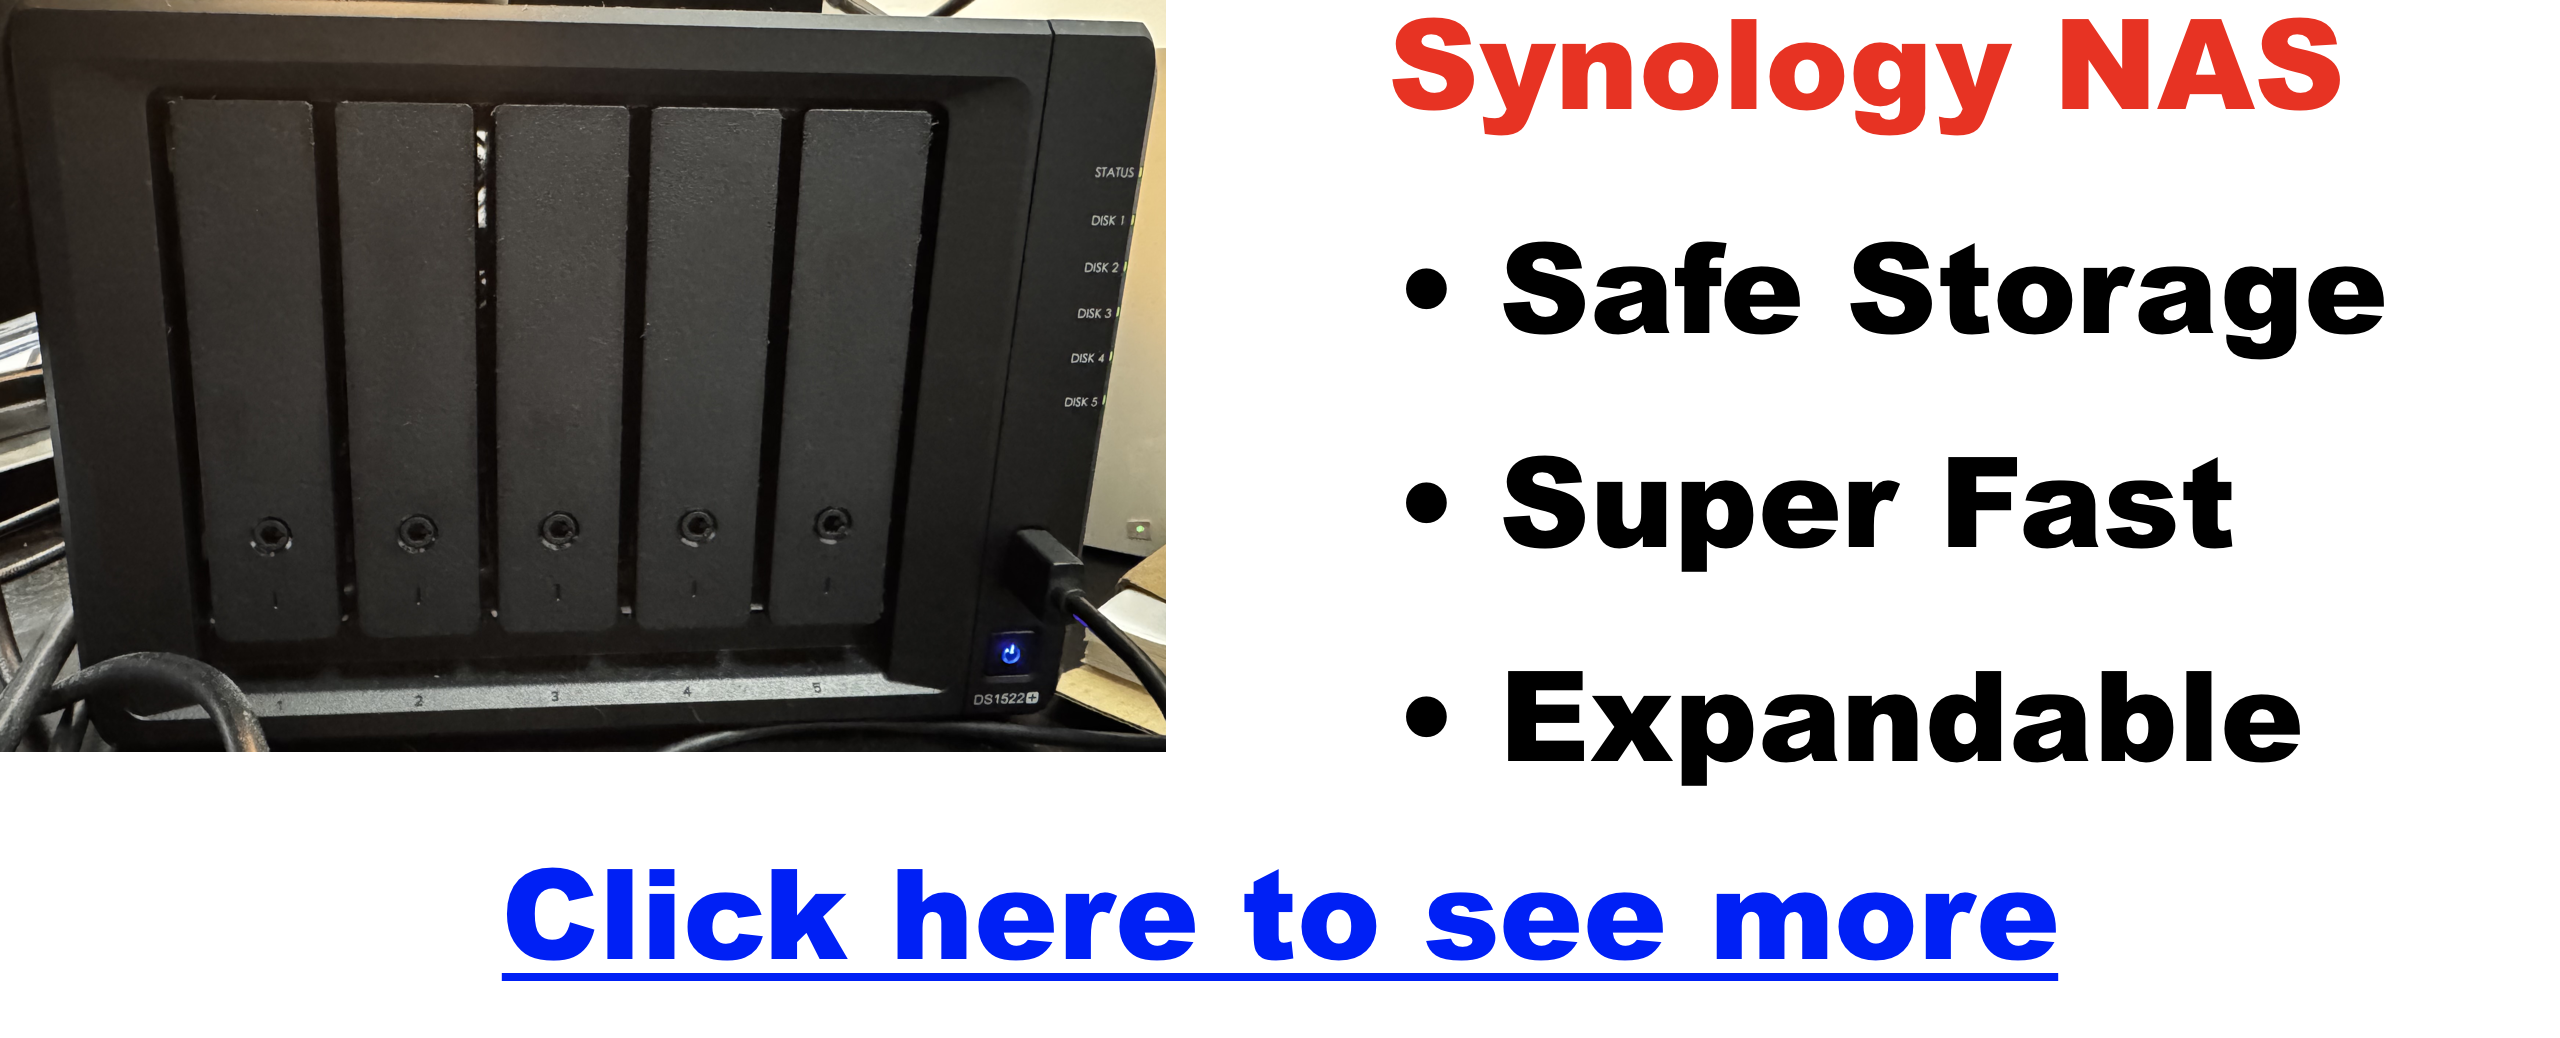
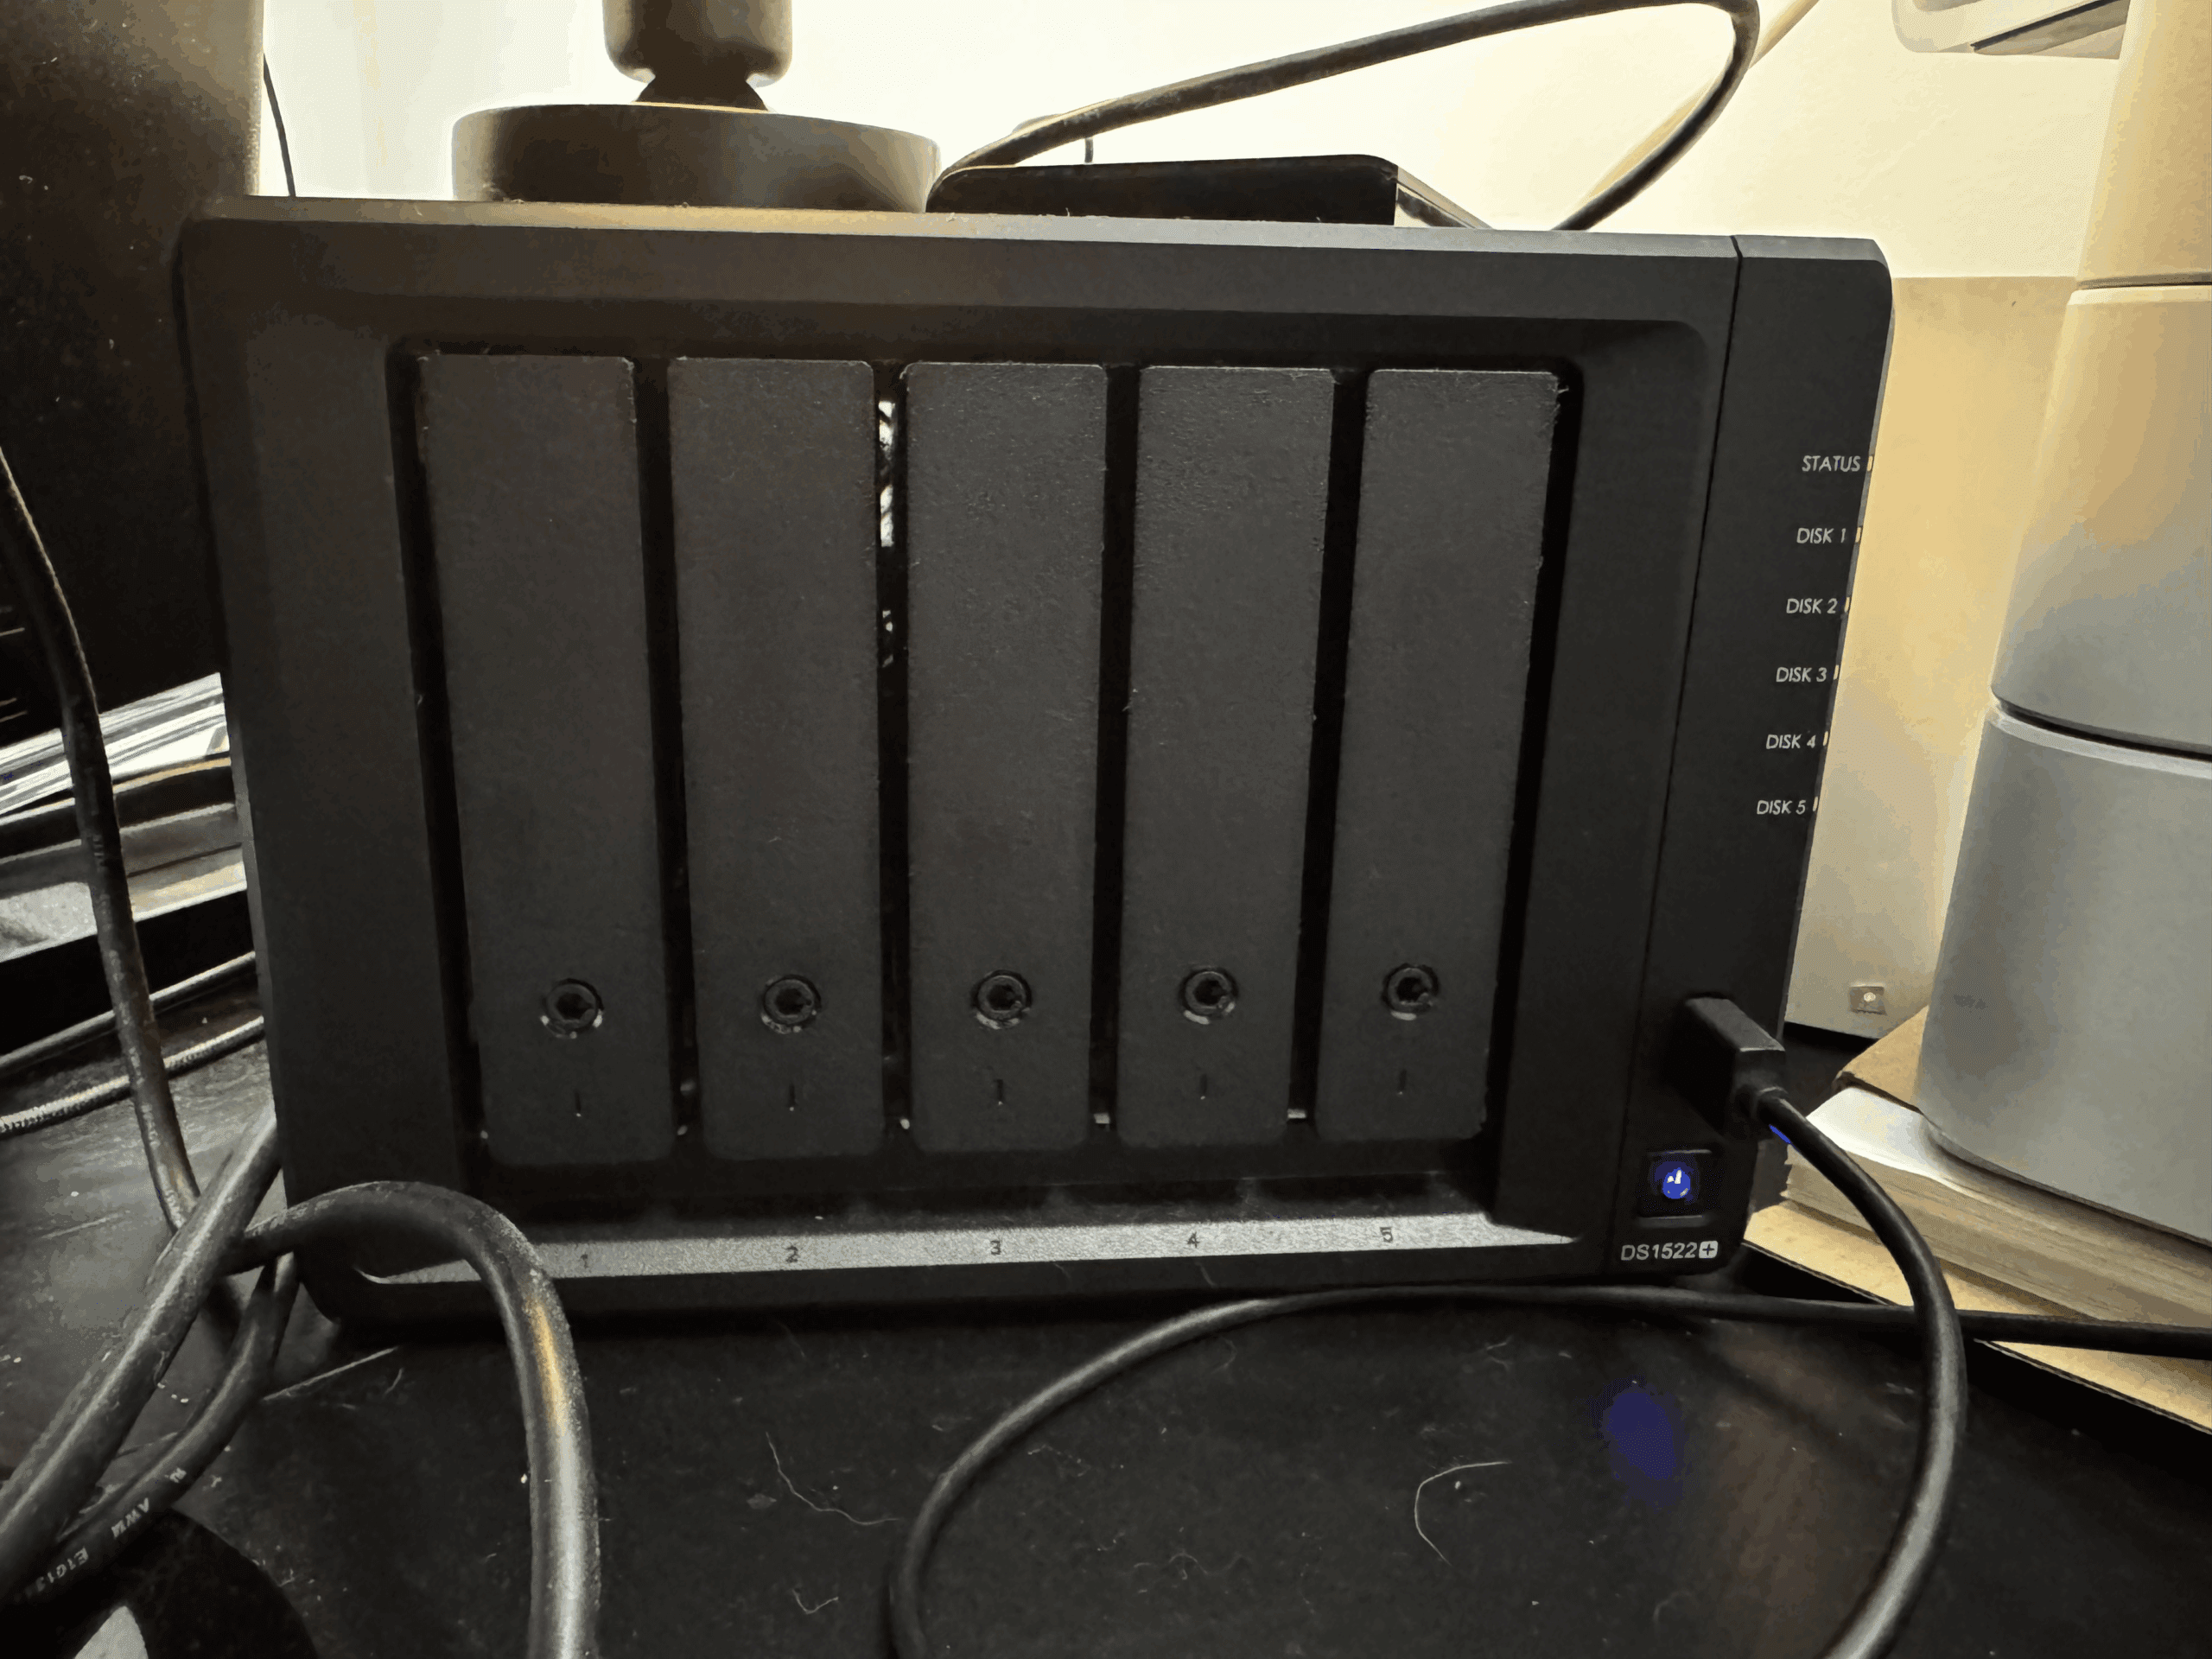
- Synology NAS (example: DS1522+)
- At least 1 hard drive (HDD or SSD)
- A computer (Mac or PC)
- Ethernet cable
- Internet router (home or office)
Easy NAS Setup (Plain English, Step-by-Step)
1. Plug Everything In
- Connect the NAS to power.
- Use the Ethernet cable to connect the NAS to your internet router.
2. Install the Drives
- Slide the hard drives into the front of the NAS until they click into place.
3. Turn It On
- Press the power button. Wait 1–2 minutes for it to start up.
4. Open Your Computer’s Web Browser
- Type this address into your browser:
find.synology.com - Click your NAS name when it shows up and follow the setup steps.
5. Choose Your Storage Type
- Pick “SHR” for a safe and flexible setup if you’re unsure.
6. Make Your Folders
- Create folders like “Photos,” “Videos,” and “Client Work.”
7. Turn On Synology Drive
- This tool helps you share and sync files easily.
8. Install Synology Drive on Your Computer
- Download the app from Synology’s website.
- Connect it to your NAS.
- Now you can sync files just like Dropbox or Google Drive.
Optional: Set Up Access on Your Phone
- Download Synology Drive or DS File from your app store.
- Sign in and you’ll be able to view or upload files from your phone.
Time Machine Backups (Mac Instructions)
Want your Mac to back up automatically to your Synology NAS? Here’s how to do it.
Step 1: Prepare the NAS
- Open DSM in your web browser.
- Go to Control Panel > File Services and turn on SMB.
- Create a new user just for backups (example: “timemachine”).
- Create a new shared folder and name it “TimeMachineBackup”.
- Edit the folder and turn on the setting: “Enable as Time Machine backup target.”
- Make sure the backup user has permission to write to that folder.
Step 2: Connect Time Machine on Your Mac
- On your Mac, go to System Settings > General > Time Machine.
- Click “Add Backup Disk.”
- If your folder doesn’t appear, click “Connect to Server.”
- Type this address:
smb://your-nas-name.local/TimeMachineBackup
- Type this address:
- Use the username and password you created earlier.
- Choose the folder and start your backup.
Your Mac will now back up to the NAS automatically in the background.
Bonus Tips
- Want an extra backup in the cloud? Use Hyper Backup to connect to Dropbox or Google Drive.
- You can access your NAS files anywhere using Synology’s QuickConnect feature.
- Add SSDs to your NAS for a speed boost—this is especially helpful for editing.
Don’t wait until you lose your work. If you’ve ever had a drive fail or hit a wall with your current setup, this is your chance to fix it for good. Be sure to read the article, “The Shocking Storage Mistake That’s Sabotaging Your Podcast—And How to Fix It,” to learn how a simple upgrade changed everything for my workflow.
Synology DS1522+ Review: Is This the Best NAS for Podcasters?
If you’re serious about podcasting, there’s one painful truth nobody talks about until it’s too late: your storage setup can make or break your workflow. Lost files, slow transfers, and scattered folders across drives and cloud services can kill productivity, creativity, and worst of all—momentum.
For years, I’ve relied on external USB drives or free cloud storage to manage my libraries. But once your show grows—more guests, longer episodes, multitrack editing, maybe even video—these simple solutions start falling apart. That’s where the Synology DS1522+ comes in.
As someone that has a closet full of drives, I put this off for a long time. And as someone that has run Windows Home Server, Windows Server, various Linux builds, and who literally shoved a computer into an old bucket as an experimental storage server… I was very happy to find this device.
Is the hardware the fastest in the world? No. Is it the most decked out thing ever? Not at all. So why do I like it so much? The hardware and the software it comes with is STELLAR together. It’s the combination of both of these, extremely flexible software with redundancy, optional 10 gig, SSD options for caching… it’s got great stuff in it.
This NAS (Network Attached Storage) device isn’t just another hard drive. It’s become my centralized, scalable, and surprisingly easy-to-use hub for all my podcast assets. I’ve used this unit personally for over a year, and while I’ll let the features speak for themselves, I can say it solved problems I didn’t even realize were slowing me down.
So is the DS1522+ the ultimate podcast storage upgrade? Let’s take a look inside.
Click Here To Learn More About This Unit
What Is the Synology DS1522+ (and Why Podcasters Should Care)?
The Synology DS1522+ is a 5-bay NAS system that holds up to five hard drives, expandable to 15 with optional units. That’s a potential of 330TB of centralized, protected podcast data—all accessible across your network.
What Makes It Different from External Drives:
- ✅ Centralized Storage – Access your files from any device
- ✅ Private Cloud – Skip third-party subscriptions
- ✅ Expandable – Add drives as your podcast grows
Whether you’re editing in your home studio, traveling with a laptop, or collaborating with an editor across the country, this unit becomes your always-on, always-safe content hub. If you want to see the Synology 1522+ editing video directly from it click here.
Key Features That Make This a Podcaster’s Dream Setup
🔄 Massive, Expandable Storage
Why it matters:
- Store years of audio content and archives
- House RAW interviews, multitrack sessions, images, and assets
- Grow without buying new devices
⚡ Blazing Fast File Transfers
- 4x 1GbE ports standard; optional 10GbE module
- Real-world speed: Gigabytes in seconds, not minutes
- Great for large episode exports and quick team sharing
🛡️ Built-In Redundancy and Protection
- Uses Synology Hybrid RAID (SHR)
- Swap failed drives without downtime
- Prevent catastrophic data loss from drive failure
🚀 NVMe SSD Caching for Speed
- 2x slots for NVMe cache drives
- Speeds up access to large DAW sessions
- Perfect for podcast editors working with heavy files
Pro Tip:
Mix high-capacity HDDs for bulk storage and SSDs for high-speed caching to optimize both size and speed.
🔁 Built-in Backup + Snapshots: Protecting Your Podcast Assets
Backup Features Include:
- 🔄 Hyper Backup – Schedule backups to Dropbox, Google Drive, or Synology C2
- 🕒 Snapshots – Roll back file versions with a few clicks
- 🌐 Offsite Replication – Mirror to another NAS at a second location
Why this matters:
- You’ll never lose a file to accidental deletion
- You can undo mistakes fast
- You can keep a full disaster recovery plan with minimal tech skills
🤝 Collaboration Just Got Easier (Even Remotely)
Working with editors, co-hosts, or a VA? The DS1522+ makes teamwork seamless.
With Synology Drive, you can:
- Share password-protected folders
- Enable version control and sync files across devices
- Grant custom user access (read-only, edit, etc.)
Bonus:
- Integrated with Dropbox, Google Drive, OneDrive
- Mobile apps available for on-the-go uploads or downloads
🔧 Integrates with Your Existing Workflow
Compatible with:
- macOS, Windows, Linux
- Time Machine for Mac backups
- All major DAWs (Audition, Reaper, Logic Pro, etc.)
Use Cases:
- Edit directly from the NAS
- Auto-sync recordings from your field recorder to NAS
- Access files remotely through secure QuickConnect URLs
💵 Is It Worth the Price Tag? (And What Are the Alternatives?)
DS1522+ Pricing Overview:
- NAS unit: ~$700 (diskless)
- Drives: Add your own (recommend NAS-grade)
| Feature | DS1522+ | DS923+ | QNAP TS-464 |
|---|---|---|---|
| Drive Bays | 5 (expandable) | 4 (expandable) | 4 (expandable) |
| CPU | AMD Ryzen R1600 | AMD Ryzen R1600 | Intel Celeron N5095 |
| RAM (max) | 32GB ECC | 32GB ECC | 16GB (non-ECC) |
| Ports | 4 x 1GbE | 2 x 1GbE | 2 x 2.5GbE |
| 10GbE Upgradeable | ✅ Yes | ✅ Yes | ✅ Yes |
| Ideal For | Audio-heavy workflows & multi-user teams | Smaller setups | Transcoding & video |
✅ Final Verdict: Is This the Ultimate Storage Upgrade for Podcasters?
If your podcast is growing—and your storage setup is holding you back—the Synology DS1522+ is more than an upgrade. It’s a full-on production asset.
In a nutshell:
- 🎧 Speeds up editing and backups
- 🧠 Organizes your growing content library
- 🛡️ Safeguards your episodes from data disasters
- 🤝 Makes collaboration simple and secure
It’s not for hobbyists or minimalists. But for podcasters ready to treat their show like a business, this NAS might be the most valuable gear upgrade you’ll ever make.
The Shocking Storage Mistake That’s Sabotaging Your Podcast—And How to Fix It
Click Here To Learn More About This Unit
Ever Lost an Episode Overnight? Here’s Why
I’ll let you in on a not-so-secret secret: if you’ve ever woken up to a corrupted file or a mysteriously vanished recording, it wasn’t a ghost—it was your storage. Even seasoned podcasters are tripping over the same stumbling block, sacrificing hours of work to a single hard drive that can—and will—fail on you.
If you want to skip the reading and want to get right to the point; I’ve spent years using a mixture of external drives to store my most valuable data, and it consistently fails me when I need it the most. I’m sure if you’ve ever lost stuff because your drive died, you know what I’m talking about! That is why I say it is a MUST HAVE to use a multi-drive setup because it offers extra redundancy, upgradeability, and insane performance boosts that will skyrocket your productivity. It is a game changer! Click here for the models to be considered.
Explore the Tools That Turned My Podcast Storage Around →
What’s That One Big Mistake Podcasters Keep Making?
Most creators stash every raw take, edit, and final render onto one consumer-grade drive (or a lone cloud folder). It’s affordable and feels easy… until that drive crashes or the cloud refuses to sync. Without redundancy or backup, this is a ticking time bomb.
How This Mistake Slows You Down and Risks Your Files
- Data Loss Risk: One mechanical failure or cloud sync error, and your podcast episodes, branding assets, or even client projects are gone.
- Performance Bottlenecks: Traditional external drives weren’t made for constant multi-track access, especially if you’re editing 4K video or recording remotely.
- Growth Roadblocks: As your show scales, so do the assets—intros, outros, backups, b-roll, thumbnails, raw footage. You’ll hit space limits fast if you don’t plan ahead.
Signs You Might Already Be in Trouble
- Your editor complains about slow project loading times.
- Files go missing—or don’t save properly—on external drives.
- You’ve had to delete old projects just to make room.
Why Your Portable Drive Isn’t Enough
Most podcasters begin with a USB external drive or Dropbox folder. That’s fine for a few episodes. But here’s what they’re not telling you:
- Single-Point Failure: One drop, coffee spill, or corrupt sync and you’re toast.
- No Tiered Performance: Important, active files should live on fast SSDs. Archive files can sit on slower disks. A basic external drive gives you none of this flexibility.
- Cloud Latency: Cloud restores can take hours or days—and you need fast access now, especially under deadline.
Five Steps to Bulletproof Your Podcast Storage
1. Know Your Podcast’s Storage Appetite
Are you producing audio-only interviews once a week? Or full-length video podcasts with multiple camera angles, intro animations, and 4K output?
- Audio-only podcasts: ~1–3 GB per episode
- Video podcasts (HD/4K): 10–50 GB per episode
- Add backups, show assets, and client work, and you’re easily in terabyte territory within a few months
Knowing your file footprint helps you avoid overpaying—or worse, underpreparing.
2. Pick the NAS That Fits Your Show
NAS (Network Attached Storage) is like a private cloud server at your fingertips. Synology makes NAS devices that connect to your network and store your media securely.
Here’s what different podcasters need:
- Solo Audio Hobbyist: BeeStation (1-bay), DS223j (2-bay). Simple setup, great for audio backups.
- Audio + Light Video: DS223, DS224+. Enough RAM and CPU to stream, back up, and run apps like Plex.
- Small Team/Video-Heavy: DS923+, DS1522+. Handles video editing workflows, shared access, and RAID protection.
- Multi-Show Network: DS1621+, DS1821+. Designed for larger storage, faster transfers, and multiple editors.
- Enterprise / Publisher: DS1823xs+, DS3622xs+. Top-tier performance, 10GbE networking, and maxed out scalability.
These models aren’t just about space—they’re about preventing downtime, editing faster, and future-proofing your workflow.
3. RAID: Your Safety Net
RAID (Redundant Array of Independent Disks) keeps your podcast data safe even if a drive fails.
- RAID 1: Two drives mirror each other—simple, effective.
- RAID 5/6: Requires 3–4+ drives. Offers a mix of storage space, speed, and redundancy.
Use RAID to avoid starting over if a disk dies—your system keeps running while you replace it.
4. Supercharge with SSD Caching
Most Synology models let you install M.2 SSDs that work as cache drives. This means your frequently accessed files load way faster—ideal for editing or moving large media files.
- Without cache: Waiting minutes for transfers or file previews
- With cache: Blazing-fast response times, even in a team setting
It’s like giving your NAS a nitro boost.
5. Set It and Forget It with Automated Backups
Synology’s built-in tools let you:
- Backup locally, to the cloud, or both using Hyper Backup
- Create file versions with Snapshot Replication
- Monitor drive health so you catch issues early
Set it up once, and your entire show’s content stays protected—with minimal tech headaches.
Which Synology Model Is Your Perfect Match?
Refer back to our model recommendations to pinpoint the right DiskStation for your setup:
| Model | Bays | CPU | RAM (Std/Max) | M.2 NVMe | LAN Ports | Max Drives | Best For |
|---|---|---|---|---|---|---|---|
| BeeStation | 1 | Realtek RTD1619B | 1 GB DDR4 (fixed) | No | 1 × 1 GbE | 1 | Plug-and-play backup for solo creators |
| DS223j | 2 | Realtek RTD1619B | 1 GB DDR4 (fixed) | No | 1 × 1 GbE | 2 | Entry-level audio-only podcasters |
| DS223 | 2 | Realtek RTD1619B (1.7 GHz) | 2 GB DDR4 (fixed) | No | 1 × 1 GbE | 2 | Audio + occasional video |
| DS224+ | 2 | Intel Celeron J4125 | 2 GB / 6 GB DDR4 | No | 2 × 1 GbE | 2 | Light video editing, Docker-capable |
| DS923+ | 4 | AMD Ryzen R1600 | 4 GB / 32 GB ECC DDR4 | Yes | 2 × 1 GbE (10GbE opt) | 9 | Video workflows, remote editing |
| DS1522+ | 5 | AMD Ryzen R1600 | 8 GB / 32 GB ECC DDR4 | Yes | 4 × 1 GbE (10GbE opt) | 15 | Growing teams with Plex/RAID/caching needs |
| DS1621+ | 6 | AMD Ryzen V1500B | 4 GB / 32 GB ECC DDR4 | Yes | 4 × 1 GbE | 16 | Multi-show networks with archive storage |
| DS1821+ | 8 | AMD Ryzen V1500B | 4 GB / 32 GB ECC DDR4 | Yes | 4 × 1 GbE | 18 | Large-scale project archiving |
| DS1823xs+ | 8 | AMD Ryzen V1780B | 8 GB / 32 GB ECC DDR4 | Yes | 2 × 1 GbE, 1 × 10GbE | 18 | Fast shared editing + backups |
| DS3622xs+ | 12 | Intel Xeon D-1531 | 16 GB / 48 GB ECC DDR4 | No | 2 × 1 GbE, 2 × 10GbE | 36 | Enterprise media teams & publishers |
Check Out the Models That Fixed My Workflow Woes
A Real-Life Rescue Story
Let me share what happened to me.
At one point, I was storing all of my podcast files—raw audio, edited episodes, backup exports, you name it—on a single external hard drive. It was my go-to storage solution because it seemed easy. One day, I plugged it in, and… nothing. The drive wouldn’t mount. It wouldn’t even spin up. After trying different cables, ports, and recovery tools, I realized it was a hardware failure. There was something physically wrong with the drive itself.
I had terabytes of irreplaceable podcast content on that drive—interviews, b-roll, templates, and show archives. All gone in an instant. I wasn’t able to recover any of it.
Luckily, I had an old backup from a few months prior, which saved me from starting completely from scratch. But that was the moment I knew I needed something better. Something built for this.
That’s when I switched to a Synology NAS.
Now, I have:
- RAID redundancy, so if a drive fails, I don’t lose anything.
- Expansion options, so I can grow my storage without starting over.
- SSD caching, which speeds up editing when I’m working directly off the NAS.
- Automated backups, both local and cloud-based, so I’m always protected.
What started as a near-catastrophe became a turning point. Today, I feel confident that my work is safe—and that I’ve got a professional setup that will grow with me. See the Storage Setup I Recommend for Podcasters →
Wrapping Up & Your Next Move
You’ve got the playbook—now audit your setup. Is your storage ready for your next episode, or are you gambling with months of work?
Start by answering:
- Are my files backed up?
- Can I recover if a drive fails?
- Am I constantly out of space?
If any answer makes you pause, it’s time to act.
Why Every Business Podcast Needs Its Own Website—Especially Now
Why Successful Businesses Use Separate Websites For Their Podcasts
Podcasting Isn’t Just Audio Anymore
In 2025, podcasting has evolved into a full-spectrum content strategy. YouTube now leads the way in podcast consumption, with over 400 million hours of podcast content consumed on TVs alone.
If you’re running a business podcast—or using a podcast as part of your brand strategy—simply relying on Spotify or YouTube is no longer enough.
To stand out, you need a dedicated website—a central hub you own, control, and optimize.
📺 The Rise of YouTube and the Video Podcast Era
Video podcasts aren’t the future—they’re the present. Listeners want more visual content, and platforms are prioritizing video-based discovery.
While this is a major opportunity, it also comes with a risk: you don’t own the audience on platforms like YouTube. They do.
If you’re serious about growth and longevity, your podcast needs its own domain and a reliable place to live online.
🧠 Why a Business Podcast Needs Its Own Website
1. You Control the Narrative—and the Leads
With a website:
-
You can guide listeners to specific calls to action.
-
Add opt-ins, lead magnets, offers, or service pages.
-
Showcase testimonials, transcripts, and more.
Platforms are noisy. Your site is focused.
Tip: Choose a hosting provider that makes it easy to install tools like WordPress or Elementor. We recommend InMotion Hosting for its speed, uptime, and excellent support.
2. It Future-Proofs Your Podcast
Algorithms change. Platforms disappear. Policies tighten.
A website gives you:
-
A stable content archive.
-
The flexibility to rebrand or pivot.
-
Full control over user experience.
InMotion’s hosting plans include free SSL, email, and backups—so your content stays protected as your podcast grows.
3. Boost Discoverability with SEO
Each episode is a chance to rank on Google.
-
Turn it into a keyword-optimized blog post.
-
Embed your YouTube or audio player.
-
Add transcripts, quotes, and resources.
This drives long-term traffic—especially important for evergreen business content.
Bonus: InMotion Hosting supports SEO plugins and caching tools to help you load faster and rank higher.
4. It’s the Core of Your Monetization Funnel
Whether you’re selling services, courses, or just growing your list—your website is where it all happens.
Without a site:
-
No landing pages
-
No upsells
-
No retargeting
-
No real ownership
Many podcasters use InMotion’s Business Hosting to host both their podcast website and a private member area or course.
🔧 What Your Podcast Website Should Include
| Page/Section | Purpose |
|---|---|
| Home Page | Introduce the show and lead to your #1 CTA |
| Episode Hub | Display all episodes with notes & SEO titles |
| About You | Build trust and expertise |
| Email Capture | Grow your list with a lead magnet |
| Blog / Resources | Attract organic traffic |
| Work With Me | Convert visitors into customers |
With InMotion, you can install WordPress in one click and access 24/7 support—ideal for beginners and pros alike.
✅ Best Web Hosts for Podcasters & Small Business Creators
| Web Host | Avg. Monthly Cost | Key Features Included | Is It As Good As InMotion? |
|---|---|---|---|
| InMotion Hosting | $3.29 – $14.99 | Free domain, email, SSL, site migration, business tools, 24/7 US-based support | ✅ Best overall value |
| Bluehost | $2.95 – $13.95 | Free domain, email, WordPress install, but limited migration tools | ⚠️ Good, but basic business features |
| SiteGround | $3.99 – $14.99 | Great performance, limited business tools, no free domain | ⚠️ Strong tech, less value |
| HostGator | $2.75 – $11.95 | Email, SSL, WordPress—but lacks real business scaling tools | ⚠️ Budget-friendly, but limited |
| GoDaddy | $5.99 – $19.99 | Domain included, many features are paid add-ons | ❌ Not ideal for creators |
✅ Bottom Line
Podcasting is no longer just a hobby—it’s a business tool.
If you’re serious about growth, lead generation, or building a brand, then your podcast deserves more than a linktree or a Spotify page.
A fast, flexible, secure website is your home base—and the key to future-proofing your content.
🎁 Want a Quickstart?
Set up your podcast website today with InMotion Hosting.
You’ll get:
-
Free domain
-
Fast WordPress setup
-
Built-in security & email
-
Tools for growth
👉 Click here for the free podcast ebook to make money with your new site
Best Desktop Computers for Podcasters, Audio Engineers, and Editors (2026 Guide)
Podcasting has grown far beyond simple voice recordings. Today’s podcasters are editors, audio engineers, and even video creators. Whether you’re producing high-fidelity interviews, editing multi-track sessions, or live streaming to your audience, your desktop is the powerhouse behind the scenes. Choosing the right desktop isn’t about brand loyalty — it’s about matching your workflow with reliable, future-proof performance.
This guide breaks down the best Mac and Windows desktop computers for podcasters, based on real-world use, power, expandability, and value.
What Makes a Great Desktop for Podcasting?
Podcast production requires more than a decent processor. Here’s what to look for:
Core Specs to Prioritize:
- Multi-core CPU: Essential for smooth DAW performance and faster rendering.
- 32GB+ RAM: Critical for multitasking, plugins, and editing large audio files.
- SSD/NVMe Storage: Ensures fast access to session files and reduced load times.
- Quiet Operation: Your microphone can pick up fan noise — choose quiet builds.
- Thunderbolt/USB-C Ports: Ideal for modern audio interfaces and fast external drives.
Bonus Features:
- High-end GPU (if you’re editing video podcasts).
- PCIe Expansion for pro cards and future upgrades.
- Upgradable components (especially in Windows towers).
Best Mac Desktops for Podcasting in 2026
| Model | Chip | Max RAM | Best For |
|---|---|---|---|
| iMac (M4) | M4 | Not stated | All-in-one setups with minimal cables |
| Mac Studio | M4 Max/M3 Ultra | 512GB | Heavy editing, multi-track production |
| Mac Pro | M3 Ultra | 512GB | Large studio environments with expansion |
iMac (2024, M4)
- All-in-one design with 24-inch 4.5K Retina display
- Ideal for creators who want simplicity and performance in one unit
Mac Studio (2025, M4 Max / M3 Ultra)
- Compact but incredibly powerful
- Thunderbolt 5, massive RAM support, fast SSD
- Ideal for power users working with dozens of tracks and plug-ins
Mac Pro (2024, M3 Ultra)
- For studios needing internal PCIe expansion (DSP cards, RAID, etc.)
- Best for those already deep into Apple’s professional ecosystem
Best Windows Desktops for Podcasting in 2026
| Model | CPU | Max RAM | Best For |
| Dell Precision 7960 | Intel Xeon W9-3495X | 2TB | Enterprise-level audio studios |
| HP Z8 G5 Fury | Xeon/Threadripper Pro | 2TB | Audio post-production houses |
| ASUS ProArt PD5 | i9-14900K / Ryzen 9 7950X | 128GB | Content creators and podcast editors |
| Corsair Vengeance i8200 | i9-14900K / Ryzen 9 7950X | 128GB | Home-based podcasters + streamers |
Dell Precision / HP Z8 / Lenovo PX
- Designed for critical workflows and redundancy (ECC RAM, RAID, dual CPUs)
- Expensive, but mission-critical reliable
ASUS ProArt PD5
- Balanced for podcasters who also do video work or advanced editing
- Quiet cooling and elegant design
Corsair Vengeance i8200
- Gamer-class power meets podcasting
- Excellent thermals and upgradability
Mac vs. Windows for Podcasting: Which to Choose?
| Feature | macOS | Windows |
| Software Access | Logic Pro, GarageBand | Audition, Reaper, Pro Tools |
| Expandability | Limited (except Mac Pro) | High |
| Upgradability | Low (except Mac Pro) | Very High |
| Ease of Use | High | Varies |
| Initial Cost | Higher | More options at lower cost |
Choose macOS if:
- You already use Logic Pro or Final Cut
- You prefer all-in-one simplicity
Choose Windows if:
- You want custom builds or upgrades
- You run plugin-heavy or video workflows
Final Recommendations by Podcasting Style
| Use Case | Best Desktop Option |
| Solo podcaster + editing | iMac (M4), ASUS ProArt PD5 |
| Remote interviews + plugins | Mac Studio, Corsair Vengeance |
| Livestreaming and podcasting | Corsair Vengeance, Mac Studio |
| Audio agency / production team | Mac Pro, Dell Precision, HP Z8 |
Pro Tips Before You Buy
- Opt for 1TB+ of storage for long-term episodes and backups.
- Don’t forget a UPS battery backup — power loss ruins recordings.
- Consider dual monitors for easier multi-track editing.
- Check compatibility with your preferred audio interface.
- Budget for a high-quality mic, audio interface, and room treatment.
Conclusion
Your desktop is the foundation of your podcast studio. Whether you’re editing your first episode or producing high-end interview shows, the right computer will make your workflow faster, smoother, and more enjoyable.
The Mac Studio (M4 Max) and ASUS ProArt PD5 hit the sweet spot for most podcasters — offering massive performance without the overkill. For those building out a commercial studio, the Mac Pro or Dell Precision 7960 provide the flexibility and muscle needed to scale.
Choose the machine that matches your ambition — and let your content shine.
Best Cheap Podcast Microphones in 2026 (That Still Sound Pro)
Want great audio without spending a fortune? Whether you’re launching your first show or upgrading your setup, the right podcast microphone doesn’t have to cost $200+. Below are the best cheap podcast microphones under $100 — offering solid sound, simple setup, and serious value.
✅ What to Look for in a Cheap Podcast Mic
Before we dive into the top picks, here’s what really matters when shopping for a budget microphone:
- Sound Quality: Even low-cost mics can produce studio-like clarity.
- Background Noise Rejection: Especially important for untreated rooms.
- Connection Type: USB is plug-and-play. XLR offers pro-level upgrade paths.
- Build Quality: Cheap shouldn’t mean flimsy.
- Included Accessories: Bonus points for pop filters, stands, and cables.
🎧 6 Best Cheap Podcast Microphones (Under $100)
1. Samson Q2U – Best Overall Budget Mic
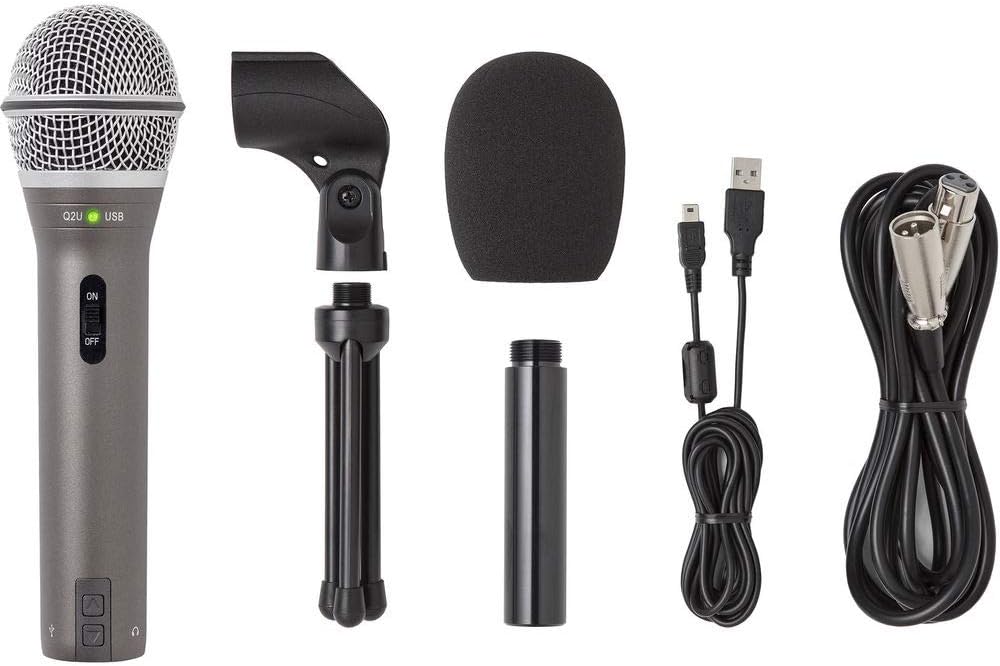
- Type: Dynamic | Connection: USB + XLR
- Price: ~$77 | ⭐ 4.7 (1,000+ reviews)
Why It’s Great:
This mic punches way above its price class. The Samson Q2U offers both USB and XLR outputs, making it ideal for beginners now and future upgrades later. Its dynamic capsule naturally blocks room noise, giving you cleaner audio even in echoey spaces.
✅ Pros:
- Dual USB/XLR for flexibility
- Excellent clarity for the price
- Rugged build
⚠️ Cons:
- Can be harder to find in stock
2. Audio-Technica ATR2100x-USB – Best Value Alternative
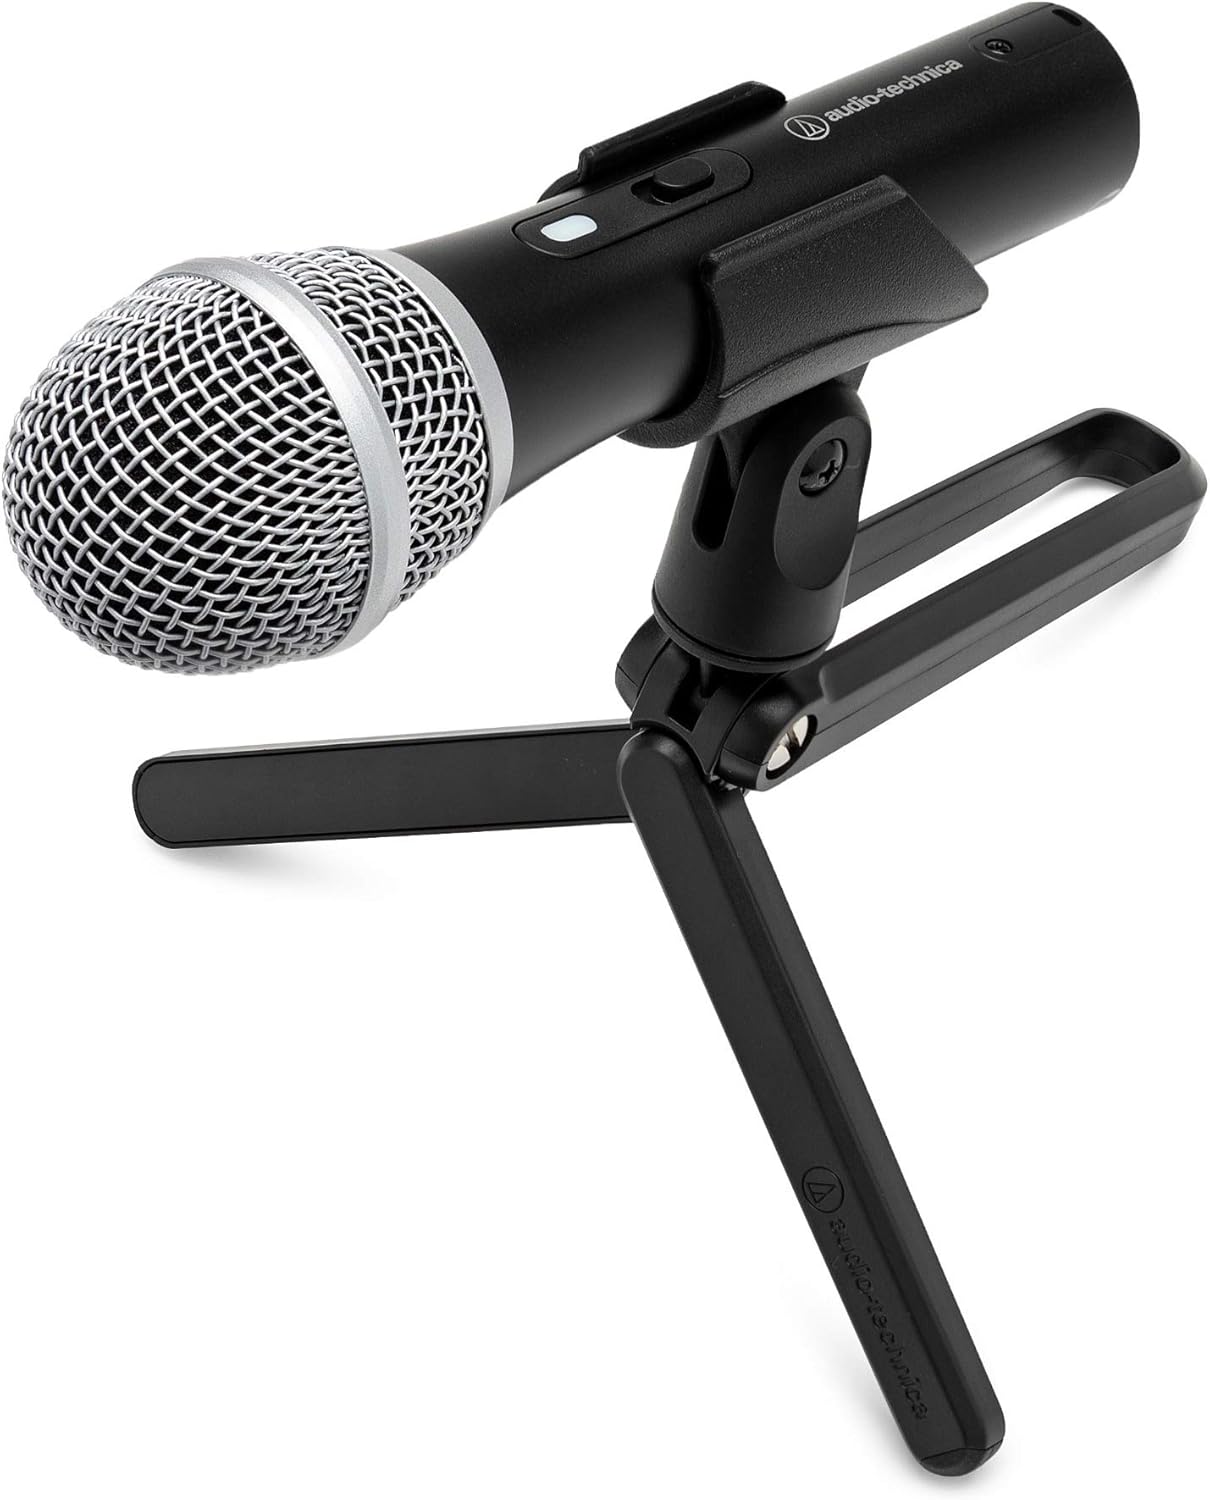
- Type: Dynamic | Connection: USB + XLR
- Price: ~$49 | ⭐ 4.8 (500+ reviews)
Why It’s Great:
Nearly identical to the Q2U, the ATR2100x is a favorite among podcasters for its quiet background handling and upgrade-ready connections. It’s a plug-and-play mic that can also go pro when paired with an interface.
✅ Pros:
- Great noise rejection
- Dual connectivity
- Crisp vocal capture
⚠️ Cons:
- Included stand is a bit flimsy
3. Behringer D3 Podcast Bundle – Best All-in-One Starter Kit
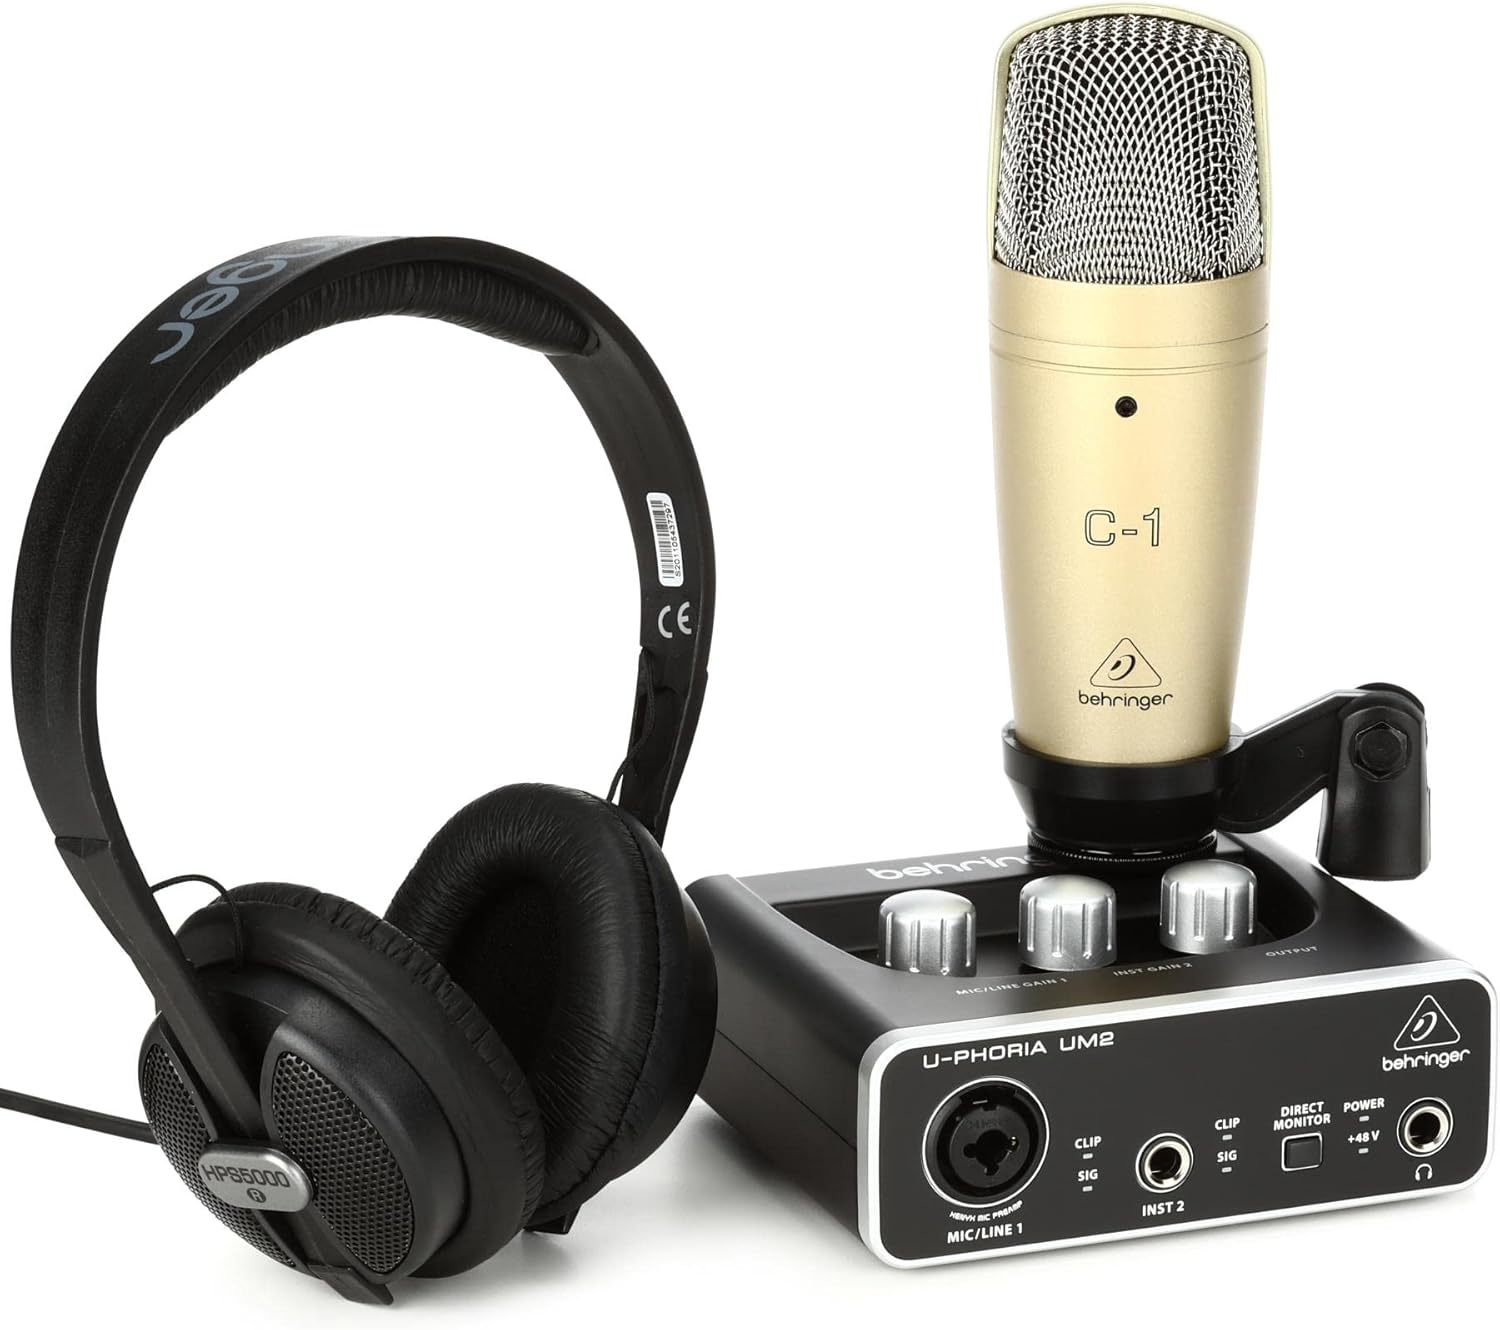
- Type: Condenser | Connection: USB
- Price: ~$72
Why It’s Great:
Just starting out? The Behringer D3 Podcast Bundle includes everything you need: USB mic, boom arm, pop filter, and cables. It’s a simple way to jump into podcasting without buying accessories separately.
✅ Pros:
- Complete kit
- Easy USB setup
- Cardioid pattern for voice focus
⚠️ Cons:
- Mic is basic, better for solo or beginner setups
4. Blue Snowball iCE – Most Popular USB Mic
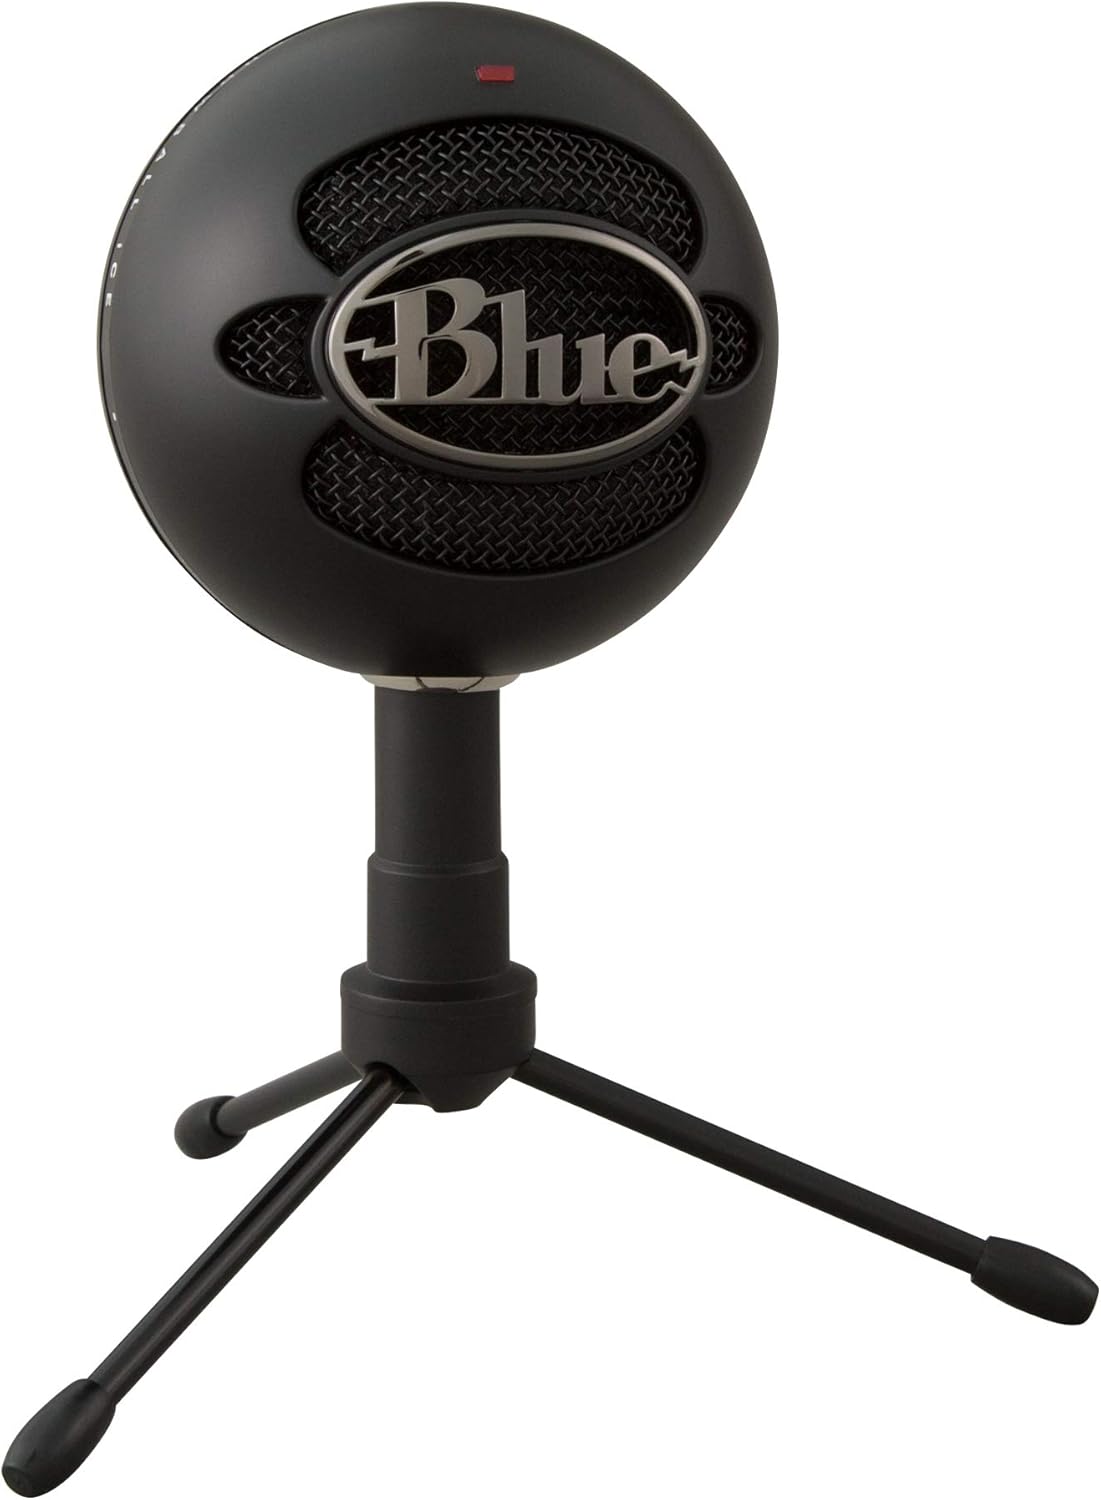
-
Type: Condenser | Connection: USB
-
Price: ~$49 | ⭐ 4.5 (1,600+ reviews)
Why It’s Great:
The Blue Snowball iCE is a longtime favorite of hobby podcasters. It’s simple, stylish, and delivers decent sound for the price. Great for voiceovers, solo podcasts, and general use.
✅ Pros:
- Recognized brand
- Sleek, compact design
- Plug-and-play simplicity
⚠️ Cons:
- Picks up more background noise than dynamic mics
5. HyperX SoloCast – Best for Streamers & Podcasters
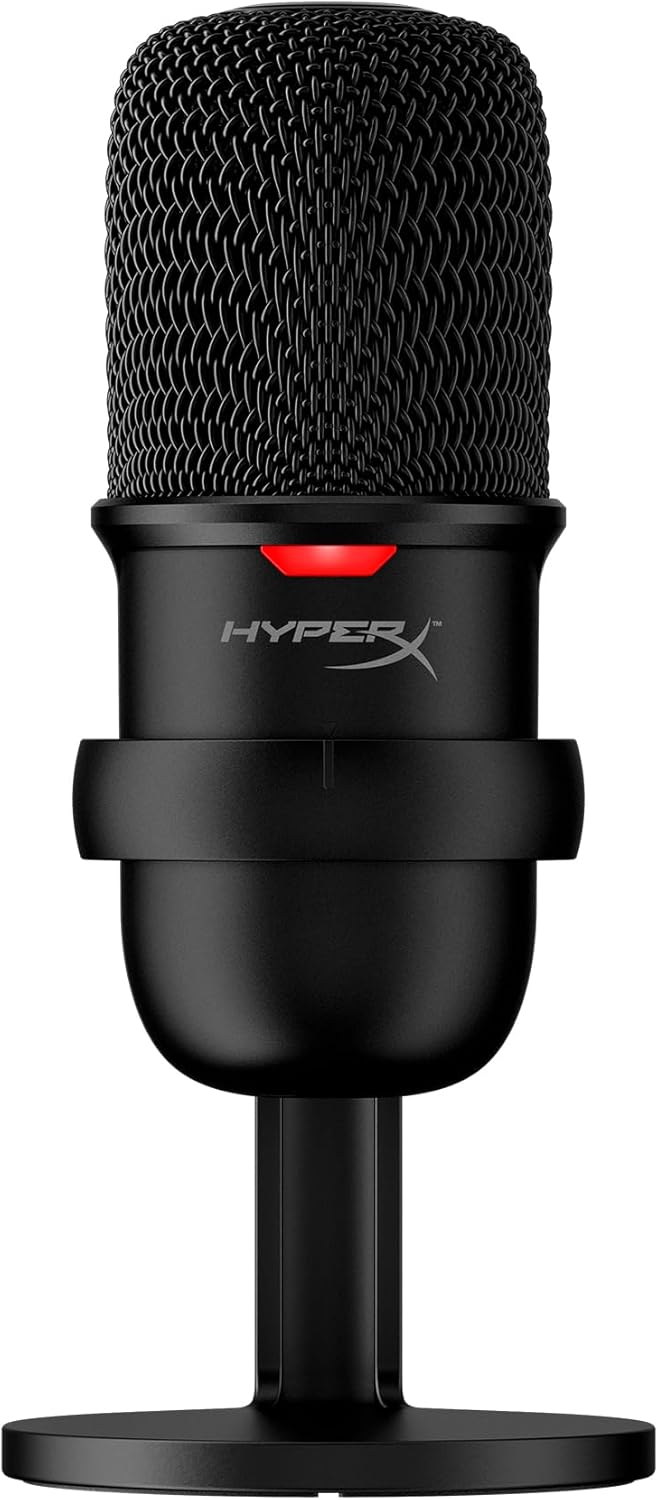
- Type: Condenser | Connection: USB
- Price: ~$48 | ⭐ 4.8 (3,800+ reviews)
Why It’s Great:
The HyperX SoloCast brings modern convenience to a budget mic. Features like tap-to-mute and a slim design make it perfect for podcasters who stream or record regularly in small spaces.
✅ Pros:
- Tap-to-mute + LED indicator
- Great voice isolation
- Certified for Discord & TeamSpeak
⚠️ Cons:
- Condenser mic = more room sensitivity
6. Sudotack ST-800 – Best Full Kit on a Tight Budget
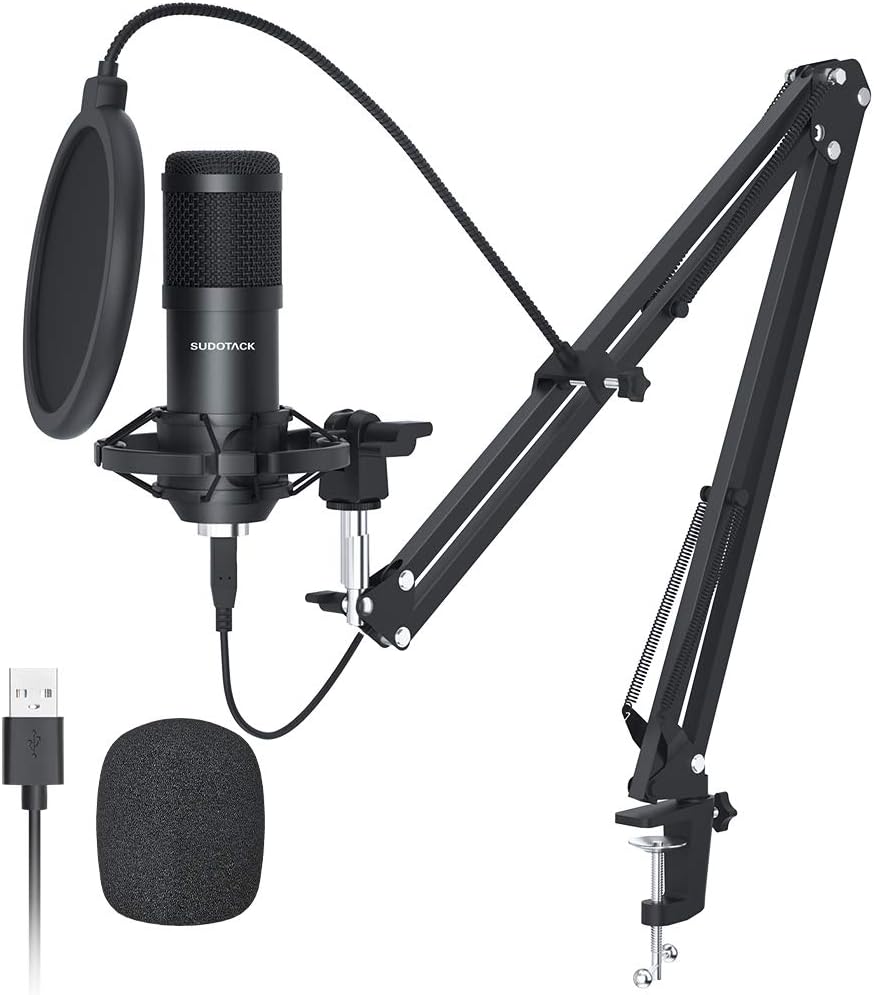
- Type: Condenser | Connection: USB
- Price: ~$48 | ⭐ 4.5 (Amazon)
Why It’s Great:
The Sudotack ST-800 offers premium features at a budget price — including 24bit/192kHz resolution and a full kit with stand, pop filter, and shock mount. Perfect for quiet rooms where detail matters.
✅ Pros:
- High-res audio
- Complete kit included
- Excellent value
- ⚠️ Cons:
- Best used in quiet environments due to condenser design
🔍 Quick Comparison Table
| Microphone | Type | USB/XLR | Price | Best For |
|---|---|---|---|---|
| Samson Q2U | Dynamic | Both | ~$77 | All-purpose, long-term setup |
| ATR2100x-USB | Dynamic | Both | ~$49 | Beginners with upgrade plans |
| Behringer D3 Bundle | Condenser | USB | ~$72 | First-time users, full kit |
| Blue Snowball iCE | Condenser | USB | ~$49 | Hobbyists, solo podcasters |
| HyperX SoloCast | Condenser | USB | ~$48 | Streamers & minimalist setups |
| Sudotack ST-800 | Condenser | USB | ~$48 | Quiet rooms, full-feature kit |
💡 Pro Tips for Better Sound on a Budget
- 🎧 Use a pop filter: Cuts out harsh ‘p’ and ‘s’ sounds.
- 🪟 Record in soft spaces: Curtains, rugs, and pillows help dampen reverb.
- 🎚️ Learn to EQ: Even free tools like Audacity let you polish your audio.
- 🧼 Use noise reduction software: Clean your recordings with tools like Krisp or Adobe Enhance.
🙋♂️ FAQ: Cheap Podcast Microphones
What is the best cheap podcast microphone under $100?
The Samson Q2U and Audio-Technica ATR2100x-USB are top choices. Both offer excellent sound quality, background noise rejection, and dual USB/XLR connectivity, making them ideal for beginners and intermediate podcasters.
Can a cheap microphone still sound professional?
Yes! Many budget mics offer impressive audio quality. Dynamic microphones like the Samson Q2U or ATR2100x are especially good for untreated rooms because they block out background noise better than condenser mics.
What’s the difference between USB and XLR microphones?
- USB mics are plug-and-play and ideal for beginners.
- XLR mics require an audio interface or mixer but provide more control and upgrade options for serious podcasters.
Some mics, like the Q2U and ATR2100x, offer both connections.
Should I get a dynamic or condenser mic for podcasting?
- Dynamic mics (like Samson Q2U) are better at rejecting room noise — ideal for noisy or untreated environments.
- Condenser mics (like the Blue Snowball or SoloCast) capture more detail but are sensitive to background sounds. Best used in quiet, treated spaces.
Do I need accessories with a cheap podcast mic?
Some cheap mics include stands, pop filters, or shock mounts. Others may require you to buy accessories separately. Look for bundles or starter kits (like the Behringer D3 or Sudotack ST-800) to get more value upfront.
Is it okay to buy a used or refurbished podcast mic?
Absolutely. Sites like Amazon Renewed, eBay, or Sweetwater often offer gently used or refurbished mics at steep discounts. Just make sure you’re buying from a reputable seller with a return policy.
🎬 Final Thoughts: Build Your Dream Podcast Setup Without Breaking the Bank
A great podcast starts with great audio — and as you’ve seen, you don’t need to spend a fortune to sound professional. Whether you go with the Samson Q2U for long-term flexibility, the all-in-one Behringer D3 Bundle, or the sleek HyperX SoloCast, there’s a cheap podcast microphone out there that fits your budget and goals.
But your mic is just one piece of the puzzle.
If you’re ready to take your podcast to the next level, don’t miss these essential guides:
- 🎧 Best Laptops for Podcasting – Find out which laptops handle editing, recording, and streaming with ease.
- 💡 Podcast Lighting Setups – Learn how to look polished on video even if you’re filming in a small room.
- 📷 Best Cameras & Lenses for Podcasting – Explore gear that captures sharp, professional video for interviews and livestreams.
With the right tools and knowledge, launching or upgrading your podcast doesn’t have to be expensive — just intentional. Focus on gear that’s budget-friendly but reliable, and you’ll be well on your way to creating content that sounds (and looks) like a pro.
The Best Wireless Podcast Mics
Wireless microphones are revolutionizing how podcasters and content creators capture high-quality audio. No more tangled cords or being tethered to a desk—just freedom to move, clean recordings, and sleek, minimal setups. Whether you’re recording from your home studio, interviewing on location, or streaming on the go, this guide covers the best wireless podcast mics of 2025, carefully reviewed for sound quality, ease of use, and value.
Quick Comparison Table
| Microphone | Recording Format | Range (ft) | Battery Life | Noise Cancellation | Best For |
|---|---|---|---|---|---|
| DJI Mic 2 | 32-bit float | 820 | 6 hrs (18 w/ case) | Intelligent noise canceling | Best overall |
| Rode Wireless PRO | 32-bit float | 853 | 7 hrs (w/ smart case) | N/A | Premium / Pro users |
| Hollyland Lark M2 | 48 kHz/24-bit | 984 | 10 hrs (w/ case) | >70 dB SNR | Interviews, dual-host setups |
| Rode Wireless GO II | 24-bit/48 kHz | 656 | 7 hrs | N/A | 2-person podcasting |
| Hollyland Lark M1 | 48 kHz/24-bit | 656 | 4 hrs (w/ case) | DSP algorithms | Budget pick |
| Saramonic Blink 500 | 48 kHz/16-bit or 24-bit | 328 | 8 hrs (w/ case) | Yes | Flexible, mobile creators |
| Neewer CM28 | 48 kHz/16-bit | 200 | 6 hrs (w/ case) | Basic | Beginners on a budget |
| Samson Go Mic | 48 kHz/16-bit | 100 | 6 hrs (w/ case) | Basic | Simple setups, tight spaces |
| Rode Wireless ME | 24-bit/48 kHz | 656 | 7 hrs | N/A | On-the-go/mobile podcasting |
| Lark 150 System | 48 kHz/16-bit or 24-bit | 328 | 8 hrs (w/ case) | Yes | Dual-host, easy setup |
Click here to learn more about our favorite wireless mic
Best Overall Wireless Podcast Mic
DJI Mic 2 The DJI Mic 2 balances professional-grade audio with portability. Designed for creators who move between settings, it offers up to 820 feet of wireless range and 32-bit float recording that preserves audio dynamics even in fluctuating environments. Intelligent noise canceling ensures your voice stays crisp.
Why we love it: The DJI Mic 2 works seamlessly with smartphones, cameras, and computers. It magnetically clips on, charges in a sleek case, and supports USB-C, Lightning, and 3.5mm TRS outputs.
Pros:
- 32-bit float recording
- 18 hours total battery with case
- Great noise reduction
Cons:
- Single-channel only—best for solo creators
Best Budget Option
Hollyland Lark M1 The Lark M1 delivers reliable wireless audio without breaking the bank. It’s ideal for beginners who want plug-and-play simplicity with surprising audio clarity. DSP noise cancellation and a 656-ft range give it more value than most entry-level systems.
Pros:
- Clear sound for under $100
- Easy to use, auto-pairing transmitters
- Solid build for the price
Cons:
- Limited battery per charge (4 hrs)
- No internal storage
Best for Mobile/On-the-Go Podcasting
Rode Wireless ME This compact system is designed for creators recording from a smartphone or DSLR. It features built-in microphones on both the transmitter and receiver, making quick interviews and mobile podcasting easier than ever.
Pros:
- Ultra-lightweight and portable
- Compatible with iOS and Android
- Internal mic on both ends
Cons:
- No on-device storage
- Lacks 32-bit recording depth
Best for Interviews and Multi-Person Setups
Rode Wireless GO II and Hollyland Lark M2 These dual-transmitter systems are perfect for co-hosts, guests, or on-location interviews. Both provide clean audio, extended range, and internal storage (GO II), with the Lark M2 offering up to 10 hours of runtime.
Pros:
- Dual mics and receivers
- Long wireless range
- Versatile connectivity
Cons:
- Requires some initial setup and software familiarity
Premium Pick for Professionals
Rode Wireless PRO The Wireless PRO is built for serious audio work. It supports 32-bit float recording, timecode sync for video alignment, and encrypted digital transmission. Whether you’re a documentary producer or a commercial podcaster, this is a top-tier mic system.
Pros:
- Broadcast-quality audio
- Timecode for syncing video
- Comes with lav mics and smart charging case
Cons:
- More expensive than most others
- Overkill for casual users
What to Look For in a Wireless Podcast Mic
Click here for our favorite wireless podcasting mic
Choosing the right mic depends on your workflow, environment, and goals. Here’s what to prioritize:
- Audio Quality: 24-bit or 32-bit float recording ensures detail and dynamic range.
- Battery Life: Look for systems with 6–10 hours or a charging case that extends use.
- Wireless Range: Longer range allows flexibility in setup and movement.
- Noise Cancellation: Vital for busy or outdoor environments.
- Connectivity: Ensure compatibility with smartphones, DSLRs, and computers via USB-C, Lightning, or TRS.
- Storage: Onboard memory is helpful as a backup or when recording in remote areas.
FAQs
Are wireless mics good for podcasting?
Yes. They reduce cable clutter and are ideal for dynamic or multi-person recordings.
Do wireless mics have latency?
High-end models have negligible latency. Entry-level models may experience slight delay.
Can I use wireless mics with my iPhone or DSLR?
Absolutely. Most come with or support adapters for phones and cameras.
How many people can record at once?
Depends on the system—some support one transmitter, others (like Rode GO II or Lark 150) support two or more.
Conclusion
The best wireless podcast mic for your needs depends on your goals, budget, and environment. If you’re serious about podcasting and want top-tier performance, the Rode Wireless PRO delivers unmatched clarity and control. For most creators, the DJI Mic 2 offers the best balance of portability, quality, and price. And if you’re just getting started, the Hollyland Lark M1 is your best bet.
Use the table above to compare specs at a glance—and choose the mic that will let your voice shine wherever you record.
- The Ultimate Guide to Choosing Cameras and Lenses for Podcasting
- StreamYard Business Plan Review: Is It Worth $299/Month for Teams?
- Synology DS1525+ for Podcasters: What You Need to Know Before You Buy
- StreamYard Pricing (2026): Full Comparison of Plans, Differences, Features & Discounts
- Podbean Pricing: The Best Podcast Hosting Platform for Getting Started?