helpful-info
10 Mistakes to Avoid When Naming a Podcast
Naming your podcast seems simple—until you realize it can make or break your brand.
A great podcast name helps you stand out, attract the right audience, and build trust. A bad one? It confuses listeners, gets buried in search results, or worse—leads to legal issues.
Before you commit, make sure you’re not falling into these 10 common podcast naming mistakes.
🎯 Pro Tip: Use our Podcast Name Generator to find creative, brandable, and available name ideas fast.
1. Picking a Name That’s Already Taken
This is the most common and most dangerous mistake. If someone else already uses your chosen name—especially on Apple or Spotify—you risk:
-
Listener confusion
-
Takedown notices
-
Legal trouble (if it’s trademarked)
✅ Solution: Check if the podcast name is taken before launching on each platform.
2. Using Generic or Boring Words
Names like “The Marketing Show” or “Talks with Sarah” don’t stand out. They’re forgettable and hard to search for.
✅ Solution: Aim for something distinctive, specific, or clever—and make sure it reflects your topic or tone.
3. Going Too Long
Long podcast names get cut off on mobile displays and are harder to remember. Listeners should be able to say or search your name without thinking.
✅ Solution: Stick to 2–5 words max. Bonus points if it’s catchy or rhymes.
4. Ignoring Searchability
If your name has nothing to do with your topic, you’re missing out on organic search. People often find podcasts by searching themes, not titles.
✅ Solution: Include a keyword or descriptor that hints at your topic (e.g., “True Crime Tapes,” “The AI Breakdown”).
5. Using Difficult-to-Spell Words
Clever spellings or made-up words might seem cool—but if people can’t spell them, they can’t find you.
✅ Solution: Keep it phonetic, clear, and easy to type.
6. Making It Too Similar to Another Podcast
Even if your name is technically available, sounding like another show can still confuse listeners and hurt your brand.
✅ Solution: Search Apple Podcasts and Spotify for similar-sounding names before locking yours in.
7. Forgetting About Domain & Social Handles
If you want to grow a brand around your podcast, you’ll need a matching domain and social media handles.
✅ Solution: Check domain availability on sites like Namecheap, and lock down consistent handles on platforms like Instagram and Twitter.
8. Using Trendy Slang That May Age Poorly
What sounds cool today might feel outdated in a year or two. If you’re aiming for longevity, be cautious with slang or meme references.
✅ Solution: Choose something timeless or brandable—not a passing trend.
9. Being Too Vague or Abstract (Unless It’s Intentional)
Names like “The Loop” or “EchoCast” are artsy but don’t communicate what your podcast is about—unless your audience already knows you.
✅ Solution: Abstract names are okay if supported by a clear subtitle (e.g., “EchoCast: Conversations on Creativity”).
10. Skipping the Audience Test
You might love your name—but what about your potential listeners? If it confuses, offends, or bores them, it won’t stick.
✅ Solution: Test 2–3 top name ideas with friends, fans, or in relevant communities. Get feedback before going live.
Bonus: Still Stuck on a Name?
Don’t spend weeks brainstorming from scratch. Use our free Podcast Name Generator to instantly get customized, creative, and available podcast name ideas based on your topic and style.
100+ Podcast Name Ideas by Niche
Struggling to name your podcast? You’re not alone.
Coming up with a podcast name that’s original, memorable, and on-brand is no small task. Whether you’re launching a true crime series or a laid-back comedy show, the right name can help you stand out—and connect with the right audience.
To help, we’ve curated over 100 podcast name ideas across the most popular niches. Use this list to spark inspiration, or plug your topic into our Podcast Name Generator for instant, personalized suggestions.
Business Podcast Name Ideas
Whether you’re speaking to entrepreneurs, investors, or corporate pros, your podcast name should sound sharp and purposeful.
Name ideas:
- Startup Spark
- The CEO Flow
- Boardroom Breakdown
- Hustle Metrics
- Exit Velocity
- Capital & Coffee
- The Founder’s Filter
- BrandCast
- The Scale Up Show
- WorkSmart Weekly
- Bizmode
- Office Hours On Air
- Pitch and Profit
- The Exit Interview
- Grind & Growth
Comedy Podcast Name Ideas
Funny, punny, and off-the-wall names work great here. Think energy, sarcasm, and pop culture references.
Name ideas:
- Chuckle Fuel
- Banter Box
- LOL Files
- Two Mics, No Filter
- Punchline Parade
- The Giggle Syndicate
- Seriously Not Serious
- Roast & Repeat
- The Laugh Draft
- Talking Nonsense
- Deadpan Delivery
- Improvised Out Loud
- Joke Audit
- Humor Me
- The Wit Pit
Tech & AI Podcast Name Ideas
Talk tech, startups, or the future of AI? Your name should sound sleek, smart, and forward-looking.
Name ideas:
- Future Loop
- Code Noise
- Neural Streams
- Beta Brain
- Syntax Society
- Next Version
- The AI Report
- Glitch Mode
- Debug Daily
- Pixel & Protocol
- Cloud Chatter
- Hardwired
- Input Output
- Mindware
- Data Setcast
Health & Wellness Podcast Name Ideas
From fitness to mindfulness, wellness podcasts thrive with names that feel grounded, encouraging, or aspirational.
Name ideas:
- Calm Core
- MindFuel Daily
- The Wellness Word
- Fit Frequency
- Heal & Hustle
- The Reset Routine
- Full Body Fix
- Soul Stretch
- Health Hack Radio
- Breathwork Beats
- InnerPath
- The Clean Slate
- Balanced Living Lab
- Focus Flow
- Vital Vibes
True Crime Podcast Name Ideas
Dark. Mysterious. Addictive. These names should spark intrigue and give a glimpse into your storytelling style.
Name ideas:
- Bloodline Tapes
- Midnight Casefiles
- The Red Record
- Vanished Voices
- Dead Time Diaries
- Suspect Zero
- The Final Clue
- Cold Case Signal
- Hidden Evidence
- Grave Whispers
- Crime Frequency
- No Alibi
- Lawless Lore
- The Shadow Report
- Buried Truths
Lifestyle & Self-Improvement Podcast Name Ideas
Productivity, minimalism, routines, and leveling up—these names should feel motivating and intentional.
Name ideas:
- Level Up Lounge
- The Reset Habit
- Daily Drive
- Optimize On Air
- Better Every Day
- Zen and Done
- The Morning Method
- Mindful Minutes
- Rise Routine
- Action Stacked
- 1% Better Radio
- Focus First
- Growthcast
- The Evolving Self
- Intentional AF
Creative & Abstract Podcast Name Ideas
These work well for artistic, variety-format, or experimental podcasts where vibe matters more than genre.
Name ideas:
- EchoCast
- The Loop
- Sound Drift
- Tangent Theory
- Open Mic Sky
- Rhythm & Blur
- Frequencity
- Audio Atlas
- The Sketch Tape
- Word Spiral
- Colorform
- Tape and Time
- Imaginary Line
- Cast Aside
- The Infinite Pause
Bonus: How to Come Up With Your Own Podcast Name
Want to brainstorm something 100% original? Try these quick steps:
-
Define your core theme – What’s your podcast really about?
-
Pick your tone – Is it serious, funny, inspiring, edgy, nerdy?
-
List relevant keywords – Think topics, emotions, or insider language.
-
Play with combinations – Mash up words, puns, alliterations, or phrases.
-
Check availability – Make sure your name isn’t already taken on podcast directories or as a domain.
Need a hand? Try our free Podcast Name Generator to get hundreds of personalized ideas in seconds.
Ready to Name Your Podcast?
Naming your show doesn’t have to be stressful or time-consuming.
Use our Podcast Name Generator to instantly get hundreds of podcast name suggestions tailored to your topic, tone, and style. It’s fast, free, and built for creators like you.
Best Monitors for Color Grading a Podcast (Video Editing)
Color grading a podcast (especially one with video content for YouTube or similar) requires a color-accurate monitor that can faithfully display your footage. The ideal monitor should cover the key color spaces (like sRGB/Rec.709 for standard video, and possibly DCI-P3 for wider gamut content), have reliable factory calibration or calibration tools, and offer features that make editing comfortable (high resolution, good connectivity, etc.). Below we break down the top monitor options across entry-level, mid-range, and professional budgets, and explain the important factors – from panel type to HDR – to guide your choice.
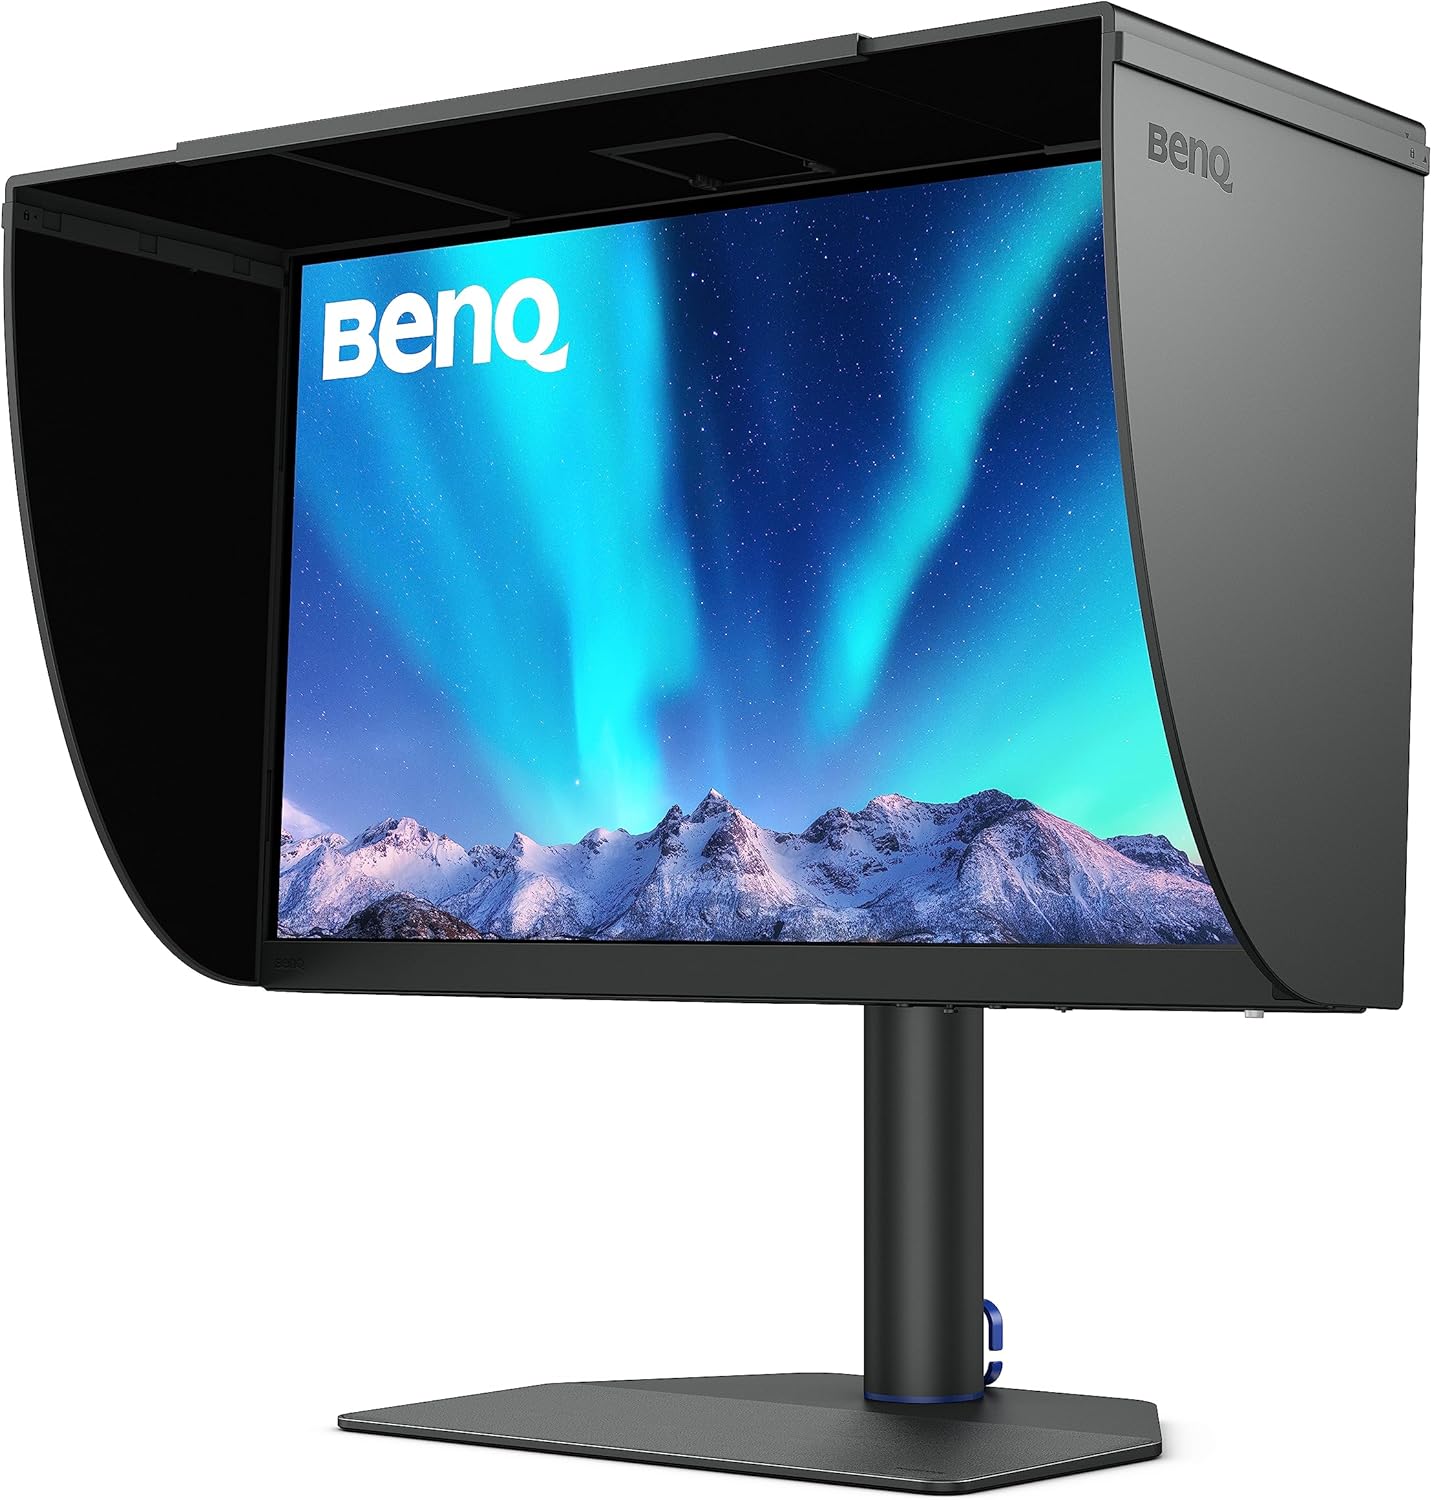
Click here to learn more about the BenQ Monitor
Key Considerations for Color-Grading Monitors
Panel Type and Color Accuracy
- IPS panels: excellent color and wide viewing angles.
- OLED: infinite contrast, vibrant colors, but potential for burn-in.
- Mini-LED: high brightness, local dimming, good for HDR.
- VA: good contrast but narrower viewing angles.
Color Gamut Coverage and Calibration
- Aim for 100% sRGB / Rec.709 minimum.
- Wide gamut (DCI-P3, Adobe RGB) ideal for high-end work.
- Factory calibration (Delta E < 2) is a must.
- Hardware LUT and built-in calibrators for pro-level color.
Resolution and HDR
- 4K is preferred for accurate grading and sharp visuals.
- HDR support varies: DisplayHDR 400 is basic, 1000+ nits and local dimming are needed for true HDR work.
Connectivity and Ergonomics
- USB-C with Power Delivery simplifies laptop setups.
- Multiple inputs (HDMI, DisplayPort), daisy-chaining, KVM switches are useful.
- Adjustable stands and shading hoods help reduce fatigue and improve accuracy.
Comparison Table: Top Monitor Picks by User Level
| Monitor | Size & Res | Color Coverage | HDR | Key Features | Best For |
|---|---|---|---|---|---|
| ASUS ProArt PA279CRV | 27″ 4K | 100% sRGB, ~99% P3 | DisplayHDR 400 | Factory calibrated, USB-C (96W), Calman Verified | Beginner |
| Dell U2723QE | 27″ 4K | 100% sRGB, 98% P3 | DisplayHDR 400 | IPS Black, USB-C hub, KVM, Delta E < 2 | Enthusiast |
| ViewSonic VP2786-4K | 27″ 4K | 100% Rec.709, 98% P3 | HDR10 | Calman Verified, shading hood, ColorPro Wheel | Enthusiast |
| BenQ SW272U | 27″ 4K | 99% Adobe RGB, 99% P3 | HDR10 (SDR-focused) | 16-bit LUT, Hotkey Puck, Uniformity Tech | Professional |
| Eizo CG2700X | 27″ 4K | 99% Adobe RGB, 98% P3 | DisplayHDR 500 | Built-in calibrator, 16-bit LUT, USB-C PD | High-End Pro |
Final Thoughts
The best monitor for your podcast color grading workflow depends on your budget and goals:
- Beginner: ASUS ProArt PA279CRV offers incredible value with wide gamut and factory calibration.
- Enthusiast: Dell U2723QE or ViewSonic VP2786-4K are excellent choices with better contrast and creator-friendly tools.
- Professional: BenQ SW272U and Eizo CG2700X provide near-reference accuracy, uniformity, and long-term reliability.
No matter which you choose, regular calibration and good lighting will help ensure your podcast videos look professional and consistent. A good monitor is a foundation for video editing success.
🎬 Final Thoughts: Elevate Your Color Grading Setup
A high-quality monitor is the cornerstone of precise editing—and this guide helped you zero in on the ideal display for color-critical work. But even the best screen works best when paired with the right supporting gear.
Whether you’re grading video podcasts, YouTube content, or cinematic footage, your studio setup should be built to handle visuals and sound with equal care. Think color accuracy, but also recording clarity, editing speed, and proper lighting.
👉 Here’s what to consider next:
- 📸 Best Podcast Cameras — Use accurate visuals at the source to minimize color correction work later
- 🎤 Top Podcast Microphones — Clean audio is essential for any content that matches polished visuals
- 💡 Podcast Lighting Gear — Balanced lighting makes it easier to judge and adjust your footage in post
- 💻 Best Laptops & Desktops for Editing — Color grading is GPU-intensive. These machines are built for it
- 💾 Reliable Podcast Data Storage — Work with large video files? You’ll need fast and secure media storage
- Live Streaming Equipment — For creators who want to stream in real-time with accurate visuals
Color grading isn’t just about your monitor—it’s about your entire visual workflow. With the right tools in place, you’ll produce professional, calibrated content that looks great on any screen.
Best Remote Podcast Recording Software & Platforms
The best remote podcast recording software in 2026 depends on your format. Riverside and SquadCast lead for studio-quality interviews, StreamYard wins for live and multistreamed shows, and Zencastr or Cleanfeed cover budget audio-only recording. Every option here records locally, so a guest’s shaky Wi-Fi won’t wreck your episode.
Remote podcasting is now the default, not the exception. You might interview a guest three time zones away, co-host from a different city, or run a live panel with people scattered across the country. The software you record on is what separates a clean, editable episode from a laggy, echo-filled mess.
Below is a current comparison of the top remote podcast recording platforms, what each one actually does well, and how to pick the right one for the kind of show you make.
What Is the Best Remote Podcast Recording Software in 2026?
For most podcasters, Riverside and SquadCast are the top picks for recorded interviews because both capture separate, studio-quality tracks locally on each person’s device. StreamYard is the better choice if you go live or multistream to YouTube and Facebook (you can read my review here). Zencastr and Cleanfeed are the strongest budget-friendly options. Here’s how the main platforms stack up.
| Platform | Free Plan | Local Recording | Separate Tracks | Video | Best For |
|---|---|---|---|---|---|
| Riverside | Yes (limited) | Yes | Yes | Up to 4K | Studio-quality video interviews |
| SquadCast (via Descript) | Yes (limited) | Yes | Yes | Yes | Reliability + built-in editing |
| Zencastr | Yes | Yes | Yes | Up to 4K | All-in-one record, host, monetize |
| StreamYard | Yes (watermark) | Cloud + local | Yes (paid) | Yes | Live and multistreamed shows |
| Zoom | Yes | Local (compressed) | Yes | Yes | Guest familiarity and backup |
| Cleanfeed | Yes (Lite) | No (cloud) | Yes (Pro) | No | Free audio-only interviews |
The single most important column is local recording. Platforms that capture each track on the participant’s own device (Riverside, SquadCast, Zencastr) protect you from internet dropouts, because the high-quality file never has to travel across a wobbly connection mid-recording.
How Do the Top Remote Recording Platforms Compare?
Is Riverside Good for Remote Podcasts?
Riverside is built for high-fidelity remote recording, capturing lossless audio and up to 4K video locally on each participant’s device. Its free plan covers 2 hours per month at 720p with a watermark, and paid plans start around $15 to $19 per month on annual billing, unlocking separate tracks, higher quality, and AI editing tools like Magic Clips and Magic Audio.
Guests join in a browser with no account required, and Riverside charges per host seat rather than per participant. The main trade-offs are cost at the higher tiers and occasional browser or upload hiccups. If pristine video is your priority, it’s the platform to beat. See the head-to-head in StreamYard vs. Riverside.
What Happened to SquadCast?
SquadCast is now part of Descript. It still runs as a standalone browser-based recording studio, but every plan now bundles Descript’s full editing, transcription, and AI suite at no extra cost, and the reverse is also true. Plans run Free, Hobbyist, Creator, and Business, tied to Descript’s tiers, with annual billing saving up to 35 percent.
Its signature feature is progressive upload, a patented system that pushes each track to the cloud in real time so a dropped connection or crashed browser doesn’t cost you the recording. Dolby audio processing is built in. The catch: SquadCast does not live stream, so it’s a recording tool, not a broadcast tool. Compare it in SquadCast vs. Riverside and SquadCast vs. Zencastr, or check the full SquadCast pricing breakdown.
Is Zencastr Worth It for Remote Recording?
Zencastr is the most complete all-in-one option, combining remote recording, hosting, monetization, and AI editing in a single dashboard. Its free plan is unusually generous, offering unlimited audio and video recording with separate tracks and basic editing. Paid plans start around $20 per month and add more transcription hours, AI clipping, and team features.
Recording is local at 48kHz WAV with video up to 4K, and guests join through a browser link with no downloads. It’s the strongest pick if you want to record and publish without stitching together three separate tools. Details are in the Zencastr pricing guide.
Is StreamYard Good for Remote Podcast Recording?
StreamYard is the best choice when your remote show is live, video-first, or multistreamed. I’ve run my own live shows on StreamYard’s Advanced plan since 2024, and the thing it gets right that the others don’t is the guest experience: you send a link, they click it in a browser, and they’re on your set in seconds with no software, no account, and no config call before the show.
It streams simultaneously to YouTube, Facebook, LinkedIn, and more, with branded overlays, on-screen comments, and layouts built in. On paid plans you can download separate audio and video tracks per participant for editing, so a live broadcast can double as source footage for a polished, edited episode.
Two honest caveats from real use. First, your local recording resolution can shift because StreamYard shares your camera feed rather than pulling a separate high-res capture, so it’s not a true double-ender like Riverside or SquadCast. Second, the built-in music library is a copyright trap for anyone repurposing to YouTube, so vet your tracks. Pricing after the April 2024 Bending Spoons acquisition runs Free, Core ($44.99/mo or $35.99 annual), Advanced ($88.99/mo or $68.99 annual), Business ($299/mo), and custom Enterprise. Note that the 4K on Advanced is for local recording only, not streaming. The full plan-by-plan comparison lives in the StreamYard pricing guide.
If you’re weighing StreamYard against the free option, OBS is powerful but demands technical setup. In my own rig, an Elgato HD60 X capture card keeps OBS CPU usage around 6 percent, but that’s after a lot of tuning most creators don’t want to do. See StreamYard vs. OBS and Restream vs. StreamYard for the alternatives.
Try StreamYard free and see if it fits your show →
Can You Record a Podcast Remotely With Zoom?
Yes, but with caveats. Zoom is the platform your guests already know, which makes it a reliable backup and a low-friction option for non-technical interviewees. It can record separate tracks locally, but audio is compressed by default and only sounds acceptable if you enable “original sound” and everyone wears headphones.
It was never designed for podcasts, so it lacks the studio-quality capture of purpose-built tools. Use it as a safety net or when a guest simply won’t install anything else. The deeper comparison is in StreamYard vs. Zoom.
Is Cleanfeed a Good Free Option?
Cleanfeed is the best free tool for audio-only remote recording. Cleanfeed Lite delivers high-quality browser-based audio with no time limits and no watermarks, which is rare at zero cost. The Pro tier, around $23 per month, adds multitrack recording and enhanced processing.
The limitation is right there in the pitch: no video at all, and a bare-bones interface. If your podcast is purely audio and you want broadcast-quality sound without a subscription, Cleanfeed is hard to beat. For video shows, look elsewhere on this list.
Which Remote Podcast Software Should You Choose?
Match the tool to your format rather than chasing a single “best” pick:
- Best video quality and control: Riverside or SquadCast, thanks to local 4K capture and separate tracks.
- Live streaming and multistreamed video panels: StreamYard.
- All-in-one record, host, and publish: Zencastr.
- Recording plus editing in one pipeline: SquadCast with Descript.
- Free audio-only: Cleanfeed, or Zencastr’s free tier.
- Guests who only know Zoom, or a backup recording: Zoom.
How Can You Get Better Remote Recordings?
Software choice sets the ceiling, but a few habits protect the final episode regardless of platform:
- Send guests a prep checklist: headphones, a wired connection, a quiet room, and the recording link tested in advance.
- Always run a backup: record on a second platform, or ask guests to capture locally where possible.
- Use separate tracks: isolated files make fixing mistakes and balancing voices far easier in post.
For a full walkthrough of the process itself, from scheduling to export, see how to record a podcast remotely. If your show is video-heavy, the remote video recording software guide goes deeper on the video side.
What Gear Do You Need for Remote Podcasting?
Great software still needs decent hardware behind it. Clear audio matters even more when you’re not in the same room, so start with a solid microphone and, for video shows, a proper camera and lighting setup.
Multi-track remote recording is demanding on your machine, so a capable laptop or desktop keeps sessions lag-free. And once the episodes pile up, reliable NAS storage keeps your source files safe and backed up.
Remote podcasting doesn’t mean compromising on quality. With the right platform and a clean setup, your show can look and sound as professional as anything recorded in a studio.
Ready to go live? Start with StreamYard for free →
Frequently Asked Questions
What is the best software for recording a podcast remotely?
There’s no single winner. Riverside and SquadCast lead for recorded interviews thanks to local, separate-track capture. StreamYard is best for live, multistreamed video shows. Zencastr suits creators who want recording and hosting together, while Cleanfeed covers free audio-only. Match the tool to your format.
Can you record a podcast remotely for free?
Yes. Cleanfeed Lite offers unlimited free audio-only recording with no watermark, and Zencastr’s free plan includes unlimited audio and video with separate tracks. Riverside, SquadCast, and StreamYard also have free tiers, though they add watermarks, recording caps, or quality limits until you upgrade.
Is StreamYard good for remote podcast recording?
StreamYard is excellent for live, video-first, and multistreamed remote shows because guests join instantly through a browser link. It streams to multiple platforms at once and offers per-participant track downloads on paid plans. It’s less ideal than Riverside or SquadCast for pure double-ender audio quality, since it shares your camera feed.
What happened to SquadCast?
SquadCast is now part of Descript. It still works as a standalone browser recorder, but every plan now bundles Descript’s editing, transcription, and AI tools at no extra cost, and Descript subscribers get SquadCast recording included. It’s effectively two tools for one price, though it still doesn’t live stream.
Does remote recording software work if a guest has bad internet?
The good ones do. Platforms with local recording, like Riverside, SquadCast, and Zencastr, capture each track on the participant’s own device rather than over the connection. SquadCast’s progressive upload even saves files to the cloud in real time, so a dropped connection won’t cost you the recording.
Should I record video or audio-only for a remote podcast?
It depends on where your audience is. Video unlocks YouTube and social clips and is increasingly expected, so Riverside, SquadCast, Zencastr, and StreamYard all support it. If you publish audio only and want the cleanest sound for the least money, Cleanfeed or Zencastr’s free tier will serve you well.
Do my guests need to download or install anything?
With most modern platforms, no. Riverside, SquadCast, Zencastr, StreamYard, and Cleanfeed all let guests join through a browser link with no software or account required. This zero-friction join is one of the biggest reasons to use a purpose-built tool instead of asking guests to install a desktop app.
What’s the difference between local recording and cloud recording?
Local recording captures each participant’s high-quality file directly on their device, then uploads it, so internet problems don’t degrade the audio. Cloud-only recording captures the compressed stream sent over the connection. Local recording is why studio-quality remote tools sound clean even when someone’s Wi-Fi is unreliable.
Can I record a remote podcast with just Zoom?
Yes, but quality suffers. Zoom compresses audio unless you enable “original sound” and everyone wears headphones, and it wasn’t built for podcasting. It’s best used as a familiar backup for non-technical guests. For publishing-grade results, a dedicated tool like Riverside, SquadCast, or StreamYard is worth the switch.
How many people can join a remote recording session?
Most platforms comfortably handle a host plus several guests. SquadCast supports up to 10 on-screen participants with more in a backstage area, and StreamYard’s limits scale with your plan. Check each platform’s current caps, since guest limits and simultaneous-speaker counts vary by tier.
Best Podcast Equipment for Co-Hosts and Groups
Thinking about launching a podcast with a co-host, or building a studio for group discussions, interviews, or roundtable chats? This guide will help you build a setup that sounds professional—no matter how many people are at the table. Here’s everything you need for crisp audio, easy setup, and a stress-free recording experience for in-person podcasts with two or more hosts.
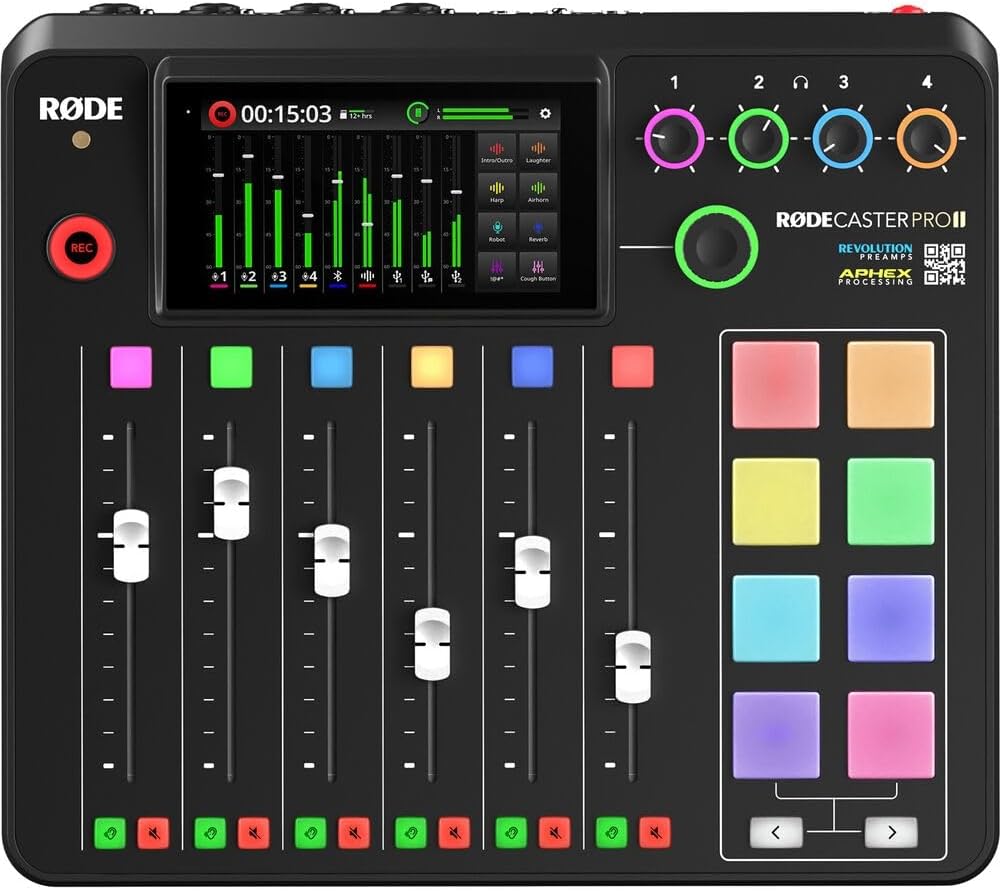
Click here for my favorite 4 person podcasting kit
Why Group Podcasts Need Different Gear
Recording with co-hosts or a group isn’t just “more of the same”—it adds new challenges: crosstalk, echo, mic bleed, and balancing multiple voices. Each host needs their own mic and headphones, and you’ll need gear that can handle multiple inputs and keep everyone sounding their best.
Quick Start: The Best Pre-Built Podcast Bundles for Groups
If you want to get started fast, there are some excellent all-in-one podcast kits that provide everything needed for 2–4 hosts. These bundles save time and ensure you’re not missing any crucial components.
| Bundle Name | Best For | Price | What’s Included |
|---|---|---|---|
| Focusrite Scarlett 2i2 Studio Pack | 2-person budget pro | ~$320 | 2x Mics, interface, cables, headphones |
| Zoom PodTrak P4 Podcasting Bundle | Up to 4 hosts, travel | ~$420 | 4x Mics, PodTrak P4, headphones, cables, stands |
| Rode Rodecaster Pro II Starter Kit | 2–4 hosts, pro setup | ~$950 | 4x Mics, Rodecaster Pro II, cables, headphones |
Tip: Bundles are often cheaper than buying everything separately and guarantee compatibility. Check for updated options from reputable brands (Focusrite, Rode, Zoom, PreSonus, Tascam, etc.).
Microphones: Every Host Needs Their Own
Key Principle: Never share a microphone! Every host (and guest) should have their own, positioned close to their mouth.
Best Microphones for Co-Hosts & Groups
| Microphone | Type | Connection | Price | Best For |
|---|---|---|---|---|
| Samson Q2U | Dynamic | USB/XLR | ~$60 | Budget, flexible, easy to add |
| Audio-Technica ATR2100x-USB | Dynamic | USB/XLR | ~$80 | Simple, upgradable |
| Shure SM58 | Dynamic | XLR | ~$99 | Classic live/podcast sound |
| RØDE PodMic | Dynamic | XLR | ~$99 | Great value, podcast-ready |
| Shure MV7 | Dynamic | USB/XLR | ~$250 | Pro sound, flexible |
| Shure SM7B | Dynamic | XLR | ~$399 | Studio, broadcast quality |
For two hosts, you can get away with dual USB mics if you’re careful, but for three or more, XLR is a must for reliability and sound.
Audio Interfaces & Mixers: More Mics, More Control
You need an interface or mixer with enough mic inputs for your whole group. Bonus points for onboard recording, sound pads, or easy headphone mixing.
Top Interfaces and Mixers by Group Size
| Model | Inputs | Built-In Recording | Price | Best For |
|---|---|---|---|---|
| Focusrite Scarlett 2i2 | 2 | No | ~$180 | 2-person, USB/XLR |
| Zoom PodTrak P4 | 4 | Yes (SD Card) | ~$150 | Up to 4 hosts, portable |
| Rodecaster Pro II | 4 | Yes (microSD/USB) | ~$700 | Pro podcast studios |
| Tascam Mixcast 4 | 4 | Yes | ~$600 | Multi-host, podcast & radio |
| PreSonus StudioLive 8 | 8 | No | ~$500 | Larger panels, live sound |
Always buy for at least one more input than you think you need—you’ll thank yourself when it’s time to add a guest.
Headphones: Everyone Needs Their Own
Closed-back headphones are best to prevent audio bleed. Use a headphone splitter or amp so every host can monitor the show.
| Model | Price | Best For |
|---|---|---|
| Audio-Technica ATH-M20x | ~$50 | Budget, durable |
| Sony MDR-7506 | ~$100 | Industry standard |
| Audio-Technica ATH-M50x | ~$150 | Pro, very comfortable |
| Behringer HA400 Splitter | ~$25 | Split 1 output to 4 |
| ART HeadAmp4 | ~$65 | Individual volume |
Recording Software: Multi-Track Matters
Choose software that allows multi-track recording so you can edit each host’s audio separately. This is key for professional-sounding group podcasts.
-
Audacity (Free): Multi-track, basic but solid.
-
Reaper (~$60): Flexible, full-featured, pro quality.
-
Hindenburg Journalist (~$100+): Designed for voice/podcast, easy to use.
-
Adobe Audition (Subscription): Industry standard for editing.
-
GarageBand (Mac, Free): Good for 2–3 tracks, limited for larger setups.
Essential Accessories & Studio Comfort
Beyond mics and mixers, the right accessories and comfort upgrades will make your sessions smoother and keep your studio organized.
-
Mic stands or boom arms: One per host, adjustable for posture and comfort.
-
Pop filters/windscreens: Eliminate plosives and sibilance for cleaner audio.
-
Labeling supplies: Colored tape, cable tags, or reusable bands for easy setup and teardown.
-
Cable management gear: Velcro ties, under-desk trays, or floor covers for a tidy, safe workspace.
-
Table pads/mats: Absorb vibrations, prevent desk noise.
-
Headphone amps/splitters: So everyone can monitor audio with their own headphones.
-
Comfortable chairs: Long sessions are easier with good seating and adjustable height.
-
Water bottles/cups: Keep hydrated and protect gear from spills with lidded drinks.
-
Portable acoustic panels or blankets: Minimize echo if your space is untreated.
-
Notepads/whiteboards: Quick access for show notes, time cues, and reminders.
Pro Setup Tips for Co-Hosts & Groups
-
Space mics evenly: Aim for 6–10 inches from each mouth, angled away from each other to reduce bleed.
-
Monitor with headphones: Always have everyone listen to themselves.
-
Avoid talking over each other: Practice hand signals or use a “round robin” cue.
-
Room setup: Use soft furnishings or portable panels to cut echo.
-
Record a quick test: Catch issues before the real show.
Gear Comparison Table: 2-, 3–4-, and 5+ Host Setups
| Setup Size | Mics | Interface/Mixer | Headphones/Splitter |
|---|---|---|---|
| 2 Hosts | Q2U, ATR2100x, PodMic | Scarlett 2i2 | ATH-M20x, MDR-7506, HA400 |
| 3–4 Hosts | SM58, PodMic, MV7 | PodTrak P4, Rodecaster | ATH-M50x, HeadAmp4 |
| 5+ Hosts | SM58, PodMic, SM7B | StudioLive 8, Mixcast 4 | Mix of above + more splitters |
FAQ: Group Podcasting Equipment
Can you use USB mics for multi-host podcasts?
Not reliably. Most computers only handle one USB mic at a time. Use XLR mics and an interface/mixer for anything over two hosts.
How do I avoid crosstalk and mic bleed?
Use dynamic mics, keep them close to each mouth, and angle them away from each other. Sound treatment helps, too.
What if we want to add remote guests?
Look for mixers/interfaces with mix-minus or USB connectivity, or use a dedicated remote recording platform (like Riverside or Zoom) and route audio with a mixer.
Is it worth buying a podcast-specific mixer?
If you plan to grow, want onboard recording, or need sound pads and remote guest features, yes. Otherwise, a regular interface works for most.
Wrapping Up
Setting up a podcast for co-hosts or groups isn’t hard—but getting it right saves you hours of editing and gives your show a professional edge from day one. Invest in the right mics, an interface or mixer with enough channels, headphones for all, and some basic accessories.
🎬 Final Thoughts: Build a Studio That Supports the Whole Team
Collaborative podcasts demand clear, consistent sound—and this guide showed you how to choose the right podcast microphone bundle for your setup. But as your team grows, so do your production needs.
Whether you’re working with a co-host or running a multi-mic roundtable, your studio setup needs to handle more voices, more visuals, and more complexity—without slowing you down.
👉 Here’s what to explore as a group:
- 📸 Best Podcast Cameras — Capture every angle and make your hosts look polished on camera
- 🎤 Top Podcast Microphones — Studio-quality mics for each speaker, so everyone sounds their best
- 💡 Podcast Lighting Gear — Even lighting ensures everyone in the group is camera-ready
- 💻 Best Laptops & Desktops for Editing — Multitrack editing? Heavy file exports? These machines can handle it
- 💾 Reliable Podcast Data Storage — Centralize your project files so your team stays in sync
- Live Streaming Equipment — Go live with a setup that supports multiple hosts and guest feeds
A great group podcast is built on smooth collaboration and reliable gear. With these tools in place, you’ll sound united and look professional—no matter how many voices are on the mic.
Best Podcast Recording Equipment for Solo Podcasters
If you want your solo podcast to sound professional and attract new listeners, you need the right gear. This updated guide breaks down the best podcast microphones, audio interfaces, headphones, and accessories for solo podcasters—plus real setup tips and answers to common questions. Whether you’re a complete beginner or ready to upgrade, you’ll find exactly what you need to launch or improve your solo podcast in 2025.

Why Quality Equipment Matters for Solo Podcasters
Your audience will forgive small mistakes, but not bad audio. With the right podcast equipment, you sound clear, confident, and credible—even from a spare room or home office. Plus, good gear keeps your editing simple and your message front and center.
Best Microphones for Solo Podcasting
What type of microphone should you use for solo podcasts?
- Dynamic microphones: Best for untreated rooms and solo hosts—reject background noise, make you sound great.
- Condenser microphones: Capture more detail, but also more room noise—best for studios.
USB or XLR for podcasting?
- USB microphones: Plug-and-play for laptops, desktops, or iPads—perfect for beginners or travel.
- XLR microphones: Pro-level audio, require an interface, and are best for podcasters who want to upgrade later.
Top-Rated Solo Podcast Microphones in 2025
| Microphone | Type | Connection | Price | Who It’s For |
|---|---|---|---|---|
| Samson Q2U | Dynamic | USB/XLR | ~$60 | Beginners, remote podcast |
| AT2020-USB | Dynamic | USB/XLR | ~$80 | USB-C, easy upgrade path |
| RØDE PodMic | Dynamic | XLR | ~$99 | Studio feel on a budget |
| Shure MV7+ | Dynamic | USB/XLR | ~$250 | Flexible, pro sound |
| Shure SM7B | Dynamic | XLR | ~$399 | Industry standard, pro |
| Blue Yeti | Condenser | USB | ~$130 | For treated quiet rooms |
Expert Tip: If your recording space isn’t soundproofed, stick with a dynamic mic for better results. A USB/XLR mic (like the Q2U or MV7) gives you room to grow.
Top Audio Interfaces for Solo Hosts
If you’re using an XLR mic (PodMic, SM7B, etc.), you’ll need an audio interface. It powers your mic and gets sound into your computer with studio clarity.
Best Solo Podcast Audio Interfaces:
- Focusrite Scarlett Solo (~$120): Reliable, easy for first-time users, clean sound.
- Behringer UMC22 (~$60): Budget XLR interface, gets the job done.
- Audient iD4 (~$199): Best sound and features at this level.
- Universal Audio Apollo Solo (~$500+): Studio-grade, pro-level.
No interface needed for USB mics—just plug and record.
Best Headphones for Podcasting
Why do you need headphones for podcasting? They help you catch issues before it’s too late—like echo, hum, or background noise—so your episodes sound clear every time.
| Headphone Model | Price | Key Benefits |
| Audio-Technica ATH-M20x | ~$50 | Budget, solid basics |
| Sony MDR-7506 | ~$100 | Industry standard |
| Audio-Technica ATH-M50x | ~$150 | Comfort, accuracy |
| Beyerdynamic DT 770 Pro | ~$160 | Pro, very comfortable |
Never record with speakers—they’ll bleed into your mic!
Easy Recording Software for Solo Podcasters
Choose user-friendly software so you can focus on content, not tech headaches.
- Audacity (free): Best for beginners, open-source, works on all platforms.
- GarageBand (free for Mac): Easy, podcast templates.
- Reaper (~$60): Powerful, pro-quality, flexible.
- Hindenburg Journalist (~$100+): Made for spoken word.
- Descript (subscription): Edit audio like text, very beginner-friendly.
Must-Have Podcast Accessories
- Boom arm or desk stand: Keeps mic steady at mouth level.
- Pop filter or foam windscreen: Stops plosives and sharp breath sounds.
- High-quality cables: Avoid hum and noise (if using XLR).
- Acoustic treatment: Blankets, foam panels, or even recording in a closet improve sound instantly.
- Shock mount: Stops bumps and desk noise from ruining your takes.
Step-by-Step Solo Podcast Setup Tips
- Position your mic: 6–8 inches from your mouth, slightly off-center.
- Set proper gain: Watch your levels—peak around -12 dB for clean, distortion-free audio.
- Always monitor: Wear closed-back headphones so you can hear issues as they happen.
- Eliminate background noise: Shut off fans, phones, and anything that buzzes.
- Test before you record: Do a quick check, listen back, and tweak if needed.
Quick Comparison Table
| Category | Budget Option | Mid-Range | Pro Level |
| Microphone | Samson Q2U / ATR2100x | Shure MV7 / PodMic | Shure SM7B |
| Interface | Behringer UMC22 | Scarlett Solo / iD4 | Apollo Solo |
| Headphones | ATH-M20x | MDR-7506 / ATH-M50x | DT 770 Pro |
| Software | Audacity / GarageBand | Reaper / Hindenburg | Descript |
FAQ for Solo Podcasters
Can I use AirPods or a gaming headset for podcasting? You can start with what you have, but even a $60 podcast mic will sound dramatically better. Listeners can hear the difference.
Do I need headphones if I’m recording alone? Absolutely. Headphones catch mistakes before they ruin your show—don’t skip them.
Can I record a podcast on my phone or iPad? Yes, with a USB mic and adapter. Some apps let you record directly, but a laptop or desktop is easier for editing and monitoring.
How do I make my recordings sound more professional? Use a dynamic mic, record in the quietest space you can, and add soft surfaces to kill echo. Simple tweaks have a big impact.
What if my first episodes aren’t perfect? That’s normal—every podcaster gets better with practice. Launch now and improve over time.
What’s the best way to expand to co-hosts or guests later? Pick a USB/XLR mic and an interface that lets you add more mics. The gear above all has easy upgrade paths.
How do I back up my recordings? Save raw files to cloud storage, a second hard drive, or even email. Redundancy is smart—lost episodes are hard to replace!
🎬 Final Thoughts: Build the Ultimate Solo Podcast Setup
As a solo podcaster, your voice is your brand—and this guide walked you through how to pick the right podcast microphone bundle to make it shine. But strong audio is just the first step if you want to compete in today’s video-first world.
Running a one-person show means your studio setup has to do more with less. From sharp visuals to smart storage, the right gear can make your solo workflow smoother, faster, and more professional.
👉 Next up—optimize your solo studio:
- 📸 Best Podcast Cameras — Stay camera-ready with gear that flatters your solo setup
- 🎤 Top Podcast Microphones — Need an upgrade? These mics deliver pro-level clarity without the bulk
- 💡 Podcast Lighting Gear — Lighting that makes a difference, even in a spare bedroom or home office
- 💻 Best Laptops & Desktops for Editing — Handle editing, uploading, and multitasking like a pro
- 💾 Reliable Podcast Data Storage — Store your episodes safely and access them from anywhere
- Live Streaming Equipment — Easily go live with solo-friendly gear that scales with your show
With the right solo podcast setup, you’re not just recording—you’re building a brand. Use the links above to upgrade each piece of your studio and create a professional space that’s entirely your own.
25+ Best Podcast Starter Equipment Bundles for Every Budget (Solo & Multi-Host Kits Compared)
If you’re launching a new podcast or upgrading your setup, buying a podcast equipment bundle is often the smartest move. Bundles give you everything you need—mic, headphones, interface, stands—without the stress of matching compatibility or overspending.
But with so many choices (and price tags ranging from $50 to $1,500), where do you start?
This guide breaks down the best podcast equipment bundles based on use case: solo creators, two-person shows, beginners, pros, and mobile podcasters. Whether you need a USB plug-and-play mic or a full XLR studio setup, there’s a bundle here for you.
 Click here for the ultimate podcasting equipment bundle
🔍 Podcast Starter Comparison Table
| Bundle Name | Best For | Price | Mic Type |
|---|---|---|---|
| Shure MV7X Podcasting Bundle | Pro Solo Podcaster | $250–$389 | USB/XLR Dynamic |
| Zoom PodTrak P4 + Mic Kit | Mobile Multi-Person Setup | $249+ | XLR Dynamic |
| Maono PD200X Bundle | Budget Hybrid Setup | $64 | USB/XLR Dynamic |
| Rode PodMic 2-Mic Kit | Two-Host Setup | $300 | XLR Dynamic |
| Focusrite Scarlett Solo | Budget Solo Podcaster | $270 | XLR Condenser |
🌟 Editor’s Top Picks
1. Shure MV7X Podcasting Bundle
Best For: Solo podcasters who want pro sound with flexibility
Price: ~$250–$389
Includes: MV7 mic (USB/XLR), boom arm or headphones depending on bundle
Pros:
- Studio-quality sound in any room
- USB for plug-and-play, XLR for pro interfaces
- Built-in touch panel for quick control
Cons:
- Pricier than basic USB mics
- No onboard gain dial (touch panel only)
2. Zoom PodTrak P4 Podcast Kit
Best For: Mobile recording or 2+ person setups
Price: ~$249+
Includes: Zoom PodTrak P4 recorder, 2–4 dynamic mics (varies), headphones, cables
Pros:
- No computer needed to record 4 guests
- Records individual tracks
- Great for on-the-go shows
Cons:
- Interface learning curve
- Mics included are entry-level (but decent)
3. Maono PD200X Dynamic Microphone Kit
Best For: Beginners who want growth flexibility
Price: ~$64
Includes: PD200X mic, shock mount, desk stand, USB-C and XLR
Pros:
- Hybrid connectivity (USB/XLR)
- Sleek design, good voice isolation
- Great value for the sound
Cons:
- Stand is short (boom arm upgrade recommended)
- Requires close proximity when speaking
4. Rode PodMic 2-Mic Kit + Interface
Best For: Two-host podcast setups with pro sound
Price: ~$300+
Includes: 2 Rode PodMics, 2 XLR cables, and small interface (e.g., Focusrite 2i2)
Pros:
- Rugged, pro-grade dynamic mics
- Clean, broadcast-level vocal tone
- Interface records both voices to separate channels
Cons:
- Requires some setup knowledge
- Interface and mics sold together may vary by bundle
5. Focusrite Scarlett Solo
Best For: Budget-conscious beginners
Price: ~$270
Includes: XLR mic, mic stand, xlr cable, pop filter
Pros:
- All-in-one starter kit
- Plug-and-play setup
Cons:
- Picks up background noise (condenser)
📦 Expanded Podcast Bundle Comparison
Looking for more options? Here’s a full grid of additional podcasting bundles you can consider. Each one has been vetted for value, quality, and popularity.
| Bundle Name | Price | Mic Type | Best For | Key Highlights |
|---|---|---|---|---|
| Blue Yeti USB Mic | $108 | USB Condenser | Versatile Solo | Multiple polar patterns, great voice clarity |
| Shure SM7B + Cloudlifter Kit | $605 | XLR Dynamic | Studio-Grade Voice | Industry-standard mic with gain booster |
| Rode NT1-Signature Bundle | $230 | XLR Condenser | Quiet Studios | Ultra-low noise, crisp vocals |
| RODECaster Pro II + 4 Mic Kit | $600+ | XLR Dynamic | Multi-Host Studio | Full interface + 4 broadcast mics |
| Focusrite Scarlett 2i2 Studio | $280 | XLR Condenser | Home Studios | Top-tier preamps, good headphones |
| Vocaster Two Studio | $350 | XLR Dynamic | Host & Guest | Auto-gain, broadcast-ready kit |
| PreSonus AudioBox 96 Studio | $199 | XLR Condenser | Beginners | Interface, mic, headphones all-in-one |
| Samson Q2U Pack | $65 | USB/XLR Dynamic | New Podcasters | Easy to use, scalable, great value |
| Zoom ZDM-1 Mic Kit | $99 | XLR Dynamic | Entry-Level | Broadcast sound, good isolation |
| FIFINE K688 Bundle | $110 | USB/XLR Dynamic | Hybrid Use | Boom arm, mute button, warm tone |
| Behringer Podcastudio USB | $119 | XLR Dynamic | Analog Fans | Mixer-based control, budget-friendly |
| Mackie Producer Bundle | $240 | XLR Mixed | Musicians + Podcasts | 2 mics (condenser + dynamic), MIDI interface |
| Zoom PodTrak P4 + 4 Mic Kit | $300–400 | XLR Dynamic | Remote Interviews | Portable 4-track recorder |
| Audio-Technica AT2020USB+ Pack | $185 | USB Condenser | Plug-and-Play Voice | Studio-quality clarity |
| Elgato Wave:3 Bundle | $160 | USB Condenser | Streamers | Capacitive mute, virtual mixer |
| MAONO MaonoCaster Lite AM200-S1 Kit | $102 | 3.5mm Condenser | Beginners | Sound effects mixer + mic |
| ATR2100x-USB Kit | $79 | USB/XLR Dynamic | Flexible Setups | Dual output, easy monitoring |
| Rode PodMic + Interface (2 Pack) | $300+ | XLR Dynamic | Two-Person Podcast | Rugged, pro sound |
🙋 FAQ
Q: What’s the best podcast bundle for beginners?
A: Look for USB microphone bundles like the TONOR Q9 or Samson Q2U. These are plug-and-play, affordable, and don’t require extra gear like an interface or mixer.
Q: Should I go with a USB or XLR setup?
A: USB is easier and more portable. XLR offers better long-term audio quality and flexibility but requires an interface. Choose USB for convenience, XLR if you’re aiming to scale up or already have a sound-treated space.
Q: Can I record a podcast with two or more people?
A: Yes, but make sure your bundle includes multiple mics or an interface that supports more than one input—like the Zoom PodTrak P4 or RODECaster Pro II.
Q: What’s the difference between dynamic and condenser mics for podcasting?
A: Dynamic mics (like the Shure MV7 or PodMic) are better at rejecting background noise and are great for untreated rooms. Condenser mics are more sensitive and detailed but pick up more room sound.
Q: Why buy a bundle instead of separate gear?
A: Bundles are not only more affordable but also ensure compatibility. They save time, reduce guesswork, and are often curated by pros to give you everything you need to start recording.
🎬 Final Thoughts: Build Your Full Podcast Studio
Great content starts with great sound—and this guide gave you everything you need to find the perfect podcast microphone bundle. But to truly stand out in today’s video-driven world, audio is just the beginning.
Whether you’re podcasting solo or producing a multi-host show, your studio setup should evolve with your goals. That means investing not only in sound, but also in visuals, power, and performance.
👉 Here’s what to explore next:
- 📸 Best Podcast Cameras — Look sharp on every episode with high-quality video gear
- 🎤 Top Podcast Microphones — Already have a setup? These standalone mics are studio-grade
- 💡 Podcast Lighting Gear — Proper lighting = pro visuals (even with a basic camera)
- 💻 Best Laptops & Desktops for Editing — Speed matters when you’re exporting and editing audio/video
- 💾 Reliable Podcast Data Storage — From SSDs to NAS, keep your episodes backed up and accessible
- Live Streaming Equipment – From small to in-depth live streaming setups
With the right tools in place, your podcast won’t just sound great—it’ll look the part too. You’ve got the roadmap. Now it’s time to build the studio that brings your vision to life.
🎁 Want to monetize your podcast faster?
Join our mailing list and get a free guide on how to turn your podcast into a money-making machine—covering sponsorships, listener funnels, affiliate offers, and more.
👉 Join here and get the free monetization guide »
Best NAS for Video Editing: Fast, Reliable & Upgrade-Ready
If you’re tired of juggling massive video files between external drives—or you’ve hit the wall on your computer’s local storage—it’s time to consider a NAS (Network Attached Storage). Whether you’re a solo editor or a small studio, a NAS can dramatically improve your video editing workflow, collaboration, and backup strategy. In this guide, we break down the best NAS devices for video editing, ranging from budget-friendly options to high-performance models that can handle 4K, 6K, and even 8K video production.
Why Use a NAS for Video Editing?
Video editing demands speed, capacity, and structure. Here’s what a NAS can bring to the table:
- Direct Editing from Network Storage – No more copying files between machines. Edit straight off the NAS.
- Centralized File Access – Share files with collaborators, motion artists, or VFX pros without version chaos.
- High-Speed Transfers – With 2.5GbE, 10GbE, or Thunderbolt, you can scrub timelines smoothly—even in 4K.
- Redundancy + Backup – RAID options protect your work. Snapshots and offsite sync add another layer of safety. Many of these NAS devices offer storage pooling (software-based RAID) which allow for uneven sized hard drives.
Check out the video below where I go through my review of the Synology 1522+ (now the Synology 1525+,) a device I spent over a year researching before buying.
Watch the video below to see me editing live from the NAS
TL;DR I can edit straight from the drive as if it’s connected to my computer. I’m running very basic 5200 rpm hard drives in it from years ago. It does not have to be excruciatingly expensive to get this thing filled up with drives. However, for those with the budget, I would highly recommend you get the version that comes prefilled with drives for an easier time.
Click Here To Learn More About This Synology NAS
What to Look for in a NAS for Video Editing
1. Speed & Connectivity
- 2.5GbE or 10GbE networking is not essential for real-time editing, however, I prioritized units that offered 10 GbE as an upgrade. For instance, Synology sells a 10 Gbps upgrade card. 1GbE can be a bottleneck, but most units come with 1+ plugs (some have quad Ethernet ports).
- NVMe SSD caching improves performance when scrubbing timelines or loading projects.
- Look for units that take M.2 blade SSDs so that you’re not sacrificing full-size hard drive bays for SSDs.
- Look for PCIe slots to upgrade to 10GbE or add SSDs.
2. CPU & RAM
- Go with Intel Core, Ryzen, or Xeon CPUs for heavy workflows.
- Prioritize multi-core performance with a chip like the Ryzen, which enables easier multitasking and supports ECC memory. ECC means Error-Correcting Code, which is basically a fancy way of providing extra data integrity and reliability (enterprise-level servers typically use ECC memory). Learn more about ECC memory and why you shouldn’t buy a NAS without it.
- Avoid entry-level ARM chips for anything beyond basic backup.
- 8GB RAM minimum; upgrade to 16GB+ if using Docker, VMs, or heavy multitasking.
3. Drive Bays & Scalability
- 4-bay systems give you room for RAID and future growth.
- Larger projects? Go 6- or 8-bay.
- RAID 5 or 10 is ideal for balancing performance and redundancy.
- Software-based RAID allows for variably sized hard drives, which is ideal for iterative upgrades over time. For instance, if the NAS is filled with 5TB drives, you can replace 1 drive with a 20TB drive. Then replace the second drive with another 20TB drive. If you were using plain hardware RAID, you would need to upgrade all the drives at once. And you’d need a place to temporarily store everything!
4. Transcoding (Optional)
- Needed if you’re streaming preview versions or using Plex internally.
- Look for integrated GPU (Intel Quick Sync) or Xeon CPUs that support real-time transcoding.
- The AMD Ryzen is also an excellent choice. It is very fast for video transcoding, and excellent for multitasking (which the NAS might be doing unbeknownst to you whilst you’re editing from it)
Best NAS for Video Editing
Below is a comparison of top NAS units for video production. Our featured model—the Synology DS1522+—balances performance, expandability, and price, making it ideal for solo editors and small-medium studios working with 4K and even 6K footage.
| Model | CPU | RAM | Drive Bays | Network | NVMe Slots | Transcoding Support | Approx. Price Without Drives |
|---|---|---|---|---|---|---|---|
| Synology DS1525+ | AMD Ryzen V1500B | 8GB ECC memory (Expandable) | 5 | 4x 1GbE (10GbE upgradeable via PCIe) | 2 | No GPU for HW Transcoding | $799 |
| Asustor AS5402T | Intel Celeron N5105 | 4GB (Expandable) | 2 | 2x 2.5GbE | 4 | Yes (4K) | $369 |
| Synology DS923+ | AMD Ryzen R1600 | 4GB (Expandable) | 4 | 1x 1GbE (10GbE via PCIe) | 2 | No GPU for HW Transcoding | $619 |
| QNAP TVS-h1288X | Intel Xeon W-1250 | 32GB | 8 HDD + 4 SSD | 2x 10GbE | 4 | Yes (4K/8K) | $2,749 |
| QNAP TS-664 | Intel Celeron N5105 | 8GB (Expandable) | 6 | 2.5GbE | 2 | Yes (4K) | $549 |
| TerraMaster F8 SSD Plus | N/A (All-Flash) | N/A | 8x M.2 NVMe | 2x 10GbE | 8 | Yes | Varies |
🎬 Featured Pick: Synology DS1522+
If you’re looking for a balanced powerhouse that doesn’t break the bank, the Synology DS1522+ is hard to beat.
Why We Like It:
- Equipped with a Ryzen R1600 CPU and expandable to 32GB ECC RAM, it’s fast enough for real-time 4K editing.
- Includes 4x 1GbE ports that support link aggregation—and is upgradeable to 10GbE via PCIe, unlocking high-speed workflows.
- Dual NVMe SSD cache slots help with project scrubbing and faster asset access.
- 5 drive bays give room for RAID 5 or RAID 10 setups with room to grow.
🎥 Note: All demo videos featured on this page use the DS1522+, showing real-world 4K project editing, fast backups, and even network rendering setups.
- Setting Up Your Editing Network
- Use CAT6a cables for 10GbE
- Upgrade your switch to multi-gig (2.5/10GbE)
- Mac users: Use Thunderbolt-to-10GbE adapters for direct connection
Pro Tips for NAS-Based Editing
- Use RAID 10 for speed + protection
- Keep active projects on SSD cache pools
- Enable SMB Multichannel (if supported) to maximize bandwidth or use NFS mounts
- Back up regularly—RAID isn’t enough – we have an article on back ups here.
FAQ: NAS for Video Editing – What Creators Need to Know
Can I really edit video directly from a NAS?
- Yes. If your NAS and network are fast enough (2.5GbE or 10GbE with SSD caching), you can edit large video files directly over the network without needing to copy them to a local drive first. Editors working in Final Cut Pro, Premiere Pro, and DaVinci Resolve can have smooth timeline scrubbing—even with 4K or ProRes footage—when using a properly configured NAS. Watch the video above to see how it works.
Isn’t NAS too slow compared to an external SSD?
- A NAS over 1GbE is slower than a USB 3.2 SSD. However, NAS devices typically have multiple drives which spread the data out – which will boost performance to that of an SSD and beyond. NAS devices like the Synology DS1525+ can take M.2 SSDs and come with massive performance and data integrity upgrades over an external SSD that can die at any point.
- Personal story: I actually just had a 2.5 inch SSD that was less than 2 years old die. It lost its ability to connect, and that is the end of that! A NAS has redundancy, which reduces the single-point-of-failure risk that comes with using a single external drive. Plus, you gain centralized access, redundancy, and scalability.
Can I use Wi-Fi to connect to a NAS?
- Yes, but… Wi-Fi doesn’t provide consistent throughput for video editing. Use a wired Ethernet connection for reliability and smooth scrubbing.
What if my computer doesn’t have 2.5GbE or 10GbE?
- You don’t need 2.5 or 10gig to have a great experience with a NAS. In the video above I’m running on a single gigabit connection. You can use a USB-to-2.5GbE adapter or a Thunderbolt-to-10GbE adapter to upgrade most systems only if you need it, such as if you’ve got multiple people using the NAS at the same time.
Is RAID the same as a backup?
- No. RAID protects against drive failure, not human error or malware. Always use a true backup to cloud or external storage. You want at least two other copies of your data stored elsewhere. Click here to learn about backing up a NAS device.
How many bays do I need?
- 2-bay: Basic users or audio editors
- 4-bay: Ideal starting point for most video editors
- 6-8 bay: For 4K/8K workflows or multi-user environments
Will it be loud?
- Most NAS units are quiet, especially SSD-based ones. Use NAS-rated quiet drives and consider placement or fan upgrades for noise-sensitive setups.
Best RAID for video editing?
- RAID 5: Good mix of performance and protection
- RAID 10: Best for speed + redundancy
Can I stream my edited content from NAS?
- Yes. Use Plex, Jellyfin, or Emby to preview or share videos. Transcoding helps with playback on low-power devices.
Do I need a UPS?
- Yes. Power failures during writes can corrupt data. A UPS ensures safe shutdown and integrity. Each UPS depends on the power load necessary. If you’re running a smaller setup, click here to see some of the best UPS models.
Is NAS setup difficult?
- Not at all. Most systems include guided wizards and apps. Synology, QNAP, and others make setup beginner-friendly.
Should I get a NAS or DAS?
- DAS is fine if you’re editing alone on one machine. NAS is superior for teams, remote access, backups, and growth. Pick whichever is best for you.
Final Thoughts
A well-chosen NAS can completely transform your editing workflow. Whether you’re editing in DaVinci, Premiere, or Final Cut, the right setup lets you work faster, safer, and with less friction. If you’re serious about video production, investing in one of these NAS models is a no-brainer.
Why Podcasters Are Upgrading to the RØDECaster Video Console
If you’re a podcaster thinking about adding video to your show, there’s one all-in-one production console that’s turning heads in the creator world: the RØDECaster Video. It’s more than just a mixer or a switcher—it’s a complete video and audio production console built specifically for creators who want to elevate their podcasting game.
What Is the RØDECaster Video?
The RØDECaster Video is an all-in-one production hub that combines a professional audio mixer, video switcher, scene controller, and live streaming interface. It lets you record, stream, and produce video podcasts in real time without juggling multiple devices or software.
For podcasters, that means fewer headaches and more time focusing on the content.
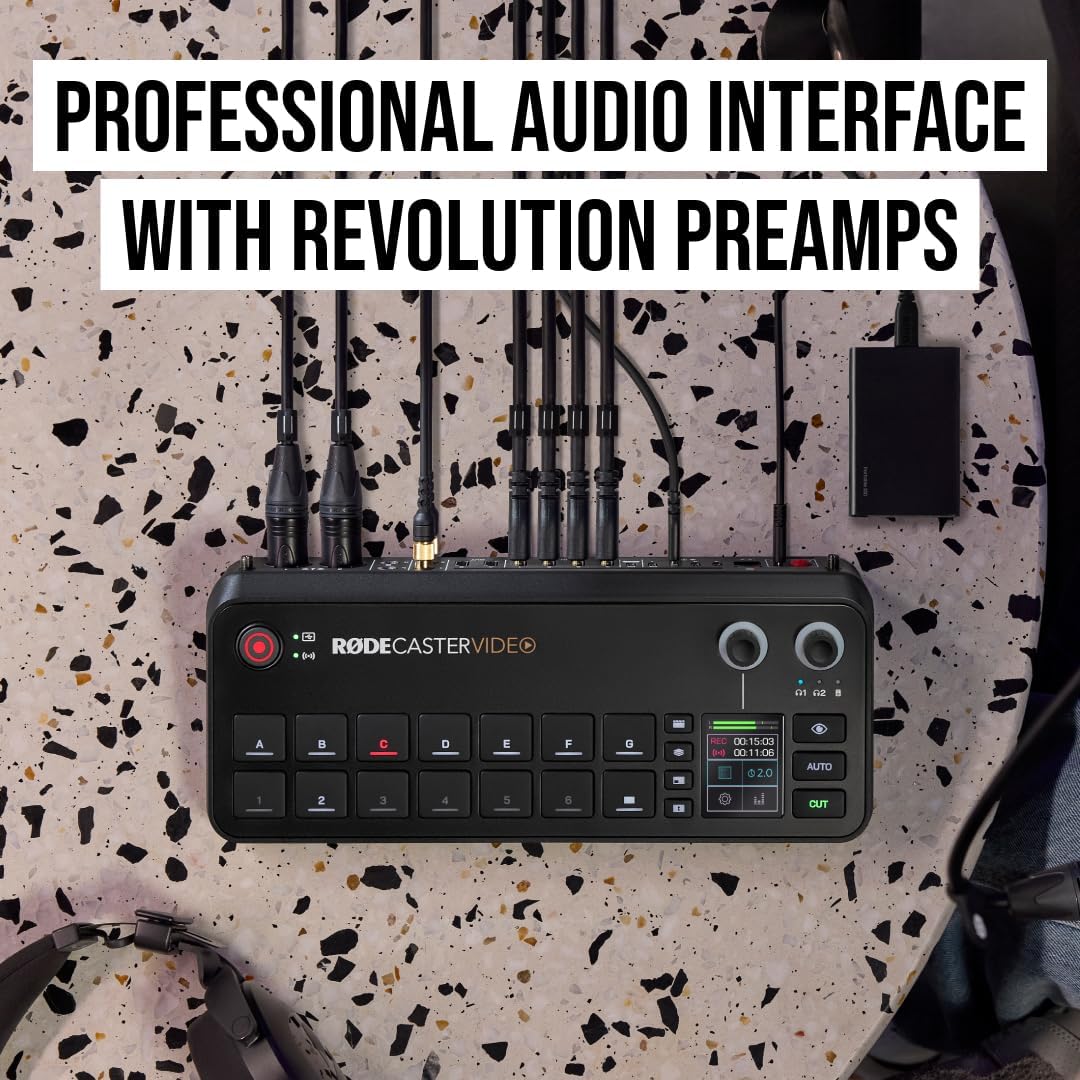
Click Here To Learn More
Why Podcasters Are Making the Switch
Audio + Video, Seamlessly Integrated
Most podcasters who dip into video face a tangle of gear: audio interfaces, switchers, capture cards, mixers, and more. The RØDECaster Video consolidates all of that. It handles up to four HDMI camera feeds, multiple USB-C sources, and high-quality XLR mic inputs, all while processing and recording the audio professionally.
Broadcast-Quality Audio
Podcasters know that poor audio kills viewer retention. The RØDECaster Video comes equipped with RØDE’s Revolution Preamps and APHEX audio processing, which means your voice sounds clean, warm, and professional—no post-production needed.
Easy Scene Switching and Overlays
With customizable scenes and live switching, podcasters can effortlessly toggle between camera angles, slide decks, split-screens, or branded overlays. Whether you’re recording solo episodes or interviews, your video looks dynamic and polished.
Live Streaming, Built In
No extra software needed. The RØDECaster Video streams directly to platforms like YouTube, Facebook, or Twitch. This is perfect for podcasters who want to go live with audience Q&As, guest panels, or real-time commentary.
ISO Recording for Post-Production
Want to repurpose your content for YouTube Shorts, TikTok, or Instagram Reels? The RØDECaster Video records isolated audio and video tracks for each source, so you can edit clean cuts and clips later without compromise.
Key Feature Comparison
| Feature | RØDECaster Video | Traditional Setup (Audio + Switcher + Software) |
|---|---|---|
| Audio Inputs | 2 x XLR/TRS combo, 2 x USB-C, Bluetooth, Wireless GO | XLR to USB interface (e.g., Focusrite) + external mixer |
| Video Inputs | 4 x HDMI, 2 x USB-C | Separate switcher (e.g., ATEM Mini) |
| Audio Processing | Built-in APHEX FX, EQ, compression, gating | DAW or third-party plugin chain |
| Video Scene Switching | Yes (touchscreen or software-controlled) | Manual or OBS/Ecamm Live |
| Streaming Capabilities | Direct to YouTube, Twitch, etc. (no OBS needed) | Requires third-party software |
| Multitrack Recording | Audio + ISO Video (to USB or microSD) | Separate audio and video files, manual sync |
| Wireless Mic Support | Built-in for RØDE Wireless GO/PRO | Requires receiver + adapter |
| Touchscreen Interface | Yes, full-color 7″ touchscreen + rotary encoder | Varies (usually none; dependent on laptop control) |
| Built-In Storage | No internal; records to USB or SSD | External drive or computer needed |
| Size & Portability | All-in-one, compact | Multi-device rig |
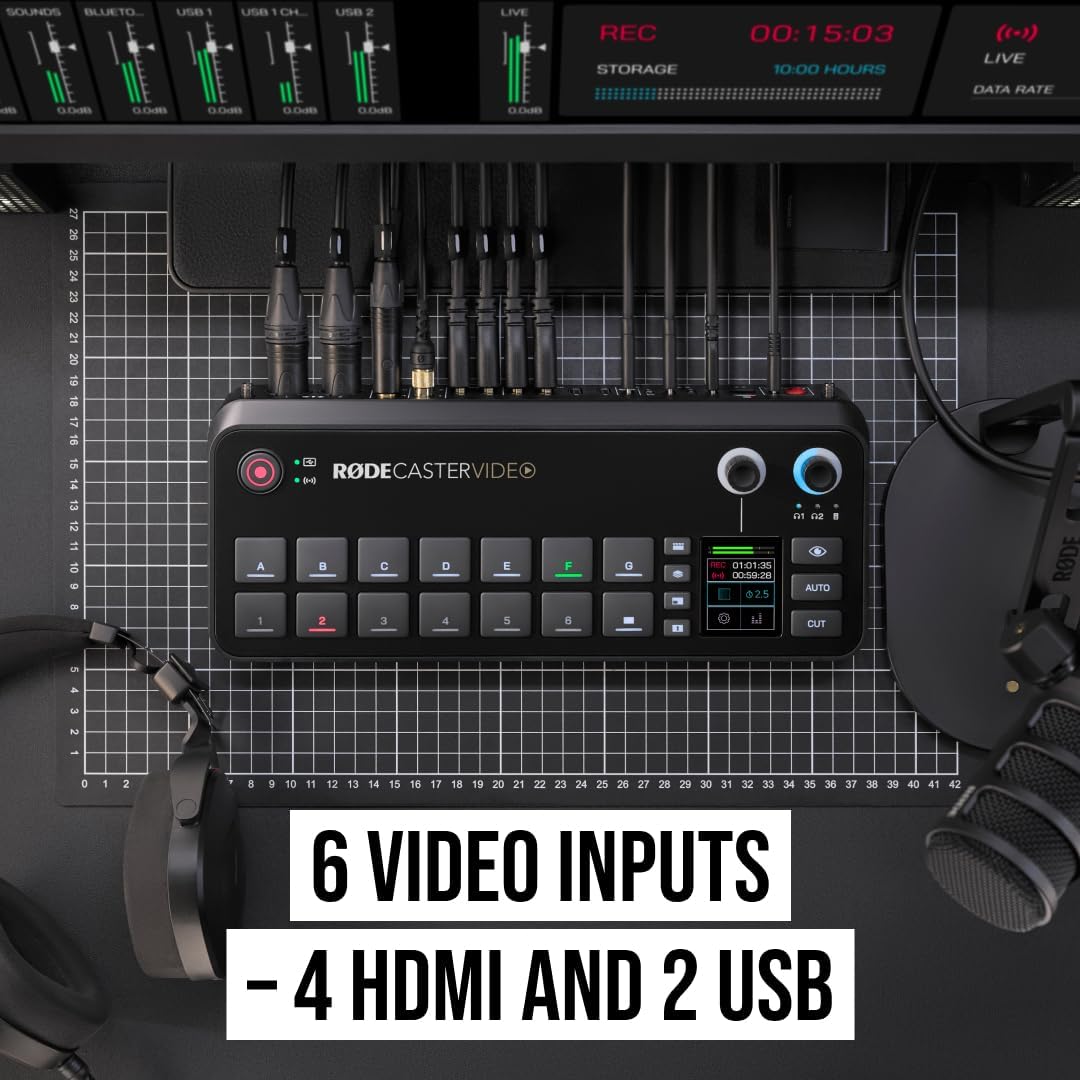
Technical Specs Snapshot
Audio:
- 2 x Neutrik combo XLR/TRS inputs
- Revolution Preamps™: ultra-low noise, high gain
- APHEX audio processing suite
- 2 x 1/4″ headphone outs, 2 x 1/4″ line outs
Video:
- 4 x HDMI inputs (1080p60)
- 2 x HDMI outputs (for multiview/program)
- 2 x USB-C inputs (camera or device input)
- 7 customizable scenes with chroma key
Connectivity:
- Dual-band Wi-Fi and Gigabit Ethernet
- USB-C for computer integration or SSD recording
- Direct RTMP streaming
Recording:
- Multitrack audio + ISO video
- Records to USB SSD or external storage (not included)
Other Highlights:
- 2 internal wireless mic receivers (Series IV compatible)
- 7” touchscreen with real-time scene control
- Chroma key and graphic overlay engine
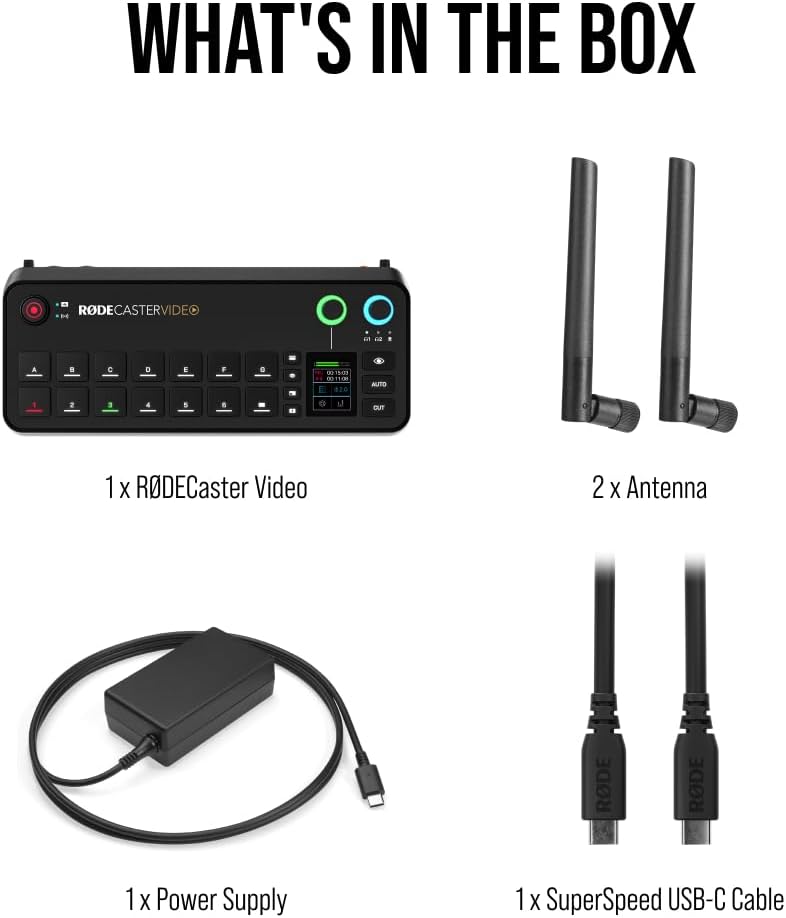
Who It’s Best For
- Podcasters adding a video component to their show
- Creators producing interviews, livestreams, or webinars
- Audio-focused creators looking to maintain quality when transitioning to video
Whether you’re going solo or managing a team, the RØDECaster Video simplifies production and helps you deliver content that looks and sounds professional.
Final Thoughts
If you’ve been hesitant to make the jump into video podcasting because of the tech hurdles, the RØDECaster Video removes those barriers. With its intuitive design, all-in-one workflow, and creator-first features, it’s a game-changer for anyone serious about podcasting
How To Turn Your Podcast Audio Into Social Media Content
You’ve already transcribed your podcast and generated show notes — great! But what if you could turn those same audio files into high-performing content for Twitter, LinkedIn, Instagram, and TikTok?
This guide will walk you through how to repurpose podcast audio into engaging social media content — using the same local-first, no-subscription-required approach we covered in our show notes automation guide and local transcription tutorial.
🧰 Tools You’ll Need
| Tool | Purpose |
|---|---|
| Whisper (OpenAI) | Transcribe audio to text |
| GPT-4, Claude, or local LLM | Summarize and stylize text for social |
| ffmpeg | Extract audio clips |
| CapCut / Headliner / Descript | Make audiograms or reels |
| Optional: Python, Notion API, n8n | Automate workflow steps |
🪜 Step-by-Step Workflow
Step 1: Transcribe Your Podcast
Use Whisper to turn your episode into a transcript.
whisper my_episode.mp3 --model large
Step 2: Identify Key Moments
Break your transcript into smaller, digestible sections. Use:
- Natural topic transitions
- Timestamped speaker changes
- Highlighted insights or quotes
💡 Tip: Use a script to detect long pauses or keyword mentions for fast scanning.
Step 3: Generate Platform-Specific Copy
Send each chunk into GPT or your preferred LLM with platform-targeted prompts:
📌 Tweet Thread Prompt
Turn this podcast transcript into a 6-8 tweet thread. Each tweet should:
- Focus on 1 insight
- Use simple, engaging language
- Include 1 emoji per tweet
- End with a CTA to listen to the episode
📝 LinkedIn Post Prompt
Create a professional LinkedIn post from this podcast excerpt. Include:
- Bold hook
- Key takeaway in 2–3 short paragraphs
- Soft CTA or question for engagement
💬 Instagram Caption Prompt
Write an inspirational or emotional Instagram caption based on this podcast clip. Use short, bold lines and end with a question or comment prompt.
🎥 YouTube Shorts / Reels Prompt (for Clip Narration or Captions)
Summarize this audio moment as a captioned quote for a vertical video. Include a 1-line headline, 1–2 supporting lines, and call to action.
Step 4: Extract Audio or Video Clips (Optional)
Use ffmpeg to grab clips by timestamp:
ffmpeg -ss 00:05:00 -to 00:05:45 -i my_episode.mp3 -c copy clip1.mp3
Then style in:
- Headliner
- CapCut
- Descript
Step 5: Automate the Reuse (Optional)
Want to streamline this every week?
- Build a script to:
- Transcribe via Whisper
- Parse highlights
- Auto-prompt GPT/Claude
- Save output to Notion, Google Docs, etc.
- Or use n8n to chain services together
🎯 Content Strategy Matters Too
It’s not just about creating content — it’s about creating content with purpose. Once you’ve turned your audio into social-ready posts, your next move should be to give your audience a reason to go deeper:
What to Link To From Your Social Post:
- 🎁 A free resource, like a checklist or template
- 🧾 Full episode show notes or transcript on your website
- 🧠 A blog post expanding on a key insight from the clip
- 🎧 Your podcast’s episode page (with embedded player)
This turns a quick scroll into a high-value interaction — helping you build trust, grow your list, and move casual viewers toward becoming subscribers or customers.
How to Position the Social Post:
- Hook with a problem or bold statement
- Use emotion, curiosity, or a surprising stat
- Include a CTA like “Read the full notes,” “Get the free download,” or “Watch the full clip”
This is how your social clips stop being just “content for content’s sake” and start becoming assets in your funnel.
🧠 Final Tip
Before you go — if you want to turn your podcast into a revenue-generating asset, don’t miss our free guide:
👉 Download the Podcast Monetization Guide
It includes step-by-step tactics, tools, and revenue models that go way beyond sponsorships.
Start with one platform and scale up. Your podcast already has all the ingredients — this process simply remixes them into formats the algorithms favor.
If you’d rather not DIY the whole process, you can always use this shortcut — it does all of the above in a few clicks (no coding required).