
Matt
StreamYard vs. Zoom: Which Platform Reigns Supreme for Live Streaming and Webinars?
When it comes to online communication, two platforms stand out: StreamYard and Zoom. While both allow real-time video and audio, they serve very different purposes. StreamYard is a browser-based live streaming studio built for creators, while Zoom is the go-to video conferencing tool for businesses, schools, and organizations.
So which is better for your needs—broadcasting, webinars, or meetings? Let’s dive into a head-to-head comparison.
An Overview of StreamYard and Zoom
StreamYard: The Live Streaming Studio
StreamYard is designed for simplicity. With no downloads required, it lets creators multistream across platforms like YouTube, Facebook, LinkedIn, and Twitch. Features like custom branding, banners, overlays, and guest interviews make it easy to run professional broadcasts.
Zoom: The Video Conferencing Giant
Zoom is a household name for virtual meetings, webinars, and online events. Known for reliability and scalability, Zoom is widely used by businesses, schools, and organizations worldwide. While it’s primarily a conferencing tool, Zoom also supports live streaming webinars to larger audiences.
Feature Comparison
| Feature | StreamYard | Zoom |
|---|---|---|
| Primary Use | Live streaming & broadcasting | Video conferencing & webinars |
| Platform | Browser-based | Desktop & mobile apps |
| Guest Management | Up to 10 on-screen participants | Up to 1,000 webinar participants |
| Multistreaming | Built-in (multiple platforms) | Yes (one platform at a time) |
| Branding | Logos, overlays, backgrounds | Limited (virtual backgrounds, name tags) |
| Ease of Use | Very easy | Easy, but more advanced features |
| Video Quality | Up to 1080p | Up to 1080p |
| Recording | Local & cloud | Local & cloud |
| Pricing | Free & paid plans | Free & paid plans |
Core Differences
-
StreamYard: Built for broadcasting, with easy multistreaming and custom branding tools.
-
Zoom: Built for meetings and webinars, with breakout rooms, polling, Q&A, and large-scale participant support.
Unique Features
-
StreamYard: A backstage area for prepping guests before going live.
-
Zoom: Breakout rooms, perfect for group discussions during webinars and workshops.
Pricing
-
StreamYard: Free plan (20 hrs/month, with branding). Paid plans start at $20/month, unlocking multistreaming, branding, and higher streaming limits.
-
Zoom: Free plan allows 100 participants for 40 minutes. Paid plans start at $14.99/month, with longer meetings, cloud recording, and webinar options up to 1,000 participants.
Ease of Use
-
StreamYard: Extremely beginner-friendly, minimal setup, live in minutes.
-
Zoom: Also user-friendly, but its advanced features (like breakout rooms and reports) come with a learning curve.
Video & Audio Quality
Both offer up to 1080p.
-
StreamYard: Great for streaming, but quality depends on your internet connection.
-
Zoom: Optimized for stability—even in low-bandwidth environments—though quality can dip with larger participant counts.
Guest Management
-
StreamYard: Up to 10 guests on-screen; link-based invites make joining seamless.
-
Zoom: Supports 100–1,000 participants; powerful tools like registration, breakout rooms, and webinar modes.
Integrations
-
StreamYard: Integrates with YouTube, Facebook, LinkedIn, Twitch, plus services like Restream and Ecamm Live.
-
Zoom: Vast app marketplace, with integrations for scheduling, CRMs, project management, and marketing.
Customer Support
-
StreamYard: 24/7 live chat, knowledge base, and forums.
-
Zoom: 24/7 phone, chat, and email support, plus a large help center and community.
Who Should Use Each?
-
StreamYard is best for:
-
Live streamers and podcasters.
-
Creators who want multistreaming and branding.
-
Businesses hosting live virtual events.
-
-
Zoom is best for:
-
Businesses and organizations needing reliable meetings.
-
Schools and educators hosting classes.
-
Large-scale webinars and corporate events.
-
Conclusion: The Final Verdict
Both are excellent platforms, but they serve different purposes:
-
Choose StreamYard if your priority is professional live streaming with branding and multistreaming.
-
Choose Zoom if you need a scalable video conferencing platform with advanced webinar tools.
Both offer free plans, so the best way to decide is to test them yourself.
Zencastr or Squadcast? The Showdown Every Podcaster Needs to Read
 Choosing the right remote recording platform is one of the most important decisions you’ll make as a podcaster. Two of the top contenders in this space are Squadcast and Zencastr. Both platforms have earned a reputation for high-quality audio, reliability, and user-friendly interfaces. But which one is the right choice for you? In this comprehensive comparison, we’ll explore the features, pricing, and unique strengths of both Squadcast and Zencastr to help you make an informed decision.
An Overview of Squadcast and Zencastr
Squadcast: The High-Fidelity Recording Studio
Squadcast is known for its commitment to pristine audio and reliability. With progressive upload technology and local recording, your sessions remain secure and uncompromised—even with unstable internet connections. It’s a go-to choice for professional podcasters and media companies that demand top-tier audio.
Zencastr: The All-in-One Podcasting Platform
Zencastr has evolved into a comprehensive solution for podcasters. Beyond recording, it now offers editing, unlimited hosting, and distribution features. With AI-powered tools and an intuitive interface, Zencastr appeals to creators looking for an all-in-one workflow.
Detailed Feature Comparison
| Feature | Squadcast | Zencastr |
|---|---|---|
| Local Recording | Yes (up to 4K video, 48kHz WAV audio) | Yes (up to 4K video, 48kHz WAV audio) |
| Progressive Upload | Yes | Yes |
| Cloud Backup | Yes | Yes |
| Video Quality | Up to 4K | Up to 4K |
| Audio Quality | Excellent (uncompressed WAV) | Excellent (uncompressed WAV) |
| Editing | Integration with Descript | Built-in editor, AI-powered |
| Transcription | Yes (via Descript) | Yes (automatic) |
| Guest Management | Up to 10 participants | Up to 12 participants |
| Hosting | No | Yes (unlimited hosting) |
| Pricing | Paid plans with a free trial | Paid plans with a free trial |
Core Features
Both platforms focus on local recording, capturing audio and video directly on each participant’s computer. This eliminates internet-related glitches and ensures studio-quality results. Progressive uploads save data to the cloud in real-time, protecting against crashes or disconnections.
-
Squadcast shines with its Descript integration, enabling text-based editing that simplifies post-production.
-
Zencastr goes further by combining recording, editing, hosting, and distribution in one place—a major draw for creators who want simplicity.
Unique Features
-
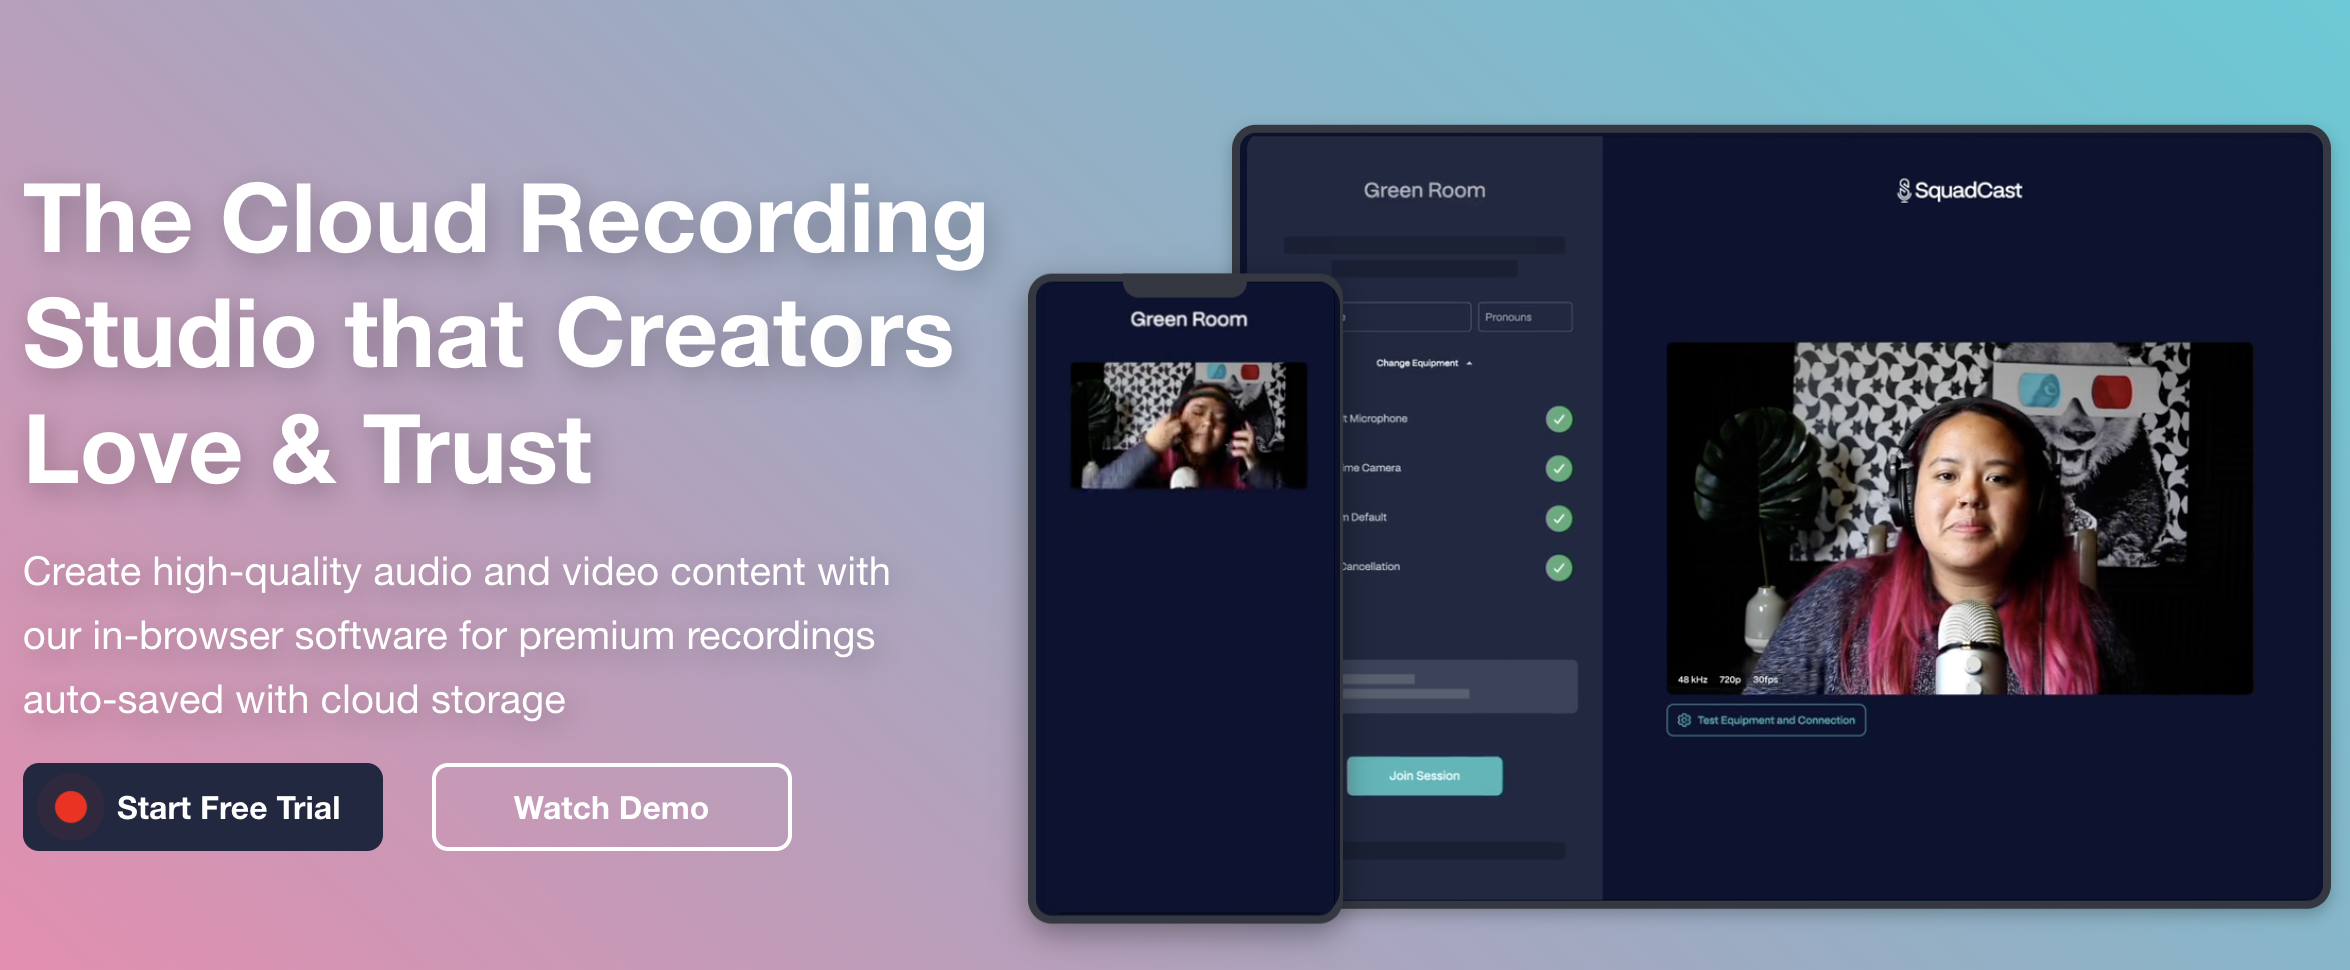
Squadcast: A green room for guest prep, device checks, and pre-session coordination.
-
Zencastr: AI editing tools that remove filler words, long pauses, and background noise automatically.
Pricing and Plans
Squadcast
Plans start at $20/month, covering local recording, progressive uploads, and cloud backups. Higher tiers provide more hours, advanced features, and dedicated support.
Click here to learn more about Squadcast pricing.
Zencastr
Plans also start at $20/month, but include unlimited hosting, AI-powered editing, and built-in distribution tools alongside high-quality recording.
Click here to learn more about Zencastr pricing.
Ease of Use
Both are browser-based and accessible without software downloads.
-
Squadcast: Extremely intuitive, with a minimal learning curve.
-
Zencastr: Slightly more complex due to its broader feature set, but supported by thorough documentation and strong customer support.
Video and Audio Quality
-
Squadcast: Records uncompressed WAV audio and up to 4K video, meeting professional standards.
-
Zencastr: Matches these specs, while adding Magic Audio, an AI feature that enhances clarity and removes background noise.
Guest Management
-
Squadcast: Supports up to 10 participants, with link-based invites and no account required for guests. The green room helps sessions start smoothly.
-
Zencastr: Allows up to 12 participants, plus a producer mode for behind-the-scenes management without appearing on camera.
Integrations
-
Squadcast: Works with Descript, Adobe Audition, Hindenburg, Zapier, and Dropbox.
-
Zencastr: Integrates with Adobe Premiere Pro, Final Cut Pro, Descript, and Zapier.
Customer Support
-
Squadcast: 24/7 live chat, knowledge base, and a community forum.
-
Zencastr: 24/7 live chat, help center, and community forum.
Who is it for?
-
Squadcast is best for:
-
Professional podcasters prioritizing flawless audio quality.
-
Media companies needing scalability and reliability.
-
Creators who want a straightforward recording-first solution.
-
-
Zencastr is best for:
-
Creators seeking an all-in-one platform for recording, editing, hosting, and distribution.
-
Podcasters who want to streamline workflows and minimize post-production time.
-
Anyone aiming to produce professional video podcasts with minimal effort.
-
Conclusion: The Final Verdict
Both Squadcast and Zencastr excel at what they do, but they cater to slightly different needs.
-
Choose Squadcast if you prioritize the absolute best audio fidelity and a streamlined recording experience.
-
Choose Zencastr if you prefer an integrated platform that handles everything from recording to publishing.
Both platforms offer free trials, so the best way to decide is to try them out and see which aligns with your creative process.
Squadcast vs. Riverside: The Ultimate Remote Recording Showdown
The short answer: Riverside is the better choice for most podcasters — it offers a more complete recording-to-publishing workflow, stronger AI editing tools, and a free plan worth actually using. Squadcast is the right pick if you’re already deep in the Descript ecosystem, since Descript now owns Squadcast and the two tools are sold together as a bundle.
That acquisition changes the comparison in ways most guides haven’t caught up to yet. This breakdown covers current pricing, what’s actually changed since Descript bought Squadcast, and how to decide which platform matches your production workflow.
What’s Changed: The Descript-Squadcast Acquisition
The most important thing to know about Squadcast in 2026 is that it’s no longer a standalone product. Descript acquired Squadcast, and the two platforms are now sold together — every SquadCast plan includes access to Descript’s transcription and editing tools. If you were comparing these platforms a couple of years ago based on old reviews, a lot of that information is out of date.
The practical implication: Squadcast’s old “integration with Descript” selling point is now just the base feature set. The question is whether that bundled Descript access is compelling enough to choose Squadcast over Riverside’s native built-in tooling.
Squadcast vs Riverside: Feature Comparison (2026)
| Feature | Squadcast (via Descript) | Riverside |
|---|---|---|
| Local Recording | Yes — up to 4K video, 48kHz WAV audio | Yes — up to 4K video, 48kHz WAV audio |
| Progressive Upload | Yes (patented technology) | Yes |
| Free Plan | Yes (limited hours) | Yes — 2 hours/month recording, 720p video |
| Paid Pricing (entry) | Bundled with Descript; check current Descript pricing | ~$19/month (Standard, billed annually ~$15/month) |
| Built-in Editing | Descript (text-based editor, screen recording, transcription) | Magic Editor, text-based video editor, AI clip generator |
| Transcription | Yes (Descript included on all plans) | Yes (automatic; hours vary by plan) |
| Participants | Up to 10 on mainstage + 10 backstage | Up to 8 participants |
| AI Audio Enhancement | Via Descript | Magic Audio (noise removal, clarity boost) |
| Pre-show Prep | Green Room (check audio/video before going live) | Producer Mode (off-camera session management) |
| Social Clip Creation | Via Descript | Built-in AI clip generator |
| Key Integrations | Native Descript; Adobe Audition, Hindenburg, Zapier, Dropbox | Adobe Premiere Pro, Final Cut Pro, Descript, Zapier |
Pricing: What Squadcast and Riverside Actually Cost in 2026
Riverside Pricing (2026)
Riverside offers four tiers. The Free plan provides 2 hours of recording per month at 720p video quality with basic editing tools. The Standard plan runs $19/month billed monthly (or $15/month billed annually) and unlocks unlimited recording, 1080p video, separate audio tracks, and up to 5 hours of AI transcription. The Pro plan at $29/month monthly ($24/month annually) bumps to 4K video, 15 hours of transcription per month, Magic Audio, and full editing tools. A Business plan with enterprise features is custom-priced.
Riverside’s pricing is per host seat — guests join your recording for free regardless of plan, which is a meaningful advantage over platforms that charge per participant.
Worth noting: exceeding your plan’s monthly recording hours triggers overage charges, typically around $5–$10 per additional hour depending on the tier. If you record long-form episodes or multiple shows, track your hours carefully on the Standard plan.
Squadcast Pricing (2026)
Since the Descript acquisition, Squadcast plans are bundled with Descript access — all tiers now include transcription, editing, and screen recording. Check the current SquadCast/Descript pricing page directly, as the bundle pricing has evolved since the acquisition and third-party listings vary significantly. Unused recording hours roll over automatically, capped at twice your monthly plan allocation.
For dedicated Squadcast pricing context, see our standalone page: Squadcast Pricing Plans Explained
Audio and Video Quality: Is There a Real Difference?
Both platforms use the same foundational approach: local recording on each participant’s device, with progressive upload to the cloud as the session runs. This means your audio quality isn’t limited by internet connection stability — the file being recorded is always local, so a brief network dropout doesn’t ruin a take.
At the spec level, both record uncompressed 48kHz WAV audio and up to 4K video on paid plans. The practical difference is in post-recording processing:
- Riverside’s Magic Audio applies AI noise reduction and clarity enhancement automatically after recording. For creators who don’t want to touch audio post-production settings, this is genuinely useful — you get cleaner audio with less manual work.
- Squadcast/Descript handles audio cleanup through Descript’s studio sound feature, which works similarly but requires you to be in the Descript editing environment.
If audio quality is your primary concern, the platform matters less than your recording environment and microphone. See: Podcast Microphone Setup Guide | Best Podcast Microphones
Editing Workflow: Built-In vs. Bundled
This is where the platforms diverge most meaningfully for day-to-day use.
Riverside keeps recording and editing inside one interface. After your session, you can move directly into the Magic Editor — which handles speaker-switching in the video, noise removal, and clip creation — without leaving the platform. The AI clip generator can automatically produce short social clips from a longer recording. For creators who want a fast path from raw recording to publishable content, this workflow is efficient.
Squadcast + Descript involves two products working together. Recording happens in Squadcast; editing happens in Descript. Descript’s text-based editor is genuinely powerful — editing audio and video by editing a text transcript is a workflow that’s hard to give up once you’re used to it — but you’re working across two tools rather than one. For anyone who already uses Descript, this is a net advantage, not a drawback. For someone new to both platforms, there’s a steeper learning curve.
Related: Best Podcast Editing Software | Podcast Editing Software for All Levels
Guest Management and Session Logistics
Both platforms are browser-based — guests don’t need to install any software to join a recording session, which dramatically reduces pre-show friction for interview podcasts.
Squadcast supports up to 10 participants on the main stage plus 10 more in the backstage area. The Green Room feature lets everyone test audio and video before the session goes live, which matters when you’re coordinating guests across time zones who may not be technically confident.
Riverside supports up to 8 participants and adds Producer Mode — someone can manage the session, monitor audio levels, and communicate with guests without appearing on camera. This is useful for shows that have a producer or engineer running the technical side while the host focuses on the conversation.
If you regularly record with large groups (panels, roundtables), Squadcast’s higher participant cap is a concrete advantage. For most podcast interviews with one or two guests, both platforms handle it identically well.
Related: Podcast Equipment for Co-Hosts and Groups | How to Record a Podcast Remotely
Who Should Choose Squadcast?
Squadcast makes the most sense if you’re already a Descript user and want remote recording that flows directly into your existing editing workflow. The bundled pricing means you’re essentially getting two tools for one subscription, which is good value if you’d be paying for Descript regardless.
It’s also worth considering if you need more than 8 participants in a single session — Squadcast’s 10 mainstage seats cover panel recordings and roundtable formats that Riverside can’t accommodate.
Who Should Choose Riverside?
Riverside is the better starting point for most creators who don’t already have a Descript workflow established. The native editing tools, Magic Audio, AI clip creation, and built-in transcription mean you can move from recording to a shareable clip without leaving the platform. The free plan is also genuinely usable — 2 hours per month is enough to record and test a few episodes before committing to a paid subscription.
Video podcasters in particular tend to find Riverside’s output quality and editing tools better matched to their needs. The Magic Editor’s automatic speaker-switching and social clip tools are designed for video-first workflows in a way that Squadcast’s recording-focused UI isn’t.
See also: Podcastle vs Riverside | Best Remote Podcast Recording Software | Remote Video Recording Software
How Squadcast and Riverside Compare to Other Remote Recording Tools
These two platforms don’t exist in isolation. Zencastr is the most direct alternative to both — it occupies a similar price range and offers comparable local recording quality. StreamYard is worth considering if live streaming is part of your production, though it approaches remote recording differently. See our full comparisons:
- Squadcast vs Zencastr
- Zencastr Pricing
- StreamYard vs Riverside
- StreamYard Pricing
- Full Remote Recording Platform Roundup
Frequently Asked Questions: Squadcast vs Riverside
Is Squadcast still a standalone product in 2026?
No. Descript acquired Squadcast, and the two products are now sold together. All Squadcast plans include Descript’s transcription and editing tools. If you’re evaluating Squadcast based on older reviews from before the acquisition, pricing and feature comparisons from that period are no longer accurate.
Which platform has better audio quality — Squadcast or Riverside?
Both platforms record uncompressed 48kHz WAV audio locally on each participant’s device, which is the same technical standard. The difference is in post-recording processing: Riverside’s Magic Audio applies AI-based noise reduction automatically, while Squadcast’s noise cleanup runs through Descript’s studio sound tools. For most podcasters, the recording environment and microphone quality will have more impact on the final result than the platform choice.
Does Riverside have a free plan?
Yes. Riverside’s free plan includes 2 hours of recording per month at 720p video quality with basic editing tools. It’s enough to test the platform thoroughly before committing to a paid subscription. Paid plans start at approximately $19/month billed monthly, or around $15/month billed annually on the Standard tier.
Can guests join Squadcast or Riverside sessions without installing anything?
Yes — both platforms are entirely browser-based. Guests receive a link, click it, and join the session in their browser. There’s no software to download on either side, which reduces technical friction significantly for interview-format podcasts where guests may not be technically confident.
How many people can record simultaneously on each platform?
Squadcast supports up to 10 participants on the main stage plus 10 more in a backstage area. Riverside supports up to 8 participants. For standard interview podcasts with 1–2 guests, both platforms work equally well. For panels or roundtable recordings, Squadcast’s higher participant cap is a meaningful advantage.
What is the difference between Squadcast’s Green Room and Riverside’s Producer Mode?
They solve different problems. Squadcast’s Green Room is a pre-session space where host and guests can check audio and video levels, chat, and get ready before recording starts — useful for making sure everything works before you’re actually on tape. Riverside’s Producer Mode lets a third person manage the session (monitor audio, communicate with guests, handle technical issues) without appearing on camera — useful for shows with a dedicated producer or engineer running the technical side.
Which platform is better for video podcasting?
Riverside is generally the stronger choice for video-first production. Its built-in Magic Editor handles speaker-switching, noise removal, and social clip creation natively, which matters when the video output is as important as the audio. Squadcast records excellent video locally, but post-production happens in Descript, which requires working across two tools. If you’re publishing to YouTube and creating short-form clips, Riverside’s workflow is more streamlined.
Do I need a separate editing tool if I use Riverside?
Not necessarily. Riverside includes a text-based video editor, automatic transcription, AI clip generation, and Magic Audio — enough for many creators to go from raw recording to a publishable episode without additional software. If you need more advanced post-production (multi-track audio mixing, complex video editing, color grading), you’ll likely still want a dedicated editor like Adobe Audition, Final Cut Pro, or Descript.
What happens to my recordings if I cancel either platform?
On Riverside, your recordings remain accessible for download during a grace period after cancellation, but always download your raw tracks immediately after recording regardless of plan — don’t rely on cloud storage as your only backup. On Squadcast, the same principle applies, and since the platform now integrates with Descript, project files in Descript are subject to Descript’s own data retention policies. Keep local copies of all original audio files as a baseline practice.
Is Squadcast or Riverside better for interviewing remote guests who aren’t tech-savvy?
Both are comparable for this use case since both are browser-based with no guest installation required. Squadcast’s Green Room gives guests a slightly more guided pre-session experience with audio/video checks before recording starts, which can reduce the chance of discovering problems mid-recording. Riverside’s interface is clean and simple, and its free plan lets you run test sessions with guests before committing. For most podcasters, the platform matters less than how well you prep your guests ahead of time.
Final Verdict: Squadcast vs Riverside
For most podcasters starting fresh or evaluating platforms in 2026, Riverside is the stronger all-around choice. The native editing tools, Magic Audio, free plan, and streamlined video workflow mean you can do more inside one platform without stitching together multiple subscriptions.
Squadcast makes more sense if you’re already using Descript and want remote recording that integrates directly with your existing workflow — or if you regularly need more than 8 participants in a session.
The most important thing to verify before you decide: check both platforms’ current pricing directly, since Squadcast’s post-acquisition bundle pricing in particular has shifted and continues to evolve.
How to Record a Podcast Remotely (High Quality Guide)
How to Record a Podcast Remotely (High Quality Guide)
Click For Our Favorite Remote Podcast Recording Software
Recording a podcast with a remote guest doesn’t mean you have to sacrifice audio quality. If you have ever listened to a show where the guest sounds “robotic” or “underwater,” it’s likely because they were recording over a standard connection like Skype or Zoom.
The video above demonstrates how to solve this using StreamYard, my preferred remote podcasting software. It uses a technique called “local recording.”
Why local recording matters: Instead of recording the audio after it travels over the internet (where it gets compressed), software like StreamYard records the audio directly on your guest’s computer. It then automatically uploads the high-quality file to the cloud. This means even if your internet glitches during the call, your final recording sounds like you were in the same room.
It makes it insanely simple to record at the highest quality. Plus, because it automatically hands the files to the host, there’s no waiting for the remote person to process or upload the files — if you’ve ever chased someone for files, then you know what I mean! Check it out here.
1. What You Need Before Recording Remotely
Before you invite a guest, ensure you have the hardware basics covered to prevent common issues like echo and audio drift.
- Stable Internet Connection — A wired ethernet connection is best for stability, but strong Wi-Fi works if you are close to the router.
- Headphones for Everyone — Mandatory. If your guest doesn’t wear headphones, their microphone will pick up your voice coming out of their speakers, creating a nasty echo that is hard to fix.
- External Microphones — USB mics like the ATR2100x or XLR setups sound significantly better than laptop built-in mics. Explore mic options here.
- Quiet Recording Space — Avoid kitchens or tiled rooms. Carpeted rooms with soft surfaces (like a bedroom or closet) are ideal for dampening sound.
Want an all-in-one setup? Check out podcast equipment bundles.
2. Best Remote Podcast Recording Software (2025 Comparison)
When choosing software, look for “Double-Ender” tools that support:
- Local recording: Records to each participant’s device independently.
- Separate audio tracks: Essential for editing; allows you to cut a guest’s cough without deleting your own question.
- Ease of guest access: No complex downloads or accounts for them to manage.
Here’s a quick comparison of the top players:
| Platform | Local Recording | Video Support | Separate Tracks | Live Streaming |
|---|---|---|---|---|
| Riverside.fm | ✅ | 4K | ✅ | ✅ |
| StreamYard | ✅ | 4K | ✅ | ✅ |
| SquadCast | ✅ | 1080p | ✅ | 🚫 |
| Zencastr | ✅ | 1080p | ✅ | ✅ |
| Zoom | 🚫 | 720p | 🚫 | ✅ |
Need help choosing? See this full comparison guide.
Best All-in-One Choice: StreamYard
3. Setting Up Your Remote Recording Session
Here’s how to prep for a clean, hiccup-free session:
- Do a “Tech Check” 5 minutes early — Check internet speed, latency, and ensure the correct microphone is selected in the settings (browsers often default to the webcam mic!).
- Control the Environment — Turn off noisy appliances, fans, and silence phone notifications.
- Record Backups — Tech fails. Have each person record their own audio locally using QuickTime or Voice Memos as a “just in case” safety net.
- Monitor Audio — Watch the wav forms on screen. If you see a flat line, stop and fix it immediately.
Learn more about mic positioning and gain control.
4. Audio Best Practices for Remote Guests
Your guest likely isn’t an audio engineer. Send them these quick tips:
- Mic Technique: “Stay close to the mic—about one fist width (3–6 inches) away.”
- Plosives: “Angle the microphone slightly to the side of your mouth to avoid popping sounds on P’s and B’s.”
- Headphones: “Please wear wired headphones. Bluetooth headsets often lower the audio quality to save battery.”
If you hear echo during the call, here’s how to fix it.
5. Editing & Post-Production Tips
Remote files can sometimes drift out of sync or have different volume levels. Here is how to polish them:
- Loudness Normalization: Use tools like Auphonic to ensure both you and your guest are at the same volume (usually -16 LUFS for stereo).
- Drift Correction: If your guest’s audio slowly de-syncs from yours, you may need to stretch/shrink the track slightly in your editor. Dedicated software like Riverside/StreamYard handles this automatically.
- Silence Removal: Remove awkward pauses or lag caused by internet latency. Here’s how.
Want software picks? Check out this roundup.
6. Going Beyond Audio: Video Podcasting Tips
If you’re also recording video for YouTube or Spotify:
- Camera: Use a quality webcam or DSLR (see our picks).
- Lighting: Face a window or use a soft light. Never have a bright window behind you, or you will look like a silhouette.
- Eye Contact: Look at the camera lens, not at the screen, to simulate eye contact with the viewer.
Final Checklist Before You Hit Record
Make sure every episode starts strong:
- ✅ All participants have headphones plugged in
- ✅ Correct microphone input selected in settings
- ✅ Notifications/Do Not Disturb turned on
- ✅ Backup recorders are running
- ✅ Water is nearby (no dry throats!)
Conclusion
Remote podcasting doesn’t need to sound remote. With the right software, solid prep, and a few pro tips, you can record studio-quality shows from anywhere.
Recommended next steps:
- Try StreamYard or Riverside.fm for pro-level results. If you’re curious about StreamYard’s pricing click here.
- Browse the full Podcast Equipment Guide to level up your setup.
FAQs
Can I record a podcast remotely for free?
Yes! Free options like Zoom or QuickTime exist, but audio quality is often compressed and tracks are mixed together. For professional results, a dedicated tool is recommended.
How do I record remote guests with separate tracks?
Use StreamYard, Riverside, Zencastr, or SquadCast. These platforms record each person’s audio independently, allowing for cleaner editing.
What if my guest has bad internet?
Choose a tool that supports local recording (like StreamYard). The recording happens on their computer, so even if the internet drops, the file remains high quality.
What’s the best mic for remote podcasting?
A dynamic USB mic like the ATR2100x or the Shure MV7 is a solid starting point because they reject background noise better than condenser mics.
How To Make Money From Podcasting On Spotify Using This Weird Strategy Nobody’s Doing
The world of podcasting is booming, and Spotify has become one of the most important platforms for distribution, discovery, and monetization.
Naturally, podcasters ask: “How do I actually make money from my podcast on Spotify?”
The honest answer is this: most podcasters do not make meaningful income from Spotify alone — but many successful podcasters use Spotify as the engine that powers their entire monetization ecosystem.
This guide breaks down every realistic way to make money from podcasting on Spotify, explains what works at different audience sizes, and shows how experienced creators turn Spotify listeners into sustainable income streams.
Make Sure You Watch The Video Below On Monetization
This video walks through a real podcast monetization example — and importantly, how Spotify fits into the bigger picture.
Watch closely, because the key insight is not where the money starts — it’s where it finishes.
The Core Monetization Methods on Spotify
Spotify offers several native monetization tools through Spotify for Podcasters. These are real revenue options — but they function very differently depending on your audience size and niche.
1. Podcast Subscriptions
Podcast subscriptions allow you to charge listeners a monthly fee for exclusive audio content inside Spotify.
- What it is:
Bonus episodes, ad-free versions, early access, extended interviews, or members-only series locked behind a subscription. - Typical pricing:
Most podcasters charge between $3–$10/month. - Realistic earnings:
Expect roughly 0.5%–2% of listeners to convert. A podcast with 5,000 monthly listeners might see 25–75 subscribers. - When it works best:
Education, niche expertise, strong parasocial connection, or bingeable content. - When it struggles:
Casual entertainment podcasts or shows without a clear “why pay?” value.
2. Listener Support & Fan Contributions
Direct listener support works best when audiences feel personally invested in the creator.
- How it works today:
Most creators use Patreon, Buy Me a Coffee, or similar tools and mention them in episodes or show notes. - Conversion reality:
Usually under 1% of listeners contribute — but those who do often give repeatedly. - Best use case:
Independent journalism, storytelling, commentary, or community-driven shows.
3. Automated Ads (Spotify Podcast Ads)
Spotify’s automated ads are the most misunderstood monetization method.
- How it works:
Spotify inserts ads dynamically and pays based on impressions. - Typical CPMs:
Often lower than host-read ads; income can be modest until downloads scale significantly. - Reality check:
A few thousand monthly downloads usually results in tens — not hundreds — of dollars. - Best role:
Baseline monetization, not primary income.
Spotify Is a Monetization Signal, Not the Paycheck
Here’s the distinction that separates hobby podcasts from profitable ones.
Spotify monetization tools validate your show — they rarely maximize it.
- Spotify proves demand:
Consistent listens, followers, and completion rates act as proof for sponsors. - Spotify warms audiences:
Listeners who hear your voice weekly convert far better than cold traffic. - Spotify data unlocks leverage:
Listener growth, demographics, and engagement help negotiate deals.
The Practical Framework
- Spotify: discovery and trust
- Website + email: ownership
- Sponsors, affiliates, products: scalable revenue
Where Most Podcast Money Is Actually Made
For many successful podcasters, the majority of revenue comes from outside Spotify’s native systems.
Host-Read Sponsorships
- Why they outperform:
Listeners trust hosts more than generic ads. - Typical rates:
$18–$50 CPM depending on niche and engagement. - Reality:
A niche podcast with 5,000 engaged listeners can outperform a generic show with 50,000.
Affiliate Marketing
- No minimum audience:
Works even with a few hundred listeners. - High leverage:
One relevant recommendation can outperform ads. - Evergreen:
Old episodes continue generating commissions.
Many podcasts earn more from a single affiliate partnership than from months of automated ads.
Why Every Podcaster Needs a Website
Spotify is a distribution platform — not a business foundation.
- Search visibility and SEO traffic
- Email list ownership
- Affiliate hubs and sponsor pages
- Algorithm independence
How to Fix Echo On Mic
Echo usually comes from one of three things: (A) your speakers feeding back into the mic, (B) a software “loop” duplicating your audio, or (C) a reverby room. Here’s a quick, no-nonsense fix list.
60-Second Triage
-
Put on headphones and mute external speakers.
-
Mute every mic source except your main mic in your app.
-
Record a 10-sec test. If the echo vanishes with headphones → it was speaker bleed. If you still hear a doubled voice → it’s a loop. If it just sounds “roomy” → it’s the room.
Kill Loops & Doubles
-
You might be monitoring yourself twice.
-
Windows: Control Panel → Sound → Recording → your mic → Properties → Listen tab → uncheck “Listen to this device.”
-
macOS/DAWs: Turn off Software Monitoring/Playthrough on the input track.
-
Audio interface: Disable Direct Monitor (or turn the mix knob fully to “Input” or “Playback,” not both, depending on need).
-
-
Only one mic source active:
-
Mute camera mics, laptop mic, “Stereo Mix/What U Hear,” etc.
-
In OBS: Settings → Audio: disable unused Mic/Aux. In the Mixer, click the gear → Advanced Audio Properties → set unwanted sources to Monitor Off and/or mute them. Don’t capture the same mic as both a Source and a Global Mic.
-
-
Joined twice in calls? If you dialed in on phone and computer, mute one. Ask teammates to do the same.
Stop Speaker Feedback
-
Always prefer headphones over open speakers.
-
Lower speaker volume and increase mic gain sensibly (see gain tips below).
-
Keep speakers pointed away from the mic and as far as practical.
Fix a Reverby Room (the “boomy” kind of echo)
-
Get closer to the mic (about a hand’s width; 4–6 inches) and lower input gain to keep peaks around -12 dBFS.
-
Use a cardioid mic pointed at your mouth; speak slightly off-axis to reduce harshness.
-
Add soft stuff: rug, curtains, blankets on hard surfaces, bookshelves behind you, or a small reflection filter/portable booth.
App-Specific Quick Wins
-
Zoom/Google Meet/Teams/Discord: Turn Echo Cancellation ON. In Zoom, only enable “Original Sound” if you need it—otherwise it disables some echo control. Make sure you’re using the correct mic in the app.
-
OBS: Ensure only one mic is active. Avoid “Monitor and Output” on that mic unless you need real-time hearing; if you do, mute your speakers or use headphones.
-
Voicemeeter/GoXLR/mixers: Check you haven’t added reverb/FX and that routing isn’t sending the mic back to your speakers and re-capturing it.
Bluetooth & Buffer Gotchas
-
Bluetooth adds latency that can sound echoey. Prefer wired headsets/mics.
-
In DAWs, lower buffer size (e.g., 128 samples) and avoid heavy plugins on input.
Clean Gain Staging (prevents cranking speakers)
-
Set interface gain so normal speech peaks around -12 dBFS.
-
Keep Windows/macOS input slider near 80–100%; do fine-tuning on the interface.
-
In apps, don’t add extra gain unless needed.
Test Procedure (fast and bulletproof)
-
Headphones on, speakers muted.
-
One mic only.
-
Record 10 seconds, listen back.
-
Add components one by one (unmute sources, enable monitoring, etc.) until the echo appears—then you’ve found the culprit.
The Podcast Videographer’s Guide to Long-Term Project Archiving
For podcast videographers and content creators, the journey doesn’t end when you hit export. Archiving your project properly ensures that your work remains protected, accessible, and usable for years to come. Whether you’re working solo or managing a large production studio, this guide walks you through the best long-term storage options, comparing cost, reliability, and usability—plus, it gives you actionable workflows tailored to your needs.
🧠 Start Here: The 3-2-1 Video Backup Strategy
Before we talk hardware or cloud providers, you need a rock-solid backup philosophy. Enter the 3-2-1 backup rule—an industry-standard approach popularized by photographer Peter Krogh.
Here’s the breakdown:
-
3 copies of your data
Your original file + two separate backups. -
2 different types of storage media
Example: a hard drive and a cloud service, to reduce risk from hardware-specific failures. -
1 off-site backup
This protects your data from local disasters like fire, flood, or theft.
A modern take for video professionals might look like:
-
Copy 1 (Active Work): Your fast SSD or NAS for editing.
-
Copy 2 (Local Backup): An external hard drive or second NAS, preferably stored in a different building.
-
Copy 3 (Off-Site): Cloud storage (like Backblaze, Crashplan Pro) or an LTO tape stored at a remote location.
💾 Compare Your Options: Storage Types Breakdown
Here’s how the most common storage solutions stack up:
| Feature | Cloud Storage | NAS (Network Attached Storage) | Physical Media (LTO / HDD) |
|---|---|---|---|
| Best For | Off-site backups, easy access, team sharing | Active projects, collaboration | Deep archival, cold storage |
| Initial Cost | Low to none | Moderate to high | High (especially LTO systems) |
| Recurring Cost | Subscription + possible egress fees | Electricity + maintenance | None (except tape cost) |
| Accessibility | Anywhere with internet | Fast local, slower remote | Requires hardware access |
| Data Integrity | High (managed) | High (RAID, scrubbing) | Extremely high (30+ year lifespan) |
| Security | Network-dependent | Full control, can be air-gapped | Fully air-gapped, immune to cyber threats |
☁️ Option 1: Cloud Backup Services (Simple, Set-and-Forget)
These are designed for ease of use and automated protection, not daily collaboration or asset delivery. Ideal for archiving projects once they’re complete.
🔹 Backblaze Personal Backup
-
Use Case: Personal computers, photographers, solo editors
-
Cost: ~$9/month per computer (unlimited storage)
-
Pros:
-
Truly unlimited storage
-
Auto-backups of external drives
-
Easy restore via web or shipped hard drive
-
-
Cons:
-
Can’t backup NAS devices
-
Limited control over folder-level retention
-
🔹 CrashPlan Pro / Small Business
-
Use Case: Solo creators or small studios
-
Cost: ~$10/month per device (unlimited)
-
Pros:
-
Business-grade security and versioning
-
Works on Windows, Mac, Linux
-
-
Cons:
-
Not ideal for high-speed restoration of huge files
-
Less common in video workflows compared to Backblaze
-
🔹 iDrive / Acronis / Carbonite
-
Similar to the above: All-in-one backup services with interfaces that prioritize simplicity over deep configurability.
-
Good for off-site copies but less ideal for direct archive access or media pipelines.
✅ Best For:
Automated off-site backups with minimal setup.
💾 2. Cloud Object Storage (Advanced, Pay-as-You-Go)
These are enterprise-grade platforms built for developers, media professionals, and IT teams who want granular control over their storage architecture. They offer:
-
APIs for automation
-
Scalability into petabytes
-
Different storage tiers (standard vs archive)
-
Fine-grained pricing (storage, egress, PUT/GET requests)
🔹 Amazon S3 (Simple Storage Service)
-
Use Case: High-reliability storage for web delivery, archiving, or backup
-
Cost:
-
~$0.023/GB/month (Standard)
-
~$0.004/GB/month (Glacier Deep Archive)
-
Egress fees: ~$0.09/GB out
-
Requests: Charged per API call (can add up)
-
-
Pros:
-
Battle-tested infrastructure
-
Lifecycle policies (automatically move files to archive)
-
Integrates with AWS ecosystem
-
-
Cons:
-
Confusing pricing
-
Costly if you need frequent access or restores
-
Requires knowledge of buckets, policies, IAM roles
-
🔹 Backblaze B2 Cloud Storage
-
Use Case: Budget-friendly alternative to Amazon S3
-
Cost:
-
~$0.005/GB/month (storage)
-
$0.01/GB (download)
-
Minimal API call charges
-
-
Pros:
-
Clear pricing
-
Compatible with many S3 tools
-
Excellent for archive-style use cases
-
-
Cons:
-
Slower feature rollout compared to AWS
-
Not optimized for hot storage or web delivery at scale
-
🔹 Wasabi Hot Cloud Storage
-
Use Case: Low-cost S3-compatible storage with no egress fees
-
Cost:
-
~$5.99/TB/month
-
No egress or API call fees
-
-
Pros:
-
Flat-rate pricing (no surprises)
-
S3-compatible
-
Good for video archival and access
-
-
Cons:
-
90-day minimum storage duration
-
Occasional lag in feature parity with AWS
-
🔹 Google Cloud Storage
-
Use Case: Media storage with advanced access control and global redundancy
-
Cost:
-
~$0.02/GB/month (Standard)
-
~$0.004/GB/month (Coldline/Archive)
-
Egress and request costs similar to AWS
-
-
Pros:
-
Powerful analytics and ML integration
-
Globally distributed
-
-
Cons:
-
Complicated billing
-
Egress can kill your budget if misconfigured
-
🔹 Microsoft Azure Blob Storage
-
Similar use cases to Amazon S3 and Google Cloud.
-
Offers Archive tier (
$0.00099/GB) and Hot tier ($0.018/GB) -
Complex lifecycle management but enterprise-grade features.
🧠 TL;DR – Which Should You Use?
| Use Case | Recommended Option |
|---|---|
| Automated, no-fuss backup of computers | Backblaze or CrashPlan Pro |
| Cost-effective cloud archive with some tech comfort | Backblaze B2 or Wasabi |
| Max control, scalability, and automation | Amazon S3 or Google Cloud Storage |
| Deepest archive with lowest cost per TB | Amazon Glacier Deep Archive or Azure Archive |
💡 Bonus Tip: Mixing Storage Tiers
If you’re using something like S3 or Google Cloud, you can configure lifecycle policies to automatically move old video files to cheaper archive tiers after X days:
-
0–30 days: Hot/Standard (for frequent access)
-
30–90 days: Nearline
-
90+ days: Archive / Glacier
This ensures you only pay premium rates for the files you’re actively using.
💾 Option 2: Network Attached Storage (NAS)
A NAS is your local file powerhouse, ideal for ongoing projects and team access.
Pros:
-
Fast Local Access – Edit straight from the NAS.
-
Redundancy – RAID protects from drive failure.
-
Control – You own your storage environment.
Cons:
-
Cost – Initial setup can be pricey.
-
Upkeep – You’ll need to handle security, drive replacements, etc.
Popular Picks:
-
Synology DS923+ or DS1522+
-
QNAP TVS-h674 for high-end 10GbE performance
📼 Option 3: LTO Tape Storage
The gold standard in Hollywood. LTO is unmatched for ultra-long-term archiving.
Pros:
-
Archival Lifespan – 30+ years is standard.
-
Low Cost per TB – Perfect for massive libraries.
-
Offline Protection – Immune to ransomware.
Cons:
-
Expensive Hardware – LTO drives start around $4,000.
-
Slower Access – Tapes are sequential, not random-access.
-
Tech Lock-In – New LTO drives may not support old tape formats.
🛠 Recommended Workflows
🧑💻 For Solo Creators / Small Studios
-
Working Files: Fast SSD or 4-bay NAS
-
Local Backup: External HDD
-
Off-Site: Backblaze B2 or Wasabi for peace-of-mind cloud storage
🏢 For Production Studios / Large Teams
-
Active Projects: High-speed NAS with RAID and 10GbE
-
Recent Projects: Slower NAS or high-capacity external drive
-
Long-Term Archive: LTO system with 2 copies – one on-site, one stored off-site
🔐 Final Thoughts: Protect Your Legacy
Archiving isn’t just about saving space—it’s about preserving your creative legacy. With the right mix of speed, redundancy, and cost-efficiency, your content will remain safe and accessible long after the final cut.
Live Streaming for Podcasters: The Best Platforms to Grow Your Audience & Engage Live
Podcasting is no longer limited to audio-only content released once a week. Not only that, but in 2025, more creators are using video and live streaming to connect with listeners in real time, to expand their reach, and create repurposable content across multiple platforms.
Whether you want to interact with your audience mid-show, broadcast a behind-the-scenes look at your recording process, or simulcast to YouTube, Facebook, and LinkedIn all at once — the right live streaming platform can help you do it with ease.
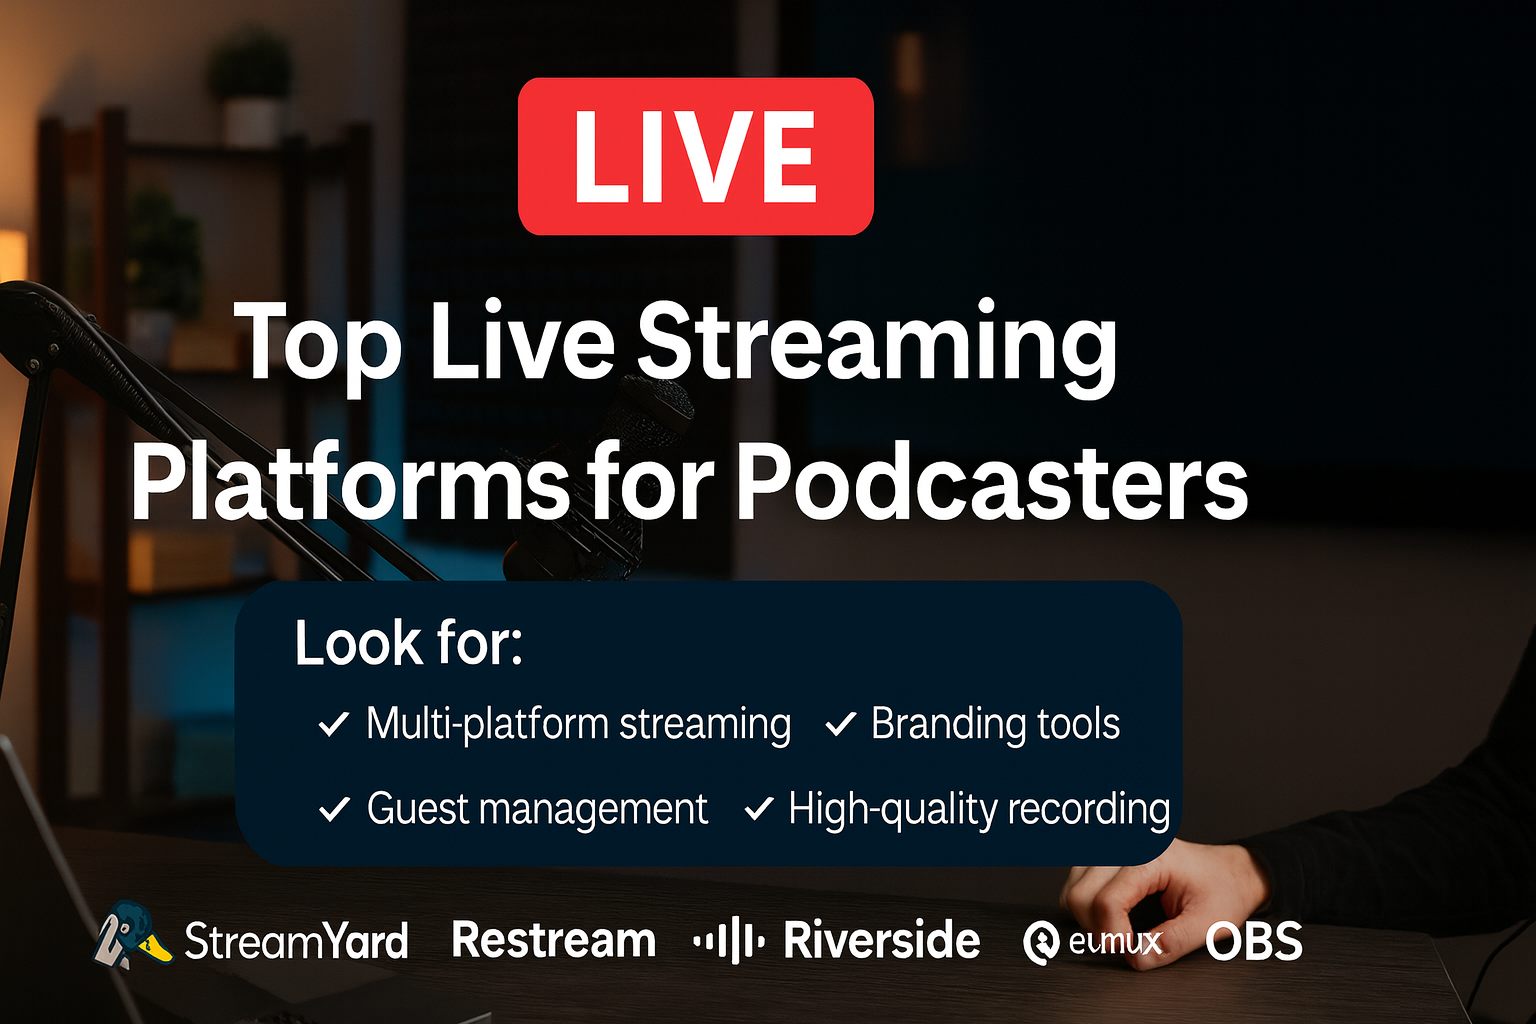
In this guide, we’ll explore why live streaming matters for podcasters, what features to look for, and review the top live streaming platforms — from beginner-friendly options like StreamYard to advanced tools like OBS.
Why Podcasters Should Consider Live Streaming
Live streaming offers unique advantages over traditional podcast production:
- Immediate audience feedback – See what resonates with your audience as it happens.
- Multistreaming reach – Broadcast to multiple platforms simultaneously for maximum visibility.
- Content repurposing – Turn a single live broadcast into an edited podcast episode, YouTube highlights, and social clips.
- Monetization opportunities – Enable tips, super chats, memberships, or even ticketed live events. Live streamed events also work as a fantastic way to bring in new audience members, who might be interested in behind the scenes, bonus content.
- Community building – Live interaction helps deepen listener loyalty and engagement.
Key Features to Look for in a Live Streaming Platform
Before you choose a tool, consider:
- Multi-platform streaming (YouTube, Facebook, LinkedIn, Twitch, etc.) – Where is your audience, and what is the best way to connect with them. It may be YouTube, Facebook, IG, TikTok, or all the above.
- Guest management (number of guests, ease of joining, backstage areas, moderation)
- Branding & customization (logos, overlays, backgrounds, custom layouts)
- Audience engagement (chat integration, polls, Q&A, on-screen comments)
- Recording quality (1080p+, separate audio/video tracks)
- Ease of use (learning curve, tech requirements)
- Pricing & free trial options
- Integrations (podcast hosts, editing software, CRM tools, monetization platforms)
The Top Live Streaming Platforms for Podcasters
1. StreamYard – Best for Beginners Who Want Ease & Reliability
Why podcasters love it: StreamYard is entirely browser-based and incredibly easy to use. Invite guests with a simple link, brand your stream with overlays and backgrounds, and stream to multiple destinations without technical headaches. This is a one-stop shop in a lot of ways because it bakes commonly needed tools right into the tool. For instance, it will record separate tracks, video files for optimum quality. It can also do transcriptions on the fly, and can reduce the amount of extra tools needed to get a podcast out.
- Strengths: Simple interface, up to 10 guests, unified chat, solid branding.
- Weaknesses: No built-in polls/Q&A, higher starting price than some competitors. We have Streamyard pricing here.
- Best for: Podcasters who want a plug-and-play streaming experience.
2. Restream – Best for Broad Audience Reach
Why podcasters love it: Restream supports streaming to 30+ platforms at once, plus unified chat from all destinations. It’s a powerhouse for reach and engagement.
- Strengths: Massive platform compatibility, unified chat, branding profiles, engagement tools.
- Weaknesses: Slightly more complex interface, prerecorded clip length limits on lower plans.
- Best for: Creators who want to stream everywhere at once and manage all chats in one place.
3. Riverside.fm – Best for High-Quality Recording & Post-Production
Why podcasters love it: Riverside records each guest locally in up to 4K video and lossless audio, ensuring top-tier quality for post-production while also streaming live.
- Strengths: Pristine local recording, integrated editing tools, audience call-ins.
- Weaknesses: More expensive for high recording hours, branding tools still maturing.
- Best for: Professional podcasters who want broadcast-quality source material.
4. Streamlabs Talk Studio (Melon) – Best Budget-Friendly Option
Why podcasters love it: Melon offers a StreamYard-like experience at a lower cost, with solid branding features and integration into the Streamlabs ecosystem (including donation alerts).
- Strengths: Affordable, up to 25 participants, built-in monetization alerts.
- Weaknesses: No separate audio tracks, fewer overlay themes.
- Best for: Podcasters on a budget who still want multi-streaming and branding.
5. EvMux – Best for Customization & Advanced Layouts
Why podcasters love it: EvMux gives you OBS-level layout control in the browser, letting you create multiple scenes and switch between them mid-show.
- Strengths: Full layout customization, scene transitions, split-track audio on Pro plan.
- Weaknesses: Higher learning curve, newer platform with evolving features.
- Best for: Tech-savvy podcasters who want a unique, TV-style live production.
6. Crowdcast – Best for Interactive, Community-Driven Shows
Why podcasters love it: Crowdcast is built for webinars and live events, with Q&A upvoting, polls, and attendee management built in.
- Strengths: Excellent audience interaction tools, event registration, private streaming options.
- Weaknesses: Higher price, limited multi-destination options on lower tiers.
- Best for: Podcasters who run interactive shows, workshops, or ticketed live events.
7. OBS Studio – Best Free, Advanced Option for Complete Control
Why podcasters love it: OBS (Open Broadcaster Software) is a free, open-source tool for streaming and recording. It offers complete flexibility in scene design, multi-camera setups, and advanced audio routing.
- Strengths: 100% free, unlimited customization, integrates with any platform via RTMP (most notably YouTube Live).
- Weaknesses: Steep learning curve, manual setup for guests (needs plugins like VDO.Ninja for remote interviews).
- Best for: Experienced podcasters or those willing to learn who want full creative and technical control without recurring software costs.
Quick Comparison Table
| Platform | Best For | Price Range | Max Guests | Multi-Stream | Recording Quality |
|---|---|---|---|---|---|
| StreamYard | Beginners, ease of use | Free – $89/mo | 10 | Yes | Up to 4K local |
| Restream | Maximum reach | Free – $39/mo+ | 10 | Yes (30+ platforms) | 1080p cloud, split-track |
| Riverside.fm | High-quality recording | Free – $29/mo+ | 9 guests + host | Yes | 4K local multi-track |
| Melon | Budget-friendly streaming | Free – $15/mo | 25 | Yes | 1080p mixed |
| EvMux | Custom layouts | Free – $49/mo | 12 | Yes | 1080p, split-track |
| Crowdcast | Interactive events | $34 – $136/mo | 4 presenters | Limited | 1080p mixed |
| OBS Studio | Complete control, free | Free | Unlimited (manual setup) | Yes (via RTMP) | Depends on settings (4K possible) |
How to Choose the Right Platform for Your Podcast
Ask yourself:
- Do I value ease of use or advanced control?
- Is multi-streaming reach or recording quality my bigger priority?
- Will my live shows be interactive events or broadcast-style episodes?
- What’s my budget for live streaming tools?
Our best advice: See which platforms have a free trial and give them a chance. The best thing you can do is make a private example episode of your podcast and see how everything works / doesn’t work – and to flesh out any workflow issues that may arise. For instance, you might realize you don’t like the chat interface of a specific platform because you can’t remove bad-faith users then decide if that’s okay with you or if it’s a deal breaker.
Tips for a Successful Live Podcast
- Promote your live event early via email and social media – a mailing list is a fantastic way to get people to come check out the livestream. This is especially true if the livestream is the same time every week, or on some kind of schedule because people will naturally check it out without needing an email blast to remember. But having the shoutout on social media is great too!
- Test your tech (mic, camera, internet) before going live.
- Use branding elements (logo, overlays) for a professional look.
- Actively engage with the chat and address viewers by name.
- Record at the highest possible quality for future editing and repurposing.
- Know that there will be bugs and that it’s part of the process. All you can do is try to fix it, and try to prevent issues for the next one.
Conclusion
Live streaming can transform a podcast from a one-way conversation into a real-time, interactive experience. It is also a fantastic way to grow your audience with new people, and a great way to keep a content schedule too. Whether you want the plug-and-play simplicity of StreamYard, the far-reaching power of Restream, the production quality of Riverside, or the complete control of OBS — there’s a platform to fit your needs.
Start with the one that matches your current skill level and goals, then expand your toolkit as your live streaming game grows. Hope this helps.
How to Convert Video to Audio
Convert Video to Sound
How to convert video to audio on a computer
Sometimes, you want the audio track from a video. It could be a music video, a recorded lecture, or a funny clip you want as a ringtone. Here’s how to extract audio from video files on the most common devices:
Windows
VLC Media Player:
- Download VLC Media Player if you don’t have it (https://www.videolan.org/vlc/)
- Open VLC, go to “Media” -> “Convert/Save.”
- Click “Add” and select your video file.
- Click “Convert/Save,” then choose “Audio – MP3” as the profile.
- Select a destination for your new audio file and hit “Start.”

macOS
QuickTime Player:
- Open your video in QuickTime Player.

- Go to “File” -> “Export As” -> “Audio Only”.

- Choose your desired save location and file name.
iPhone
- App Store Apps:
- Download a converter app like “MP3 Converter”.
- Open the app and select the video from your Photos library.
- Choose your desired audio format (usually MP3).
- Tap “Convert” and save the file to your phone.
Android
- Google Play Store Apps:
- Download a converter app like “Video to MP3 Converter.”
- Open the app, then select the video you want to convert
- Choose your desired audio format (like MP3) and quality.
- Tap “Convert” and save the audio file to your device.

How to Turn Your Podcast Episode Into a Blog Post That Builds Authority (and Monetizes)
If you’re a podcaster, you’re sitting on a goldmine of content that can do more than entertain—it can help you organically grow your audience, build credibility, and drive some extra income. Here’s how to turn your episodes into high-quality blog posts that meet Google’s EEAT standards (Experience, Expertise, Authoritativeness, Trustworthiness)… and how to make sure they contribute to your bottom line.
Pro Tip: For a shortcut, try our free Podcast Monetization Tool—it analyzes your show and provides a clear monetization strategy tailored to your strengths.
Step 1: Choose a Purpose-Driven Topic
Don’t just drop the transcript. Start by identifying the key takeaway or monetizable idea in your episode.
- What is this episode really about?
- What question does it answer or problem does it solve?
- Is there a logical next step that could lead to a product, service, or offer?
Example:
If your episode is about landing podcast sponsors, the blog post could be:
“How I Landed My First Podcast Sponsor (And Why You Don’t Need Thousands of Listeners)”
Step 2: Write an Intro That Hooks + Builds Trust
Start strong with a personal story or insight. Let readers know you’ve been there—and that you have something useful to share.
Example:
“When I launched my podcast, I thought I needed 10,000 downloads to get sponsors. That turned out to be wrong. In this post, I’ll show you how I got my first deal with fewer than 800 listeners.”
💡 Monetization Tip: Include a link early on to your lead magnet, bonus download, or monetization tool (like this one) to capture attention while they’re most engaged.
Step 3: Organize the Post for Humans (and Search)
Use headers, short paragraphs, and bullets to break things up.
- Why this topic matters
- Your personal approach or process
- Tools or resources you used
- Common mistakes or myths
- Final takeaways + call to action
Format with <h2> and <h3> to help SEO and readability.
One of my favorite example podcasts doing this is Crime Junkie; They have an excellent structure to their blog posts that provides helpful resources relating to each episode. Check them out!
Step 4: Show Your Experience (Not Just Advice)
Google rewards content with real-life experience. Share stories, lessons, and what worked for you—even if it didn’t go perfectly.
- “We tried pitching 5 companies… here’s what happened.”
- “This free tool helped us land a $200/month recurring sponsor.”
These stories make you trustworthy, relatable, and Google-friendly.
Step 5: Link Smart
- Internal links: Point readers to other relevant blog posts or podcast episodes.
- External links: Reference trusted tools, stats, or industry sources.
- Monetization links: Link to your opt-in, course, service, or monetization roadmap generator.
Step 6: Add Bonus Materials
These help you stand out and encourage engagement:
- A downloadable checklist or template
- An embedded podcast player
- FAQs about the topic
- Your author bio with credentials and photo
Monetization Angle: Offer a monetization checklist or email opt-in bonus tied to the post. Then link to your free tool as the next logical step.
Step 7: Optimize It for Search (Without Overthinking)
- Use a clean URL like “/podcast-guide”
- Write an SEO title and meta description
- Include relevant keywords naturally
- Add ALT text to images
Step 8: End With a Clear CTA
Your final paragraph should drive action—whether that’s listening, downloading, or monetizing.
- “Want my exact pitch email? Download it free here.”
- “Curious how monetizable your podcast is? Try our free monetization tool.”
Final Tip: Be Human First
Don’t write like a bot or a transcript. Write like a podcaster who’s been in the trenches. Be helpful, honest, and focused on the reader’s next step.
Want to know if your podcast is monetizable?
Use our free tool to get a personalized strategy in 60 seconds: https://monetize.podcastpontifications.com